/


Latest Post

Check out this fun & unique way to use up those card stock scraps!


Look at this gorgeous card!  It's so bright, colorful and just plain fun! I made it on this week's Live video. My theme was to feature Bermuda Bay (a favorite of mine) and some sets of retiring dies I'll miss a lot! 

I used the 'Picture This' dies seen here for the multiple circle windows.  The White delicate leaves die-cuts are from the Splendid Stems dies; which I thought were still current!  Oops! 

Isn't it striking?  It's almost like a rainbow effect with these bright colors.  I adhered 1/4" strips of card stock to another layer of White (under the White window die).  It's slightly smaller than the top one. Watch the video here to catch my tips on this technique

I used Coastal Cabana, Bermuda Bay, Mango Melody, Polished Pink and Berry Burst.  The only two colors that will be in the next catalog are Coastal Cabana and Berry Burst!  But I know we'll learn to love the new color line too.  It's always sad to say goodbye to some of our favorites.  

Next I shared a fun card featuring blues/greens and the Layering Diorama dies. They're discounted to $20.30 now. 

The other dies used are the Amazing Thanks dies seen here (these were $27 and are now just $10.80). 

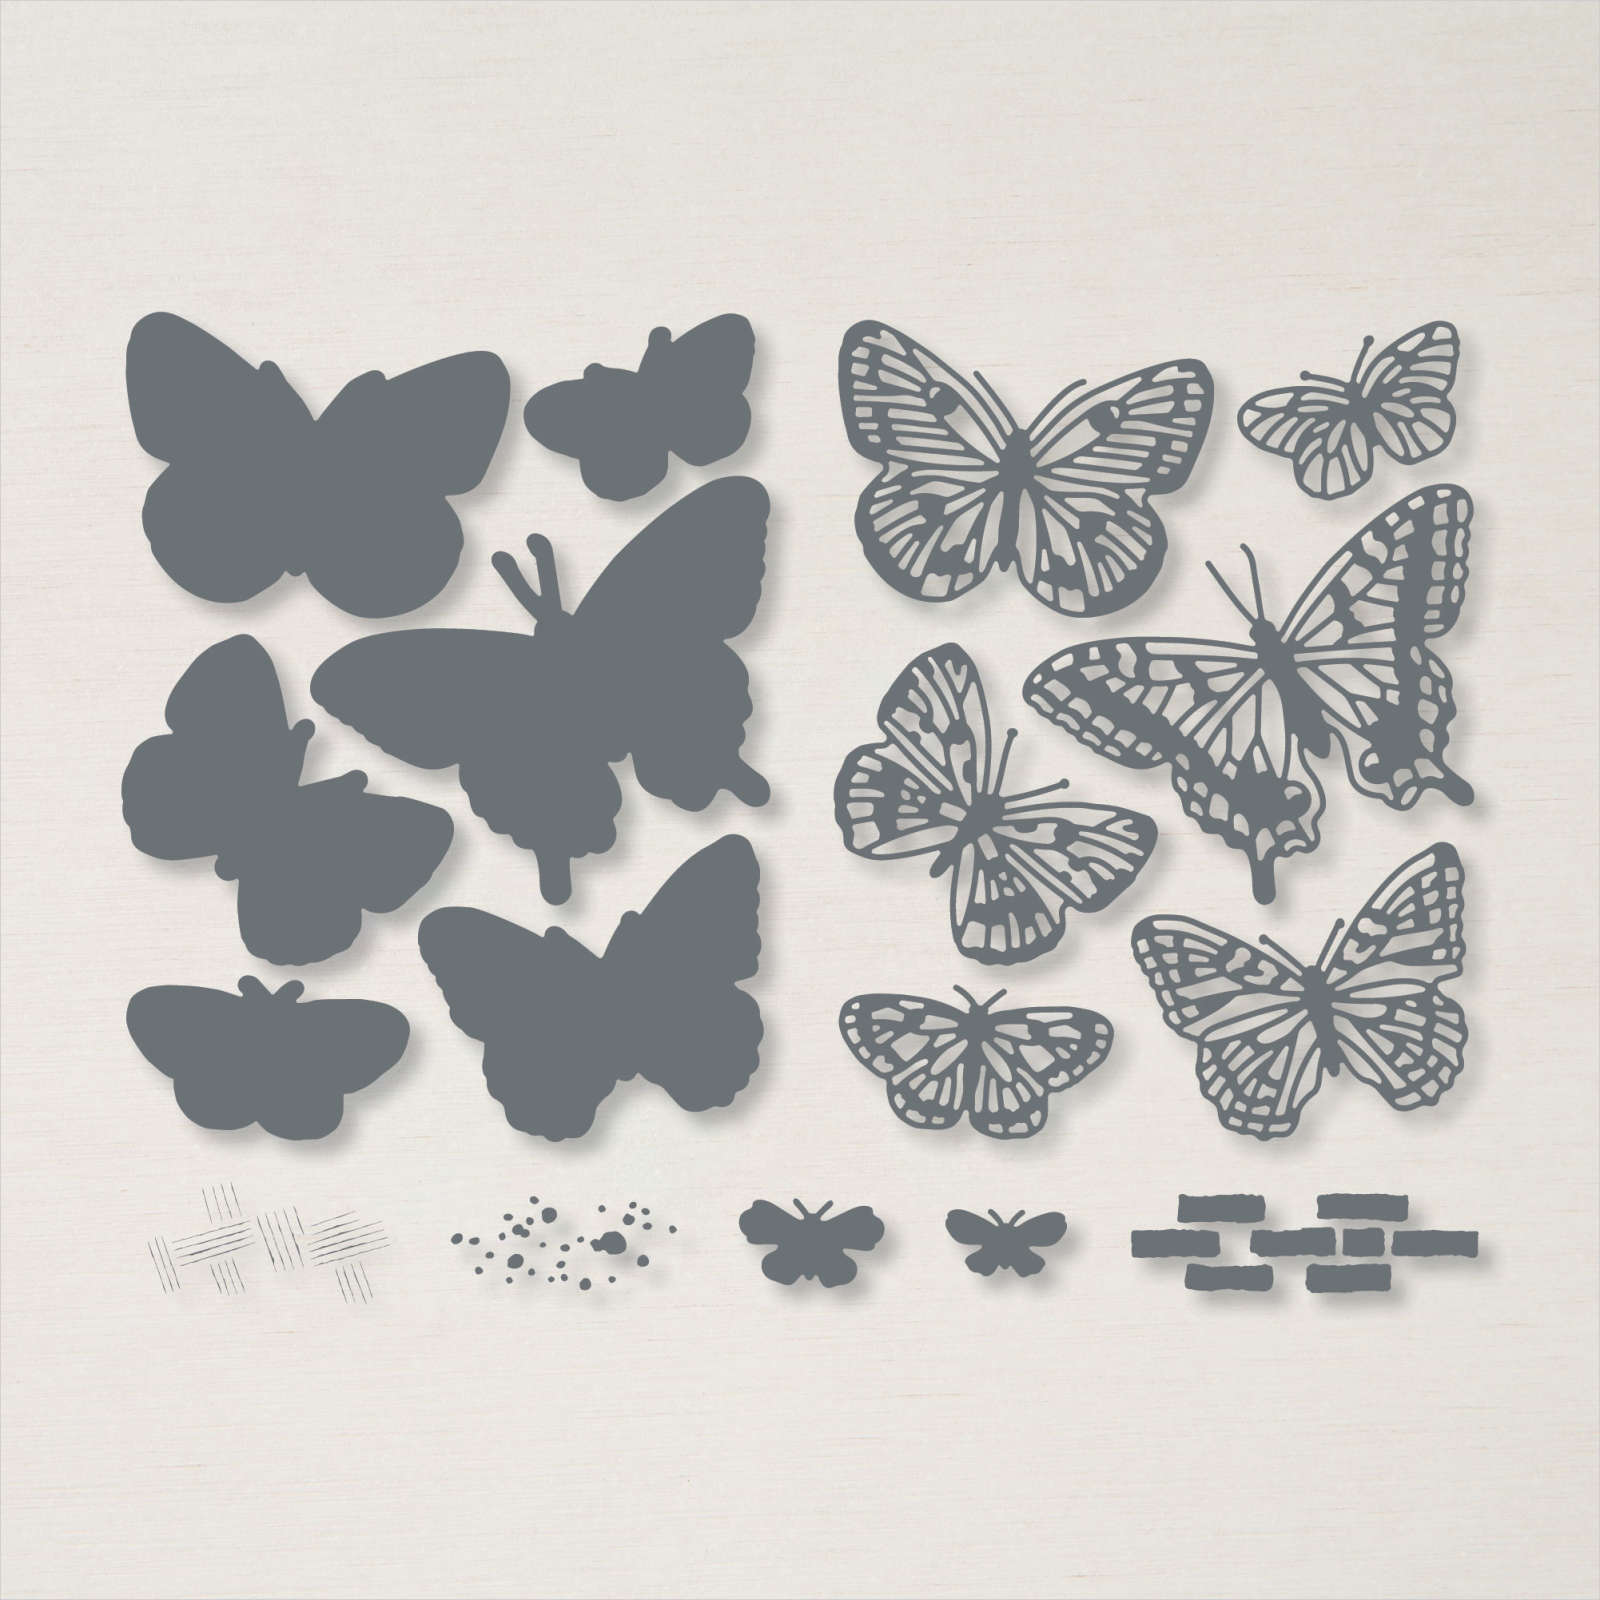
And the Brilliant Wings dies shown above which include tons of butterflies in both solid and detailed dies that layer perfectly.  They were $44 and are now just $17.60.  See them here. 

Here's how I adhered the strips to the back of the White die-cut piece. I die-cut the Layering Diorama shape first and then added these strips on the back side. It's a super fun way to show off your die-cut shape and use up those scraps you just cannot throw out! 

Here are both projects shown together.  I hope this inspired you to use up some of those paper scraps you're saving for 'someday'!  

Here's the video I shared how to make the window card with the Picture This dies.  Plus two other cool projects using up card stock strips! Click on the photo below.  Don't forget to subscribe to my YouTube channel!  

~~~

April Specials:

See the 2023 Last Chance list here 

*current host code: SYZD4PH2 or SFHU3WMT

Get a free specialty paper sampler with online orders over $55 using a host code above plus an embellishment if your order is over $100

Earn free products with my loyalty rewards! 

Click here to download yours and earn a $50 shopping spree!

All Posts

  • Easy Seriously the Best Diagonal Strips cards


    I made these fun diagonal stripes cards on a recent Facebook Live.  It's so simple to do!  

    I used one of my favorite stamp sets; Seriously the Best here. I love the pretty bold font!  You can see it here.  It also coordinates with the Seriously the Best cards kit; which is 60% off! 

    I chose to use the retiring 6 X 6" 2019-21 In Color paper pack.  It's still available while supplies last and is sale right now here!


    The strips are 1" long; you need about two of each at 1" X 6".  Here's how to make it:

    • You'll need one piece of White CS measuring 4" X 5 1/4" to adhere the strips to.
    • Adhere two DSP strips across from end to end leaving a little space between the two.  Tip: 6" is a little short so I cut the Peacock strip in half and separated it a bit under the greeting.
    • Now you'll add short lengths of DSP perpendicular to the first two strips, alternating colors and leaving a bit of space between them all.
    • Now you can trim off the excess even with the original White CS piece.  
    • Adhere to your main card (5 1/2" X 8 1/2") 

    You might notice the cute little flowers on the greeting tags and that pretty, stitched die-cut.  Well these are new products coming out in the upcoming new Stampin' Up! Annual catalog!  The flowers are a new border punch and the dies are part of the Tasteful Label dies. 

    You can order these items on June 3rd! (or purchase the Stampin' Up! Starter kit and you can add them to your $125 in product!)  Read about that here. 

    ~~~

    May Specials


    Get my 'ALL Fun Fold cards tutorial' free with any online order.

    It includes directions, photos and measurements for 18 fancy card folds!


    May Host code is EYDJ4MQN

    Get a free pkg. of Noble Peacock rhinestones from me if your order is over $55. 

    Order online here

    Leave a Reply

    Your email address will not be published. Required fields are marked *

  • Morning Star


    Have you seen this pretty stamp set yet?  It's called Morning Star (seen here) and is one of Stampin' Up!'s distinktive type of stamps. This means you can get multiple hues of color with just one inking.  It's amazing!  

    It is retiring next week so if you'd like it, get it now! Here's a few cards I created when playing with it.  I think this set has been a bit of a sleeper; lost among the many favorite in the 2020 January-June catalog.  

    Here I used Old Olive and Gorgeous Grape; one of my favorite green and purple combos.  Because this stamp set is photopolymer you can easily stamp the images just where you want them, placing them perfectly.

    Here are the measurements and supplies:

    • Old Olive 5 1/2" X 8 1/2" scored at 2 1/8" and 4 1/4"
    • Regals designer paper 5 1/4" X 1 7/8"
    • Gorgeous Grape 4 3/4" X 3 1/2"
    • White 4 1/2" X 3 3/8"
    • Label Me Fancy Punch, Grape striped ribbon, dimensionals, mini glue dots 

    Here's another simple card made with this pretty stamp set this time in green & blue: 

    I chose to use Pear Pizzazz with Night of Navy here.  This is our Neutrals designer paper pack and it is already out of stock.  It was on the Last Chance list seen here.  I'll miss these pretty patterns although we are getting new packs of 6" designer paper in the upcoming catalog.

    Measurements:

    • Pear Pizzazz 5 1/2" X 8 1/2"
    • Navy designer paper 5 1/4" X 2"
    • White – 5 1/4" strip for the Ornate Style die-cut
    • White 3 1/4" X 2 1/2"
    • Navy 3 1/2" X 3"
    • Ornate Style dies, Olive/Terracotta Tile 1/4" ribbon, Noble Peacock rhinestones 


    ~~~

    May Specials


    Get my 'ALL Fun Fold cards tutorial' free with any online order.

    It includes directions, photos and measurements for 18 fancy card folds!


    May Host code is EYDJ4MQN

    Get a free pkg. of Noble Peacock rhinestones from me if your order is over $55. 

    Order online here

    Leave a Reply

    Your email address will not be published. Required fields are marked *

  • Spring Punched Banner; cute home decor piece!


    To all of our Veterans; thank you for your service!  I wish you all a safe and happy Memorial Day! 

    ~~~

    I haven't shared this project yet; it was the bonus project many of my gals received in their Spring Retreat package.   It's made with the Pleased as Punch designer paper; it was free during Sale-a-Bration earlier this year.  

    To create the banners I first cut a piece of card stock 4 1/4" long X 3 1/2" wide.  Then I made a mark at the center of the short end and cut from that mark to the opposite corner.  Then I had my template!  

    I added lots and lots of punched pieces!  I used the Umbrella punch, the Tulips punch, Daisy, Leaf, Butterfly Duo, the Small Bloom punch and the Heart Punch pack.  A few of the banners are textured too.  It would be fun to hang this in your craft room or on a window . 

    ~~~

    May Specials


    Get my 'ALL Fun Fold cards tutorial' free with any online order.

    It includes directions, photos and measurements for 18 fancy card folds!


    May Host code is EYDJ4MQN

    Get a free pkg. of Noble Peacock rhinestones from me if your order is over $55. 

    Order online here


    Leave a Reply

    Your email address will not be published. Required fields are marked *


Notice: LeeAnn Greff, Independent Stampin’ Up! Demonstrator, Manager. The content of this website is my sole responsibility as an independent Stampin’ Up! demonstrator and the use of, and content of, the classes, services, or products offered on this website is not endorsed by Stampin’ Up! Copyright 2025