/


Latest Post

Changing Leaves Hybrid embossing folder technique; with free project sheet & video tutorial


I joined quite a few swaps featuring our newest group of Online Exclusives and this is one of the cards I made:

It features the Changing Leaves bundle seen here.  It includes a stamp & die bundle AND a coordinating hybrid embossing folder as well. 

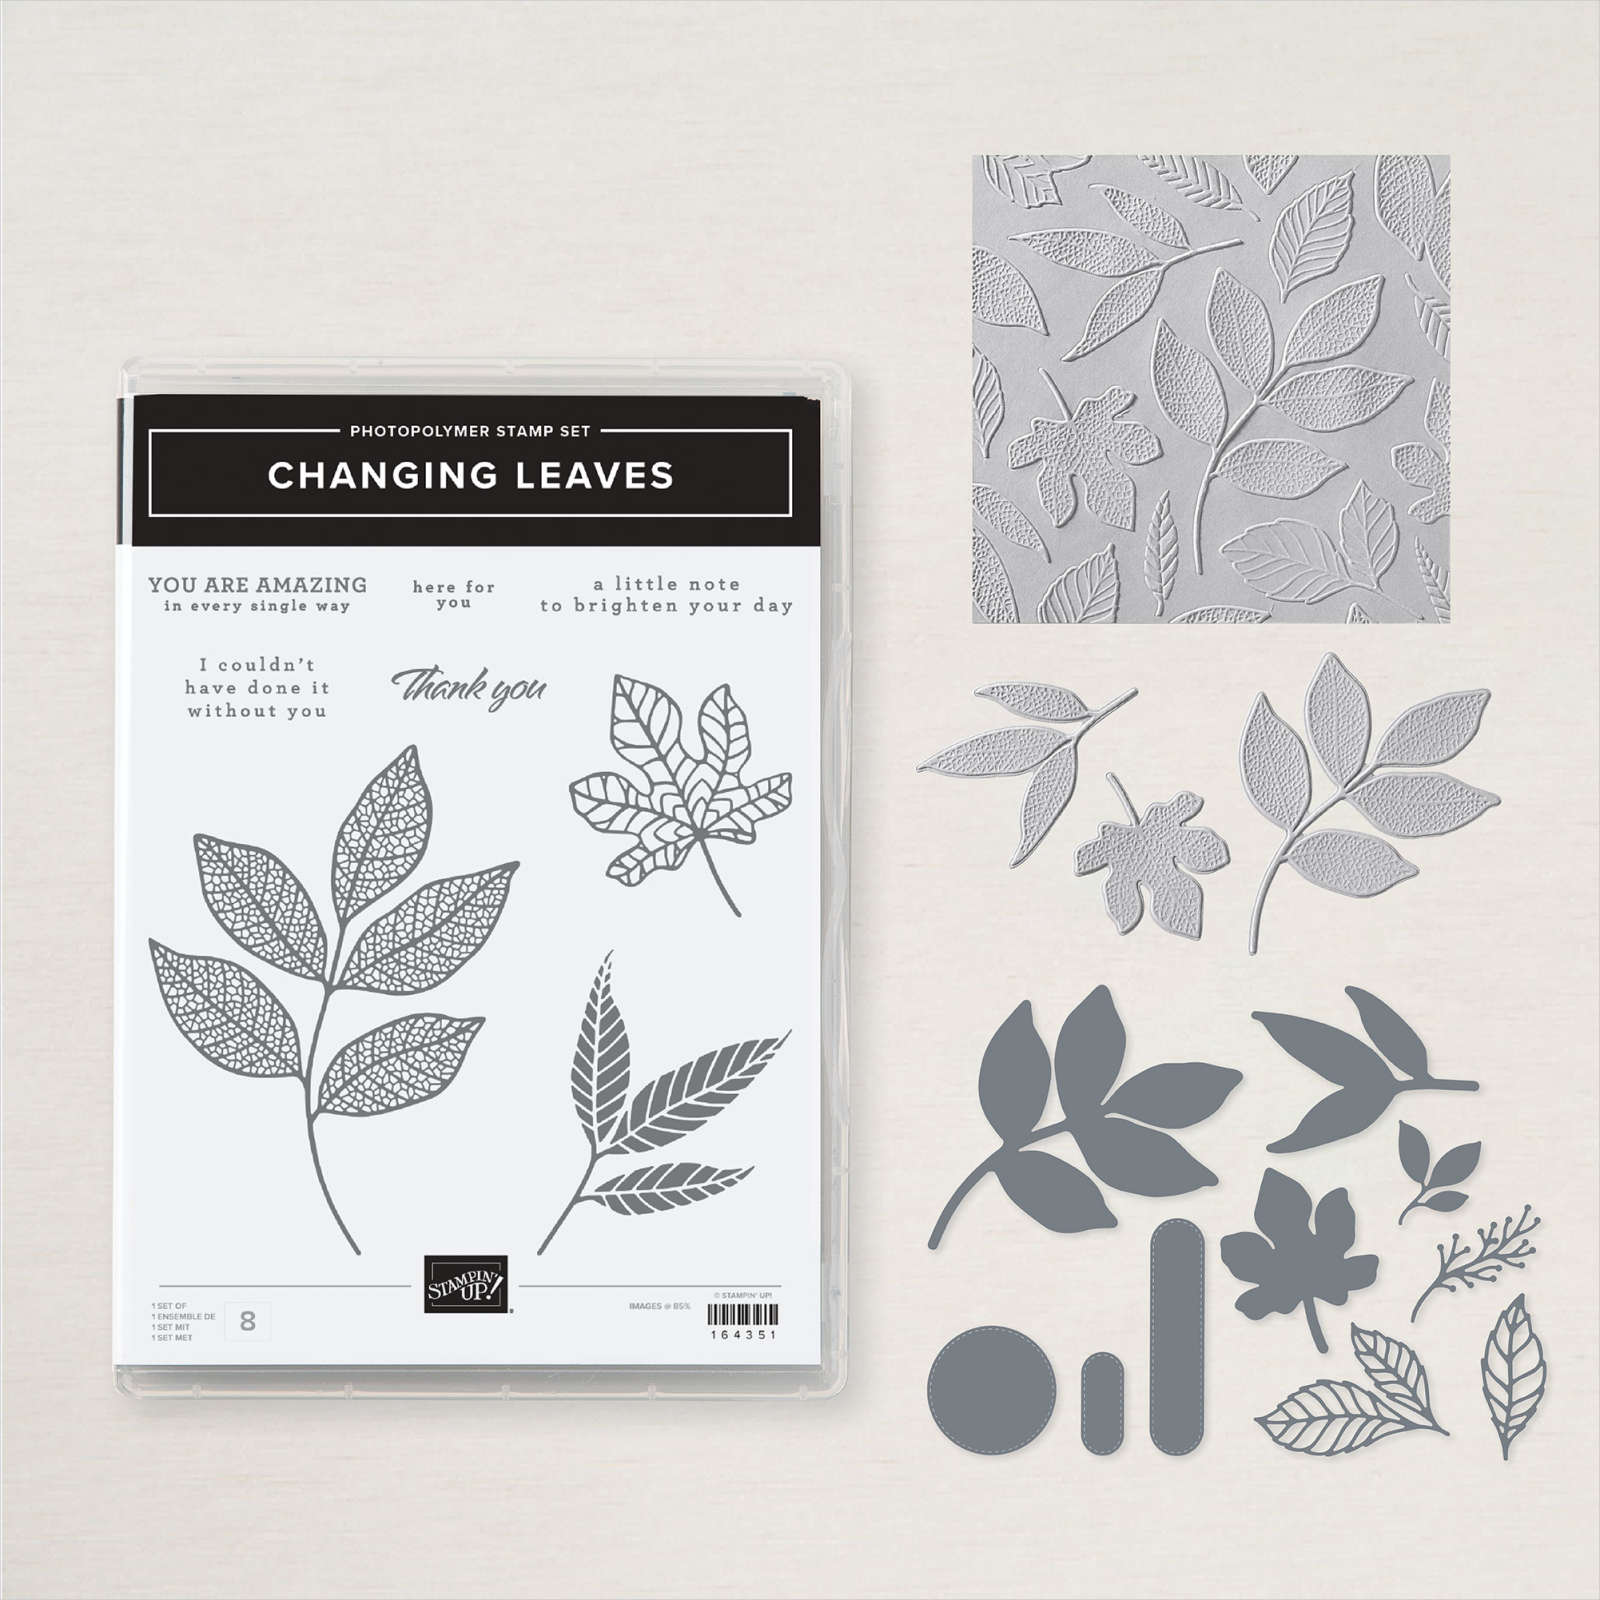
I used two different embossing techniques on this card. If you look closely at the die-cut leaf you'll see there's ink in the recessed part of the leaf.  That was done by adding ink to the embossing folder before I cut & embossed the leaves.  Please watch the video here to see how it's done. 

My colors include the new Basic Beige and Mossy Meadow with White. I also ran a piece of Basic Beige CS through the clean folder and added ink with a blending brush afterwards. 

In the two cards below you'll see that the Beige card stock looks different.  The left card was done by blending Mossy Meadow ink very lightly over the textured CS. The right card was done by adding ink to the embossing folder before I textured it. Two totally different results! Again; watch the video below to see how it's done. 

For the greetings I used another new Online Exclusive stamp set called Everyday Greetings. It's a fabulous greeting set. See it here. 

The oval die-cut is from a new set of dies called Greetings of the Season dies seen here. They're paired with a stamp set but are great on their own too. 

Did you know that Online Exclusives simply mean that they're seen online and not in any printed publication? Anyone can order them! See them all here; there are tons of them! 

Or print this flyer to see them all. Download July 24-OnlineExclusivesRelease

Click on the following link to get the free project sheet for this card: Download Changing Leaves textured diagonal card

I share a few cards using this gorgeous new Changing Leaves bundle in the video below; I hope you watch it! 

~~~

*current host code links: 4QYAPERK or 3A73HXYB


Earn $5 coupon for every $50 you spend in July; redeem in August. 

~~~

All online orders will receive my PDF tutorial featuring the Full of Life suite

All Posts

  • A WOW fun fold card with Dragonfly Dreams!


    This weekend my Flowerbug's Team held our monthly card swap & Team gathering.  Our theme was window cards and I'll be sharing them all week long!

    Check out this special Z fold card Jacki made!  

    Her colors are Terracotta Tile, Black & White and the Dandy Garden Designer paper seen here.  Did you know that the Dragonfly Punch coordinates with this Designer Paper?  She punched her dragonflies directly out of the paper!  No stamping for these at all! See the Dragonfly Garden bundle here. 

    Check out the whole suite of products here. 

    This card features almost two full card bases with just a few score lines. It looks a lot harder than it is.  

    • Terracotta Tile – 5 1/2" X 8 1/2" scored at 4 1/4"
    • Whisper White – front is 4" X 5 1/4", inside fold is 5 1/4" X 8" scored on the long edge at 4" X 6". 
    • Designer paper – 1 3/4" X 5" 

    Her 'window' in the front is 2 3/8" and the black circle on the inside fold is the same.  The White greeting circle is 2 1/8".  All of these circles are cut with the Circle dies in the Annual Catalog. 

    Steps to assemble this card:

    • You'll adhere the White front to the main card base and then cut your window. 
    • Stamp on the inside White card before adhering to the inside of the main card.
    • Add the Designer paper to the inside fold.
    • Die-cut the greeting circles and adhere together. 
    • Fold the card closed and add the circle to the inside fold 'through' the front window.  Perfect placement!   

    More window cards posted tomorrow and all week long! 

    ~~~

    Current Host code is 39A9QQZP

    Order online here

    All online orders receive a free PDF of the new Butterfly Bouquet bundle

    with 15 projects!


    ~~~

    Get a free adhesive package from me with an online order over $50 using the host code above. 3 sheets of Dimensionals and 1 for die-cuts!

    *If your order is over $150 do not use the code; you'll still receive a gift! 

    Below are the Multipurpose Glue stands we're making. They're $6 each and available in my Shop here.  

    Leave a Reply

    Your email address will not be published. Required fields are marked *

  • Create gorgeous backgrounds with just a few common stamping items! Video tutorial!


    On Tuesday's FB live I shared a fun and easy technique for gorgeous backgrounds.  Once you create them you can use them to create stunning, beautiful cards like these:

    This was my first try at this technique this week.  Honestly it's not a new technique at all but I hadn't done it for years! The stamp set is called Soar Confidently (seen here) and I hadn't used it yet.  I think it works wonderfully with a pretty background. 

    I used Highland Heather, Gorgeous Grape, Bermuda Bay and Pacific Point Stampin' Write markers on an E block and spritzed with plain water.  Then 'stamp' on our Basic White CS and let dry with the block on it (this prevents warping).  Then stamp on it with any black ink.  

    Here are a few more samples I shared: 

    The left card above features the Dragonfly Garden stamp set and the right is the Floating & Fluttering set. 

    See what I mean?  And it's fun too!  Each time you do it they turn out differently so it's kind of addicting!  Watch the video below to see how easy it can be.  

    ~~~

    Current Host code is 39A9QQZP

    Order online here

    All online orders receive a free PDF of the new Butterfly Bouquet bundle

    with 15 projects!


    ~~~

    Get a free adhesive package from me with an online order over $50 using the host code above. 3 sheets of Dimensionals and 1 for die-cuts!

    *If your order is over $150 do not use the code; you'll still receive a gift! 

    Below are the Multipurpose Glue stands we're making. They're $6 each and available in my Shop here.  

    Leave a Reply

    Your email address will not be published. Required fields are marked *

  • Gorgeous Butterflies with the Brilliant Wing dies


    I was playing around with these dies and came up with these striking colored butterflies.   

    I used the designer paper as a template to sponge through.  This is what's left after you use the Brilliant Wings dies to cut out the 6 butterflies.  Although in hindsight I should have sponged on the other side so the die fit.  It was upside down on the die; I had to hold it up to the light to get the die placed correctly.  

    I added a piece of White CS behind these butterflies and used the Stitched with Whimsy dies to add that pretty stitched edge.  See those here. 

    Click on the image below to see these items in my store. Remember this designer paper is available through May 3rd or while supplies last.


    The greeting is from the Vine Design stamp set on a 1/2" strip of Poppy Parade card stock. 

    ~~~

    Current Host code is 39A9QQZP

    Order online here

    All online orders receive a free PDF of the new Butterfly Bouquet bundle

    with 15 projects!


    ~~~

    Get a free adhesive package from me with an online order over $50 using the host code above. 3 sheets of Dimensionals and 1 for die-cuts!

    *If your order is over $150 do not use the code; you'll still receive a gift! 

    Below are the Multipurpose Glue stands we're making. They're $6 each and available in my Shop here.  

    Leave a Reply

    Your email address will not be published. Required fields are marked *


Notice: LeeAnn Greff, Independent Stampin’ Up! Demonstrator, Manager. The content of this website is my sole responsibility as an independent Stampin’ Up! demonstrator and the use of, and content of, the classes, services, or products offered on this website is not endorsed by Stampin’ Up! Copyright 2025