Today I'm sharing more of my Flowerbug Team card swaps featuring Holiday Catalog stamps or bundles.
First up is a beautiful card made by Tracey featuring the Perched in a Tree bundle seen here.
Her colors are Soft Suede, Petal Pink and Mango Melody. The designer papers are Texture Chic and the Silver & Gold Sale-a-Bration DSP. We stamped & sponged the Silver & gold DSP to add coordinating colors.
The gold leaves are from the Chic dies cut from the Distressed Gold DSP. The solid leaves are from the Aspen dies. That pretty texture on the Soft Suede layer is the Twigs & Sprigs embossing folder seen here. All contribute to making this card stunning!
Measurements:
- Card base 5 1/2" X 8 1/2"
- Soft Suede 4" X 5 1/4"
- DSP are both 3" X 4"
~~~
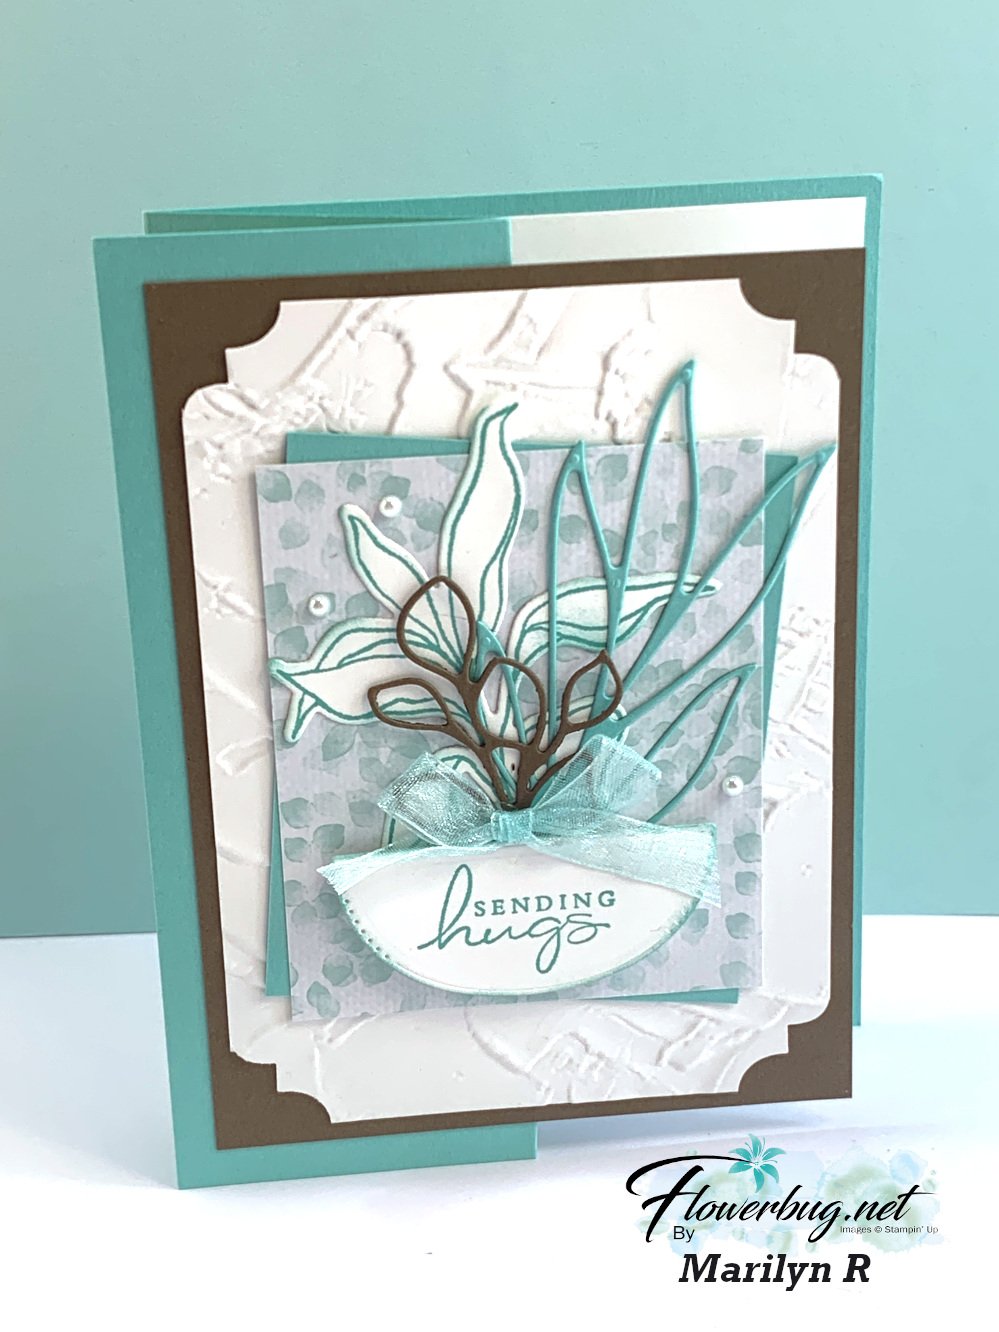
Next is a soft & pretty card Marilyn made. She used the Splendid Thoughts bundle.
Her colors are Coastal Cabana with Soft Suede & White. The Splendid Stems dies add a delicate natural touch.
The White is textured with the Painted Texture embossing folder. The corners on this piece are punched with the new Very Best Trio punch seen here. The soft DSP is from the Splendid Day specialty paper seen here.
Measurements:
- Coastal Cabana is 5 1/2" X 8 1/2" scored at 2 1/8" & 4 1/4"
- Soft Suede – 3 3/4" X 5"
- White is 3 1/2" X 4 3/4"
- DSP & Coastal Cabana layers are 2 3/4" X 3 1/4"
~~~
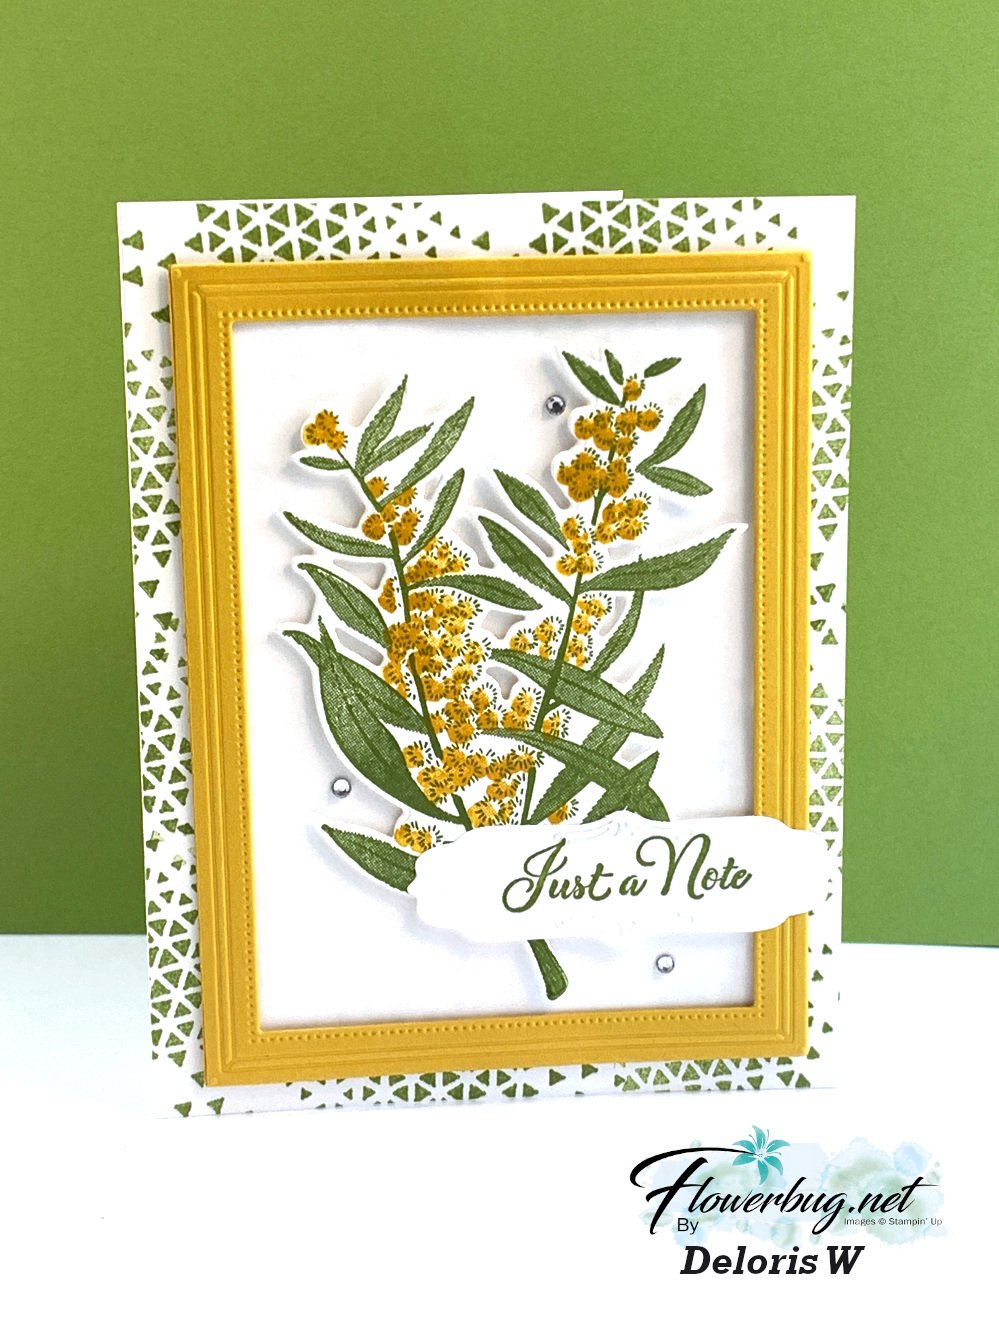
Lastly for today is a pretty card made by Paula. She cased a card made by Colleen Magness. It features the pretty Soft Seedlings stamp set. It's a Distinktive set which means you get multiple hues of color when stamping. Although she did use a sponging technique to achieve her multiple colors.
She inked the stamp in Crushed Curry first, then added Old Olive to the stem with a marker. Then used a finger dauber to add pumpkin pie and cherry cobbler ink on stamp. Huff & stamp!
The leaf texture on her Vanilla layer is made with the Leaf Fall 3D folder seen here. It's new!
Measurements:
- Crushed Curry card base 4 1/4" X 11"
- Vanilla 5 1/8" X 3 7/8"
- Cherry Cobbler 5 1/4" X 4"
- Pumpkin Pie 5 3/8 X 4 1/8"
Remember that if you're wanting any of the Holiday Catalog products it's smart to order in August so you earn free Sale-a-Bration choices!
I'll share the rest of our Team swaps soon.
~~~
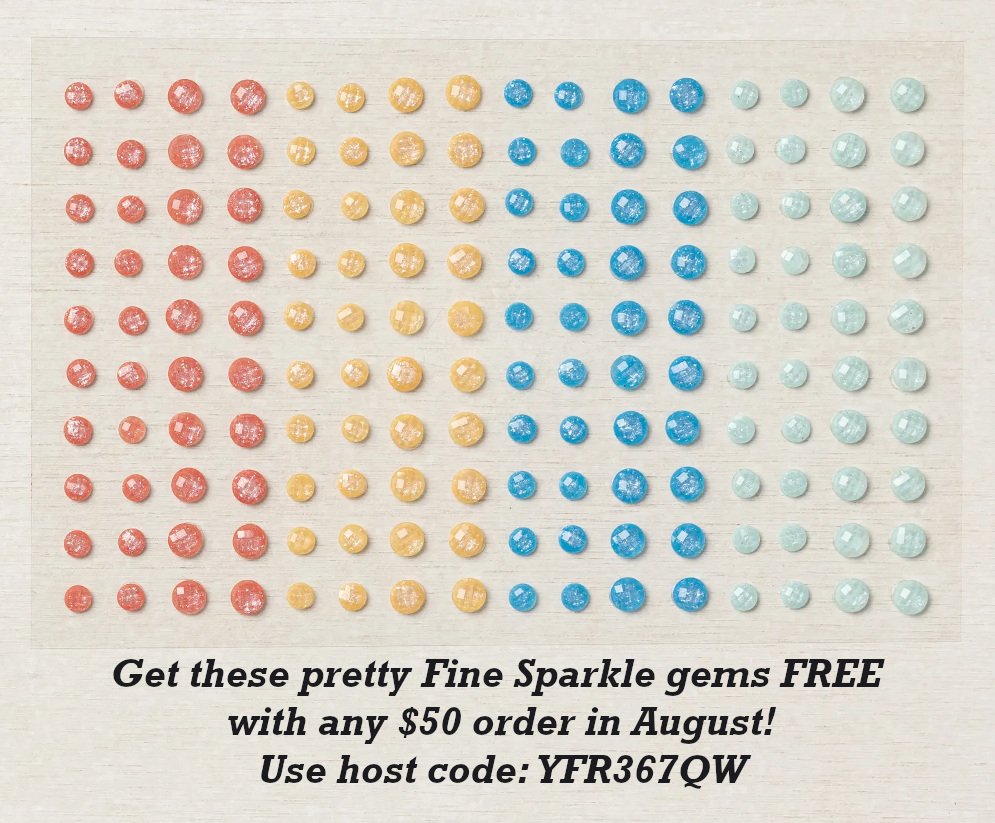
August Specials
Get free items here in August during Sale-a-Bration!
Host code: E22FXSSB
Get these pretty gems free! *click here to order
Earn free products with my loyalty rewards!
Click here to download yours and earn a $50 shopping spree!


Leave a Reply