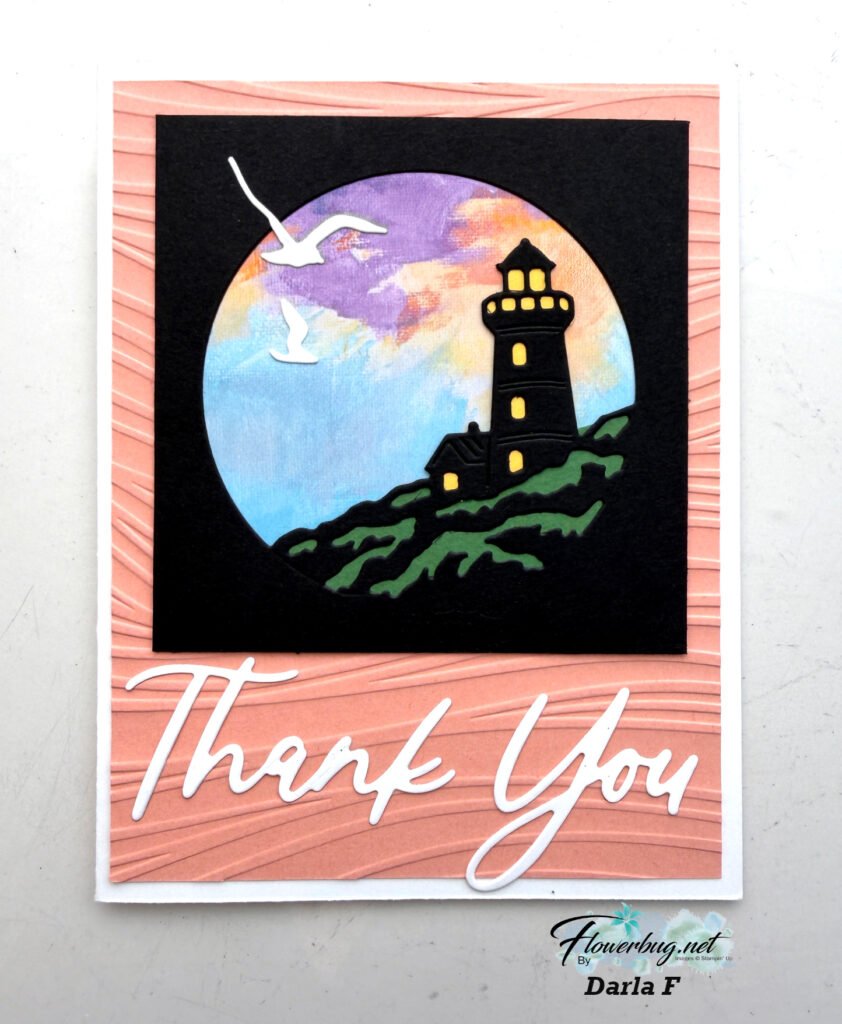
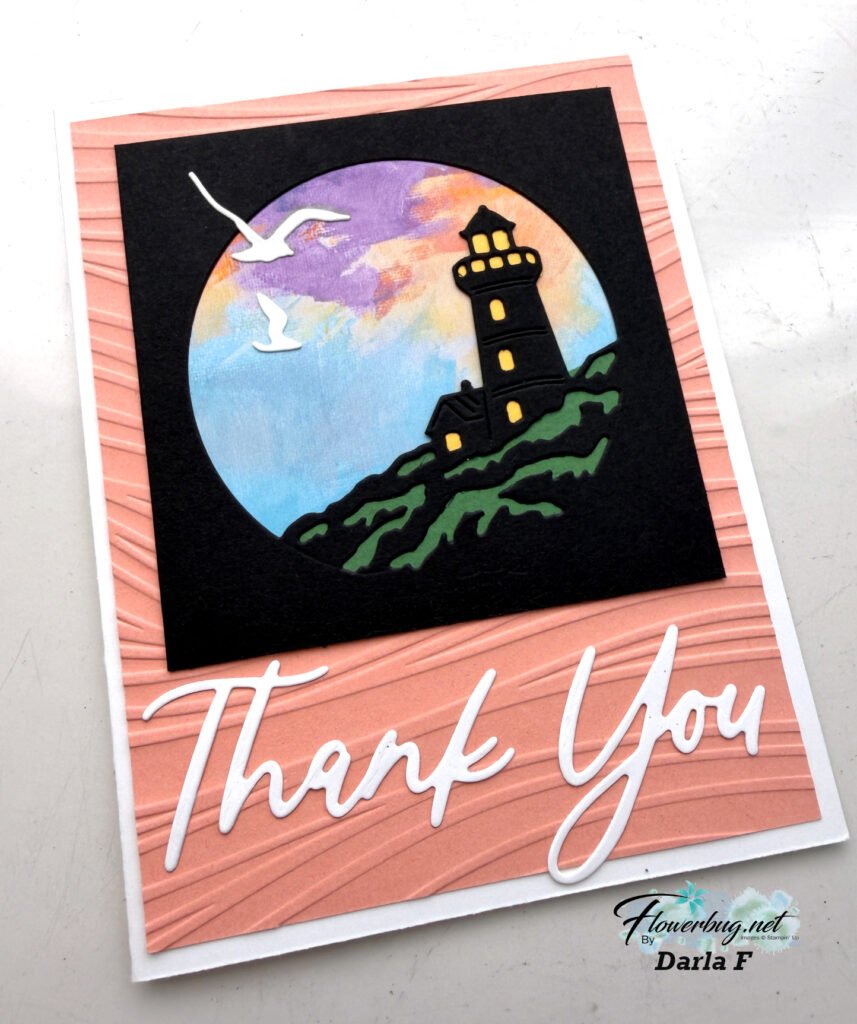
Look at this beautiful Scenic Coast swap card made by Darla. Our Team swap theme was to use new product from the 2026 May-August catalog.
She used multiple new products here. First is the Scenic Coast DSP seen here and the Sunset Coast bundleherefor the main image. I love how she added yellow to the lighthouse and green to the hills. They are small itty pieces inserted in the die-cut windows. Wow!
The background is Crisp Cantaloupe textured with the So Swirly embossing folder. The White ‘Thank You’ die-cuts are from the Words & Wishes dies seen here.
Just plain stunning! And she is a very new swapper on my Team too! You did a wonderful job Darla!
Thanks for stopping in today!
I still have 4 Mystery Boxes left! Place an order today to redeem yours! Don’t wait! Go to ShopwithLeeAnn.com
All Posts
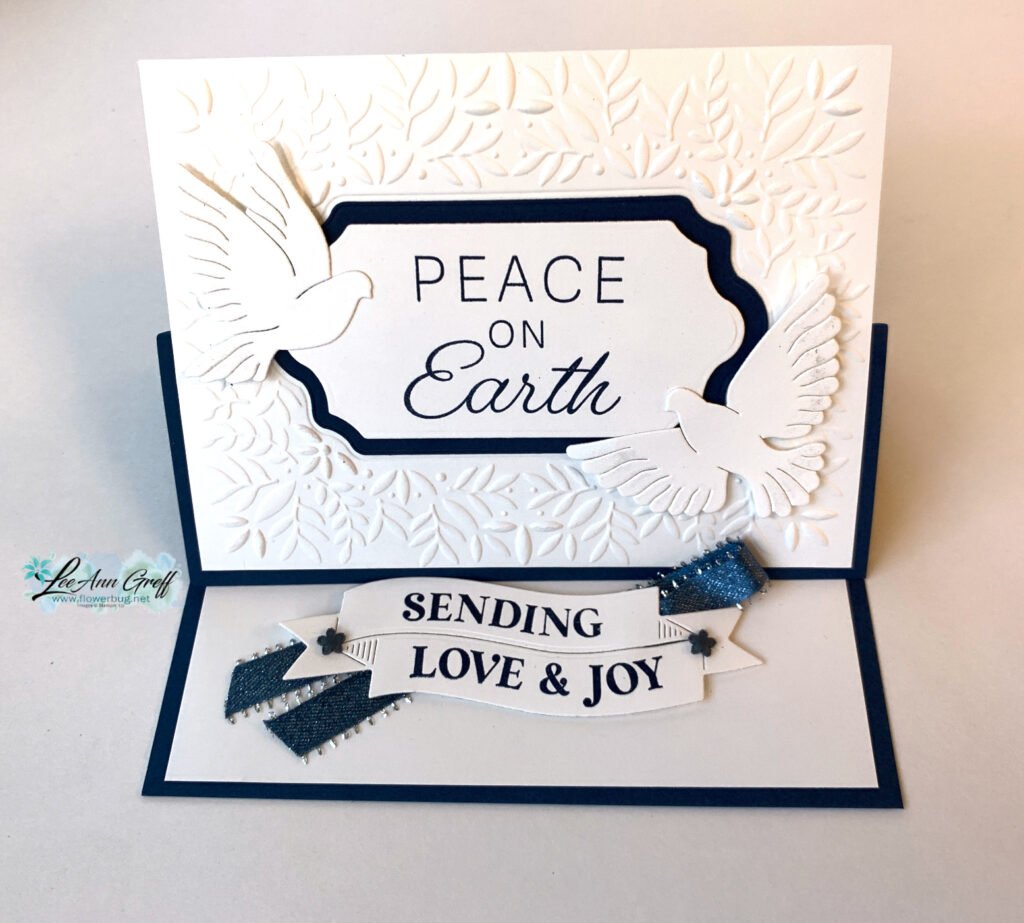
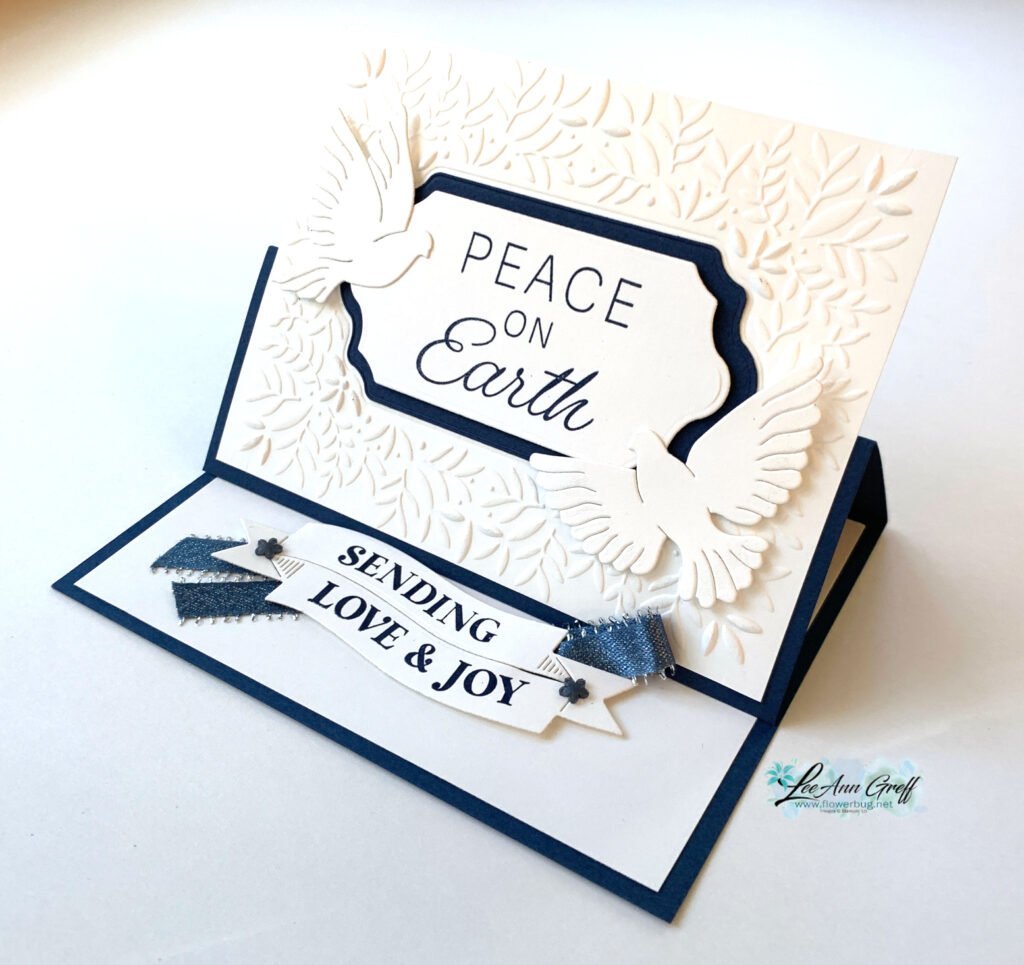
Peace on Earth easel card with free project sheet & video tutorial
I created a free project sheet with measurements & directions. Click here to access it.
The easel stands up on the inside greeting layers. The stamp & dies are part of the Traditional Labels bundle seen here. I think this is a must have if you make your own Christmas cards. Inside, I adhered the greeting die-cut to a fold of Misty Moonlight silver-edges ribbon with Stampin’ Dimensionals.
Below is the video for this card and two more featuring this Peaceful Garden suite.
And get the Starter kit here.*Choose your deal – $35 or $99 plus $90 in free products including free shipping, free Paper Pumpkin kit & free catalogs/business supplies!
~~~
All online orders from me will receive a beautiful PDF of projects featuring the Modern Christmas suite.
And get the Starter kit here.*Choose your deal – $35 or $99 plus $90 in free products including free shipping, free Paper Pumpkin kit & free catalogs/business supplies!
~~~
All online orders from me will receive a beautiful PDF of projects featuring the Modern Christmas suite.
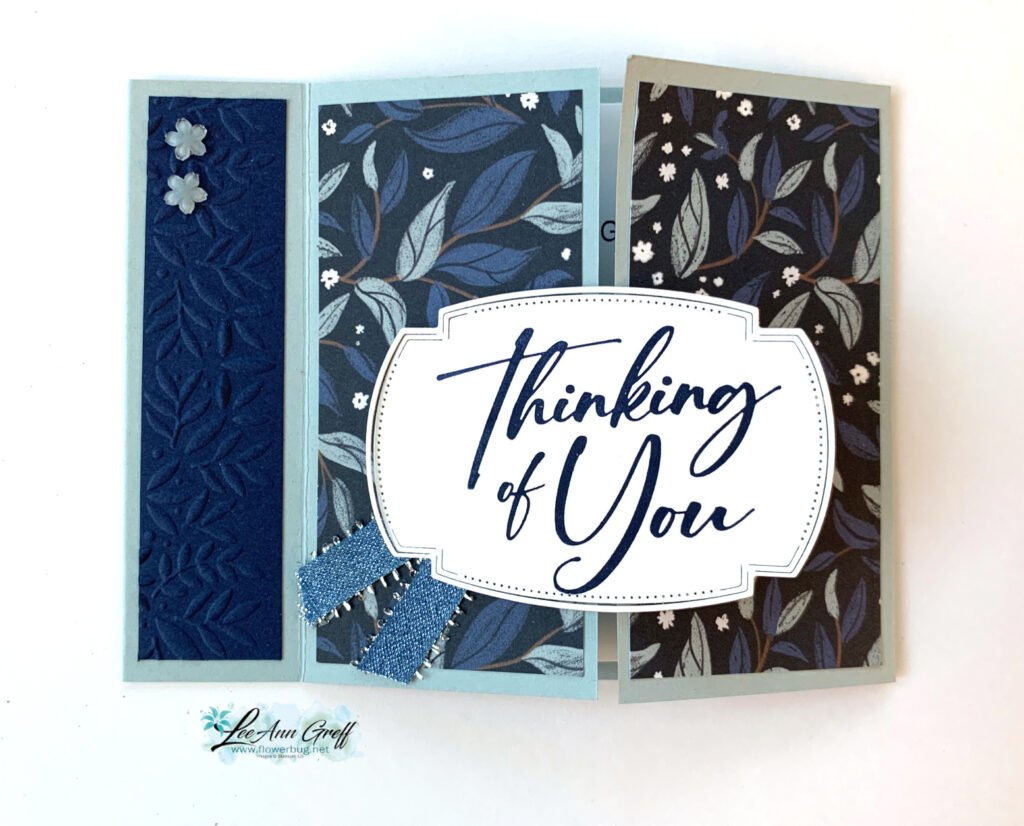
That stunning designer paper is called Season of Elegance and can be seen here. She embossed the DSP with the Peaceful Greenery embossing folder. Simple & stunning.
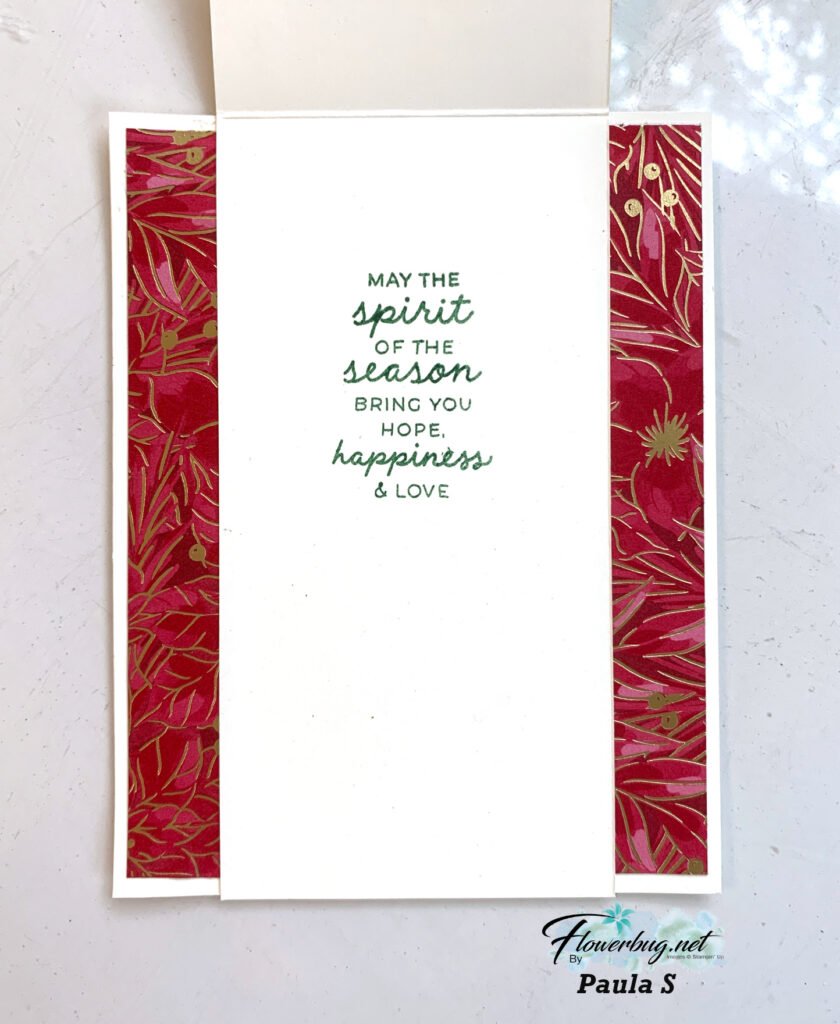
Check out this pretty fun fold card made by Paula:
She featured lots of new products! The stamp set is Branching Out and is stamped on a tag from the Patterned Tags dies seen here which is also where that cute bow is from. The Designer Paper is the Traditions of Christmas specialty paper and the embossing folder is Forever Plaid. Whew!
Her measurements are:
Vanilla card base 4 1/4″ X 5 1/2″, Vanilla scored layer is 2 3/4″ X 11″ scored at 5 1/2″, textured layer is 2 1/2″ X 5 1/4″ & the DSP is 2 strips 3/4″ X 5 1/4″
And get the Starter kit here.*Choose your deal – $35 or $99 plus $90 in free products including free shipping, free Paper Pumpkin kit & free catalogs/business supplies!
~~~
All online orders from me will receive a beautiful PDF of projects featuring the Modern Christmas suite.
Notice: LeeAnn Greff, Independent Stampin’ Up! Demonstrator, Manager. The content of this website is my sole responsibility as an independent Stampin’ Up! demonstrator and the use of, and content of, the classes, services, or products offered on this website is not endorsed by Stampin’ Up! Copyright 2025


Leave a Reply