/


Latest Post

An exciting Scrapbook kit available Wednesday with 12 layouts!


I'm super excited to share this fabulous scrapbooking kit with you.  If you're a scrap-booker you'll love this opportunity! 

Virtual albumn event

Month by Month Album Retreat 2025 Kit

To make the 12-spread album, you’ll want to purchase the Month by Month Album Retreat 2025 kit. Everyone who purchases a kit will receive an email in early July with a link to the exclusive Facebook page where the live event will stream.

We only have a limited number of kits, so make sure to order yours ASAP when the ordering period begins on May 28!

Virtual album 1

Virtual albumn 2

Virtual album 3

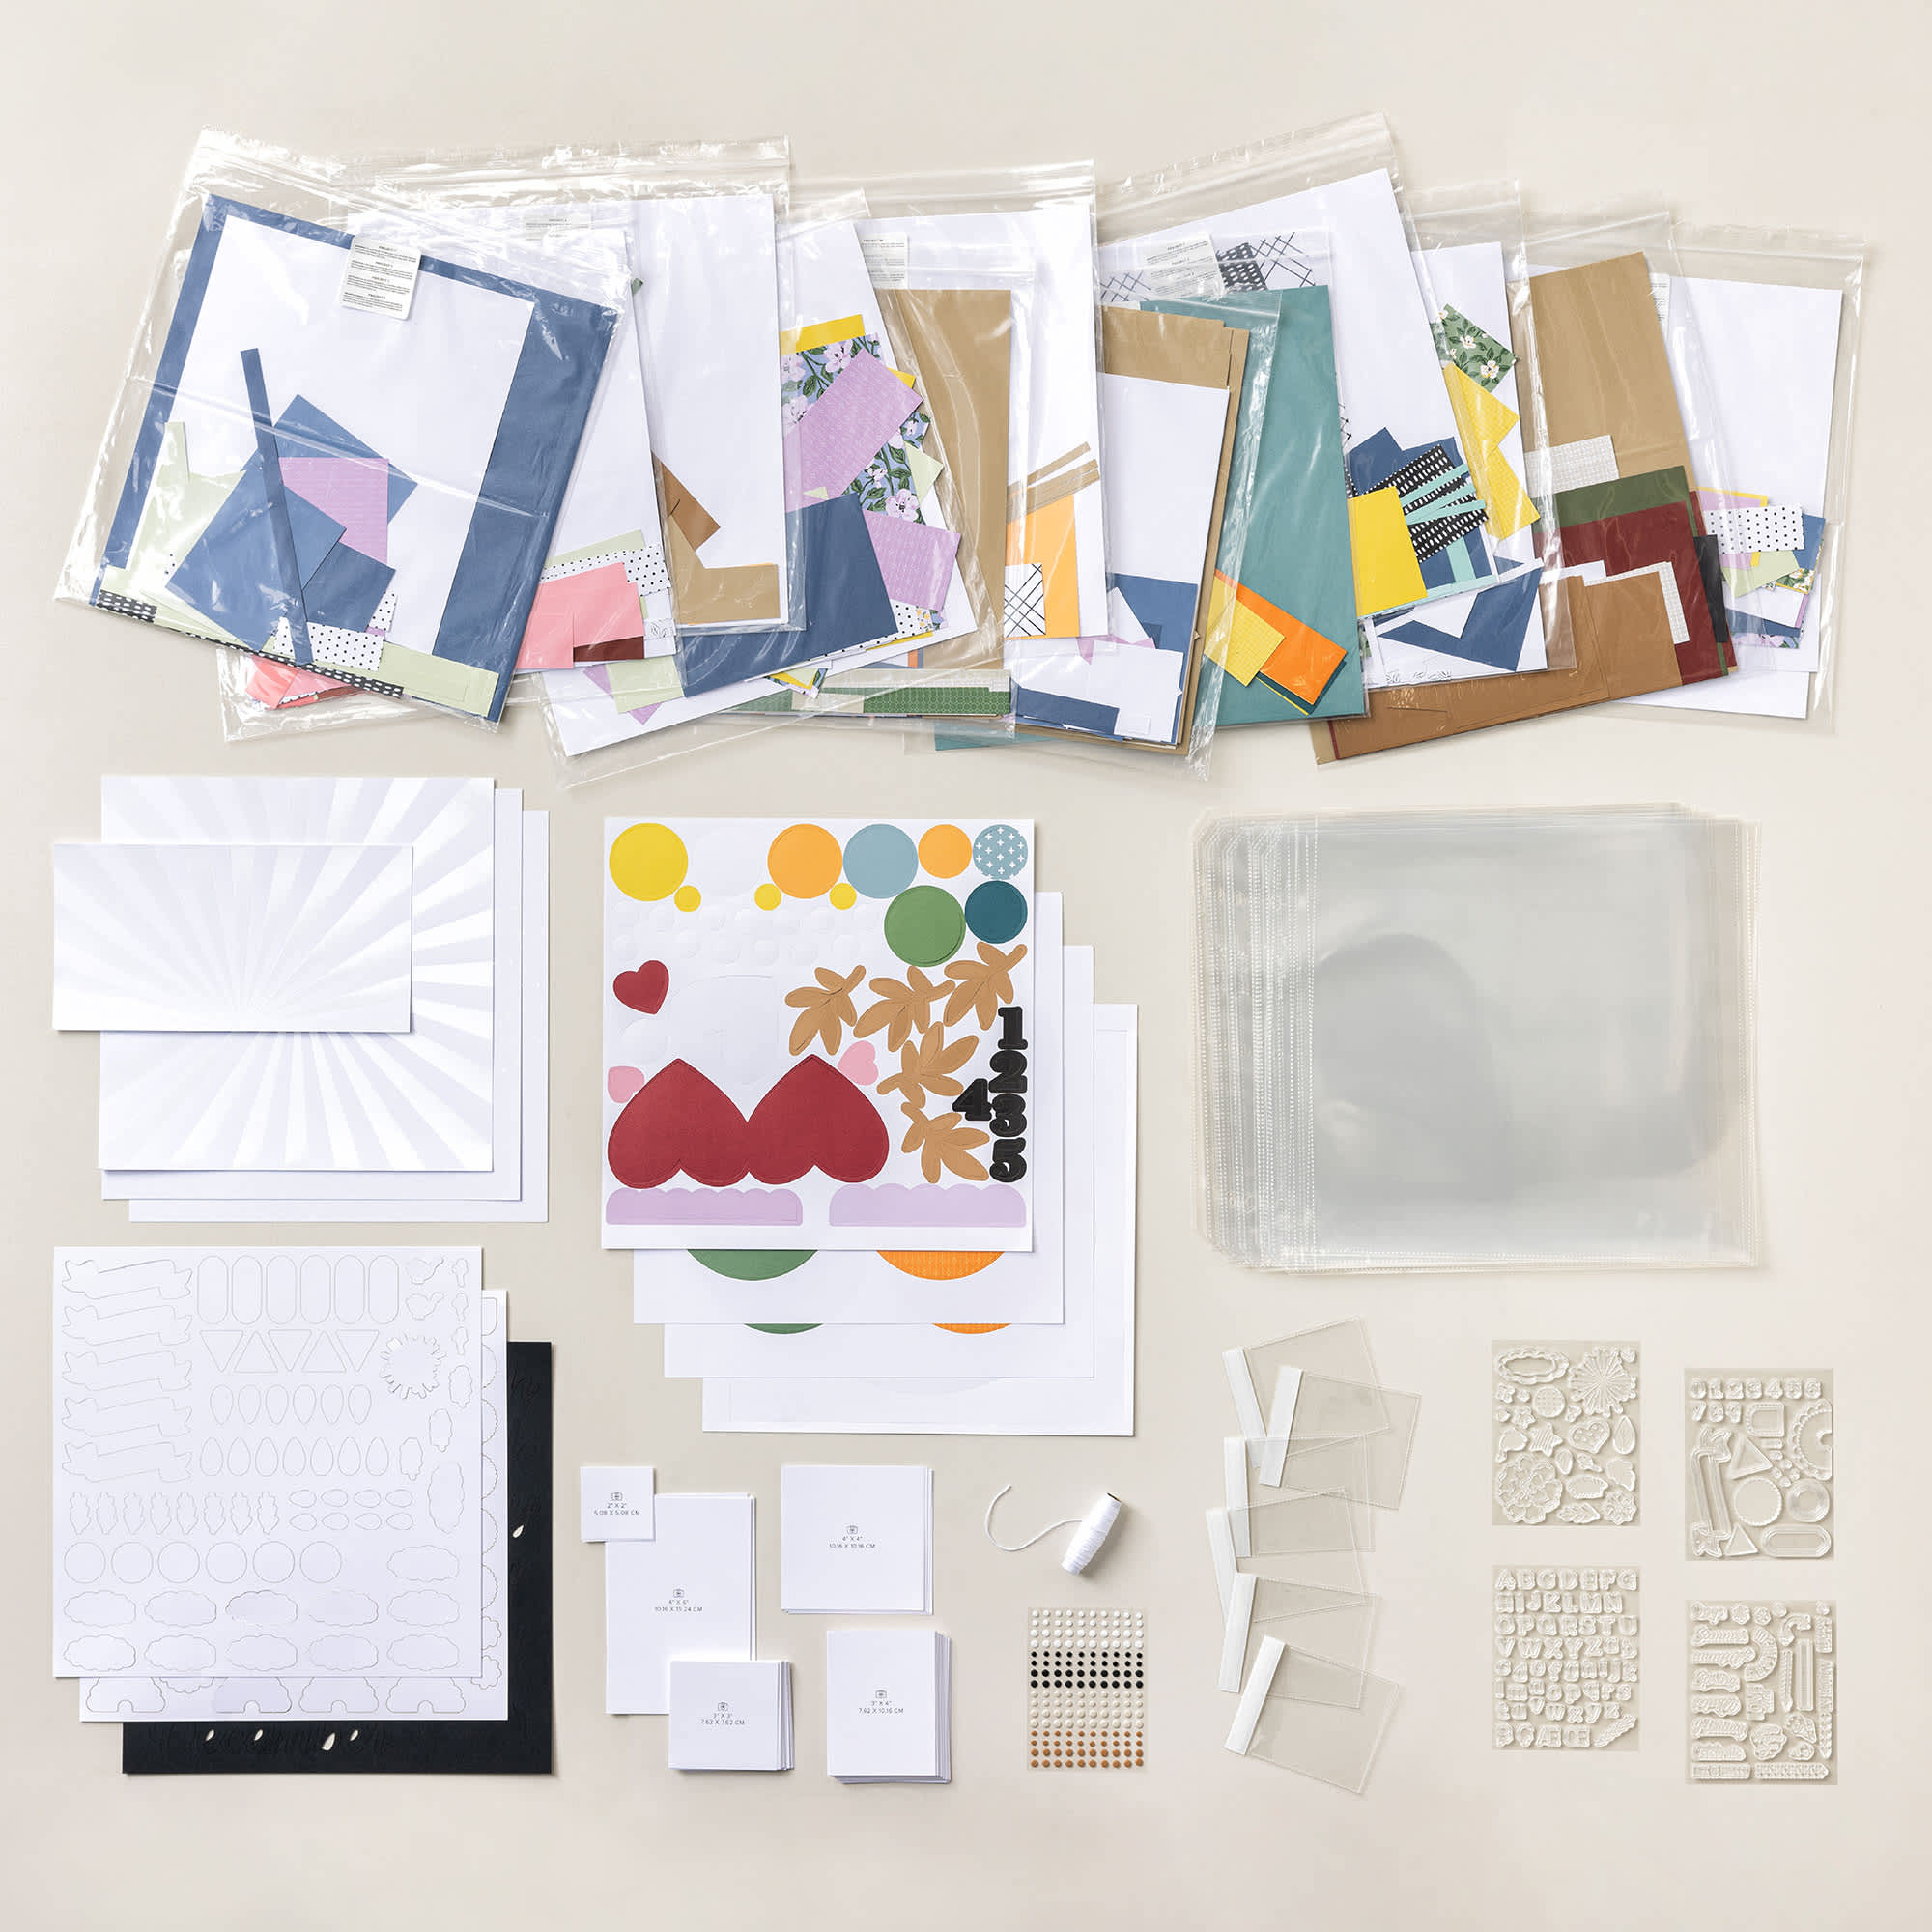
This kit contains 4 exclusive stamp sets; precut pieces of Designer Series Paper and Two-Tone Cardstock; Two-Tone Cardstock sheets; embellishments; Memory Protectors; Flip Flaps; and photo placeholders.

*It does not include an album. You do not need an album to complete this kit, but using an album is a great way to keep all your spreads together in one place. 

Here is a picture of the supplies you'll get in this kit. 

Placeholders_Craft-&-Create_Thumbnail

Here are the additional supplies you'll need to complete the 12 layouts.  Download 2025_VIRTUAL_ALBUM_RETREAT_SUPPLIES-US

This kit costs $250 and can be found in the online store here on Wednesday, May 28th. 

~~~

May Specials

Starter kit deal! 

Reserve my new Designer Paper Share here

2025 DSP share

Get $166 in product of your choice for just $99 with free shipping! Click here!

May join deal

Earn free card kits in May with online orders! Get 4 kits with a $60 order and orders over $80 receive all 6 cards. All you need are greetings, gems and adhesives to assemble. 

Order here 

May card kits

Get my Florals in Bloom PDF tutorial free with any online order in May!

Florals in Bloom suite 1

All Posts

  • Wow! Halloween Scenic cards with Life is Beautiful stamp set with video!


    I am pretty pleased of these two cards I shared on Facebook Live yesterday.  I've been wanting to make some spooky Halloween cards with my Life is Beautiful stamp set and think they turned out amazing, IF I do say so myself!  

    Halloween

    This first one features a bright, white moon with a halo of purple around it.  I used a 2" circle punched 'mask' and sponged the Rich Razzleberry and Pacific Point background.  You can get my easy sponging tips in the video below. 

    Halloween

    Here I created a window scene with the Stitched Rectangle and Plaid Builder dies.  I share my quick method of creating this window in the video below. 

    Halloween.

    I LOVE creating scenes with sponged backgrounds and the Life is Beautiful stamp set is perfect for it!  I used the following inks on the card above: Pacific Point, Rich Razzleberry, Black, Craft White and Pretty Peacock. 

    Do you like the White clouds?  I used the same image on the ground as I did on the clouds.  Love the versatility of this stamp! The pumpkins and greeting are from the Banner Year stamp set. 

    Halloween window

    The colors above are Smoky Slate, Black and Pumpkin Pie.  I used a bit of Magic in This Night DSP, the Cobweb embossing folder and Plaid Builder, Stitched Rectangles and Ornate Frames dies.  The little birds are from the Mountain View stamp set. 

    I hope you enjoy watching the video below!  

    ~~~

    Current Host code is HYSHW6QB

    Get a free package of All the Trimming embellishments in September with an

    online order over $55. 

    Box of Sunshine - June Paper Pumpkin

    *Remember that if your order is over $99 you should consider purchasing the Starter kit here.

    And if it's over $150 you should definitely get the Starter kit.  

    Order online here

    All the trimming

     Get my Beautiful Autumn pdf tutorial free with any online order in September!

    Beautiful Autumn collage

    It includes directions, photos and measurements for 13 cards!


    Leave a Reply

    Your email address will not be published. Required fields are marked *

  • Customize your cards with the Playful Alphabet!


    Who doesn't like a customized card WITH your name on it!  You won't find that at Hallmark!  Use the Playful Alphabet dies to create a one of a kind card. 

    I made this for my granddaughter Eliza. She is almost 7 and loves anything with her name on it. 

    Playing with Patterns Eliza close up

    The color palette was chosen by the designer paper Playing with Patterns.  It's full of bright, unique colors and patterns.  In fact, behind her name is a piece of the paper.  The gradation of colors sure fits the card well doesn't it?  

    I used the Stitched Nested Label dies.  I cut out the letters from the White die-cut and popped that up over a strip of the DSP.  I added some Seal Plus to the bottom edge and pressed my ribbon onto that in small loops.

    Her favorite color is turquoise; just like mine!  I chose two pieces of Designer paper for the card front and separated them with a strip of Crushed Curry.  You can see these products below in my store. 

    Playing with Patterns Eliza close up

    ~~~

    Current Host code is HYSHW6QB

    Get a free package of All the Trimming embellishments in September with an

    online order over $55. 

    *Remember that if your order is over $99 you should consider purchasing the Starter kit here.

    And if it's over $150 you should definitely get the Starter kit.  

    Order online here

    All the trimming

     Get my Beautiful Autumn pdf tutorial free with any online order in September!

    Beautiful Autumn collage

    It includes directions, photos and measurements for 13 cards!


    Leave a Reply

    Your email address will not be published. Required fields are marked *

  • Quarter Diagonal cards; watch on FB Live tonight!


    If you're like most stampers you have a LOT of Designer Paper stocked up.  I've been on a mission to use mine up and help you with ideas to use yours too.  There's always more we want; so here's a way to use some so you don't feel so bad about purchasing more!  Ha! 

    Below are the cards we're making tonight on Facebook Live – Stamp with Me.  It's the 2nd and 4th Monday nights each month at 7:30 pm CT.  Join me here. 

    Be sure to follow my FB page so you get notified when I'm live.  

    Sept 14 quarter-angle .

    I chose to use the Magic in the Night designer paper; seen here in our Halloween DSP in the 2020 Holiday catalog.  I love the colors of Pretty Peacock, Cajun Craze, Black, Blackberry Bliss and White.  And as you can see some of the designs are not all Halloween!  

    Sept 14 quarter-angle .

    The greetings and die-cuts are from the Celebration Tidings Bundle seen here.  I love that it has multiple holidays and these dies are amazing! 

    Celebration Tidings

    Here's how you create the diagonal layers; it's so easy! 

    For 2 cards, cut 2 pieces of Designer paper (or card stock) at 4" X 5 1/4". Then cut each in half on the diagonal. Next put those pieces back together on your paper trimmer to reform the full piece (just placing; not gluing) and cut on the diagonal in the other direction. Now you'll have 4 triangle shaped pieces from one 4" X 5 1/4" piece.
    I chose two coordinating pieces of DSP that would work on all 4 sides and that makes 2 full card fronts.

    Sept 14 quarter-angle .

    For the card below I chose to use the Gilded Autumn specialty DSP.  The colors here are Early Espresso, Cajun Craze and Vanilla. 

    Sept 14 quarter-angle .


    ~~~

    Current Host code is 7VPEDARH

    Get a free package of All the Trimming embellishments in September with an

    online order over $55. 

    *Remember that if your order is over $99 you should consider purchasing the Starter kit here.

    And if it's over $150 you should definitely get the Starter kit.  

    Order online here

    All the trimming

     Get my Beautiful Autumn pdf tutorial free with any online order in September!

    Beautiful Autumn collage

    It includes directions, photos and measurements for 13 cards!


    Leave a Reply

    Your email address will not be published. Required fields are marked *


Notice: LeeAnn Greff, Independent Stampin’ Up! Demonstrator, Manager. The content of this website is my sole responsibility as an independent Stampin’ Up! demonstrator and the use of, and content of, the classes, services, or products offered on this website is not endorsed by Stampin’ Up! Copyright 2025