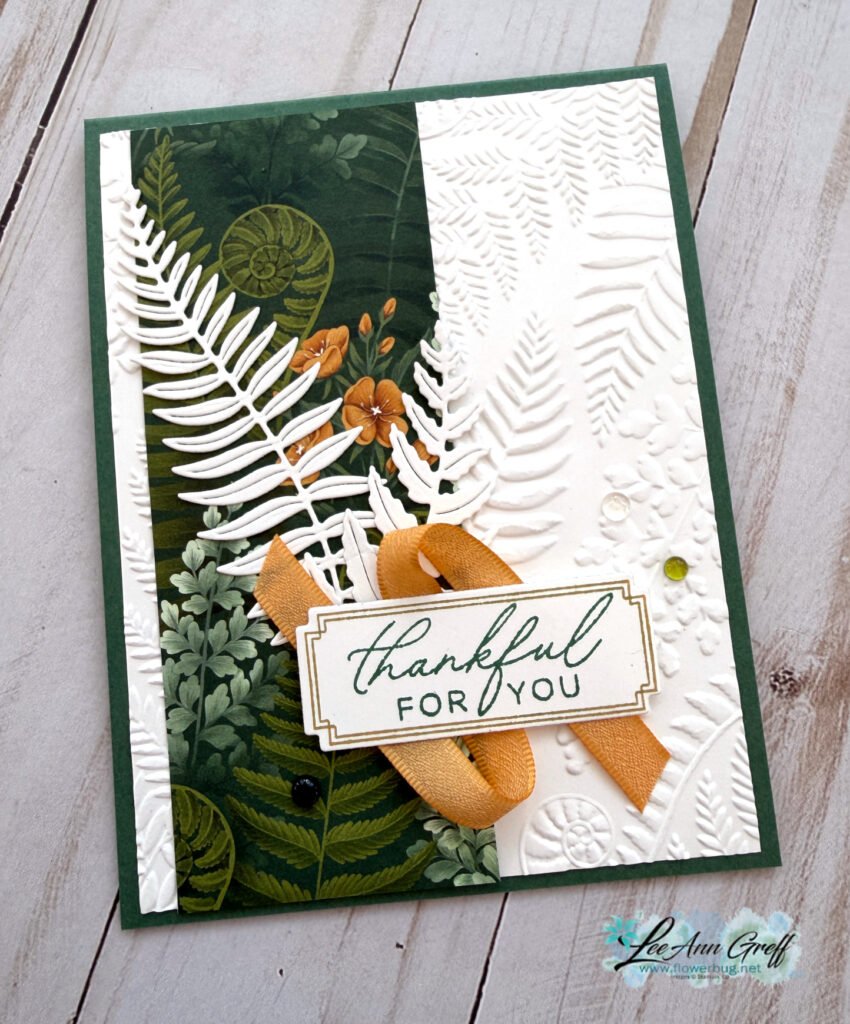
Pretty Fern & Flora card; with free project sheet & video tutorial
There’s something about crisp white on a card. It gives a feeling of elegance to your projects.
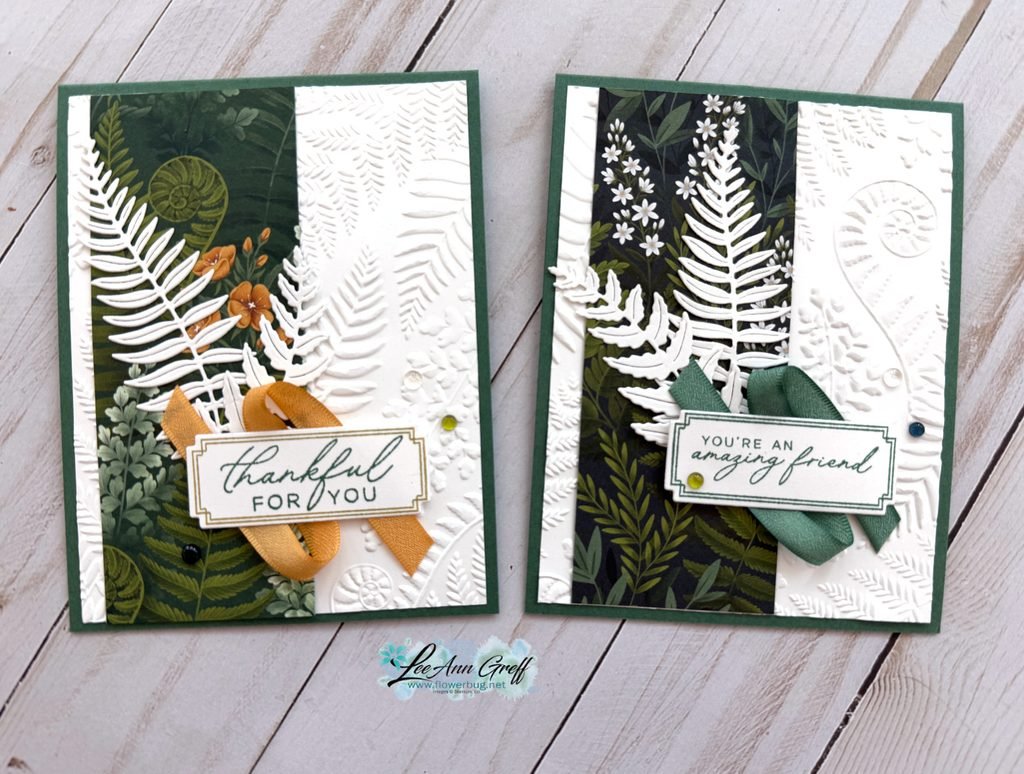
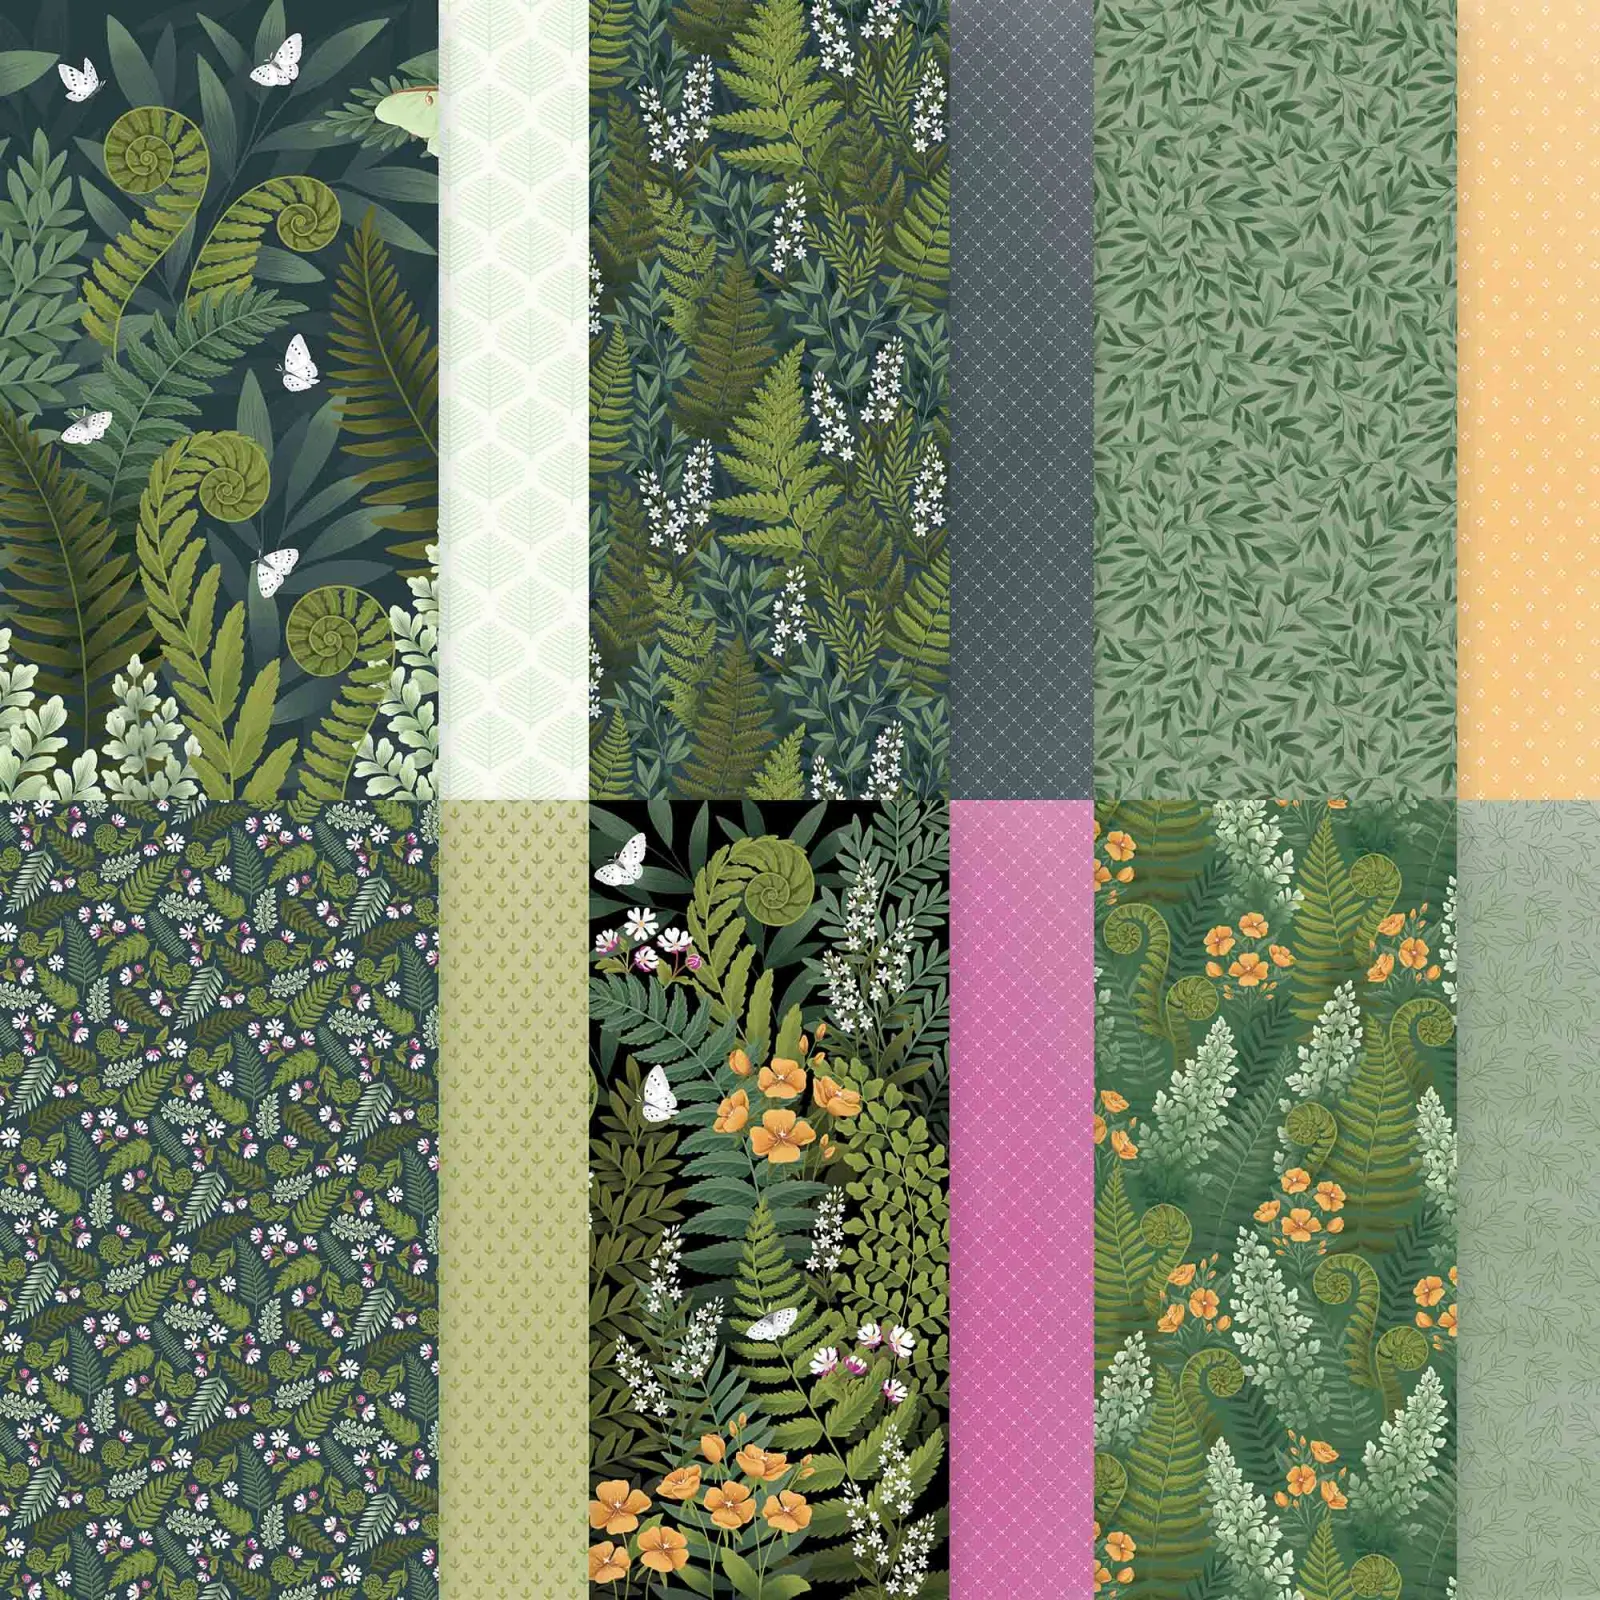
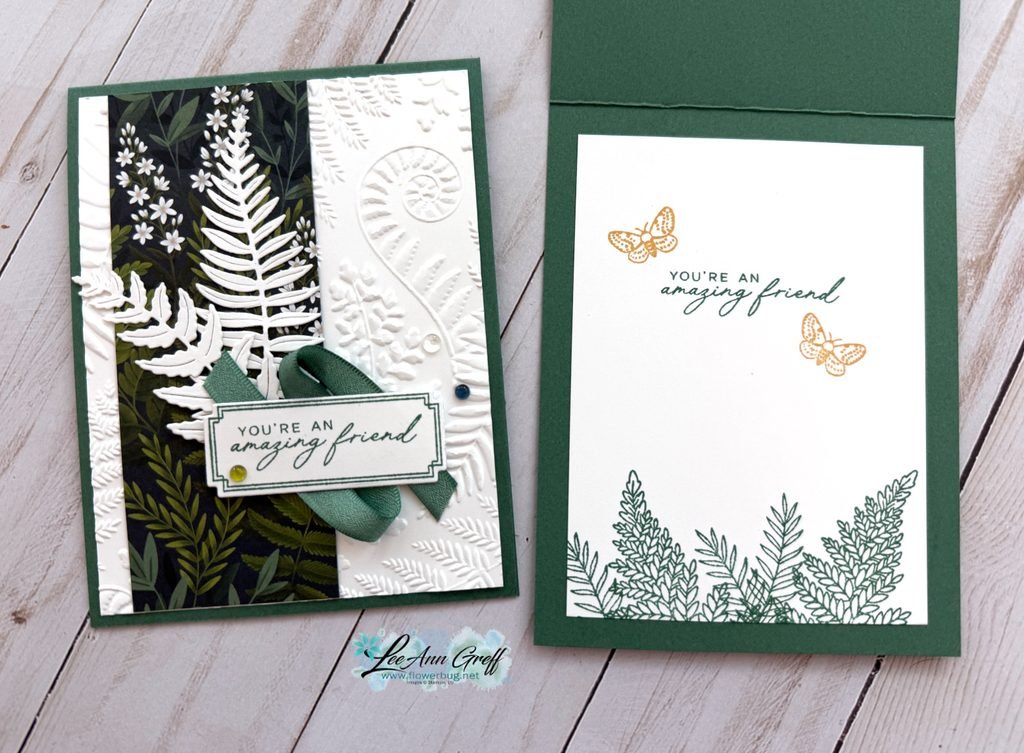
This card features the Fern & Flora bundle seen here. The designer paper is called Moonlit Flora and the embossing folder is called Fern & Flora and can be seen here. Unfortunately the Designer paper AND the embossing folder are out of stock right now. Very popular products!
I took a little creative license and added White fern die-cuts here. I love the way they show up against the Moonlit Flora designer paper strip.
The colors include Peaceful Pine, with White and the new Golden Glow in color.
Which do you like better? All green and White on the upper right, or the pop of the additional Golden Glow?
The pretty Moonlit Flora designer paper offers multiple patterns: See it here.Be sure to add your name to the product so you get an email when it’s back in stock.
I also shared a video tutorial for this card and one more using this pretty bundle. Click on it below.
All Posts
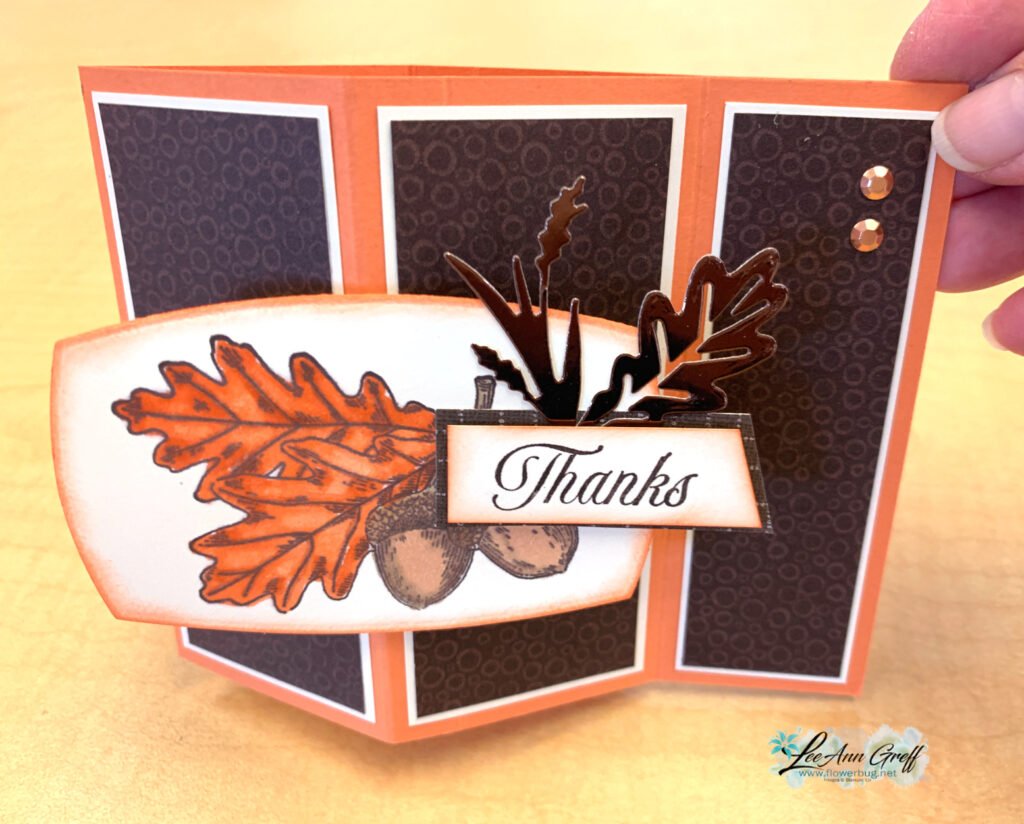
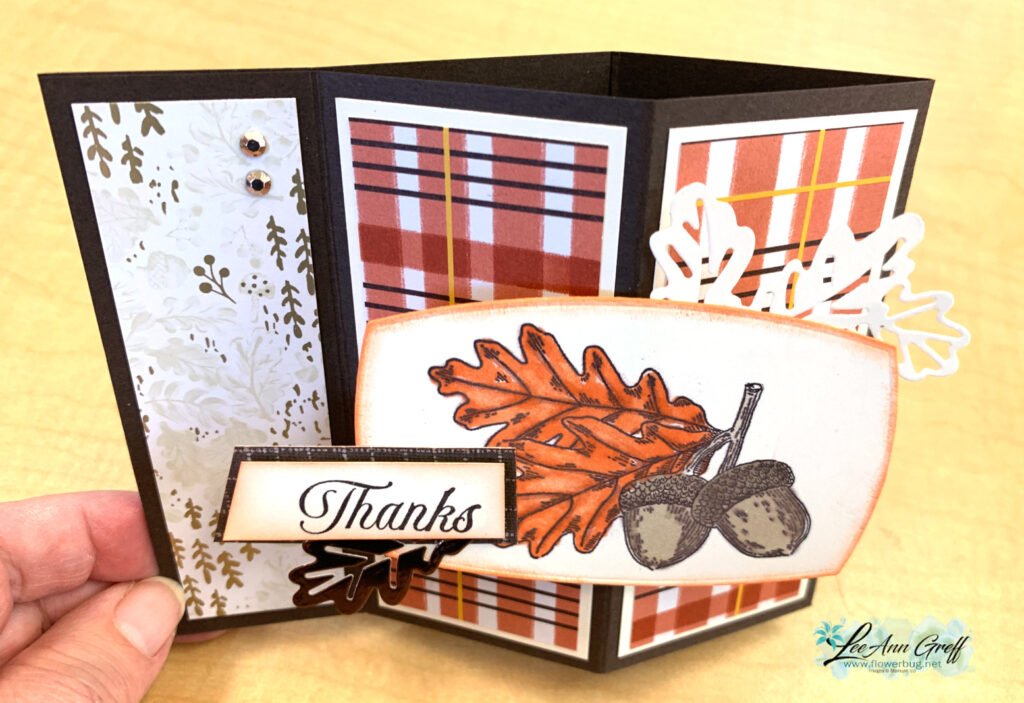
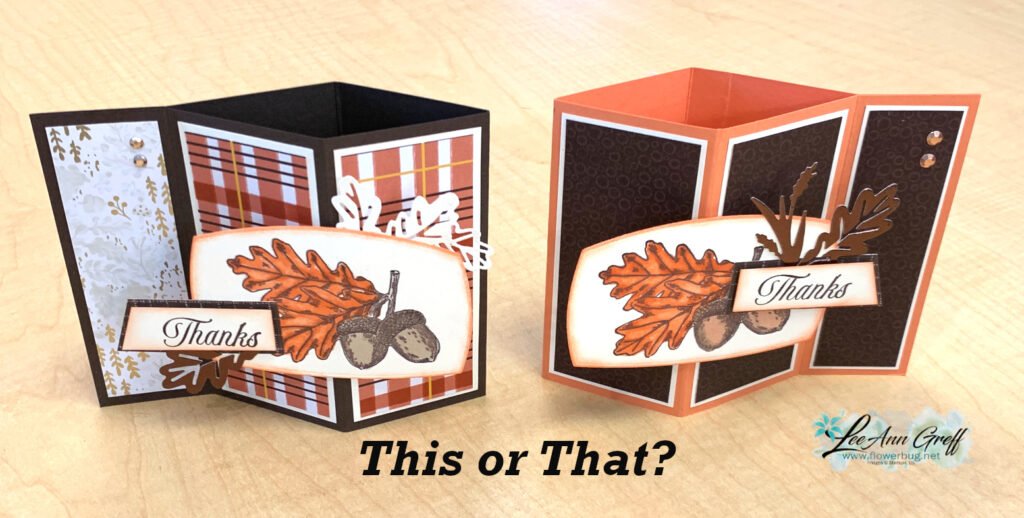
An Pillar fun fold card with Amber Autumn; with video & project tutorial
I love this fun fold card! So easy yet unique as well.
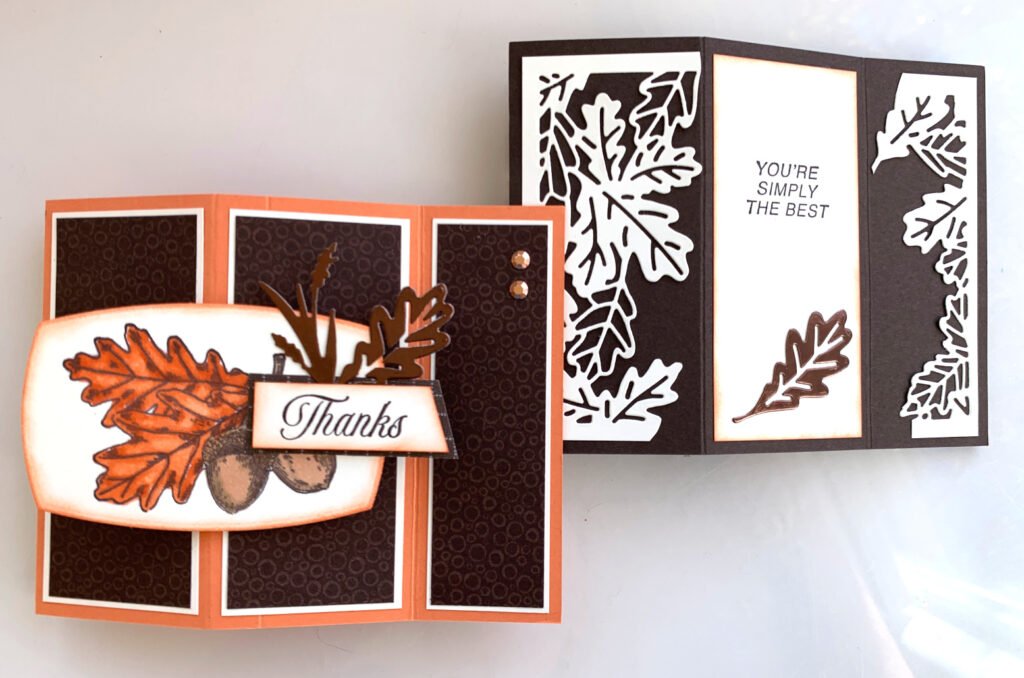
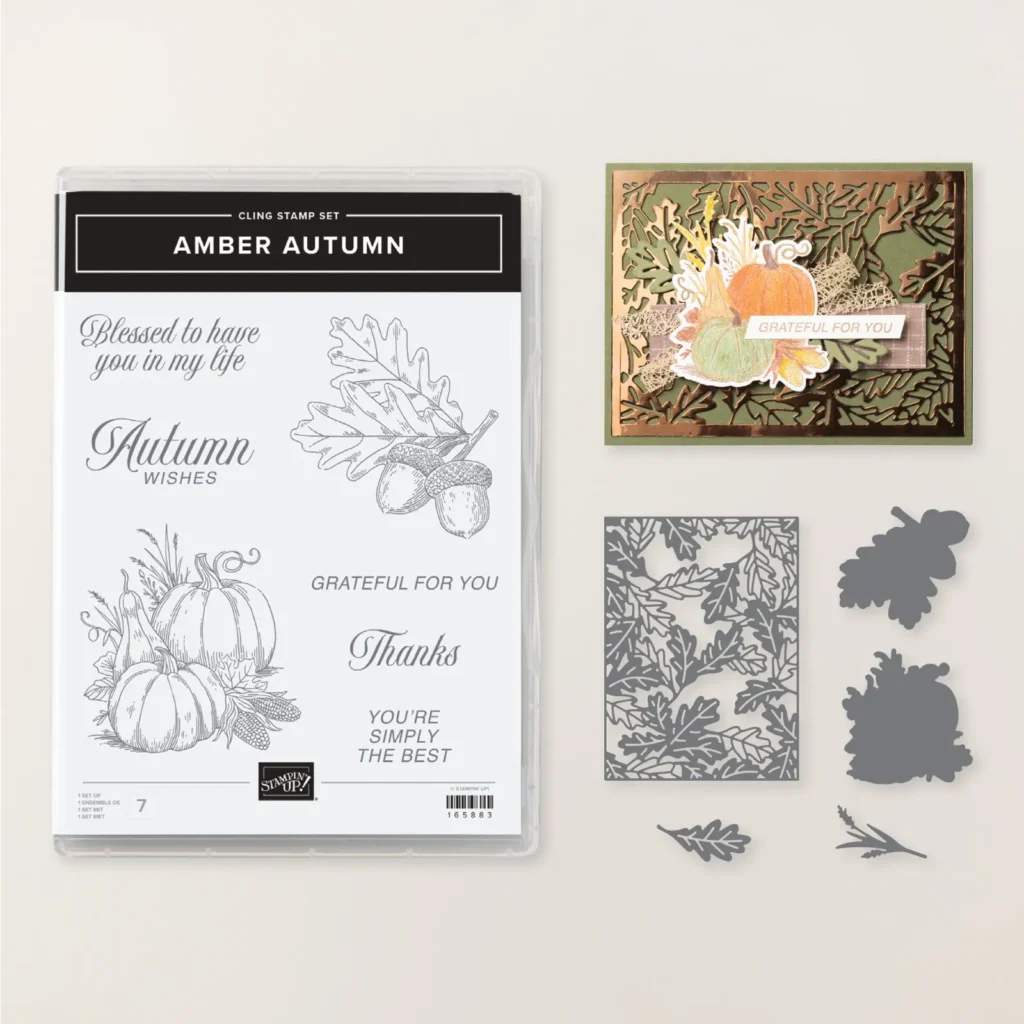
I used the Amber Autumn stamp & dies bundle seen here. I was initially on the fence about this set; did I need another fall themed bundle? But wow; am I glad I bought it! See how I finished the back side?
I used the large detailed die to add pretty borders to the sides. So pretty! It’s quite easy to snip a few of the connection points on the leaves. Here’s a photo of this pretty bundle:
The card stock colors include Early Espresso, Vanilla and Timid Tiger. In the video I shared how to get some highlights on your colored image using the Color Lifter Blends marker.
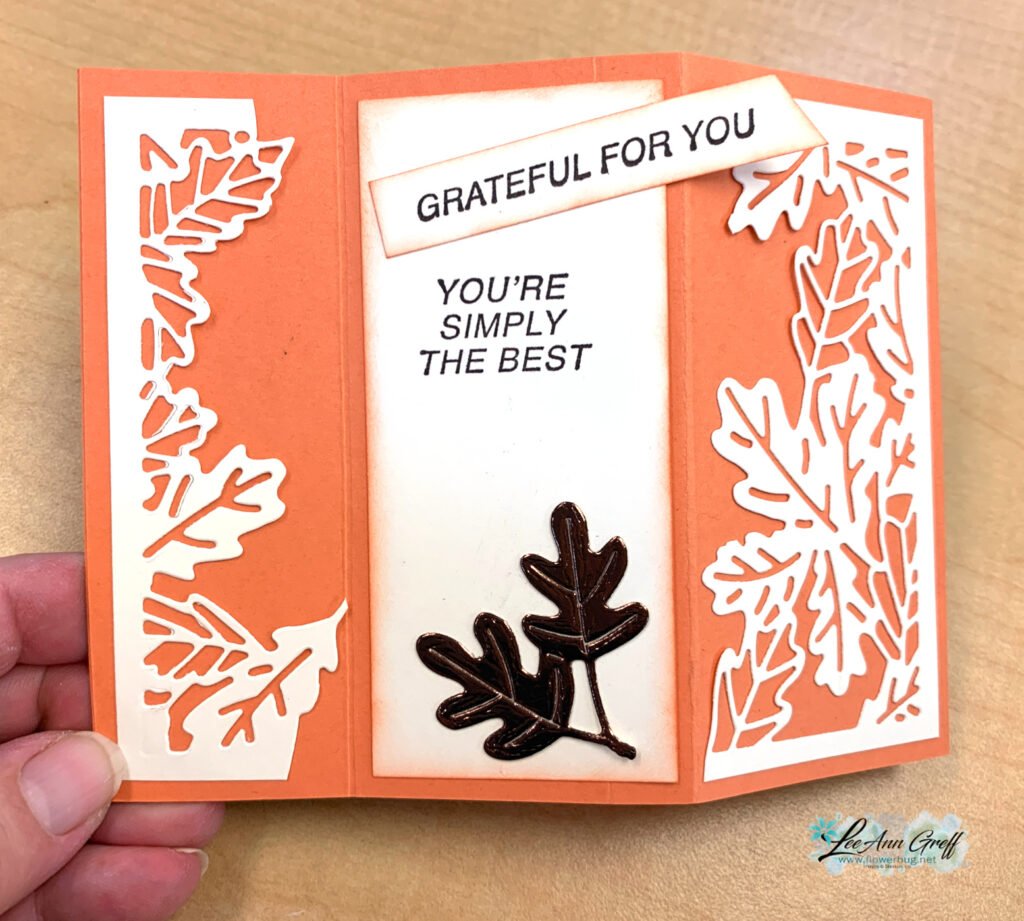
Here’s how the back looks on the Timid Tiger card:
Here is the free project tutorial you can print or download. Click hereto access it.
Be sure to watch the video tutorial for this fun fold card and my other project featuring the Amber Autumn bundle. It’s a gorgeous set of products!
~~~
November Specials
New Online products are available on November 4th. See them here.
Get the Peaceful Garden suite tutorial FREE with any online order in November!
October join special; get a complete $99 crafting kit for just $35! Do not wait!
My Flowerbug’s Team has grown by well over 20 people this month! YAY! Lots of people have taken advantage of the unbelievable join special in October.
This join special is absolutely incredible and if you’ve ever considered getting the starter kit now is THE BEST TIME!There are just 2 days left so do not wait to take advantage of this deal.
You can choose either the $99 kit or the $35 kit. I recommend the $35 kit. This gives you more money to put towards your first order as a Demo.
With either choice you get $90 in free products! From then on you get 20-25% off all purchases from Stampin’ Up! as long as you stay active. Use this link to start your kit order. It’s really just an order; you can decide how long you want to stay in later. There’s no need to sell or hold classes; just enjoy the discount! However if you do want to earn some extra $$ I am happy to help you in any way.
More details:
You have through March to meet your first $300 quarterly minimum! (And all purchases will count towards that amount)
Add the November Online Exclusive products to your Starter Kit (you can see them when you’re picking out your kit products)
During your first six months you have the following opportunities:
1. Early access to the January–April 2026 Mini Catalog (PDF in November + preorder privileges).
2. Preorder access to the January Online Exclusives.
3. Early access to the 2026–2027 Annual Catalog and preorder opportunities.
Let me tell you about this package deal. You can get the awesome 12 Days of Crafting kit with the join deal. This pretty box of products is valued at way over $100 and costs $99. But if you added it to your starter kit it costs just $35. And you still get to add $26 more in Stampin’ Up! products to get to the $125 amount! That’s crazy amazing.
This beautiful kit includes 12 ‘windows’ filled with brand new Stampin’ UP! products plus two stamp sets as well! This calendar comes with a 24-piece stamp set and has 12 never-before-seen products including papers, embellishments, ephemera, tools, and more, all of which coordinate with one another! *you will need a cut & emboss machine
Bonus perk; everyone who orders it from me (and my Team of course) will receive a big PDF filled with multiple projects using these new products. I cannot wait to play with mine.
And get the Starter kit here.*Choose your deal – $35 or $99 plus $90 in free products including free shipping, free Paper Pumpkin kit & free catalogs/business supplies!
~~~
All online orders from me will receive a beautiful PDF of projects featuring the Modern Christmas suite.
*Choose your deal – $35 or $99 plus $90 in free products including free shipping, free Paper Pumpkin kit & free catalogs/business supplies!
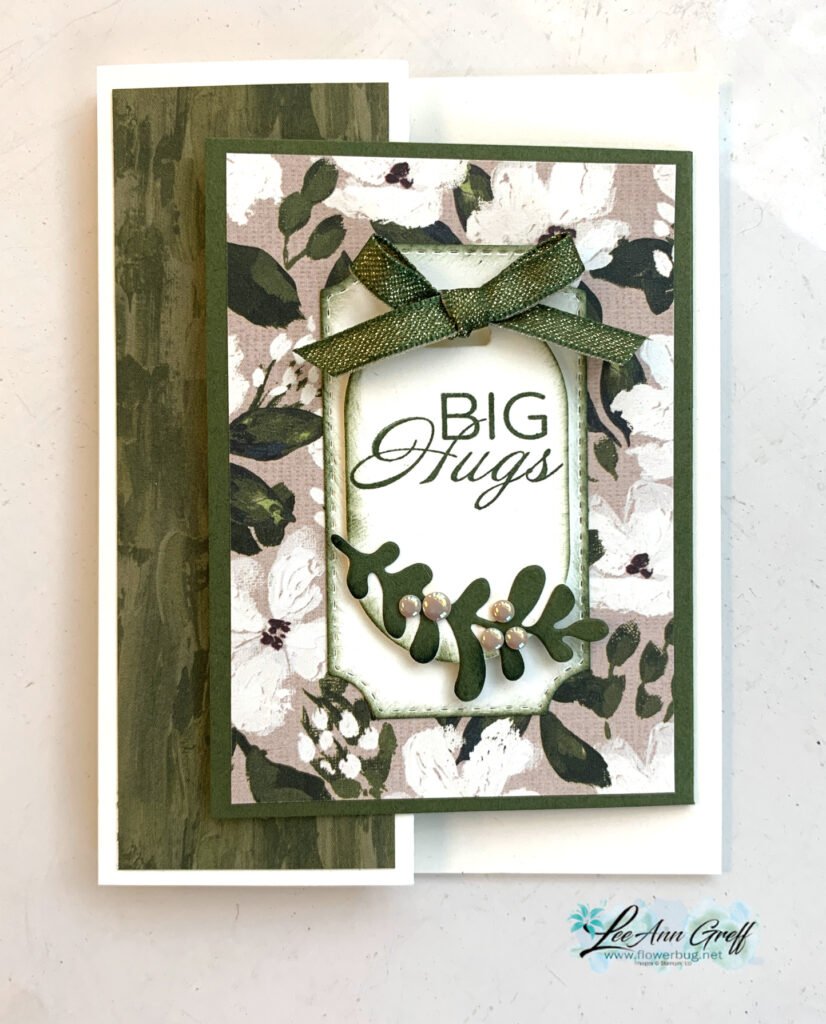
Here’s a pretty card I shared during last week’s video. It features many new upcoming products!
~~~
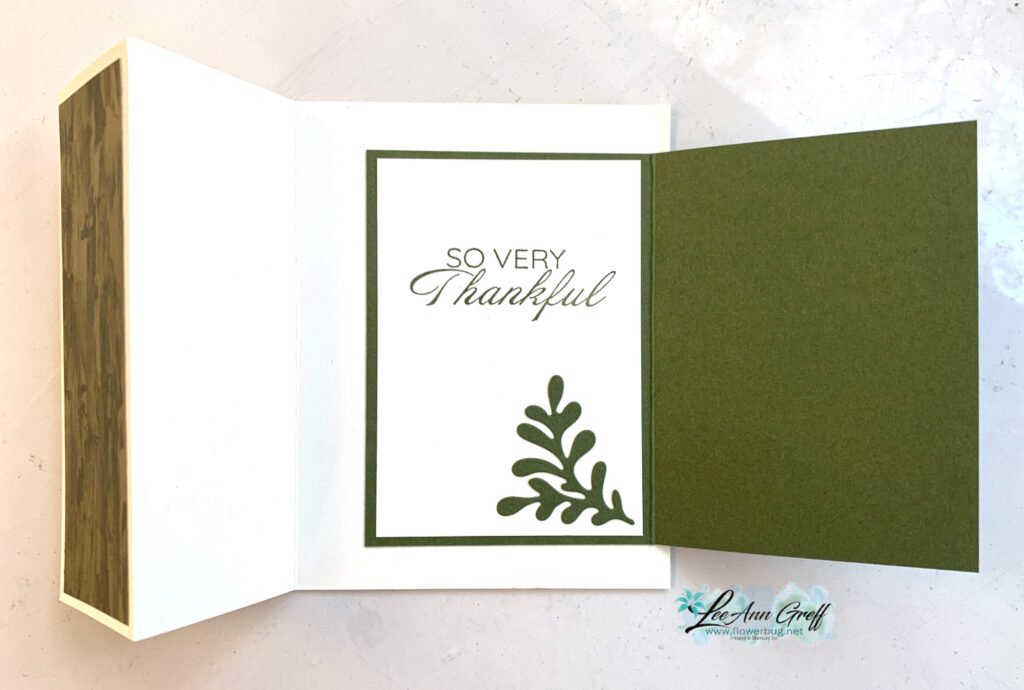
The colors include Very Vanilla with Mossy Meadow. Isn’t that designer paper beautiful? It’s called Brushed with Beauty and is one of the new products coming out on November 4th. I also used a new stamp set called Delicate Framing. The greeting is stamped on a new set of dies called Creative Haven dies and that’s layered on a die from Branching Out.
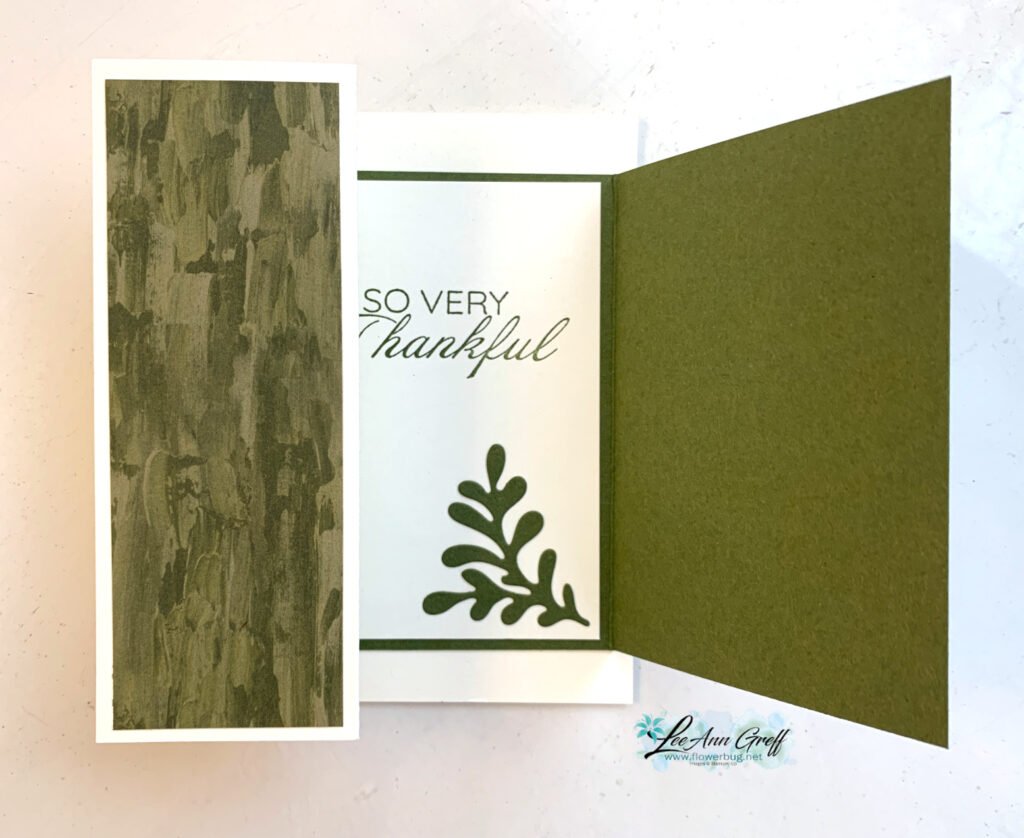
Here’s how it opens:
I love the leaf die-cuts in the Creative Haven dies! They’re just my style.
Here it is fully opened: The Mossy Meadow layer is scored & folded to add another opportunity for adding our pretty designer papers.
You’ll be able to order these new products on November 4th. However if you wanted them earlier you can add them to your starter kit now. See that opportunity below:
I created a free project sheet with measurements & photos for you. Click here to print or download it.
Below is the video for this card and two more!
~~~
5 days left to get the deal on the Starter kit
The deal ends on October 31st! Don’t wait to choose your free $90 in products plus free shipping.
Go here to get started and join the other 20 people who’ve joined the Flowerbug’s this month! Woo hoo!
And get the Starter kit here.*Choose your deal – $35 or $99 plus $90 in free products including free shipping, free Paper Pumpkin kit & free catalogs/business supplies!
~~~
All online orders from me will receive a beautiful PDF of projects featuring the Modern Christmas suite.
Notice: LeeAnn Greff, Independent Stampin’ Up! Demonstrator, Manager. The content of this website is my sole responsibility as an independent Stampin’ Up! demonstrator and the use of, and content of, the classes, services, or products offered on this website is not endorsed by Stampin’ Up! Copyright 2025


Leave a Reply