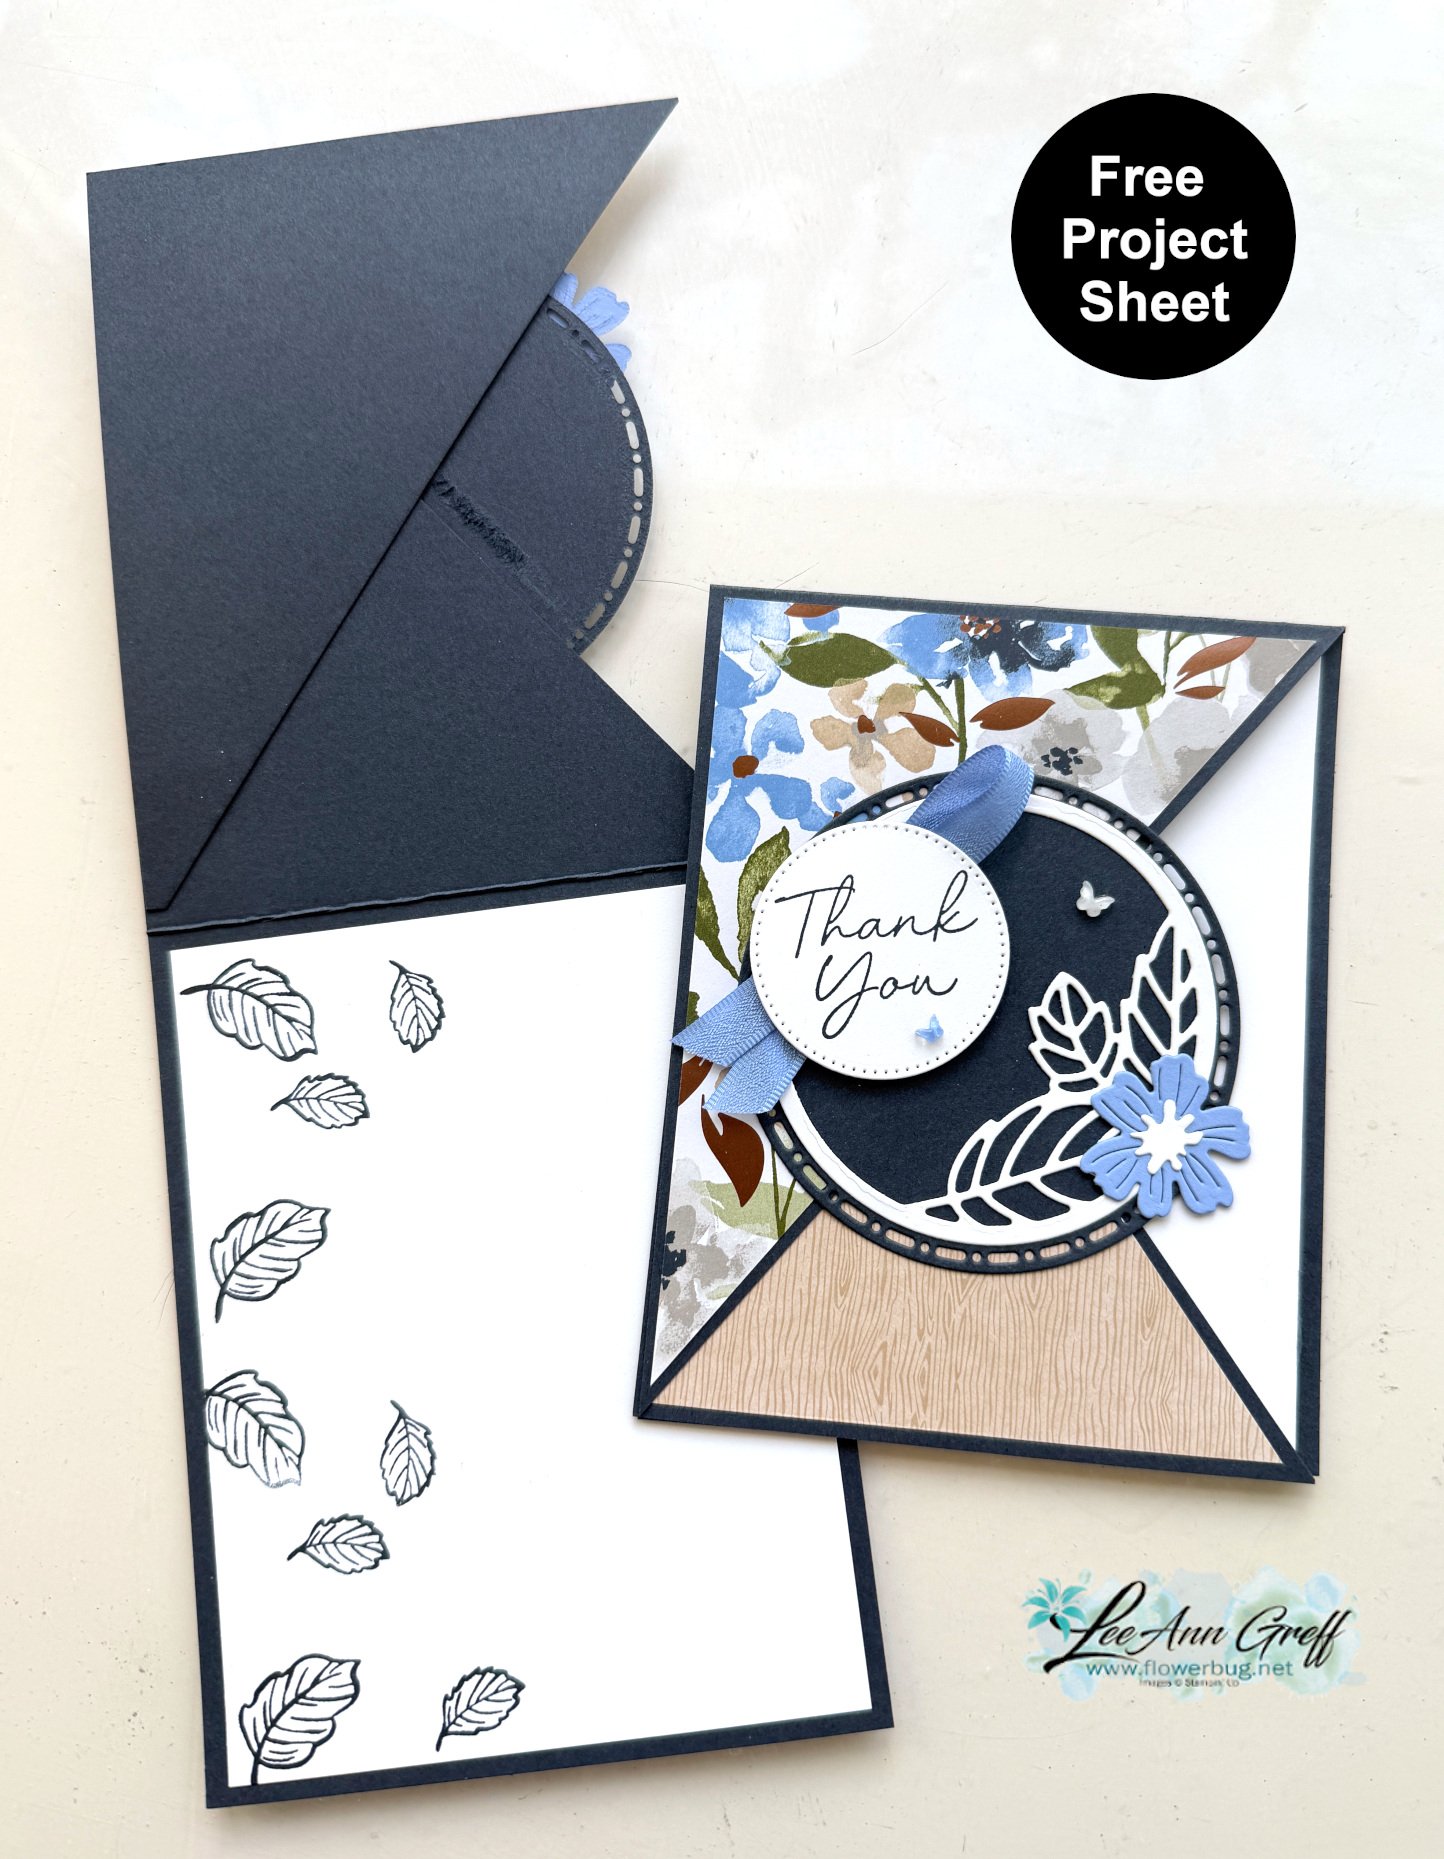
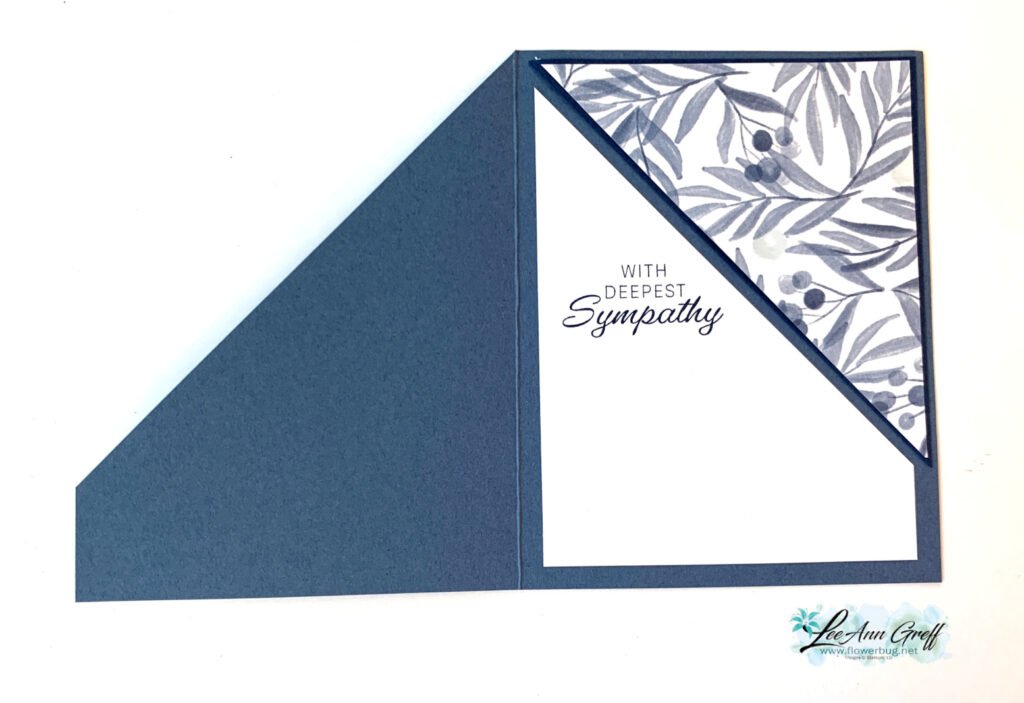
This card might look like it’s difficult but it’s as simple as trimming off one half of the card front at a diagonal and flipping it over. Yup; that’s it! Watch my video below to see how it’s done.
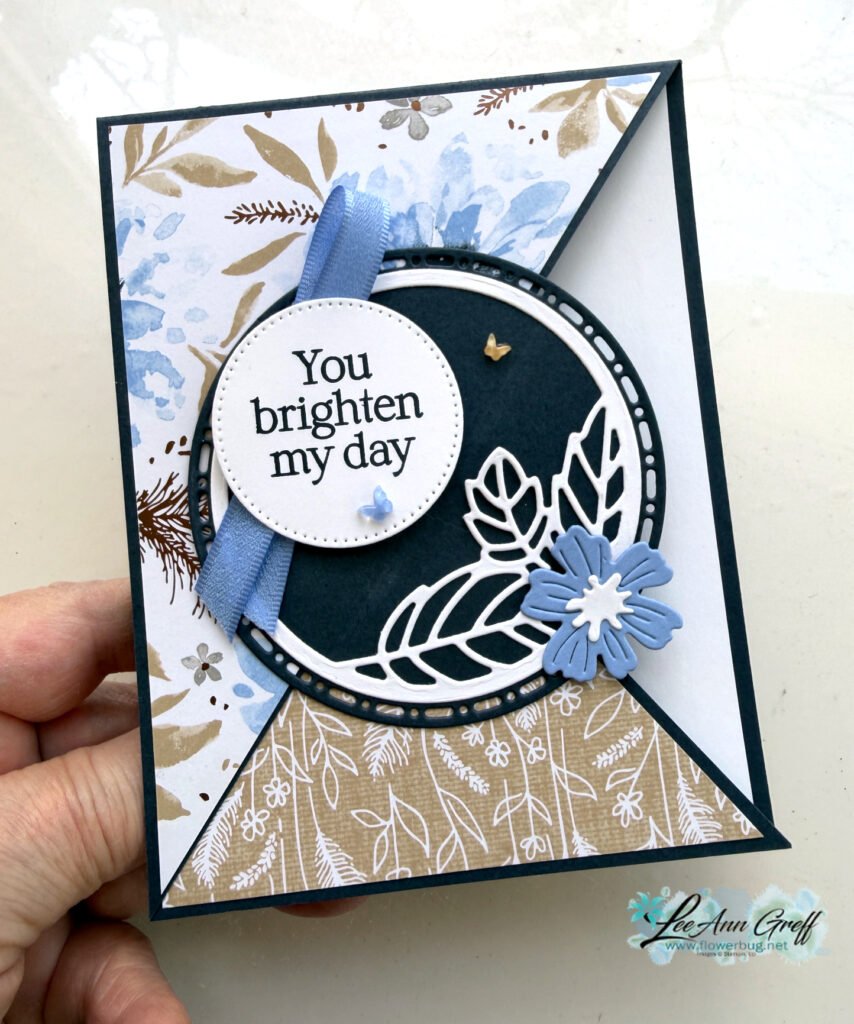
My colors include Secret Sea, Hydrangea Hue (new in color), White and Crumb Cake. The largest circle is from the Spotlight on Nature dies seen here. The small White circle is from Stylish Shapes dies.
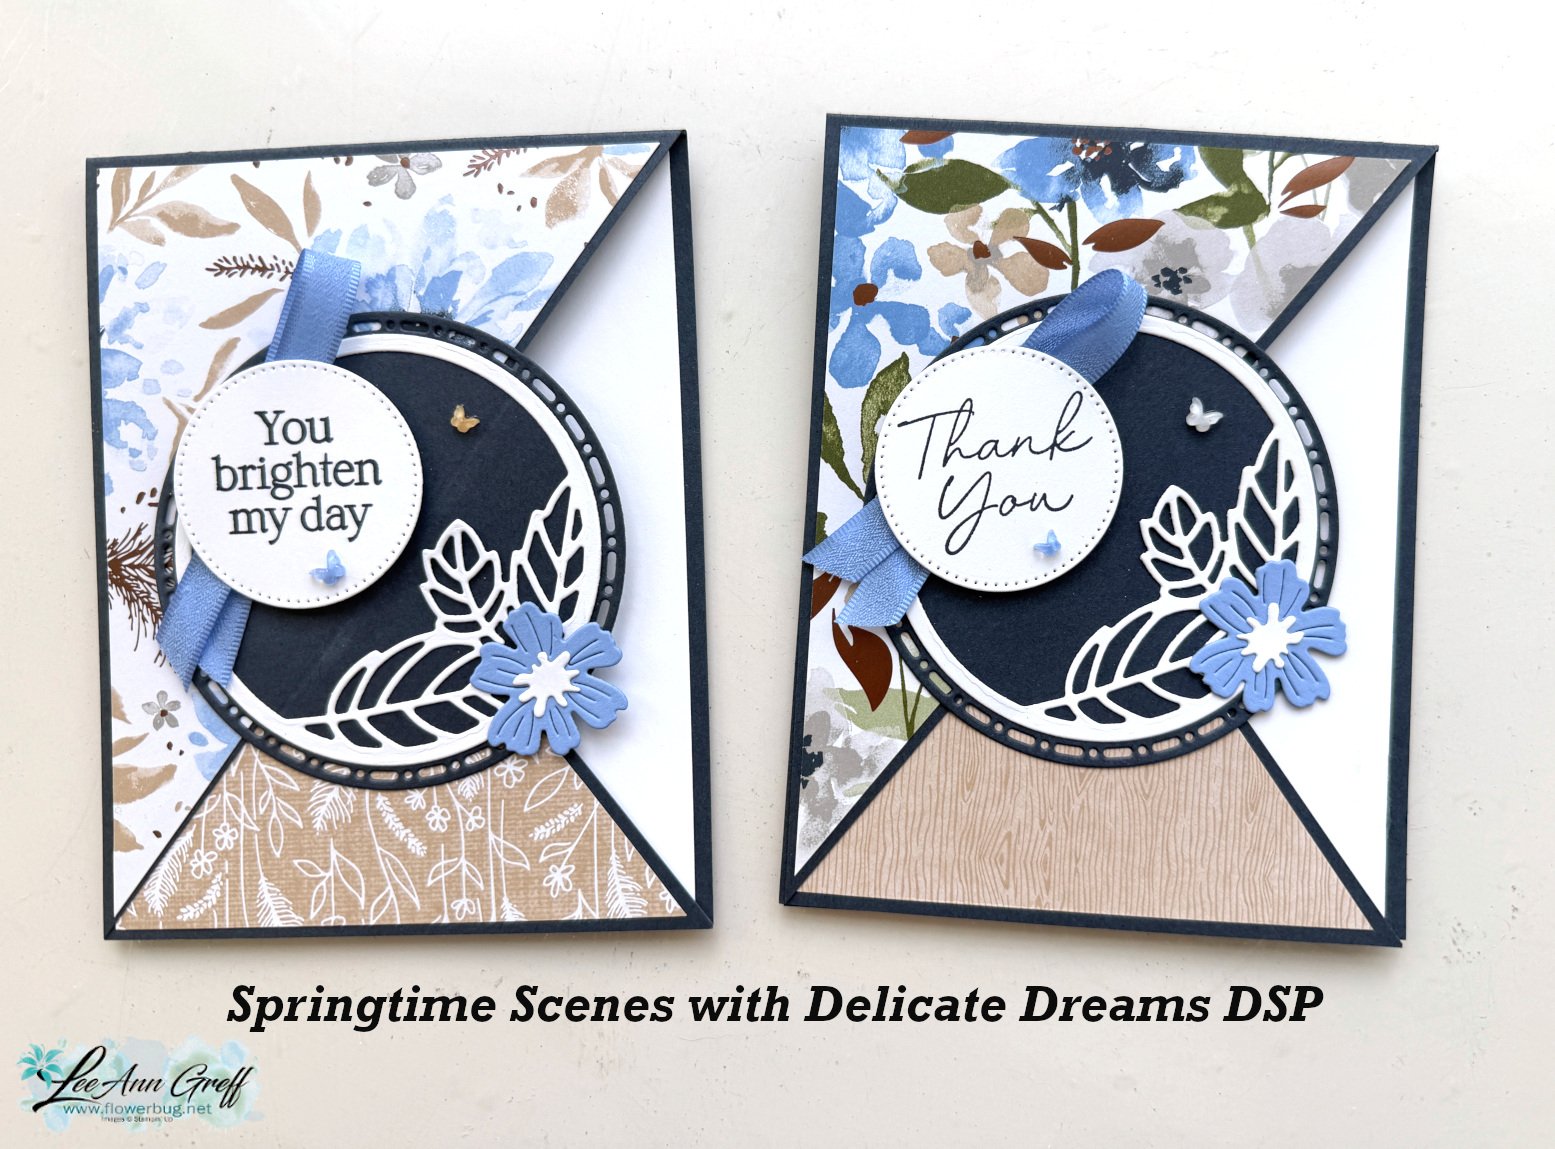
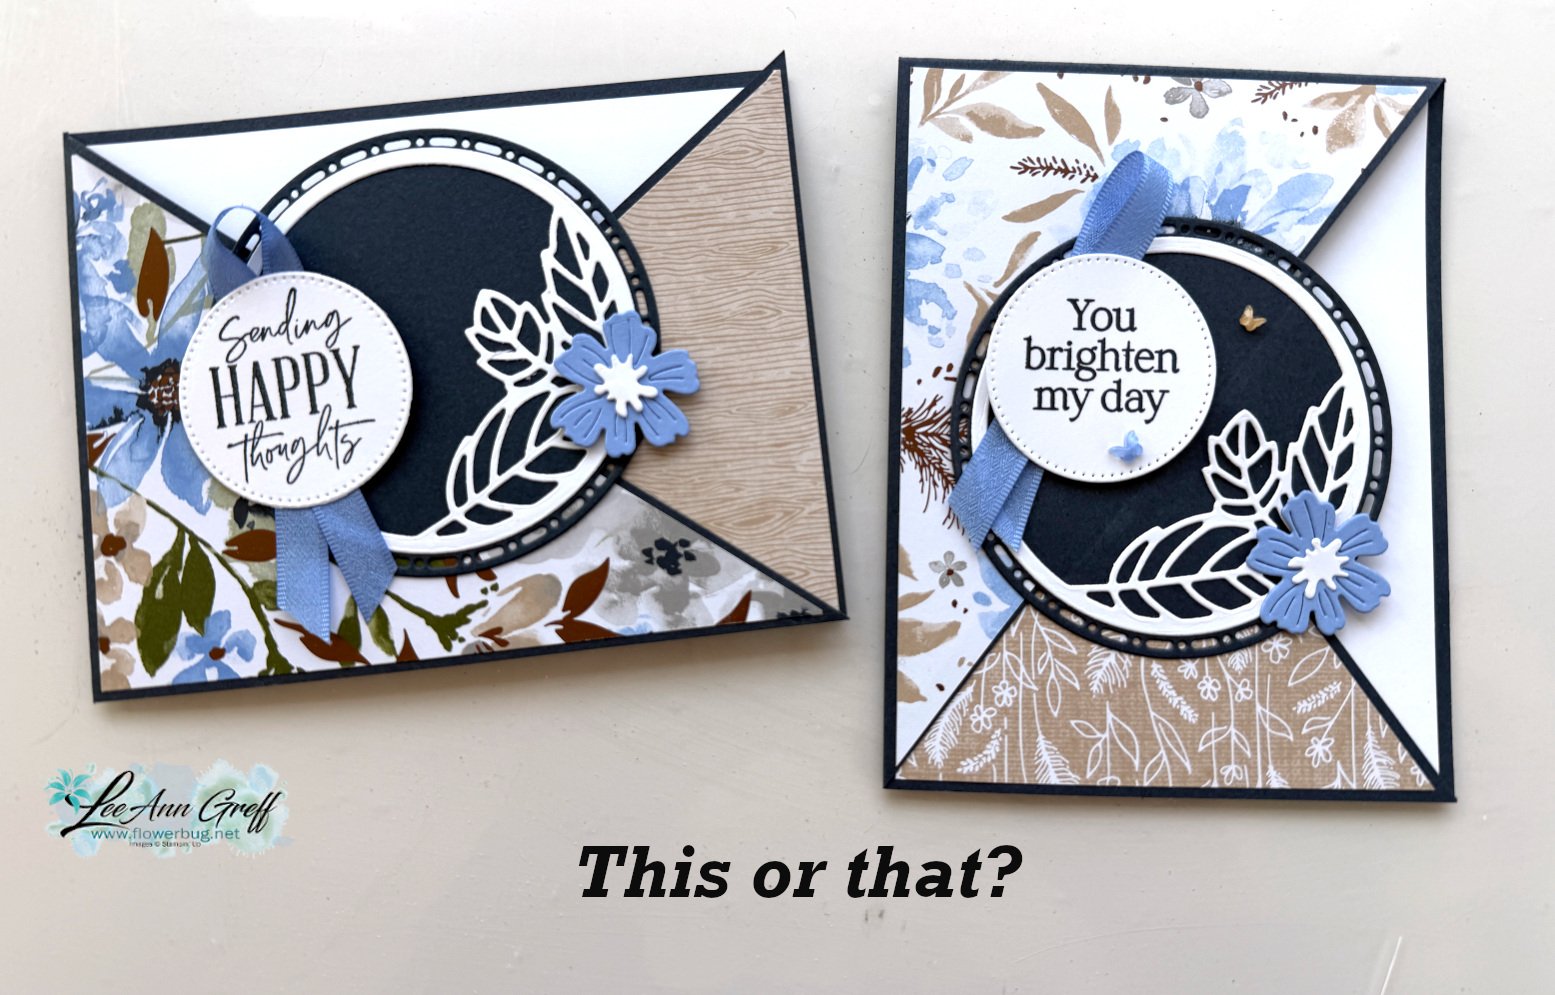
We tried this layout in both landscape & vertical position. Which do you prefer?
I created a free project sheet for this card with measurements, directions, photos and supplies listed. Click hereto download or print it.
Below is the video tutorial with tips on assembly.
All Posts
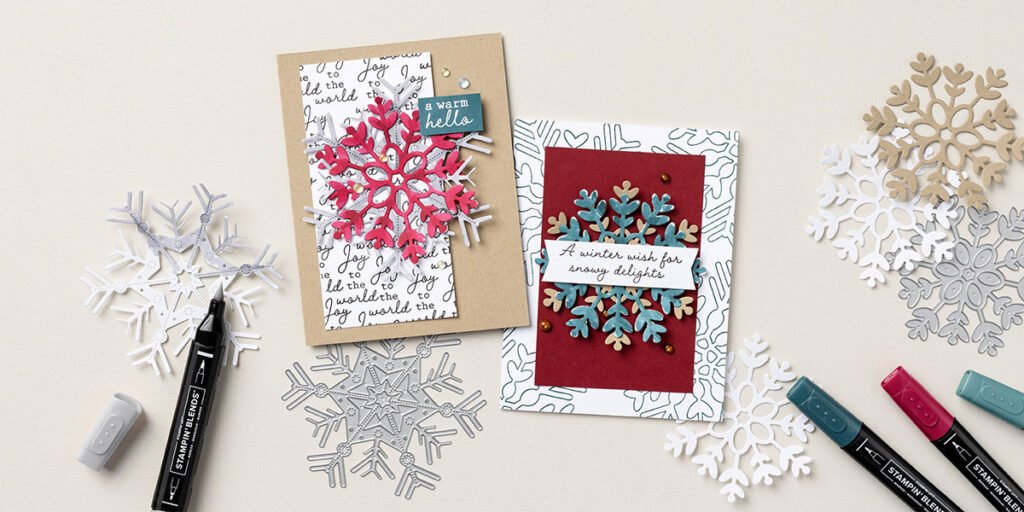
Free Shipping ends today! Plus two card ideas with a free project sheet using sketches for inspiration
You can get this absolutely free when you choose the starter kit deal in October. Since you get $125 in product of your choice with the purchase price of $35 it’s a no brainer to get it! That’s $90 in free product plus free shipping! Click here to choose your free products.
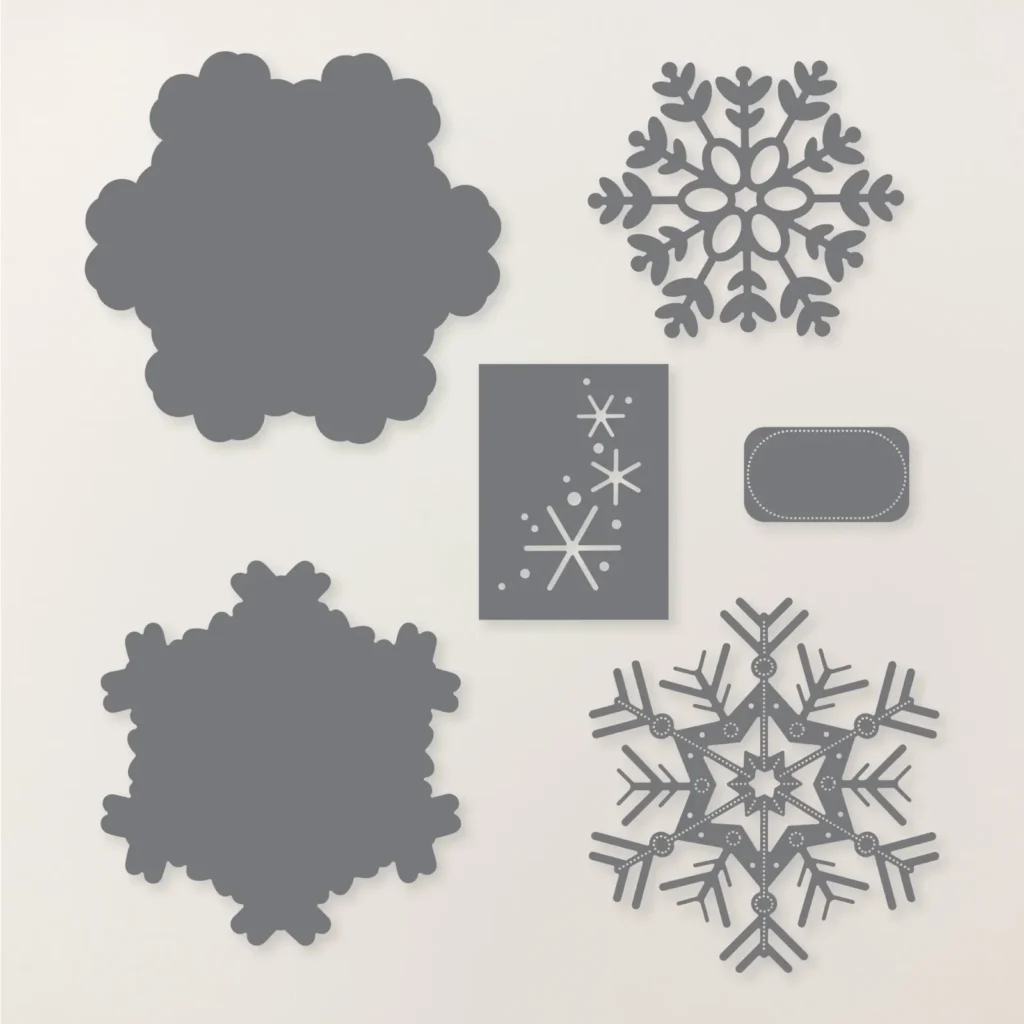
Here are the dies which are included in this big bundle:
Click herefor the free project sheet which includes photos of both the card and the sketch plus measurements, directions and project supplies. Enjoy!
And get the Starter kit here.*Choose your deal – $35 or $99 plus $90 in free products including free shipping, free Paper Pumpkin kit & free catalogs/business supplies!
~~~
All online orders from me will receive a beautiful PDF of projects featuring the Modern Christmas suite.
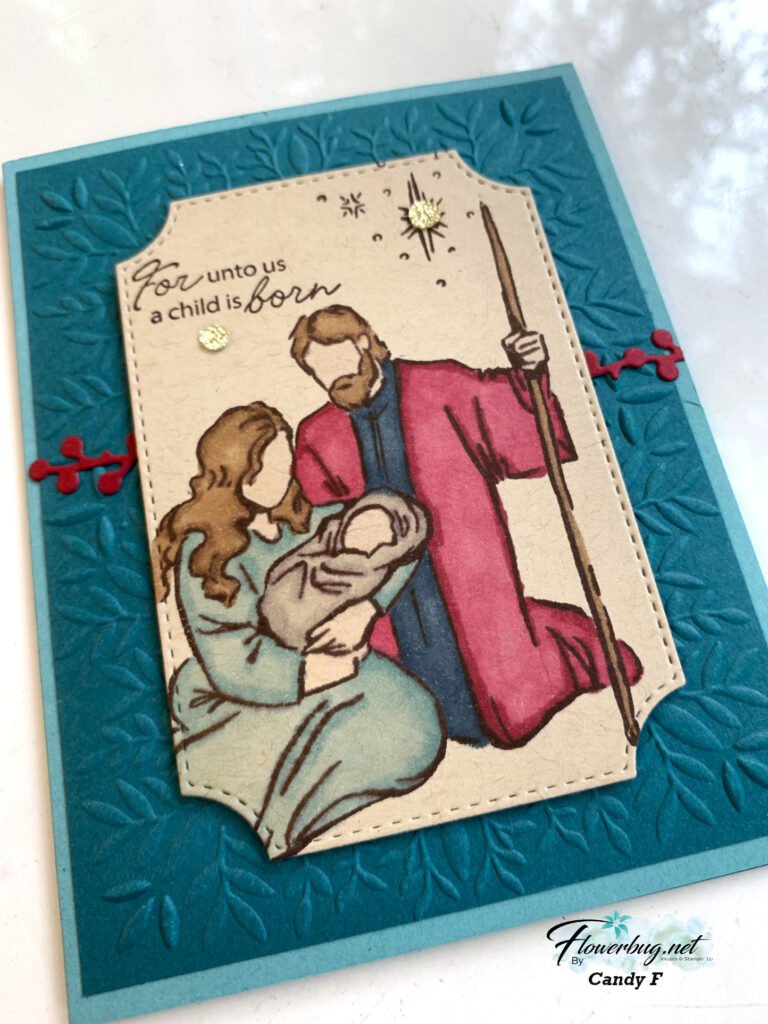
She used blends markers to color the scene on Crumb Cake card stock. The die-cut is from the Branching Out dies, the embossing folder is the Peaceful Greenery folder. Just stunning! Just look at her beautiful coloring.
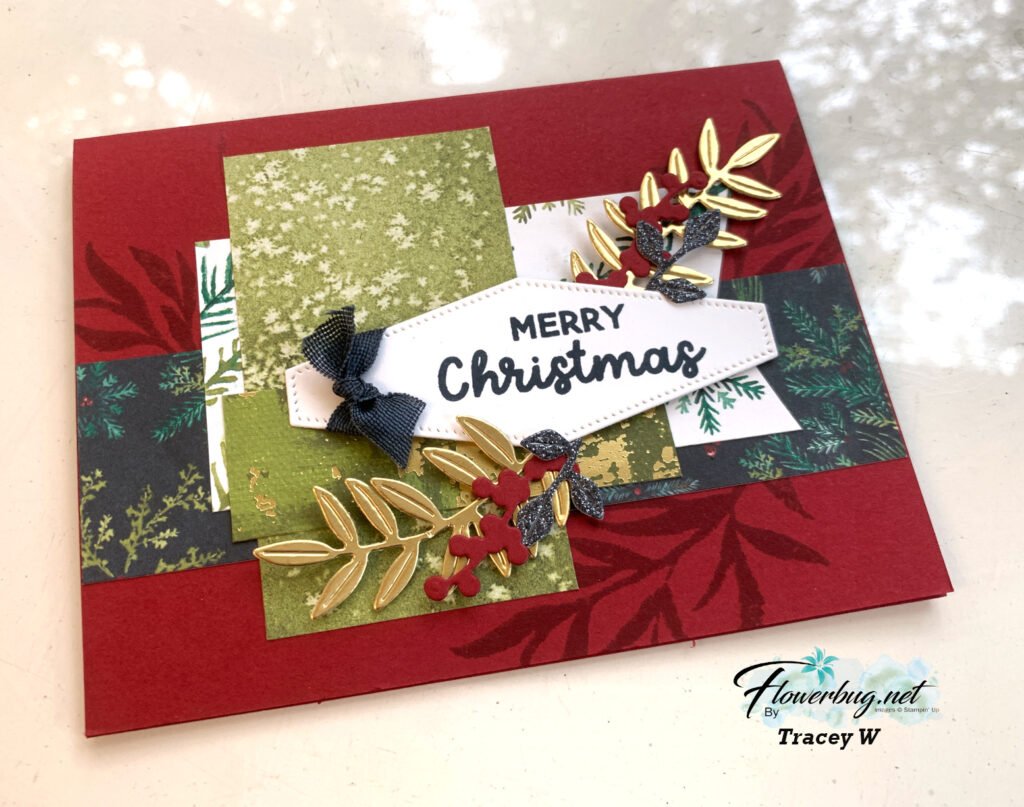
This beautiful designer paper is currently unavailable until November. The stunning greeting & die set called Traditional Labels is a classic. See it here.
And get the Starter kit here.*Choose your deal – $35 or $99 plus $90 in free products including free shipping, free Paper Pumpkin kit & free catalogs/business supplies!
~~~
All online orders from me will receive a beautiful PDF of projects featuring the Modern Christmas suite.
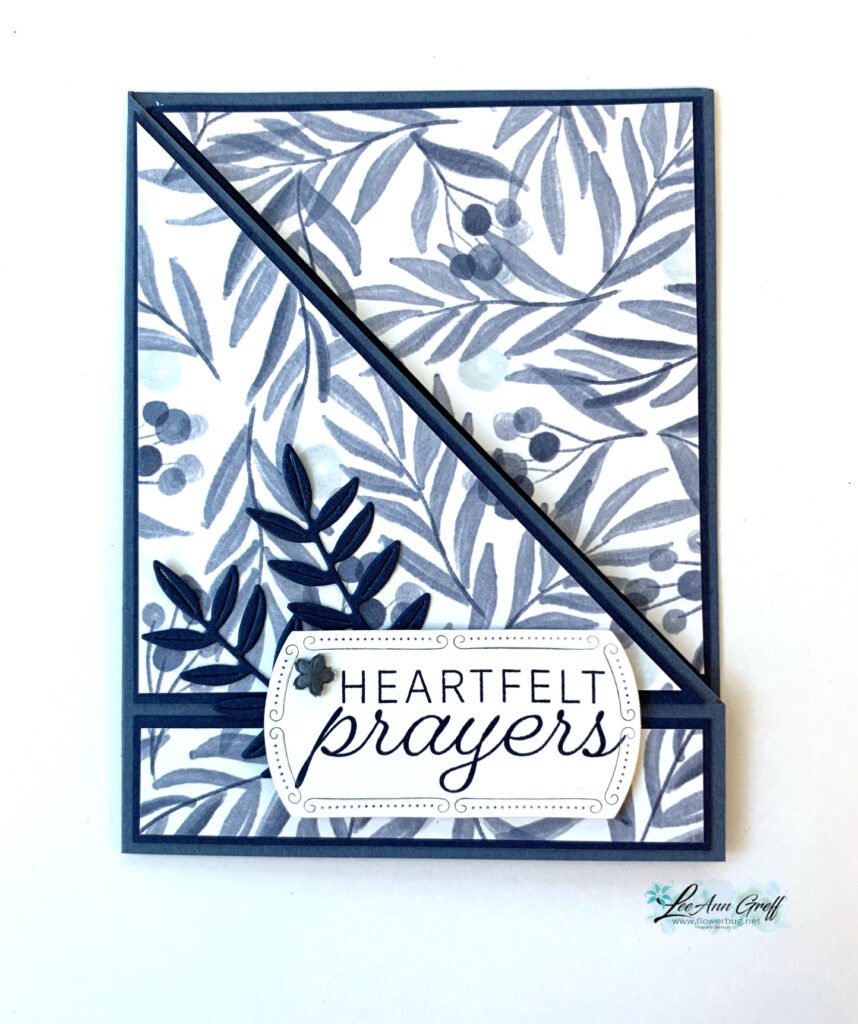
Unique Peaceful Garden Angled cut fold with free project sheet & video
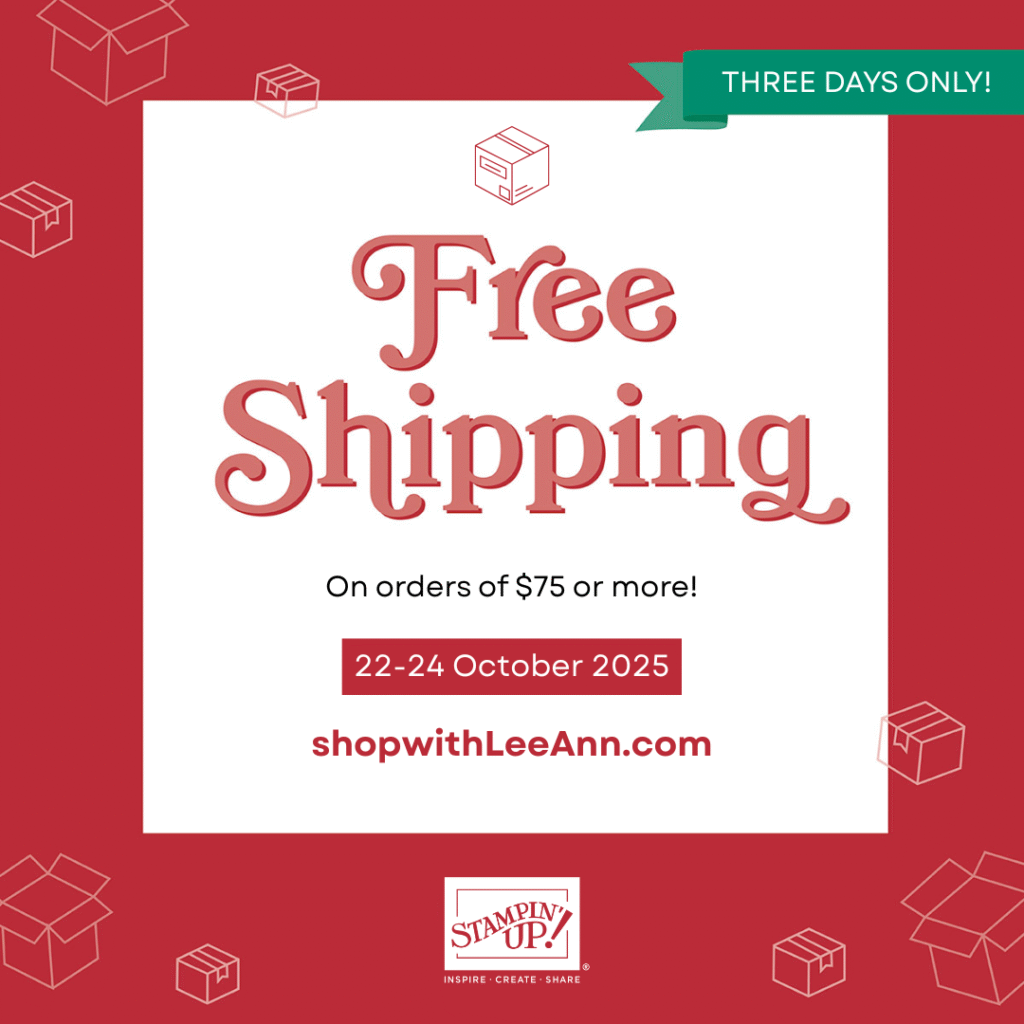
Free Shipping starts today!
For 3 days you get your shipping free when your order is over $75!
……..
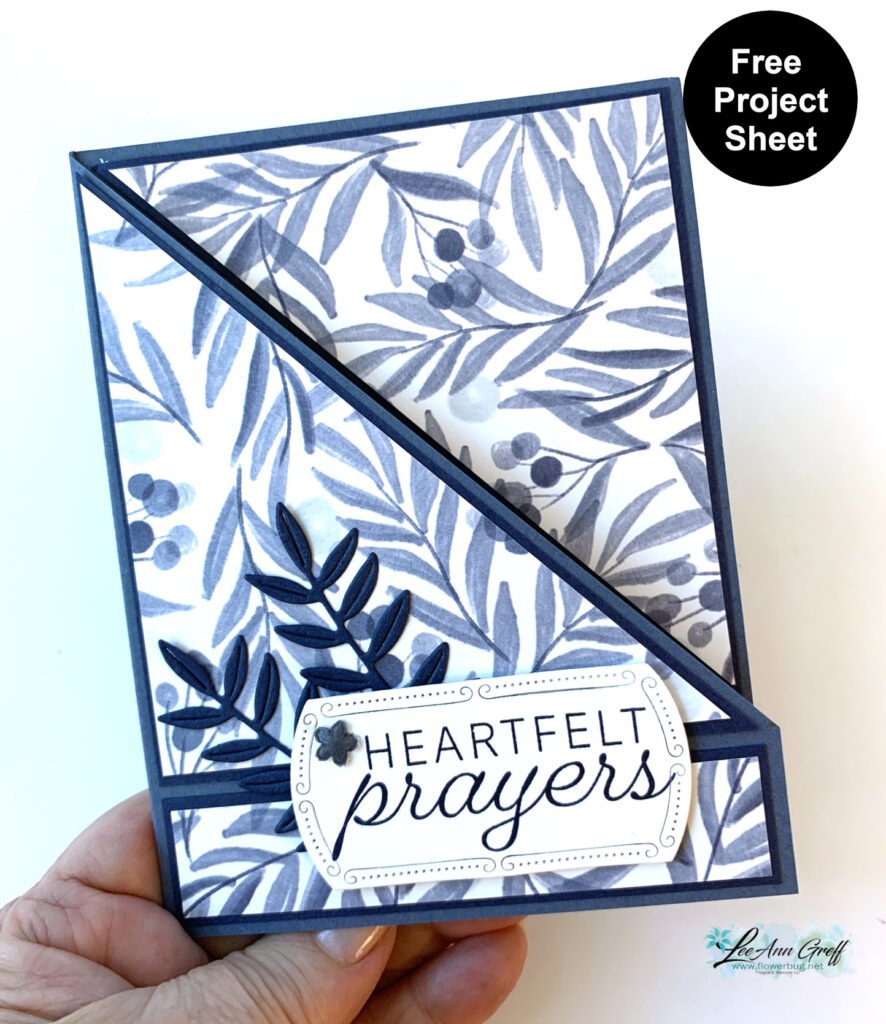
Here’s the last card I shared on last week’s video. I love this unique fold!
The designer paper is from the Peaceful Garden DSP. The greeting is from the Peace on Earth stamp set and the dies are the Traditional Label and Label Me Grateful (leaves). The colors include Misty Moonlight, Night of Navy & White.
Here’s how it opens:
Isn’t that cool? It’s a little challenging to get the angles and layers cut evenly but I share tips on that in the video below. I created a free project sheet for this card. Click on this linkto print or download it. Remember that you can access tons of free project sheets on the link/button at the top of my blog
Below is the video tutorial for this card and two more fun fold cards featuring this Peaceful Garden suite. Be sure to follow me on my YouTube channel here!
And get the Starter kit here.*Choose your deal – $35 or $99 plus $90 in free products including free shipping, free Paper Pumpkin kit & free catalogs/business supplies!
~~~
All online orders from me will receive a beautiful PDF of projects featuring the Modern Christmas suite.
Notice: LeeAnn Greff, Independent Stampin’ Up! Demonstrator, Manager. The content of this website is my sole responsibility as an independent Stampin’ Up! demonstrator and the use of, and content of, the classes, services, or products offered on this website is not endorsed by Stampin’ Up! Copyright 2025


Leave a Reply