/


Latest Post

Boughs of Holly Suite projects; with a special fun fold you’ll be amazed at!


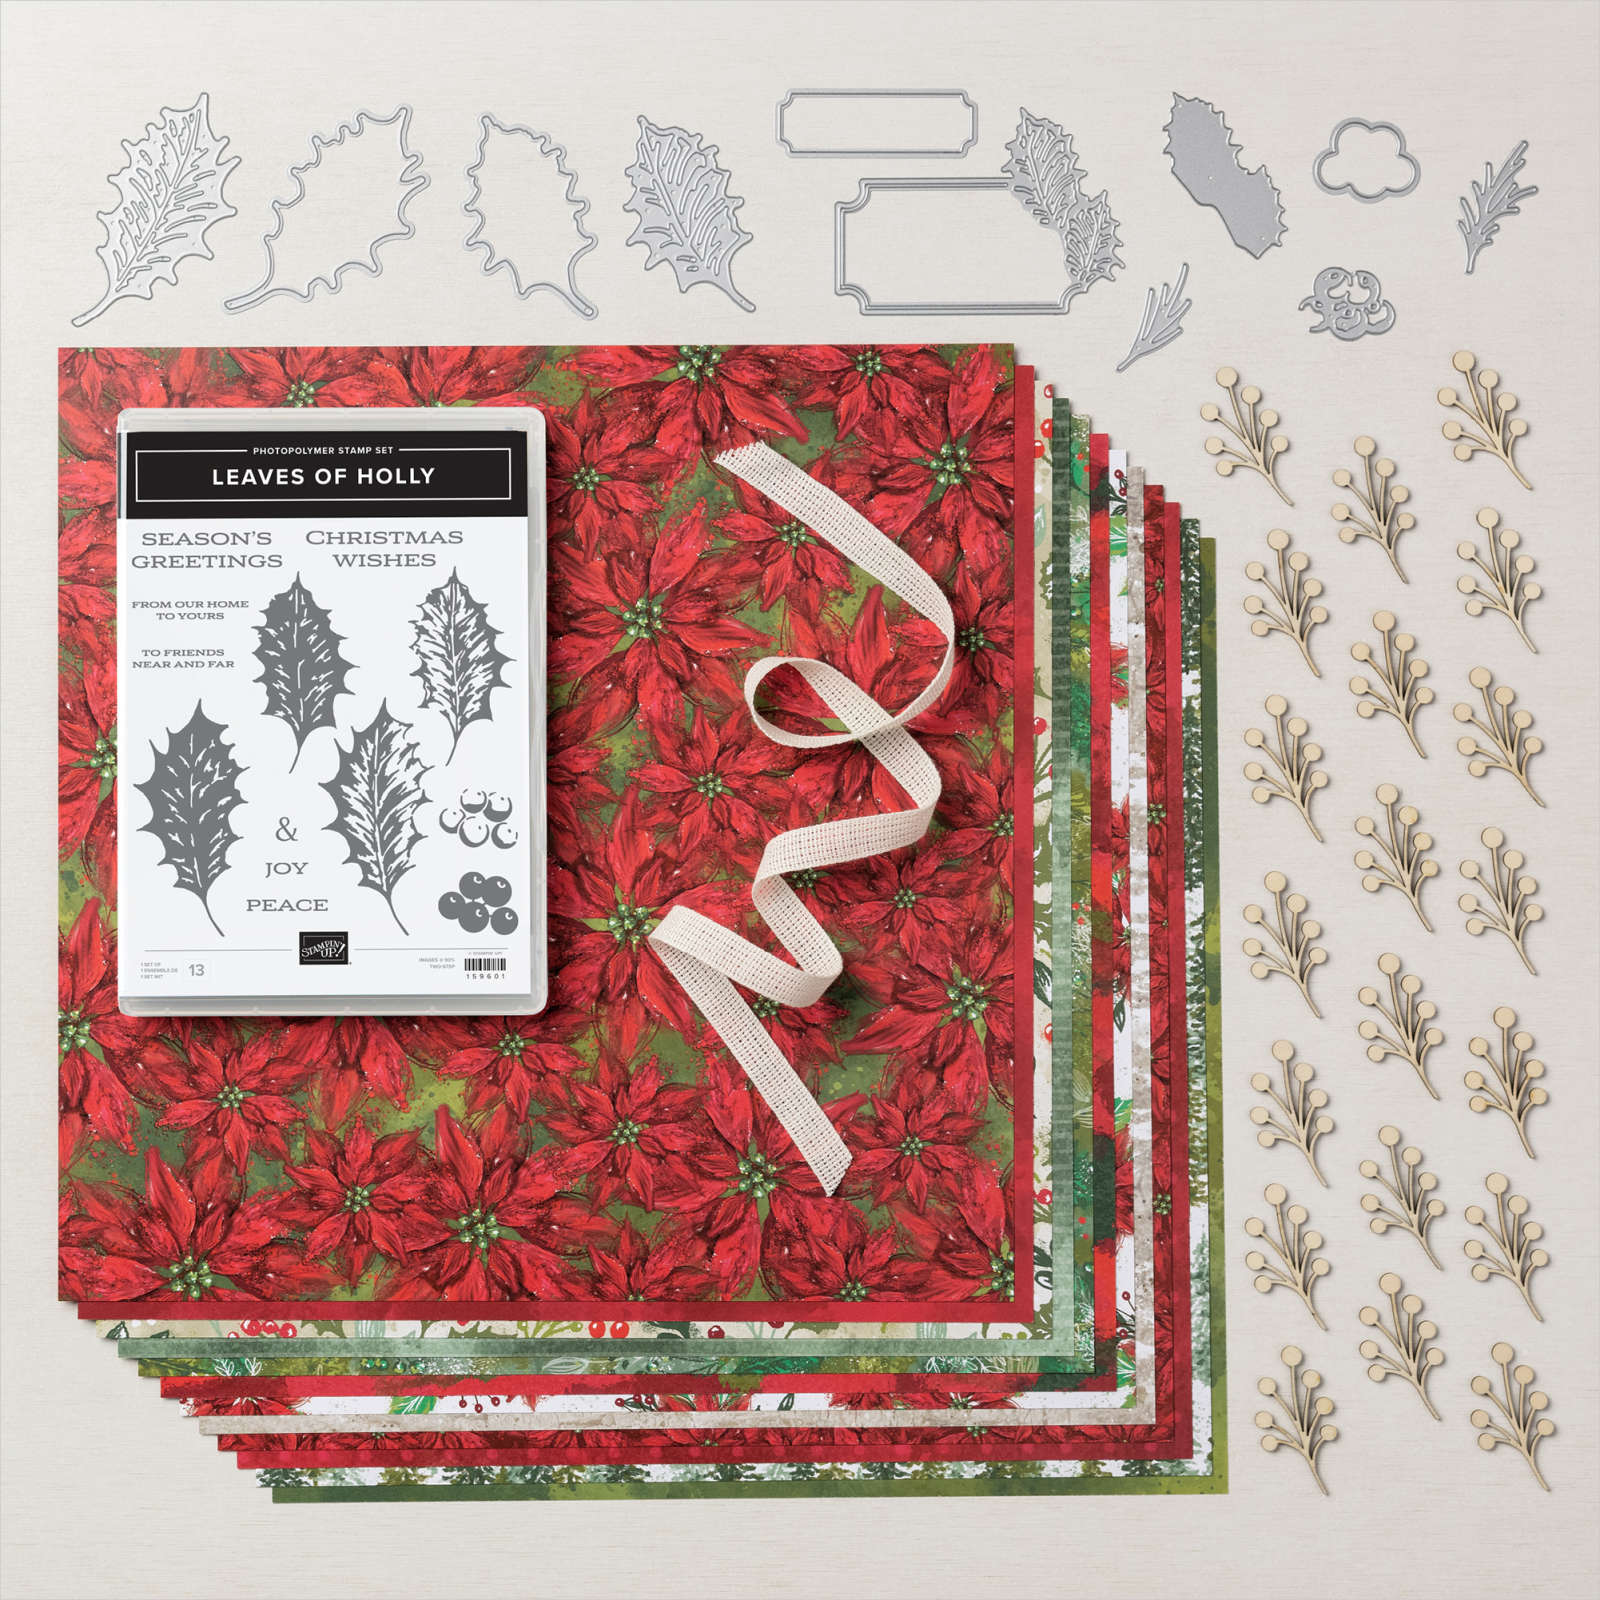
I think everyone is loving the Boughs of Holly suite seen here; the paper is stunning and the Leaves of Holly bundle is incredible as well!  

These are the last swap cards from our Christmas swap with my Flowerbug's Team.  I hope you've enjoyed their amazing & creative projects. *Scroll back to see them all. 

Marilyn made this pretty card:

Her colors include Mossy Meadow & Cherry Cobbler with White.  She stamped a few spatters on the designer paper before texturing it with the Gingham embossing folder before adding the die-cut greeting and leaves.  This greeting die-cut with the attached holly leaves is so pretty & unique. 

Measurements: Card base 5 1/2" X 8 1/2", DSP is 4 1/2" X 3 1/4", the Cherry Cobbler layer is 4 3/4" X 3 1/2" 

Here's a photo of the entire Boughs of Holly suite:
Next up is an amazing card by Paula.  She made a vertical Pillar card.  I've never seen one before.  
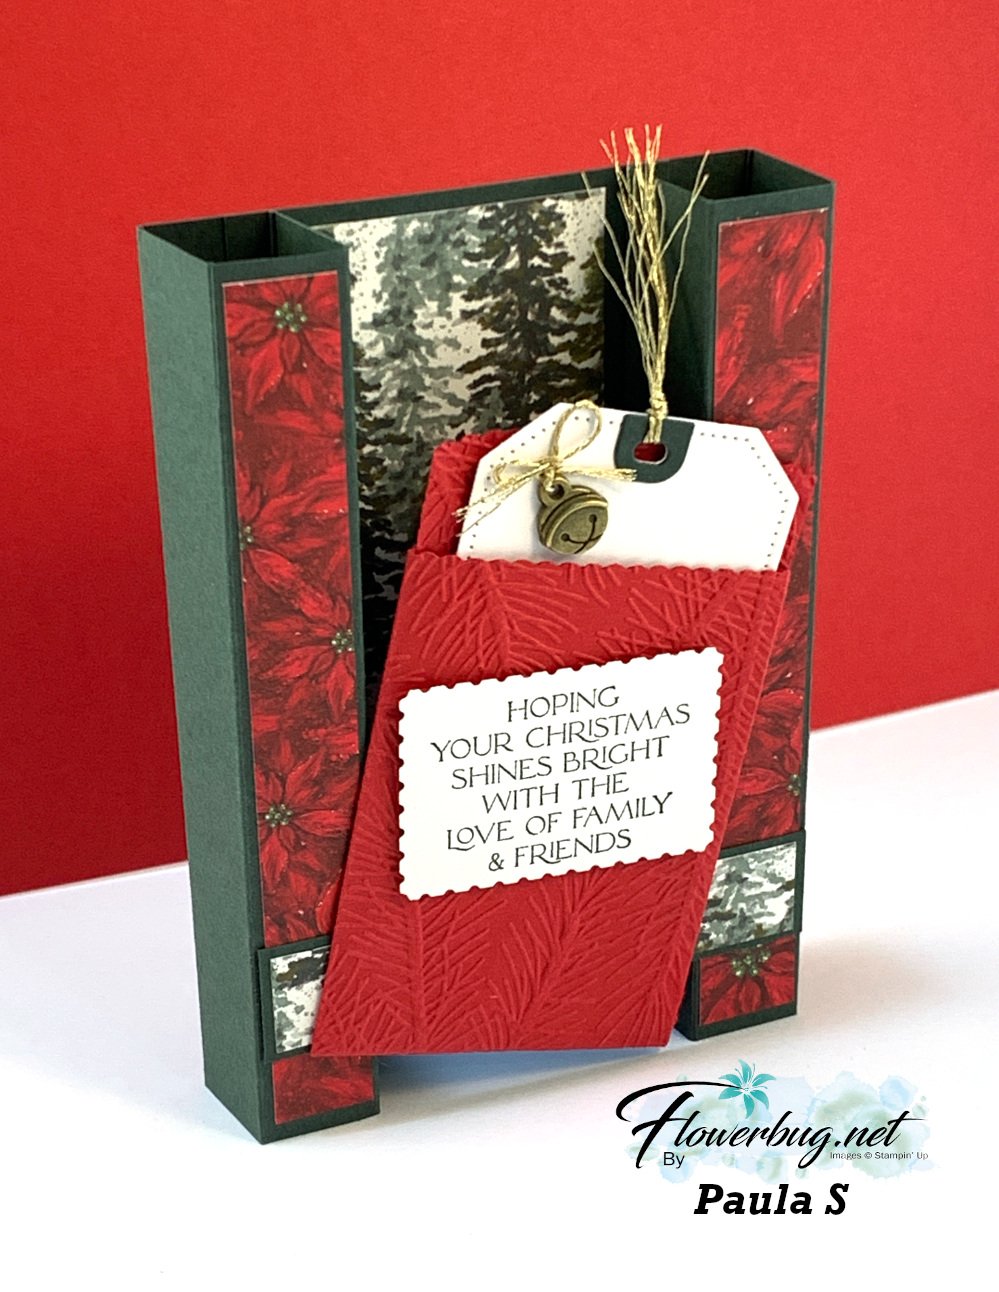
The way she attached the mini envelope across the front 'bridge' is so neat.  Here are the directions she shared with me:

The dimensions are:
  • 8-1/2 x 5-1/2 cardstock in Evening Evergreen
  • On 8-1/2 side score down 1/4, 1, 1-3/4, 2-1/2  6, 6-3/4, 7-1/2 and 8-1/4.
  • Banish all score lines toward the center
  • DSP strips are 5/8" X 5 1/4" and the center DSP is 1 3/4" X 5 1/4", the bridge piece across is 5/8" X 3 3/8"  

It folds flat to fit in a A2 size envelope.  

Products used include the Mini Pocket Envelope die, the tag was Tailor Made tags and the Rectangular Postage Stamp punch for the greeting. She also added the Flat Jingle Bells on page 27 of the Holiday catalog and the Wintry 3D embossing folder for the texture on the pocket. 

The tag pulls out of the pocket for even more interest. 
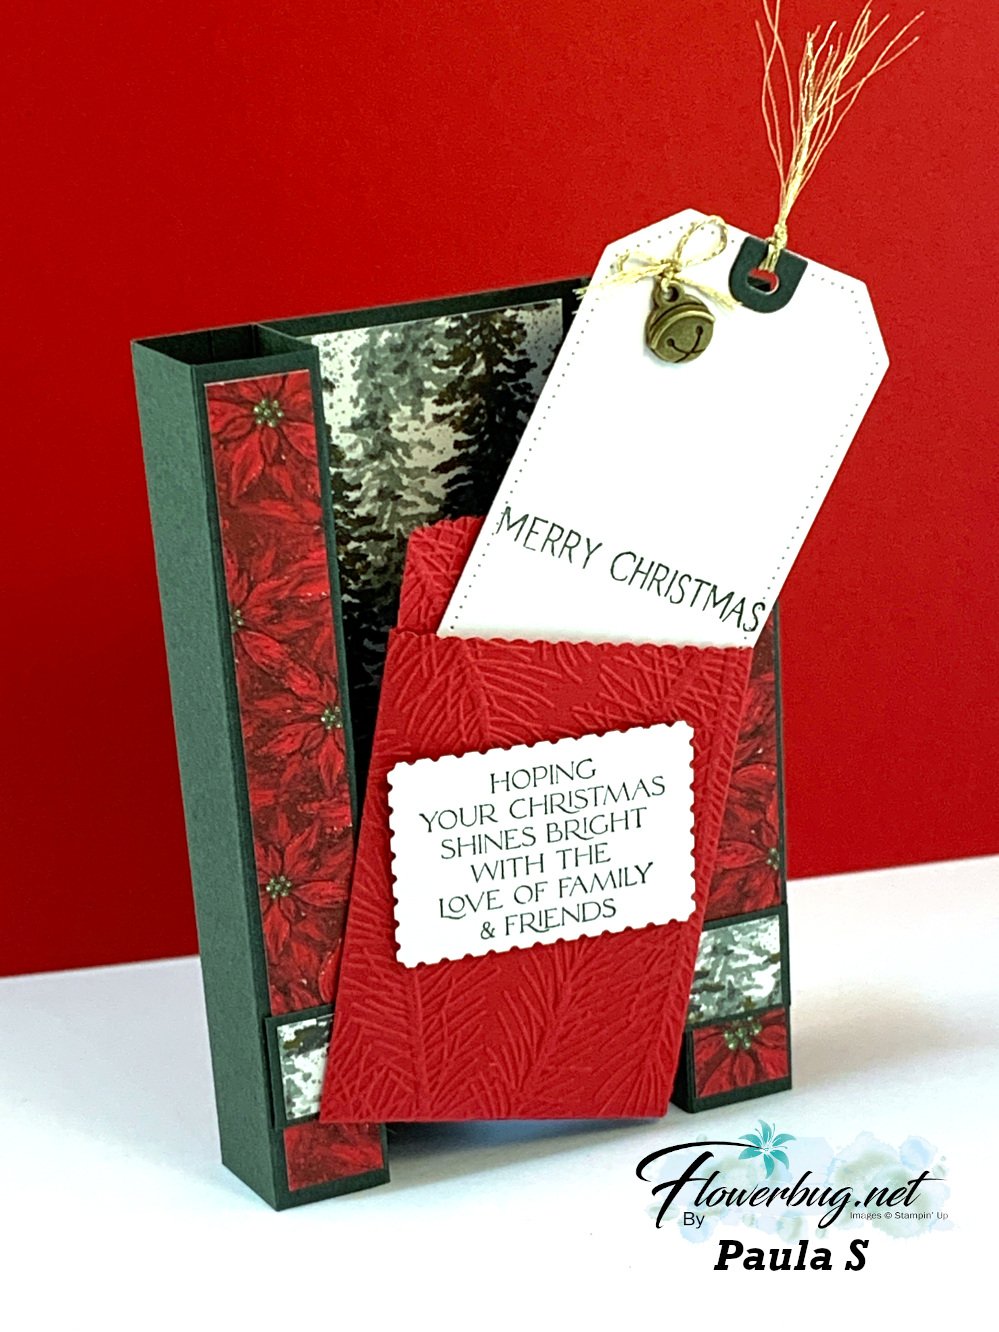
So creative and unique!  

Here is a photo of all of the incredible swap cards by my Team in October. I hope you've enjoyed this weeks posts featuring their cards.  
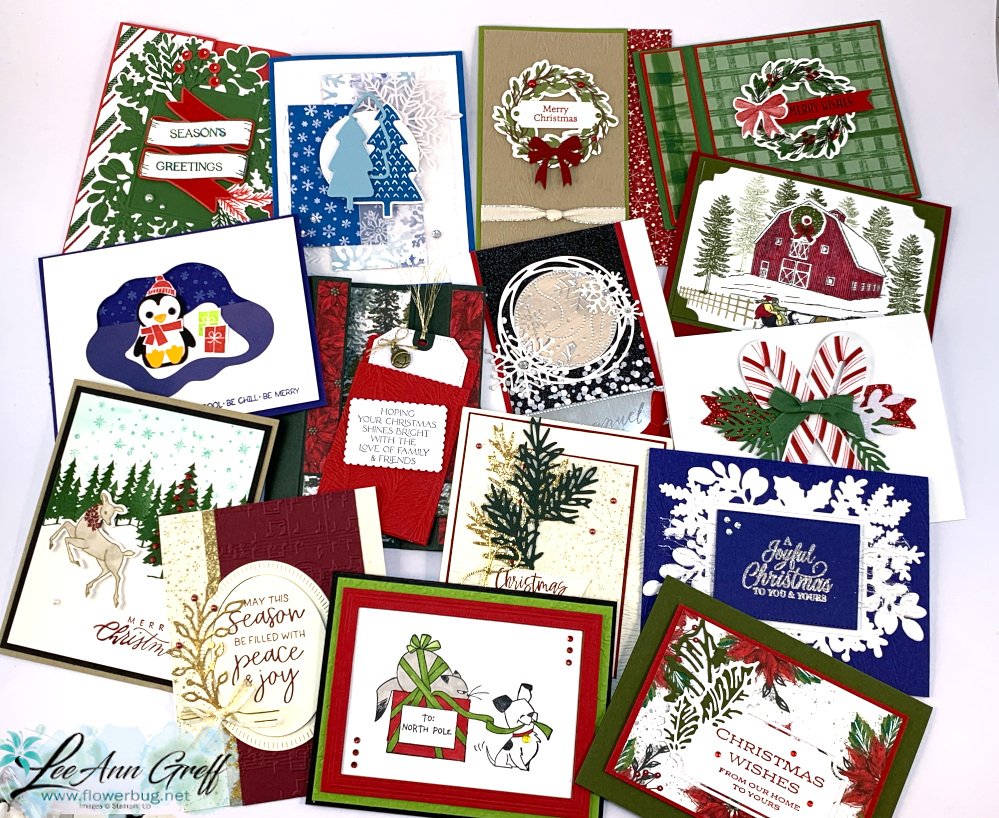

*Love swapping?  Or maybe you like discounted products?  Consider joining my Flowerbug's Team! 

The Starter Kit has bonus free dollars this month!  Check it out below:   

~~~

October Specials

Starter Kit special! Get $155 in product for just $99

click here

~~~

Order online here

Host code link: SVBHWRCY

Get a free embellishment from me with online orders over $50!


Earn free products with my loyalty rewards! 

Click here to download yours and earn a $50 shopping spree!
All Posts

  • See both sides of your designer paper with this cool fun fold card; video tutorial too!


    The Last Chance list has been out for almost 2 weeks now; things are going fast!  Do you have everything you want from this sale?  Remember it's while supplies last! 


    Also note that some prices are going up. The cost of business is increasing world wide; as I'm sure you've noticed when shopping.  Here's a chart showing some of the price changes in the upcoming new Annual Catalog. 

    Now on to the projects! 

    I shared these neat cards on last week's Live video. I love it when you can show off both sides of our pretty designer papers! 

    This card uses almost half of a 12 X 12" piece of designer paper; but it truly makes the most of your printed paper. 

    I chose the Pretty Prints DSP from the Annual catalog.  It includes 4 colors; Calypso Coral, Bermuda Bay, Evening Evergreen and Blackberry Bliss. It's on the retiring list now and discounted to $8.40 instead of $12.  See it here. 

    It's quite an easy fold to make.  You make a few score lines and then trim off the top at an angle; then add that trimmed piece to the bottom edge.  Watch the video to see how it's done.  

    Measurements: 

    • Card base 4 ¼” X 5 ½”
    • DSP 5 ¼” X 12” score at 2”, 4”, 8” & 10”. Mark at 2 3/8” and cut off to 4” mark
    • White front square 2 1/4", inside 3 3/4" X 5" 
    • Front square layer 2 1/2"


    I chose the Kind & Sincere stamp set for my greetings.  I think the mixed font and wide range of phrases is fabulous.  Unfortunately it is on the retiring list. It's now $15.60 instead of  $26. 


    Click here or below to watch this week's Live video. 

    **Don't forget to follow me here on Facebook or subscribe to my YouTube channel here. 

    ~~~

    April Specials:

    See the 2023 Last Chance list here 

    *current host code: SYZD4PH2 or SFHU3WMT

    Get a free specialty paper sampler with online orders over $55 using a host code above plus an embellishment if your order is over $100

    Earn free products with my loyalty rewards! 

    Click here to download yours and earn a $50 shopping spree!

    Leave a Reply

    Your email address will not be published. Required fields are marked *

  • Bright & Colorful In Color card kit to go or PDF tutorial option


    These bright & colorful cards feature Stampin' Up!'s 2022-24 In Colors, the Tea Boutique cards & envelopes and more 2022-24 In Color products.  

    In this pre-cut card kit you'll receive 10 Tea Boutique cards & coordinating envelopes, a share of In Color Matte dots and In Color Baker's Twine.  Plus the PDF tutorial comes FREE (a $15 value)! All for just $28 plus shipping

    Most of these products are retiring this year. Some are discounted so I am able to offer this kit at a fantastic price for all you'll receive! I have a limited quantity of these kits available; so opt in while they last.

    Get the 10 In Color cards/envelopes pre-cut kit here for $28. The card kit is mailed out at the end of April via Priority Shipping; the PDF tutorial is sent immediately after you place your order via email. 

    The PDF tutorial is seen here for $15.  It includes step by step directions, photos, a supplies list and measurements.  You'll receive it in an email after purchase. 

    What will you need?

    *Everything in the kit to go is cut, punched or die-cut for you! To finish these cards you'll need Navy, Sweet Sorbet and Starry Sky inks, adhesives and greeting images.  I used two stamp sets for my greetings; Good Feelings & Charming Sentiments. *However you can easily substitute any greetings you already own.


    Interested in getting a pre-cut kit to go each month?  Email me here for that option.  

    I have two more new card kits and/or tutorials available this month. Save $$ on shipping by getting more than one! 

    See all of my tutorial & kit to go options here.

    ~~~

    April Specials:

    See the 2023 Last Chance list here 

    *current host code: SYZD4PH2 or SFHU3WMT

    Get a free specialty paper sampler with online orders over $55 using a host code above plus an embellishment if your order is over $100

    Earn free products with my loyalty rewards! 

    Click here to download yours and earn a $50 shopping spree!

    Leave a Reply

    Your email address will not be published. Required fields are marked *

  • Gift card pop-up card; a fun fold that’s easy! Featuring Pretty Prints, Art Gallery & Radiating Stitches dies


    I shared two neat fun fold cards in this week's Live video.  Pretty Prints DSP seen here was featured in both. 

    This designer paper is an easy favorite; the soft, botanical prints and 4 rich colors are gorgeous!

    Here's the card I shared; it's a pop up gift card holder:

    The front greeting is from the Art Gallery dies seen here.  They're discounted now; they were $34 and are now just $13.60. These words are cut from Evening Evergreen card stock and adhered to a white die-cut from the Radiating Stitches dies.  These are on the Online Exclusives products but are currently unavailable. They will be back in May. 

    My colors include Evening Evergreen (so sad it's retiring!) and Soft Sea Foam.  

    Measurements:

    • Card Base 4 ¼” X 11” score at 2 ¼” & 7 ¾”
    • White front is 2 5/8” X 4”, inside gift card pop up is 3 ½” X 7” score at ½” & 5”
    • Designer Paper – upper is 4" X 3", lower is 4" X 2"


    I used the wonderful Kind & Sincere stamp set for this card; it's discounted to $15.60 and on the Last Chance list. I love the mixed font and how many phrases you can make with the greeting images. See it here. 

    This next photo shows you how the gift card layer works.  The 1/2" flap is adhered to the upper front of the card.  The lower fold is tucked in the lower fold of the card base.  The ribbon around it secures it closed; there isn't any adhesive used on the lower flap. 

    Click here or below to watch this week's Live video. 

    **Don't forget to follow me here on Facebook or subscribe to my YouTube channel here. 

    ~~~

    April Specials:

    See the 2023 Last Chance list here 

    *current host code: SYZD4PH2 or SFHU3WMT

    Get a free specialty paper sampler with online orders over $55 using a host code above plus an embellishment if your order is over $100

    Earn free products with my loyalty rewards! 

    Click here to download yours and earn a $50 shopping spree!

    Leave a Reply

    Your email address will not be published. Required fields are marked *


Notice: LeeAnn Greff, Independent Stampin’ Up! Demonstrator, Manager. The content of this website is my sole responsibility as an independent Stampin’ Up! demonstrator and the use of, and content of, the classes, services, or products offered on this website is not endorsed by Stampin’ Up! Copyright 2025