/


Latest Post

Fun shaker card with the Bottled Happiness bundle!


We made this fun shaker card at my June card clubs.  It features the Bottle of Happiness bundle and the Vintage Bottle Shaker Domes seen here. 

I shared how to make it in last week's FB Live video.  You can see it here on my YouTube channel too. 

Heads up!  Soon I will be posting my weekly videos on YouTube each Tuesday morning instead of Facebook. So be sure you're following me on YouTube.  Click on the red bell so you're notified when I go live.  

I wish you could shake it yourself!  There's just something extra special about an interactive card and the Bottled Happiness bundle makes it so easy. 

The colors are Pear Pizzazz with the new Orchid Oasis.  The products I used are:

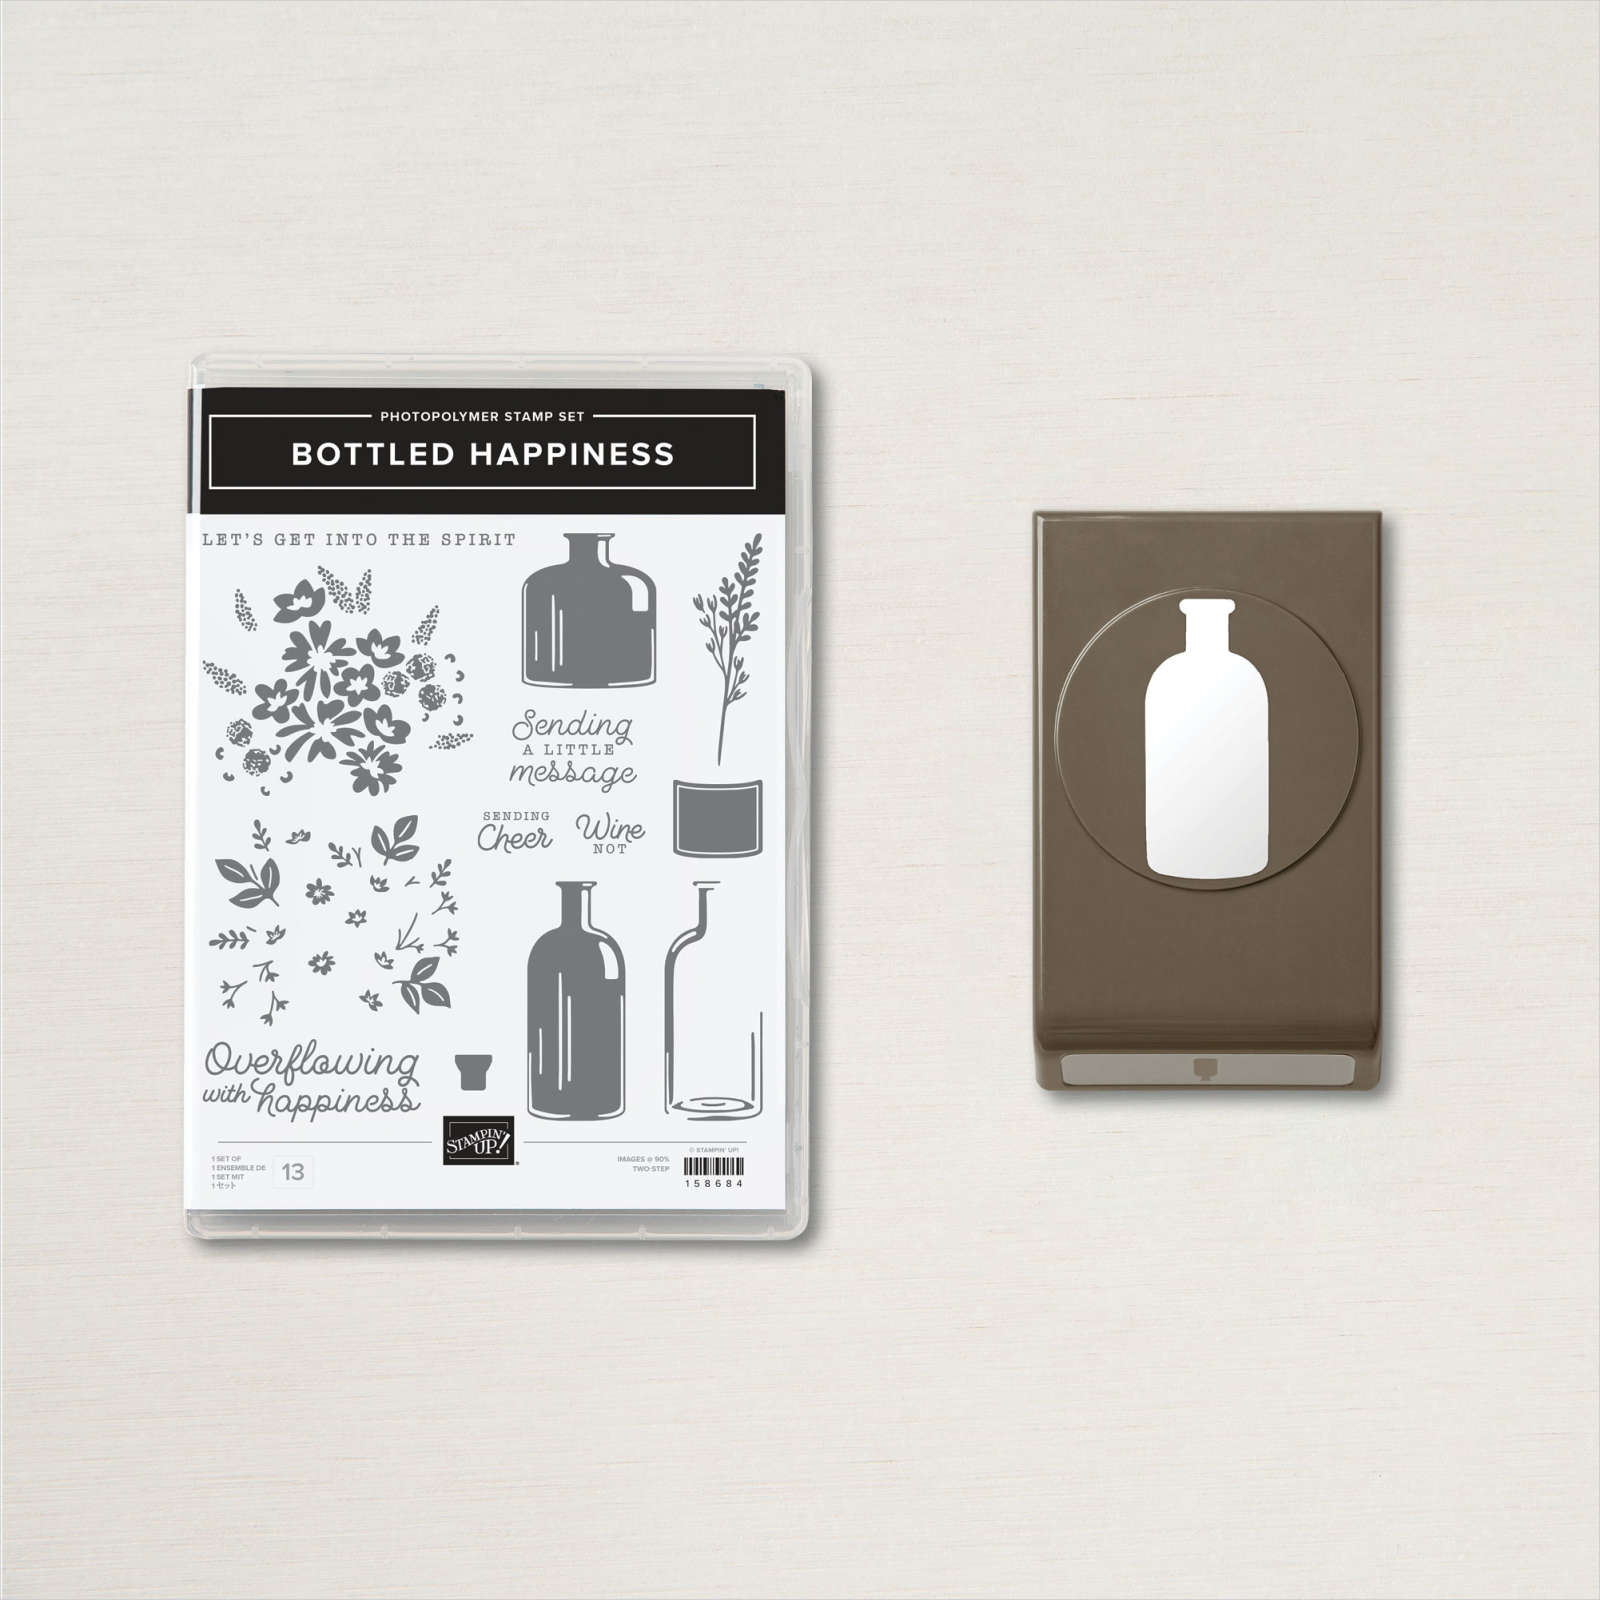
  • Bottled Happiness bundle (stamp set & Vintage Bottle punch)
  • White CS, Pear Pizzazz & Orchid Oasis inks and card stock
  • Stitched with Whimsy dies
  • Vintage Bottle Shaker Domes 
  • Effervescent Elements (pretty beads inside the dome)
  • Charming Sentiments greetings (inside) 
  • In Color twine combo pack

Below you can see the card front on the left and the inside of the card on the right.  

I hope you'll watch the video to see my tips on making a super easy shaker card!  Click on the photo below to watch. 

~~~

Last Chance List is out!  


Kits Collection BOGO – buy 1 get 1 50% off!  

Host codes: 9F9AJHYG

If your order is over $50 you'll receive a free embellishment from me. *click here to order 


Earn free products with my loyalty rewards! 

Click here to download yours and earn a $50 shopping spree!

~~~

Due to popular demand I have one more Annual Catalog paper share going.

Contact me here if you'd like one. It's $26 for 82 6 X 6" sheets!

All Posts

  • New catalogs, scrapbook brochure, online exclusives AND Sale-a-Bration all start today!!!


    So much is happening today!  Let's cover them all. 

    1. The new Spring Catalog is LIVE TODAY!  It's filled with lots of new products you can see here. 

    2. Sale-a-Bration starts today through February 28th!  This means that for each $60-120 you spend you earn free products!  It's everyone's favorite time of year!  click here

    Besides earning free products you can also get even more when you choose the Starter Kit package. It costs just $99 and you get to choose up to $125 in products.  And now there are now 2 more add-on options:

    Option 1 – Choose TWO marker sets from our Stampin' Write marker assortments (Brights, Neutrals, Regals or Subtles) plus get a beautiful new stamp set designed to work with them. 

    Option 2 – Add on an additional $30 in FREE products to the $125 you normally get. 

    3. The new Scrapbooking Brochure begins today!

    Download this brochure here. Or click here to see it online. 

    4. New Online Exclusives! A bunch of new products have been added to our online product line.  These items cannot be seen in any printed catalog.  There are lots of great items here!  Click here to see them. 


    5. Lastly we have 3 new kits in our Kit Collection released today!


    ~~~

    January Specials:

    *current host code link:  

    P243X6VH

    Get this free tutorial with any online order in January!

     Sale-a-Bration starts tomorrow; January 7th – where for every $60 you spend you can choose a free item from the SAB catalog!  

    Opt in for my Spring catalog Designer Paper share and/or the Spring catalog embellishment share seen below. 

    See the details here. 

    Contact me here

    Leave a Reply

    Your email address will not be published. Required fields are marked *

  • 4 Season Easel Calendar with video & free project sheet


    Today I'm sharing a super special 4-season calendar card. I cased one I made 10 years ago!  We made this at my December card clubs. 

    I stamped the background with the Sparkling Snowflakes set in Pool Party & Pretty Peacock inks. 

    It looks like an ordinary card front doesn't it? It actually is with the exception of the latch I added. 

    This latch is slipped under the calendar on the inside of the card. The reason why I choose the inside is so it doesn't show on the bottom.  I hope you'll watch the video here or below to see how it's done.  

    For the Spring season I used the Spotlight on Nature stamp set and colored with Blends markers. 

    My smart husband created the calendar for this project.  You can access the 2025 calendar here And the  2026 Calendar here *However you will need to scale your printer to 90% instead of the usual 100%. *please don't ask me how to do this; each printer is different. 

    For the Summer season I used the Round we Go set in Lemon Lime Twist, Azure Afternoon and Petunia Pop inks. 


    If you'd like to print or download the free project sheet for this neat card click on this link: Download 4 Season Calendar Dec 24

    See all of my free project sheets here. 

    For the last season I chose to use a layer of designer series paper (Nests of Winter).  In hindsight I could have used DSP on every season.  It would save a ton of time if you're making a bunch at a time.  

    Below is the video tutorial for this card; it's helpful to get the tips to make your creating easier.  Don't forget to follow me on Facebook here or my YouTube Channel here. 

    ~~~

    January Specials:

    *current host code link:  

    P243X6VH

    Get this free tutorial with any online order in January!

     Sale-a-Bration starts tomorrow; January 7th – where for every $60 you spend you can choose a free item from the SAB catalog!  

    Opt in for my Spring catalog Designer Paper share and/or the Spring catalog embellishment share seen below. 

    See the details here. 

    Contact me here

    Leave a Reply

    Your email address will not be published. Required fields are marked *

  • Use both sides of your DSP on this neat ‘back fold’ card; so easy!


    I joined a few online swaps in December so I could get lots of samples for my New Catalog Launch on January 18th. I love to showcase lots of products from the new catalogs each time. 

    This is one I made featuring the Friends of the Ocean DSP

    My colors include Coastal Cabana and Pumpkin Pie.  You cannot tell from the photo above that it's a fun fold card but it is. And it's so easy! 

    The Friends of the Ocean DSP is so colorful and fun; here's a peek it. 

    The layered greeting is attached to the right sided edge and it holds the left side closed. 

    How? There's an extra score line 1" from the edge.  The card base is 7 1/2" X 5 1/2" score at 1" and 4 1/4". 

    I used the new With You in Mind stamp set for this card.  I love it because the greetings are nice & large and it's my friend Julie Davison's million $ stamp set!  The greeting fits onto the new To the Point punch well and that layers on our 2 3/8" circle punch perfectly.

    **All of these products are coming out in the Spring Catalog on Tuesday, January 7th. 

    If you'd like to download or print the free project sheet (with photos, directions & measurements) for this card click on the following link: Download Friends of the Ocean back fold

    Here's a link to the video & a different version of this neat, easy fun fold card. 

    ~~~

    January Specials:

    *current host code link:  

    P243X6VH

    Get this free tutorial with any online order in January!

    Remember that Sale-a-Bration starts on January 7th where for every $60 you spend you get to choose a free item from the SAB catalog!  I'll share the link on Tuesday, January 7th. 

    Opt in for my Spring catalog Designer Paper share and/or the Spring catalog embellishment share seen below. 

    See the details here. 

    Contact me here

    Leave a Reply

    Your email address will not be published. Required fields are marked *


Notice: LeeAnn Greff, Independent Stampin’ Up! Demonstrator, Manager. The content of this website is my sole responsibility as an independent Stampin’ Up! demonstrator and the use of, and content of, the classes, services, or products offered on this website is not endorsed by Stampin’ Up! Copyright 2025