/


Latest Post

Blending Brush border idea with Artfully Layered; so pretty!


I created these pretty cards on last week's FB Live video.  I LOVE the colors and style; they're so my style!  

I chose to play with the Artfully Layered bundle seen here in colors of Coastal Cabana and Granny Apple Green.  Having a lot of 'white space' makes the textures & pretty leaves the clear star of the card. 

I used a blending brush to blend the two inks on a piece of White card stock and then cut the leaf die-cut from that.  

For the multi-colored border underneath I used the blending brush to add the same colors.  I love the effect!  

The cross-hatch texture is made with the dies in the bundle.  There are two of them in the set that give textures. 

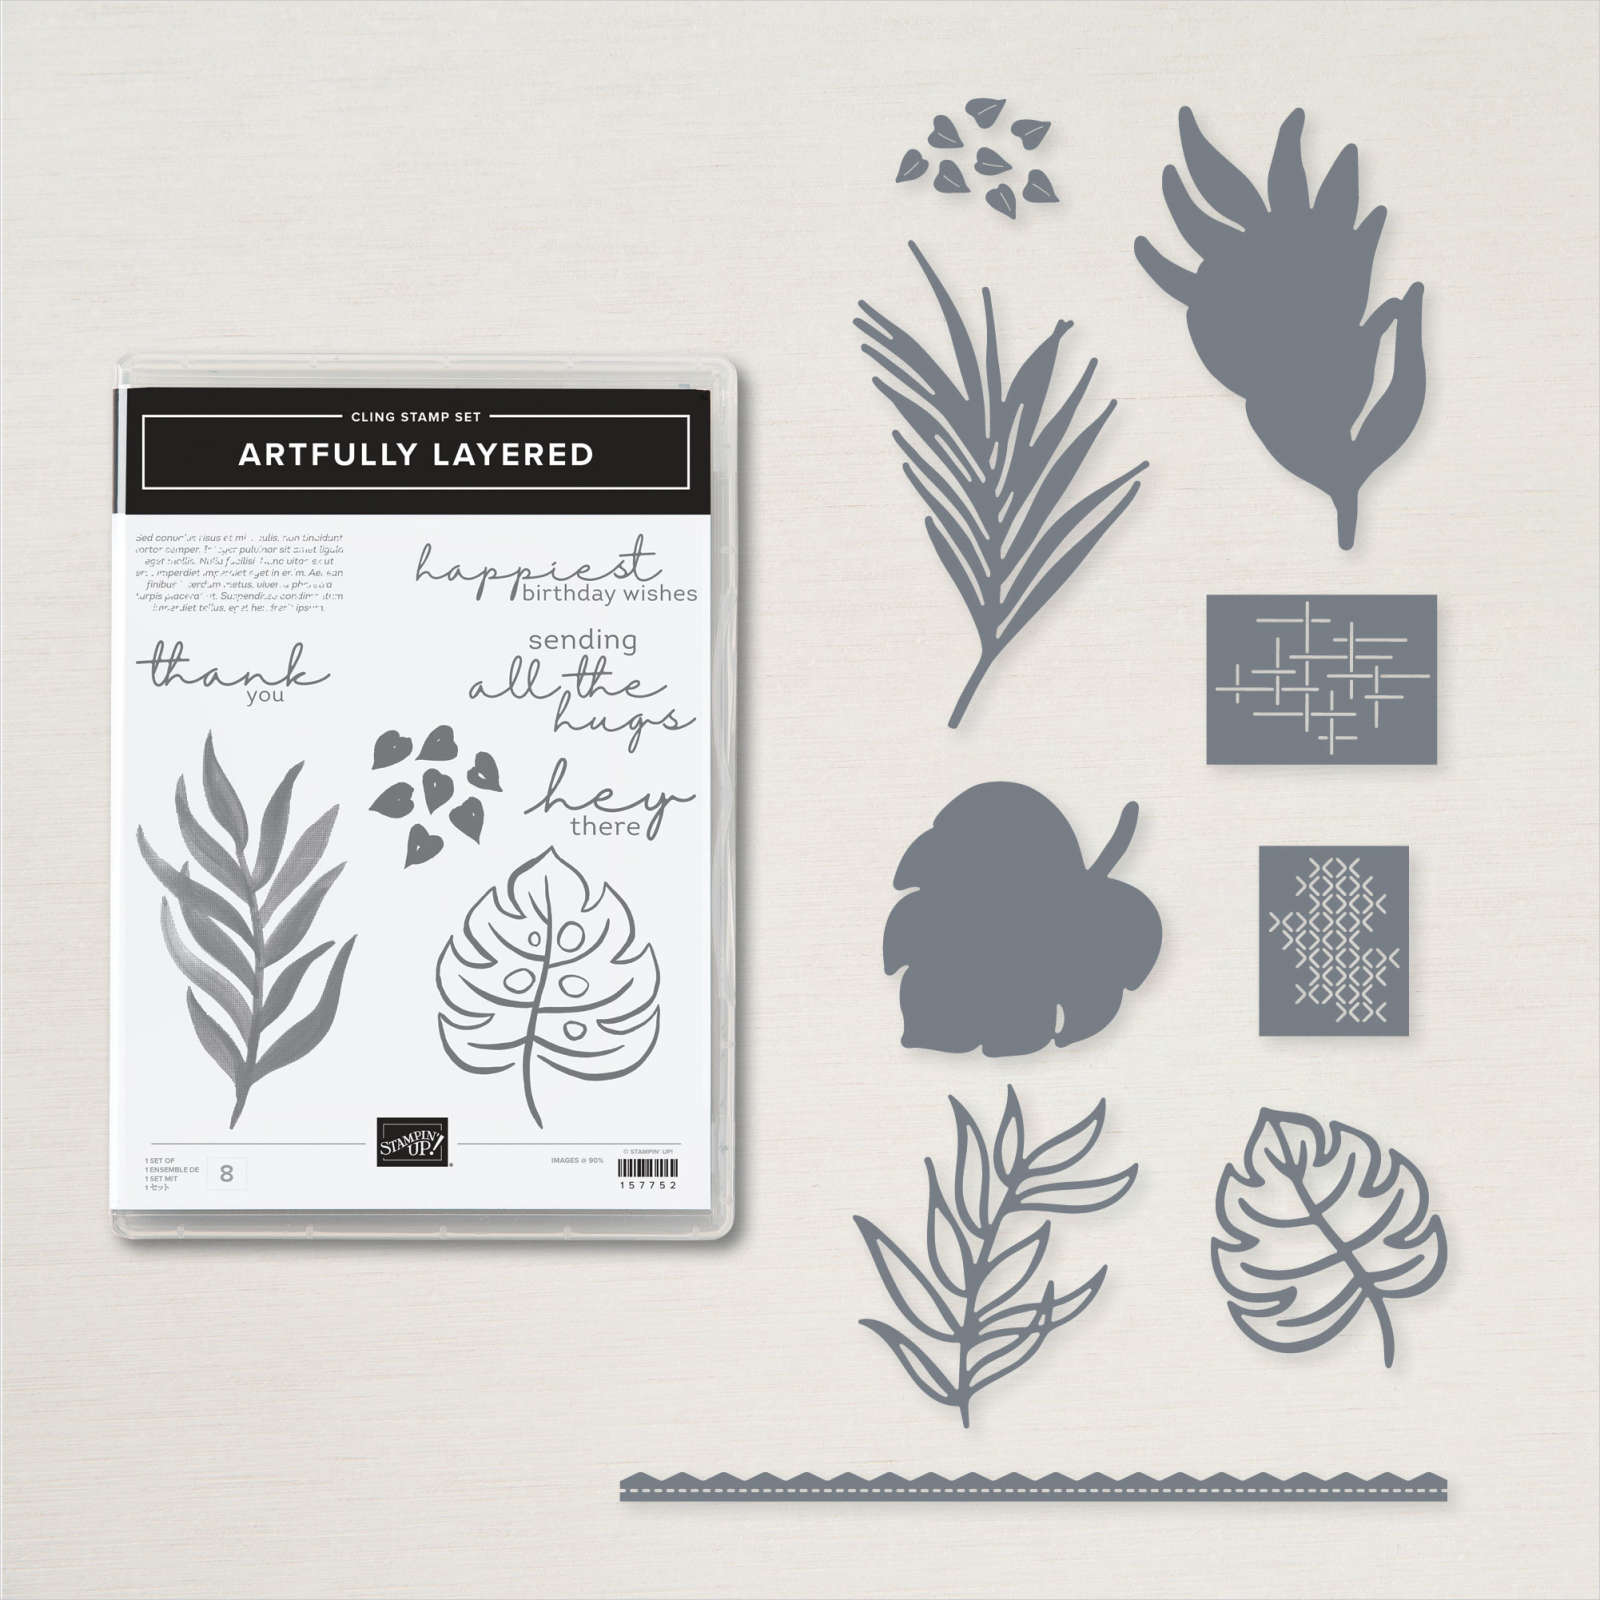
I also used the Faux Sea Glass shapes for accents.  

The measurements are in the post below but here they are again: 

  • White card base 5 ½” X 8 ½”
  • White 3 ½” X 4 ¾”, sponged layer 3 ¾” X 5”

Click on the photo below to watch the video; it's the first project of three.  And be sure to follow me on Facebook here. 

~~~

The Last Chance list is out!
Tons of items from the 2021-22 Annual Catalog are retiring and many are deeply discounted from 20-50% off.
 
Remember that these items are while supplies last and may run out. 
Click here to see it all online along with the discounts.

Host codes: E7S6DEAP

 *click here to order 

If your order is over $50 you'll receive free Polished Dots or In Color jewels and 3 hand made cards from me.


Don't forget about my loyalty rewards! 

Click here to download yours and earn a $50 shopping spree!  

All Posts

  • Harvest Meadow Fun Fold cards kit to go


    Today I'm sharing one of my September cards kit with you. I actually have two and will share the other one tomorrow. 

    This kit includes 10 pre-cut cards (2 each of 5 cards), 1/2 pkg. Nature's Harvest designer paper (6" X 12"), Metallic adhesive gems & Linen Thread.  It's a fabulous value as the product is worth $20 (without tax & shipping) and the cost is just $28 and the tutorial is free! The PDF tutorial includes photos, step by step directions, measurements to make more and a supplies list. 

    8 of these 10 cards are fancy folds and with the tutorial you'll have measurements to make more using other products.  


    You will need your own stamps, ink, adhesive and a paper trimmer to cut your new designer paper using the measurements provided in the tutorial.  Everything else is cut & prepped for you. 

    *I make sure to use only greetings in my kits to go so you can substitute what you already own.  I used Sunny Sentiments, Biggest Wishes, Create with Friends sets here.  *Inks are Misty Moonlight, Night of Navy, Bumblebee, Calypso Coral, Soft Succulent & Versamark. 

    *Be sure to order by September 19th to get this kit!  

    This PDF tutorial will be sent to you via email immediately after payment. The kit is mailed out at the end of September, barring any back-orders. 

    Go here to order the pre-cut kit to go. $28 (See the 2nd September kit option here. Choose both kits here!)

    Click here to get the PDF tutorial. $15

    ~~~

    September Specials

    Host code: ASETFASJ or T7VSZQ64

    *click here to order

    All online orders will receive a free PDF tutorial filled with projects featuring

    the Painted Christmas Suite!

    Get a pkg. of Holiday Rhinestones with a $50 online order from me in September! 

    Order here

    BEST DEAL!

    Get a Free Bundle  from the Holiday Catalog when you choose the Starter kit!  Pick out $125 in product of your choice for just $99 and shipping is free!  

    Leave a Reply

    Your email address will not be published. Required fields are marked *

  • Poppin’ Pastels Technique with Delicate Dahlia


    If you've been a stamper for awhile you've likely played with chalks and the Poppin' Pastel technique.  If not, check this out!  

    You'll need just a few supplies – Chalks, Versamark ink and sponge daubers. Well, card stock too! 

    Tip – choose a solid image with a full surface.  Outline images won't work as well here. 

    Here's how it's done:

    1. Ink your image in Versamark ink and stamp on card stock. 
    2. Dab your sponge dauber in chalk (if it's firm like our new Soft Pastels you may need to scrape some off & use the dust *watch the video below).
    3. Dab over your stamped image repeatedly. Do not rub on the outer edges or it may show outside of your stamped area. 
    4. Blow or dust off excess chalk.  Done!  

    Here's the video:

    ~~~

    September Specials

    Host code: ASETFASJ or T7VSZQ64

    *click here to order

    All online orders will receive a free PDF tutorial filled with projects featuring

    the Painted Christmas Suite!

    Get a pkg. of Holiday Rhinestones with a $50 online order from me in September! 

    Order here

    BEST DEAL!

    Get a Free Bundle  from the Holiday Catalog when you choose the Starter kit!  Pick out $125 in product of your choice for just $99 and shipping is free!  


    Leave a Reply

    Your email address will not be published. Required fields are marked *

  • Easy Explosion card video tutorial with Penguin Playmates Designer Paper!


    On last Tuesday's FB Live I shared three unique fun fold cards featuring the Penguin Place bundle and the Penguin Palace designer paper.  *Follow me on Facebook here. 

    Today I'm focusing on the Explosion card. It sure looks complicated but it's just a few score lines on a 4 X 8" piece of DSP. 

    As you can see, it's not a Christmas card.  This bundle and designer paper works well for multiple occasions.  

    The colors are Fresh Freesia, Black, White & Balmy Blue which coordinate with the adorable Penguin Playmates DSP seen here.  This paper is free during our Sale-a-Bration promotion with any $50 order.

    See that cute penguin?  It's punched out with the Penguin punch; right from the designer paper!  

    DSP Explosion card

    • Card base 5 ½” X 8 ½”, scored at 2 1/8” from each side
    • White inside square 2 ½”, Balmy Blue layer 2 ¾”
    • DSP 4” X 8” score at 2”, 4” & 6”, then in two ‘X’s’ from midpoint score to the outside corners
    • Belly Band 1 ½” X 9”

    Here's the video; I actually show three unique fun fold cards!

    ~~~

    September Specials

    Host code: ASETFASJ or T7VSZQ64

    *click here to order

    All online orders will receive a free PDF tutorial filled with projects featuring

    the Painted Christmas Suite!

    Get a pkg. of Holiday Rhinestones with a $50 online order from me in September! 

    Order here

    BEST DEAL!

    Get a Free Bundle  from the Holiday Catalog when you choose the Starter kit!  Pick out $125 in product of your choice for just $99 and shipping is free!  

    Leave a Reply

    Your email address will not be published. Required fields are marked *


Notice: LeeAnn Greff, Independent Stampin’ Up! Demonstrator, Manager. The content of this website is my sole responsibility as an independent Stampin’ Up! demonstrator and the use of, and content of, the classes, services, or products offered on this website is not endorsed by Stampin’ Up! Copyright 2025