/


Latest Post

Best Dressed FB Live cards


I made these 3 pretty cards during my weekly 'Stamp with Me' Facebook Live last night.  

Each Thursday at 8 pm CT we'll finish 3 cards together in about 30 minutes.   Prep your pieces ahead of time using the measurements I provide and you'll be surprised how quickly you can make your cards!  Join me here: 

I used the Best Dressed Designer paper seen here but you can substitute other paper, colors, stamps and punches. The stamped greetings are from the Peaceful Moments set here. I use this stamp set so much; the sentiments are wonderful.

After the video many people share their finished cards. It's so fun to see what products everyone uses and how similar (or not) they are to mine. 

Here are the details and close up views of these three cards: 
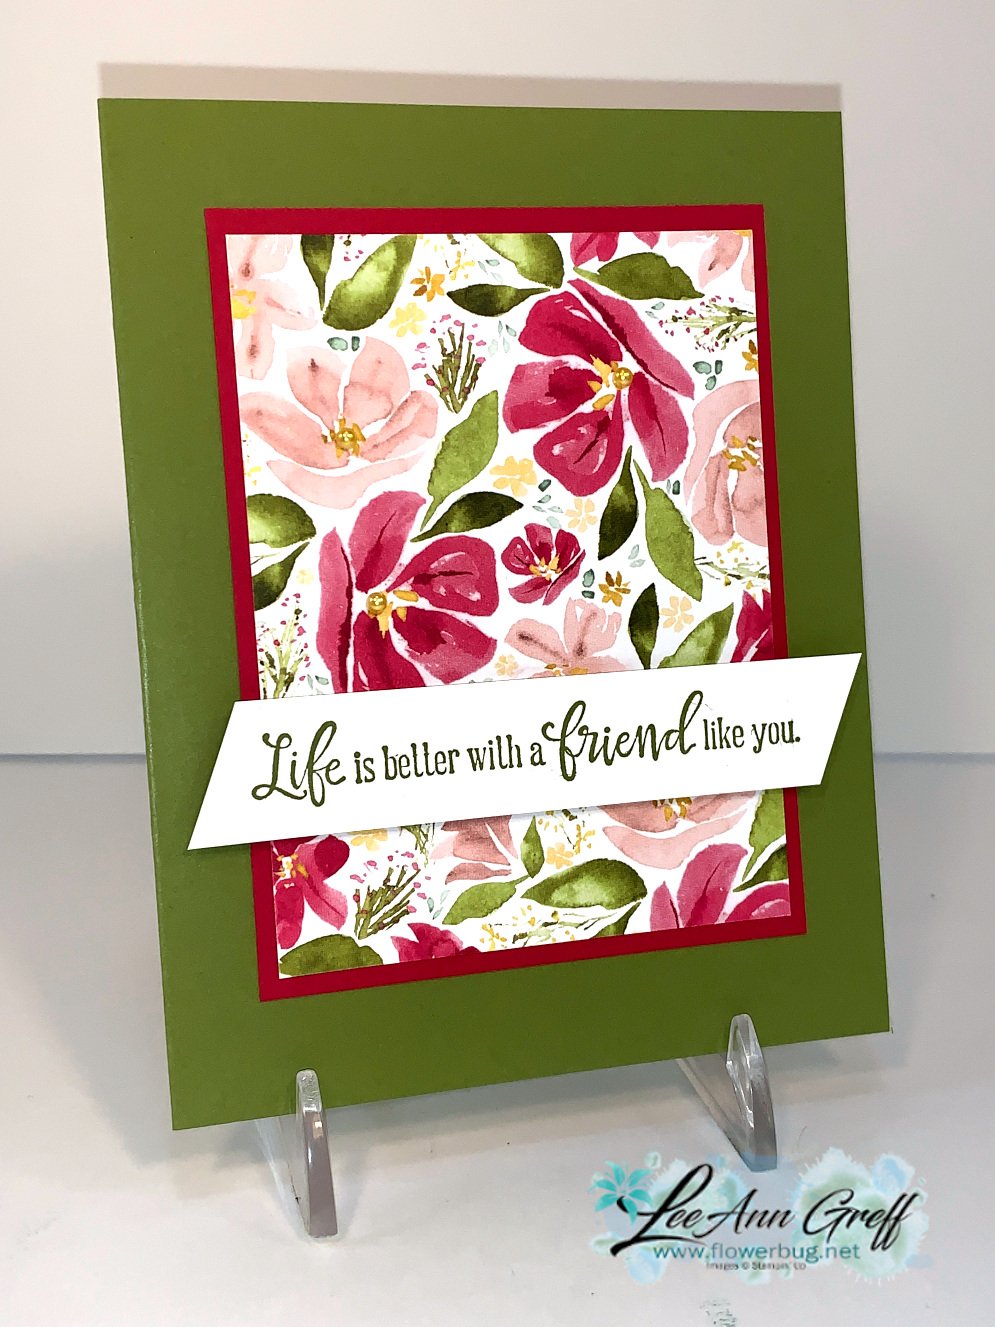
Old Olive 5 1/2" X 8 1/2", Best Dressed DSP is 4" X 3", Lovely Lipstick is 4 1/4" X 3 1/4", White strip is 3/4" X 4 1/4".  A fast, easy card. 

Purple Posy 4 1/4" X 8 1/2" scored at 5 1/2", Mint Macaron 3 1/4" X 8 1/2" scored at 4 1/4", yellow DSP is 4" X 2 3/4", floral DSP is 3" X 4", Stitched So Sweetly die-cut in White, 2 1/4" Mint circle, punched butterflies , Mint 1/8" ribbon

  • Purple Posy 4 1/4" X 9 3/4" scored at 5 1/2", DSP is 4" square, Detailed Band die-cut (see it here) in Purple Posy (Or use a border and any punch or die-cut)

~~~~

April ordering specials:

~~~

All online orders in April will receive my tutorial of the month; with 16 cards

featuring the Ornate Garden products seen here.

**Order either Ornate bundle from me and get a free 3 cards pre-cut kit! Order both and get a 6 cards kit with pdf tutorial! 


All Posts

  • Sharing Halloween cards today!


    My Team swap theme was fall or Halloween cards. So just in time for tomorrow’s spooky day here are some of my Team’s creations:

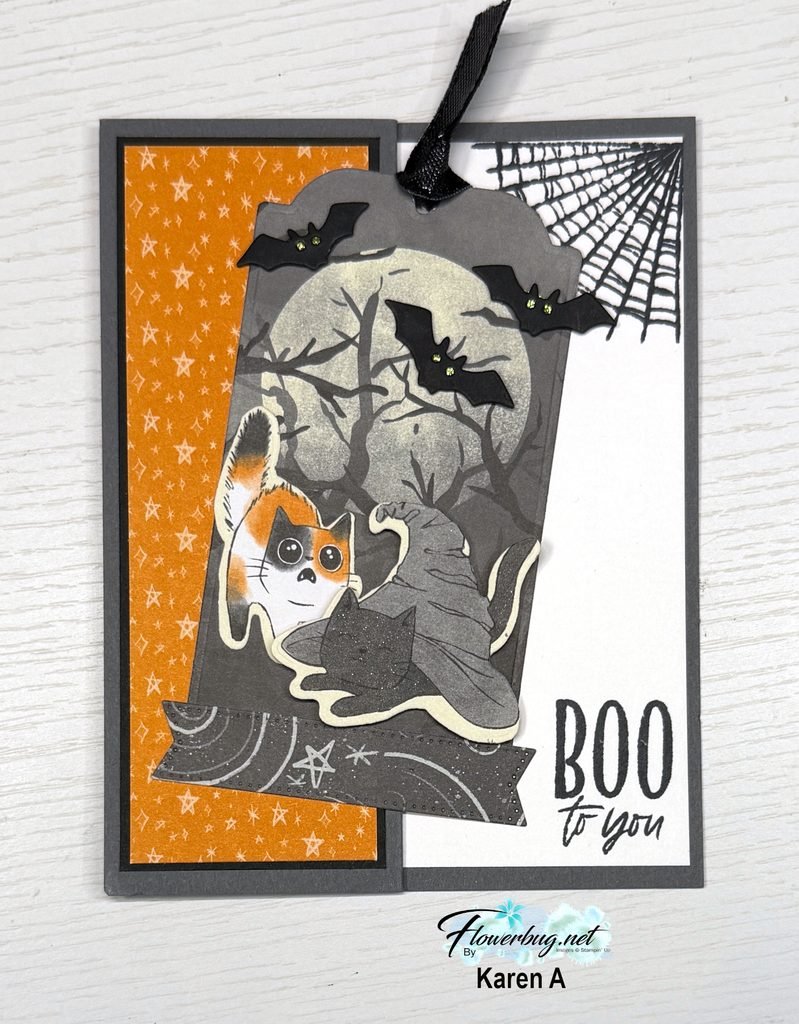
    First is Karen’s card:

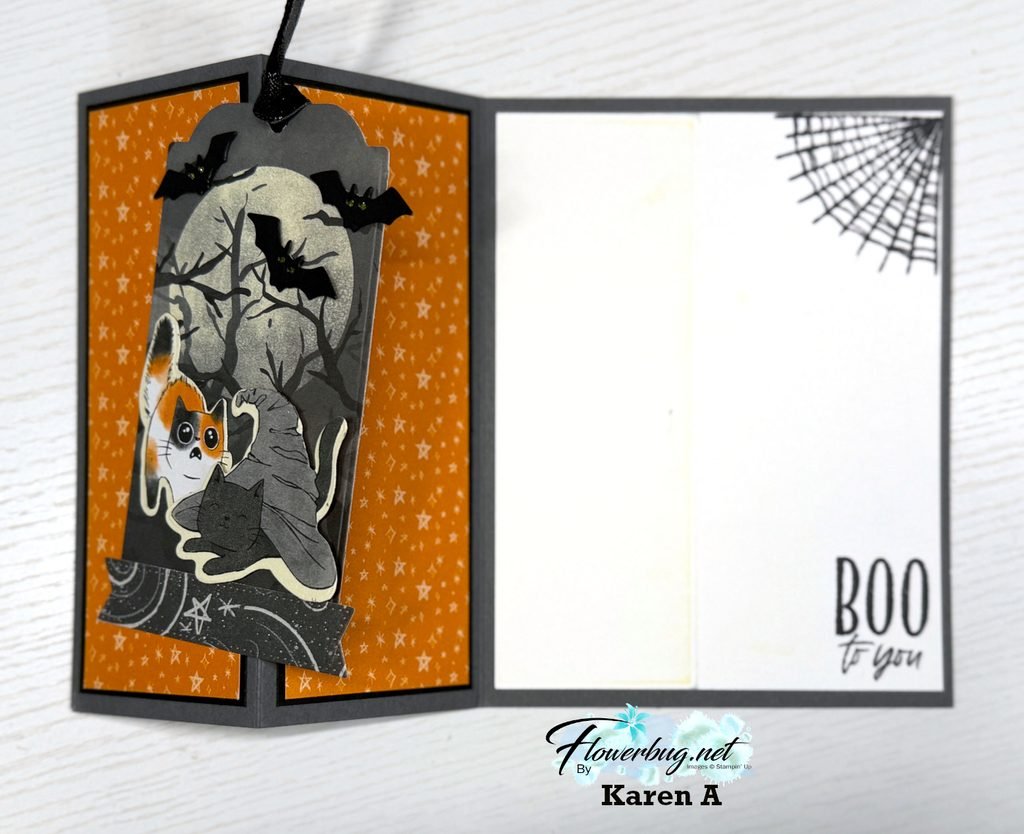
    She featured the Oh My Fright bundle and the Frightfully Times DSP here. That DSP tag is a die-cut included in the bundle. It’s a fun fold; here’s the view when opened:

    The tag is adhered to just the front panel. Love the spiderweb and greeting that shows from the front AND the inside.

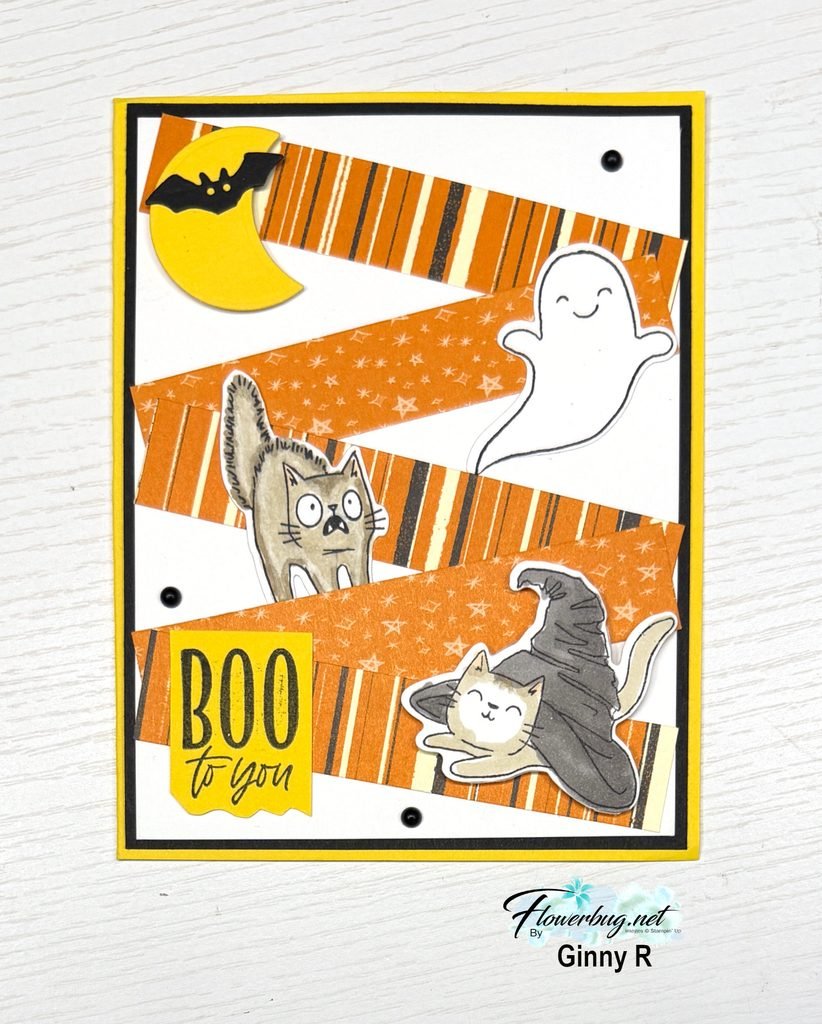
    Next is Ginny’s card; she used the same products but is totally different!

    Isn’t this a neat way to add the die-cut critters? Those 3/4″ strips of DSP placed at angles is fun! She’s a cat lover so this is totally her!

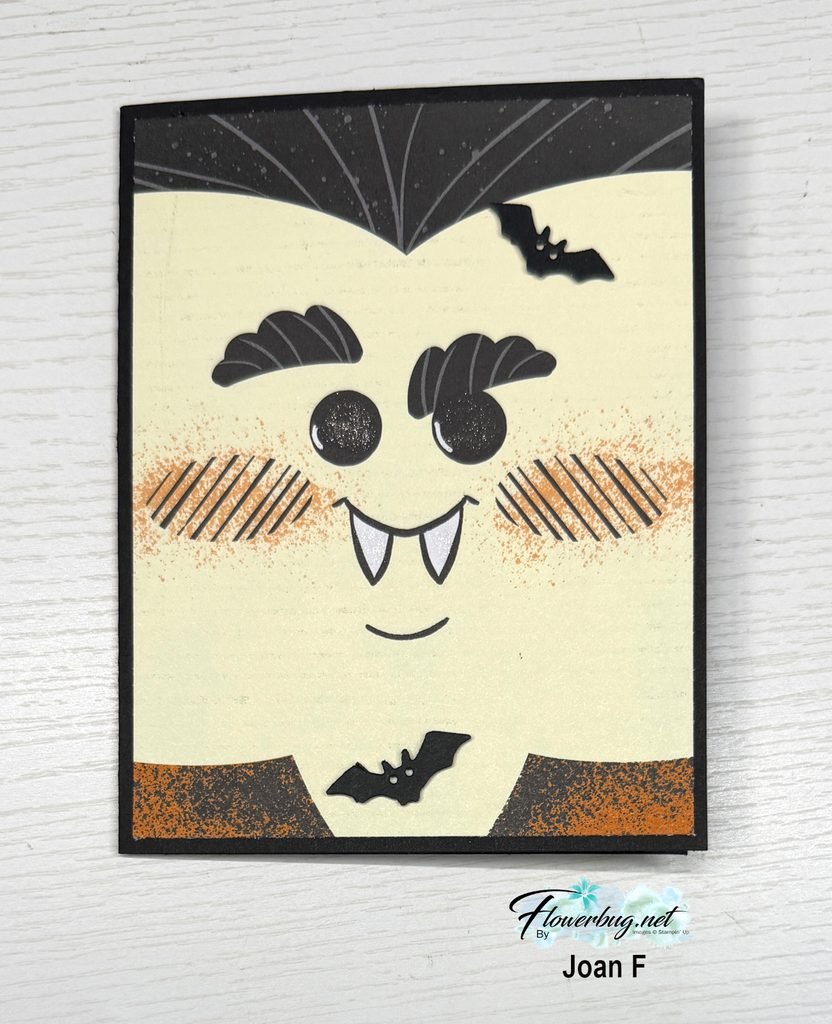
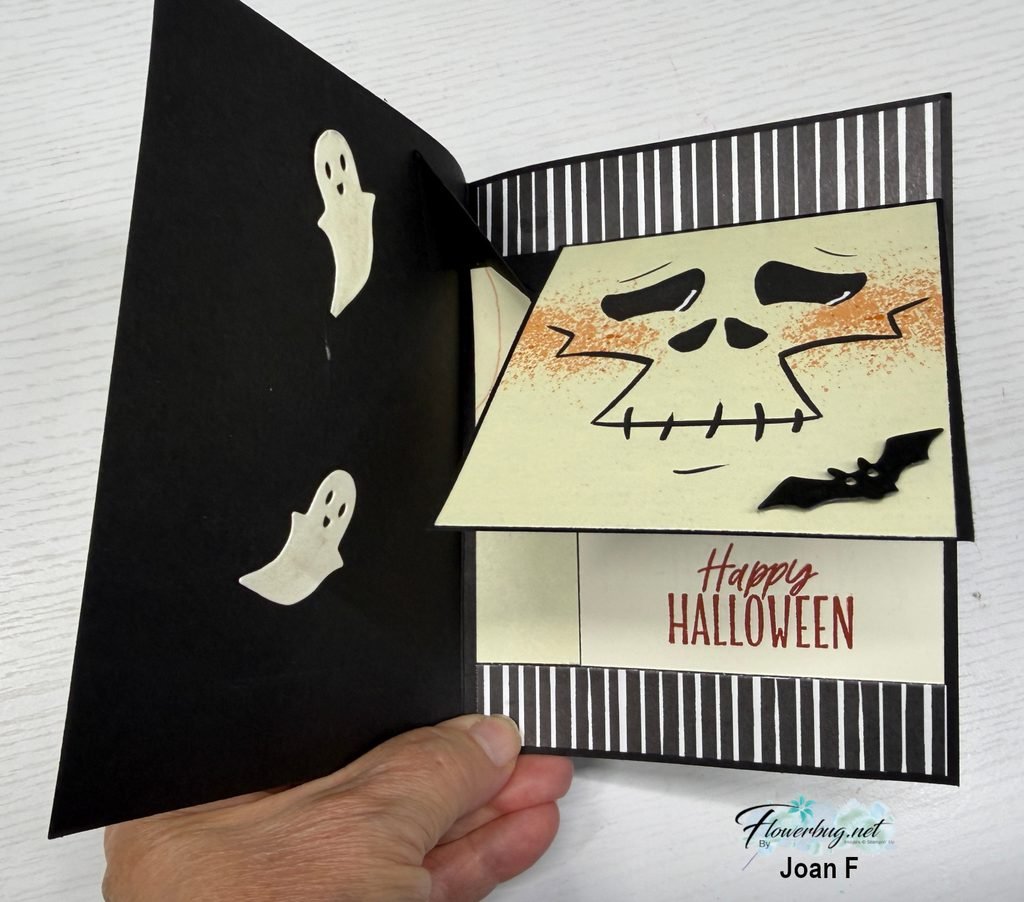
    Next is Joan’s card who created a fun fold layout. It looks pretty normal from the front…

    But here’s how the inside opens:

    She added a scored and folded mechanism that pops up the inside panel when opened. I cannot give measurements for this but maybe I’ll demo it on a video soon.

    Here DSP is called Spooktacular 6 X 6″ DSP but it has sold out. The stamps and dies are from the Oh My Fright bundle seen here.

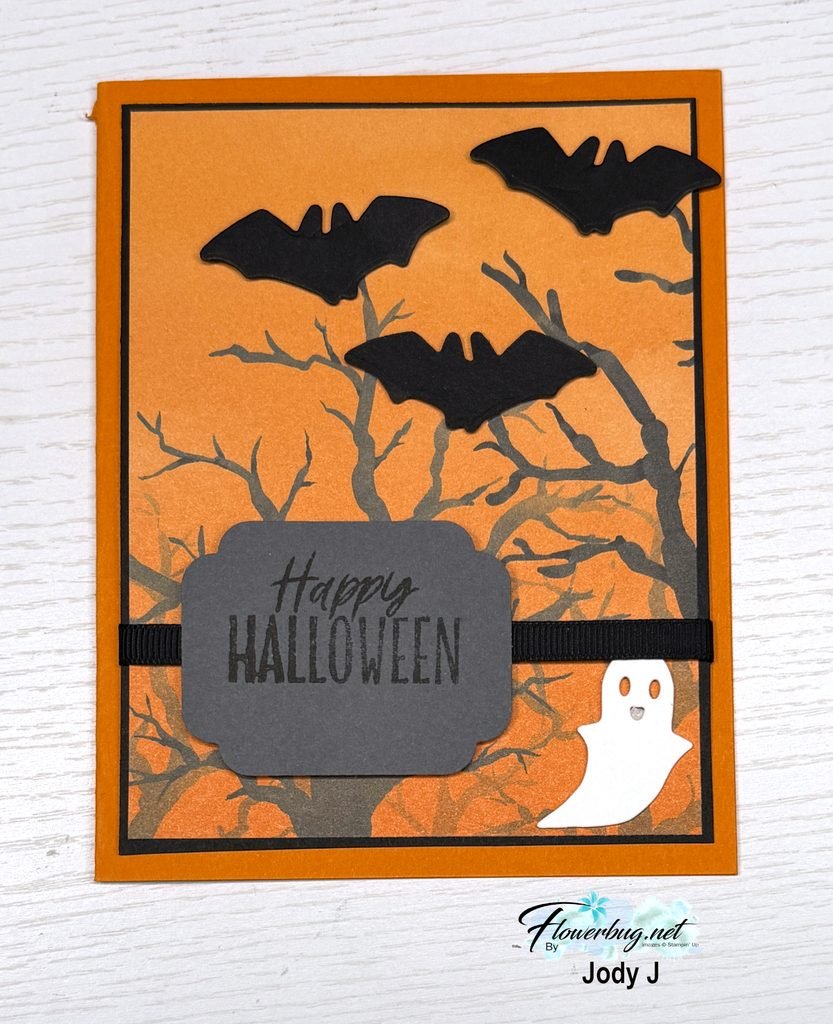
    Lastly is Jody’s card that features this same bundle and the Frightfully Fun DSP.

    She used the new Advent Labels punch for her greeting. See that punch here.

    Thanks for stopping in today. I hope you enjoy your Halloween tomorrow!

    I’ll share more Team swaps next week. Stay tuned!

    Leave a Reply

    Your email address will not be published. Required fields are marked *

  • 5 fast Christmas cards with my 5 at a time templates!


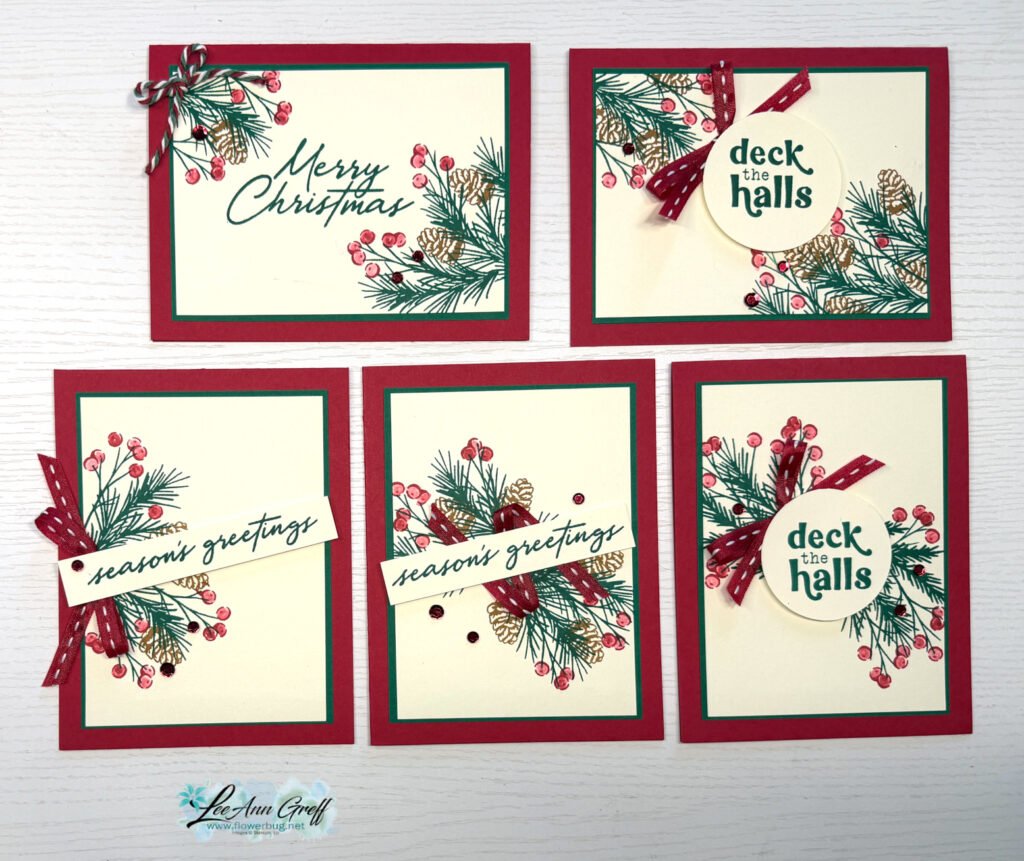
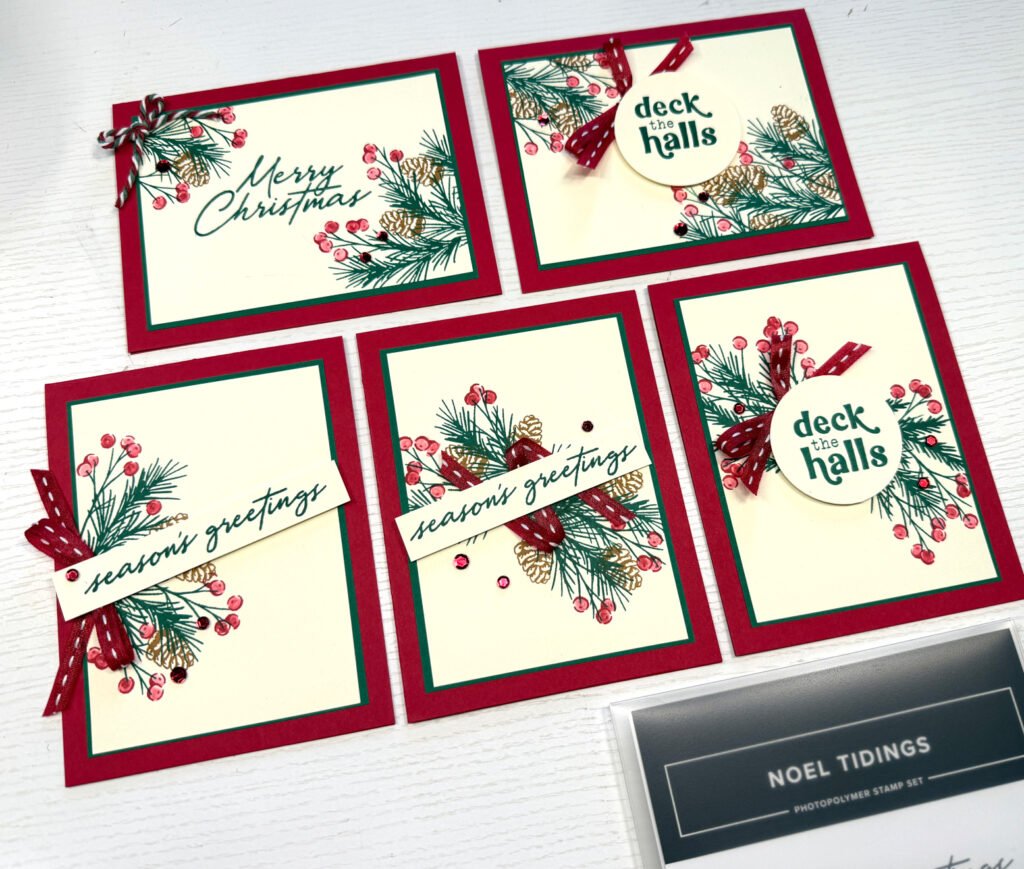
    And today I’ll share the 3rd group of ‘5 at a time’ cards from my video last week. This time I went with a Holiday theme!

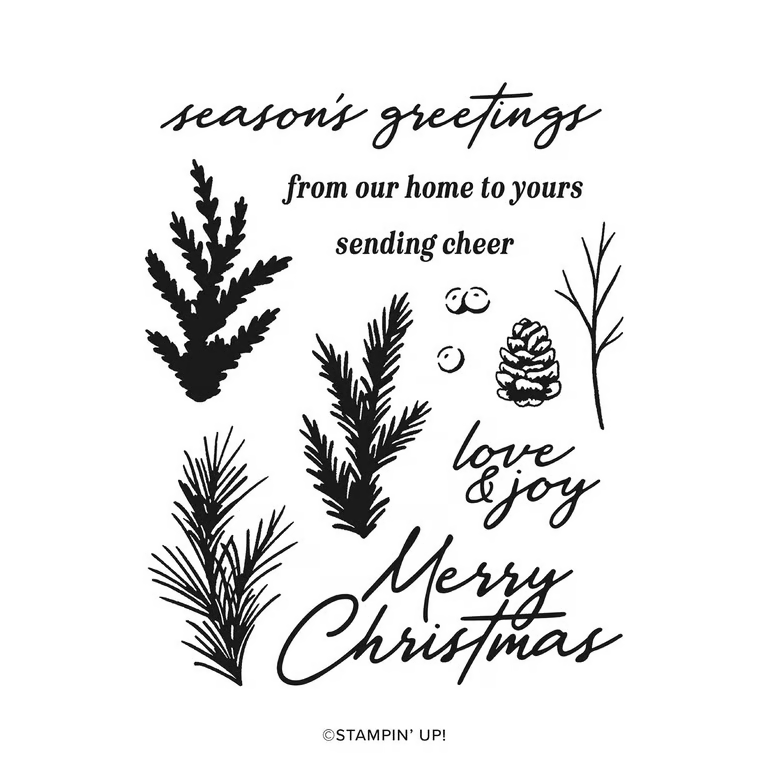
    My colors include Cherry Cobbler, Shaded Spruce, Pecan Pie and Very Vanilla. The Noel Tidings stamp set seen here has everything you need to create pretty card fronts or backgrounds for your holiday cards.

    There is a beautiful set of dies that coordinate with this stamp set. See the bundle here. The dies are currently out of stock; but you can add your email address to the product to be notified when it becomes available.

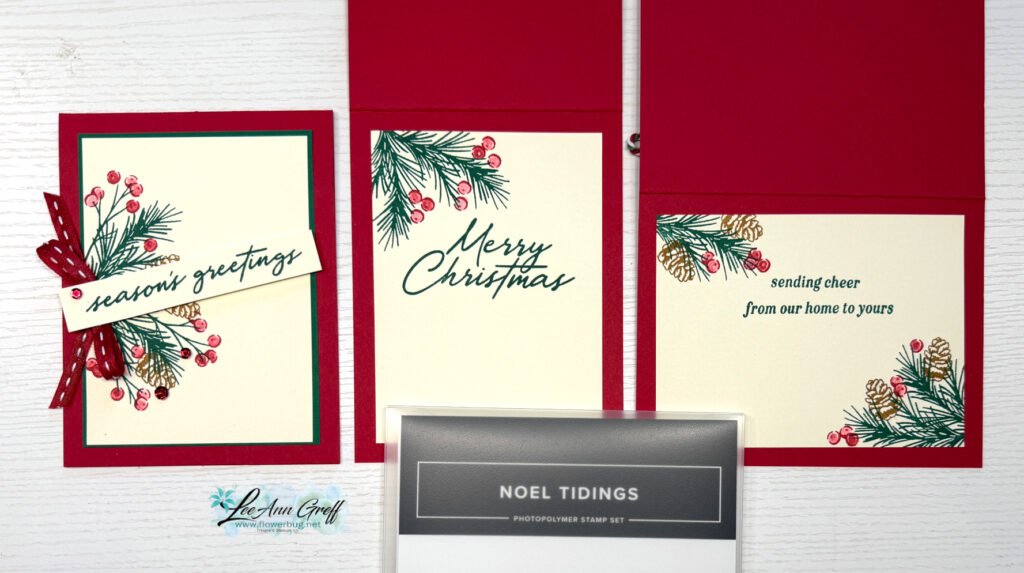
    Below you can see how I stamped the inside layers.

    Both of these templates are included in the free project sheet I created. Click here to print or download it.

    I’ll be proud to send these cards to my family and friends this Christmas.

    Below is the video tutorial for these cards; you can watch me stamp them and get my tips for coloring the berries with a blender pen too.

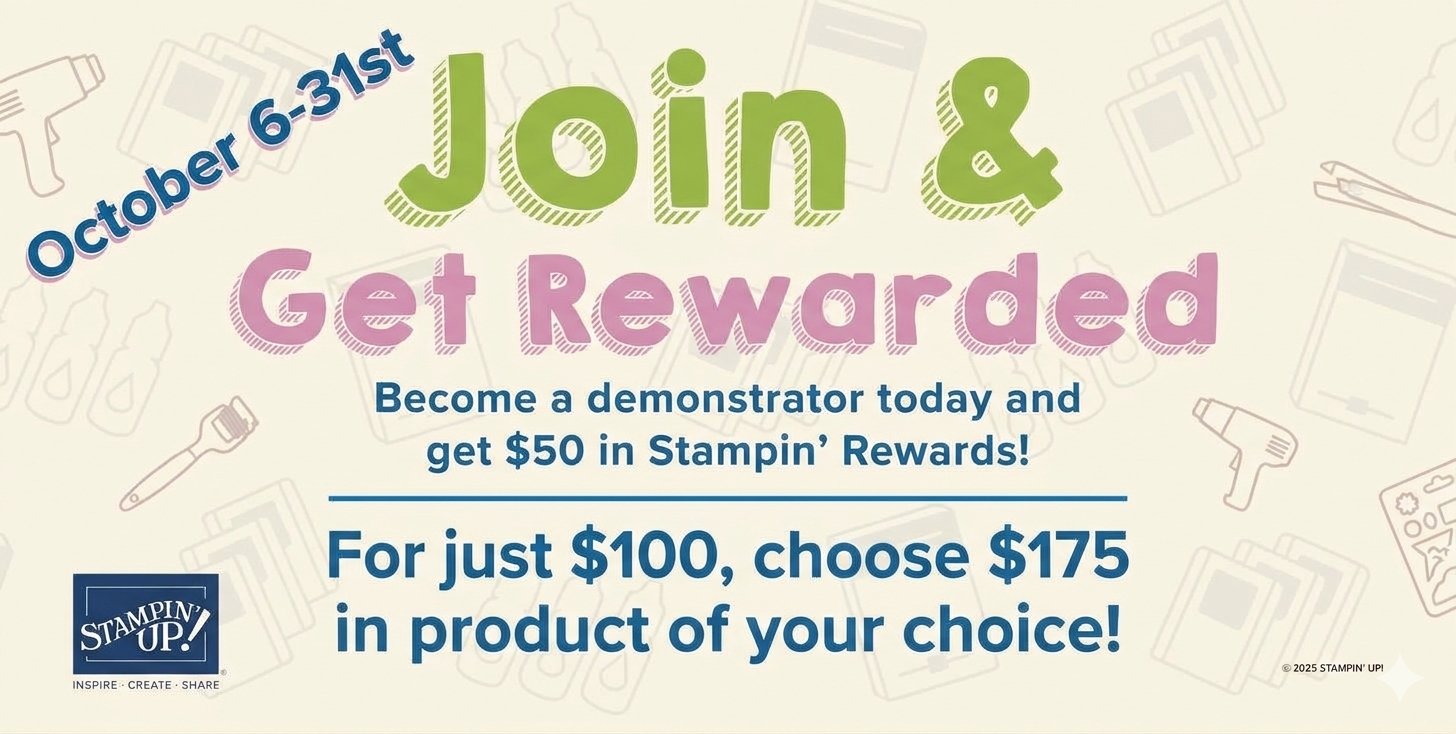
    The Starter kit deal ends on Saturday! I hope you’ll consider joining my team and taking advantage of the continual discount on all future Stampin’ Up! products!

    Click here to get the deal!!

    Leave a Reply

    Your email address will not be published. Required fields are marked *

  • Choose to get Stampin’ Up! products at a discount… and help me achieve my goal


    Many people love being a Stampin’ Up! customer. And that’s absolutely fine! But did you know you can be a Demonstrator without doing anything more than you do as a customer? Yes, it’s true!

    • Place orders whenever you wish
    • There’s no need to hold classes or events. There’s no need to run a business unless you want to.
    • When you’re done ordering you simply stop; it’s that simple!
    • Enjoy the discount on all future purchases!

    I have a personal goal and need 4 more people to join in October. Can you help me out and start saving on each order you place?

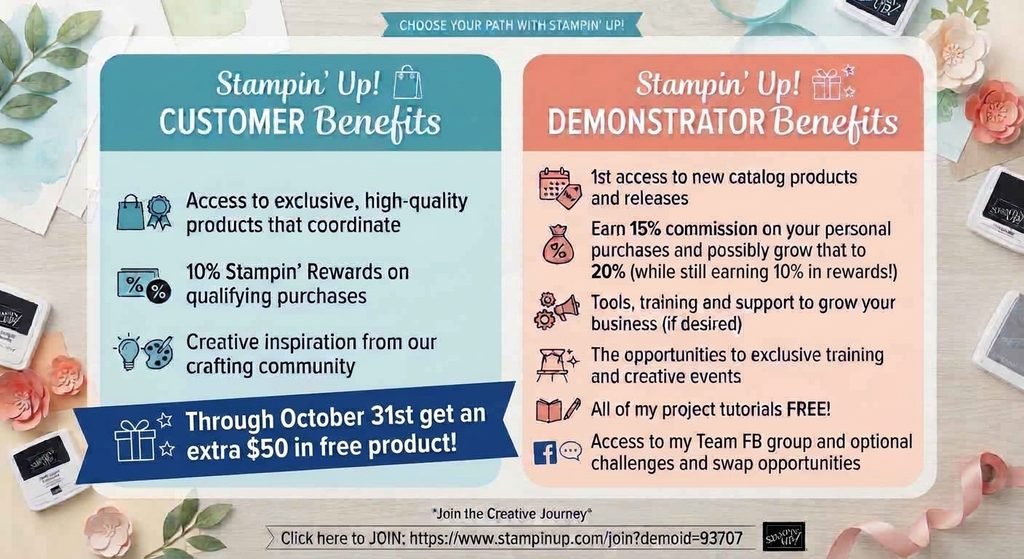
    Here’s a graphic with the details:

    Right now, through October 31st you can grab the starter kit deal and get up to $75 in FREE product of your choice!

    The kit costs $100 and you’ll receive a coupon for your starter kit purchase of $125 or less. Then you’ll receive an additional $50 in free product rewards! Click here to get started

    Details:

    • You get 15% discount on all products and can increase that to 20%.
    • There’s a minimum purchase of $300 a quarter to stay active. 
    • But your first quarter is waived so you have until March 31st to get that $300 in and each order counts towards that first $300.
    • And, when you order Stampin’ Up! counts your purchase at full price but you only pay at the discounted price.  For example, order $100 and pay just $85.  Tax and shipping is added to the discounted price.
    • In addition to your 15-20% discount you still earn 10% in product rewards; just like customers!  *your customer earned rewards transfers to your demo account.
    • You can stop ordering as a demo at any time.  There’s no pressure to continue.  It’s totally up to you on how long you stay. 
    • Get ALL of my project tutorials in my Team newsletter each month!

    I hope you’ll consider getting the Starter kit this month; you will not regret it!

    Leave a Reply

    Your email address will not be published. Required fields are marked *


Notice: LeeAnn Greff, Independent Stampin’ Up! Demonstrator, Manager. The content of this website is my sole responsibility as an independent Stampin’ Up! demonstrator and the use of, and content of, the classes, services, or products offered on this website is not endorsed by Stampin’ Up! Copyright 2025