/


Latest Post

Beautifully Happy; a perfect set for some quick cards


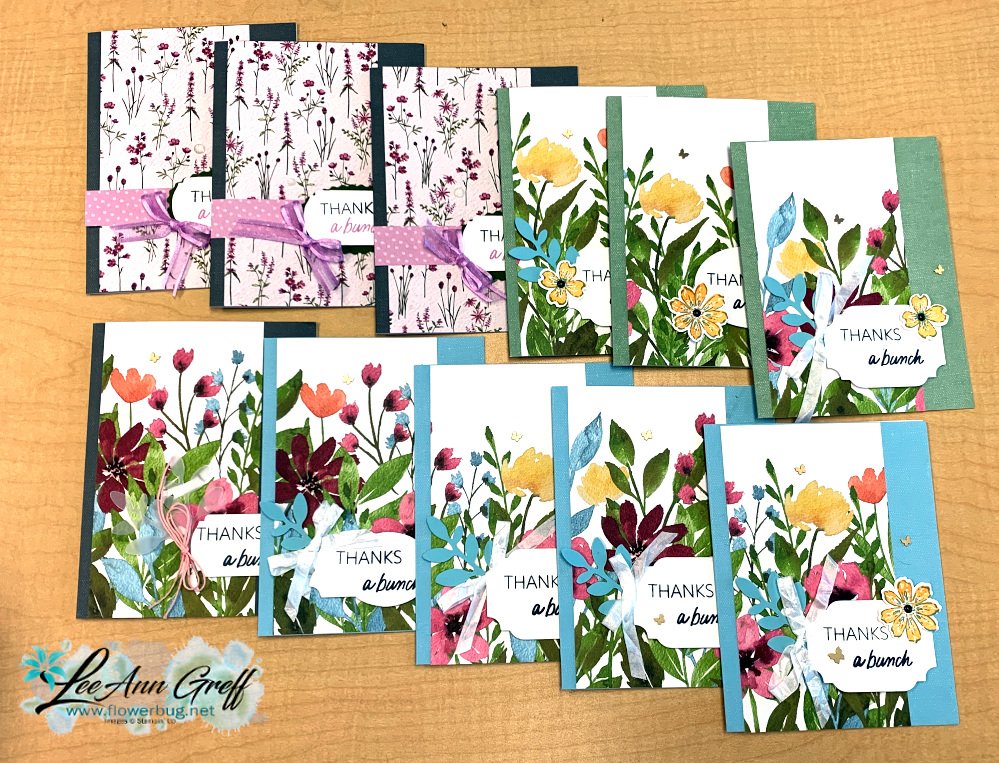
I needed a bunch of thank you cards for online orders and quickly made this set of cards: 

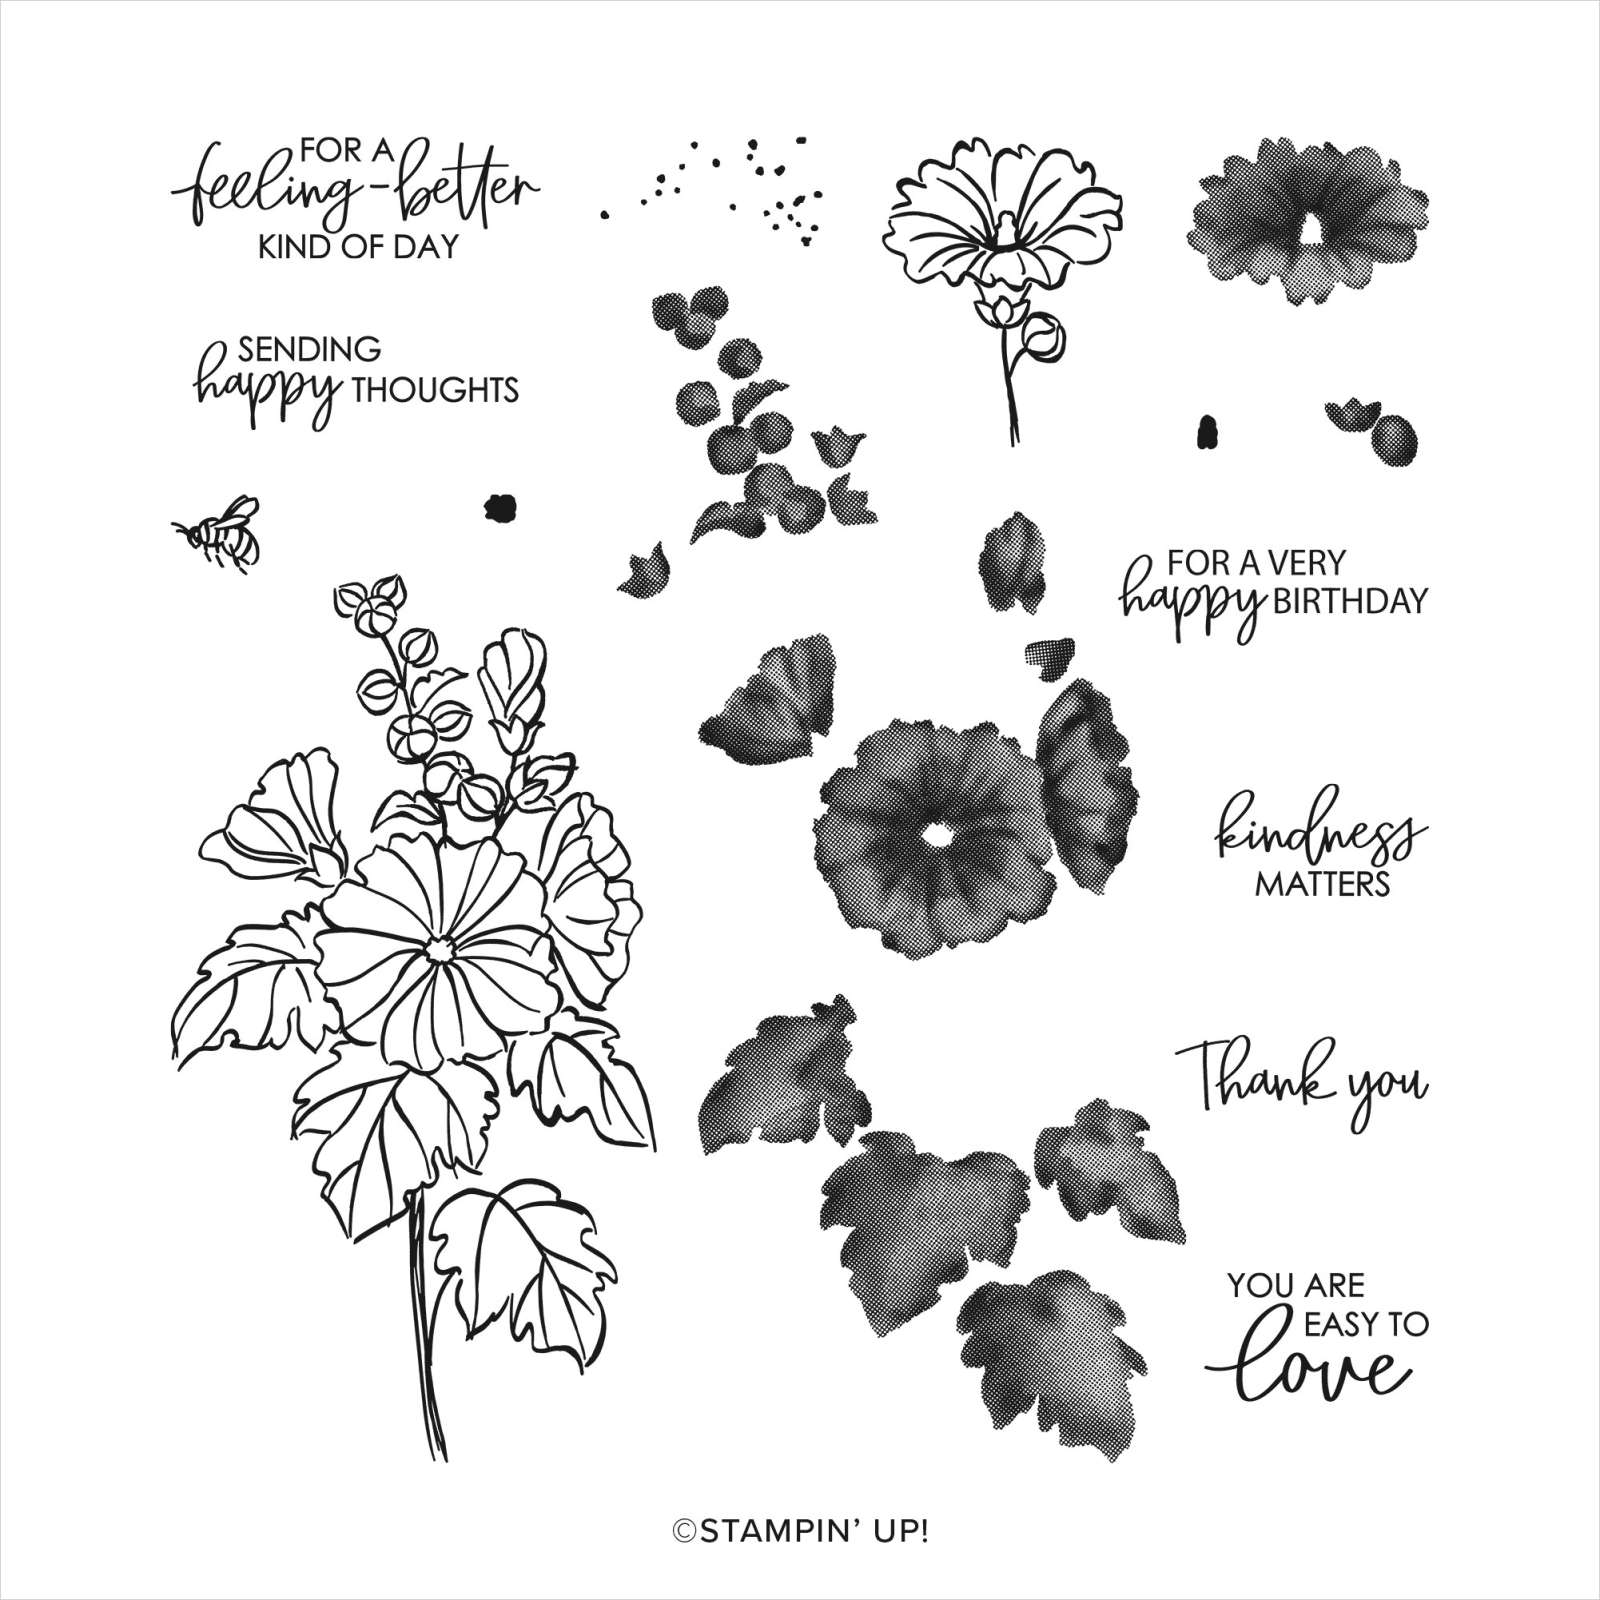
The pretty Beautifully Happy stamp set (Sale-a-Bration and free with a $100 order) is so easy to work with!  It has outline images AND coordinating 'fill in' images that make it super simple to add color where you want it.  And they're Distinktive images too!  This means they give multiple hues of color tones with one stamping.  And I love the greetings too.  

I used the Good Things cards & envelopes for these cards. They were available last month for Paper Pumpkin subscribers, but they're sold out now.  I love using coordinating products!  I added a 3" X 5 1/2" piece of Design a Daydream Host DSP to each card.  I think the lattice look works wonderfully with this flower image. 

The greetings are made with our Double Oval punch; white & Mossy Meadow.  You can see this pretty stamp set here. 

Remember that if you order $100 this set is free!  And if you use a host code below you'll get a free package of Milky Dots in your thank you card.  

~~~

February specials:

February Host code links:

  CNV2VCBT or 7EUM6NB9 

Get free Pastel Sequins with online orders over $55 when using the host code above!

 Earn free products with my loyalty rewards! 

Click here to download yours and earn a $50 shopping spree!

~~~

Best Deal Ever on the Starter kit here!

Choose $175 in products for just $129 plus the new mini machine!

Or choose $175 for $99 without a new Mini.  AMAZING!

All Posts

  • Floral Charm fun-fold card kit to go or choose the PDF tutorial option


    This is my second card kit to go I've created for July.  It features the new Floral Charm designer paper released in our newest Online Exclusives.  It's absolutely gorgeous designer paper!  

    My favorite thing about this pack of paper is that the reverse side of the pretty floral patterns have a coordinating solid print. So I created a batch of fancy fold cards to show them off!  

    The directions for these fun fold cards are included in the PDF tutorial plus there's a private video you'll get access to when you purchase either the kit or the PDF tutorial.  

    This kit to go includes the following products:

    • 1/2 pkg Floral Charm DSP (6" X 12")
    • a share of Peacock/Gold ribbon
    • a share of Shimmer dots
    • pre-cut or die-cut pieces for each of 10 cards
    • the PDF tutorial & video link 

    The kit to go is $31 and can be reserved here.  It is shipped out at the end of July. The PDF tutorial is $16 and can be seen here.  The tutorial is emailed to you immediately after purchase. 

    *You will need stamp greetings, inks, a paper trimmer (to cut your new designer paper) and adhesives to finish the cards. 

    See all of my available kits to go and tutorials here.  Opt in for more than one to save on shipping costs! 

    *If you'd like to subscribe to receive a kit automatically each month please use the button below.  My subscribers get a free surprise every few months along with the guarantee of a beautiful kit full of products too! 

    ~~~

    July Specials:

    New Online Exclusives are here!  

    ~~~

    Last Chance List has been updated!  see it all here. Don't miss out on the deals!

    ~~~

    Get my Turtle-y Cute PDF tutorial free with any online order in July!

    Leave a Reply

    Your email address will not be published. Required fields are marked *

  • Kintsugi Inspirations fun fold card kit to go or tutorial. Reserve yours now!


    I'm thrilled with the cards in the Kintsugi Inspiration kit this month!  I am featuring this unique, gold foil accented designer paper for one of my kits to go in July. (I add 2 new kits to my shop each month!)

     The gorgeous designer paper is definitely the star of these stunning cards. Each of the 10 cards are unique fun fold designs and the video will help you assemble each one.

    The directions for the cards are included in the PDF tutorial plus there's a private video you'll get access to when you purchase either the kit or the PDF tutorial.  

    This kit to go includes the following products:

    • 1/2 pkg Kintsugi Inspirations specialty DSP (6" X 12")
    • a share of Misty Moonlight 1/4" ribbon
    • a share of gold Flower Accent gems
    • pre-cut or die-cut pieces for each of 10 cards
    • the PDF tutorial & video link 

    The kit to go is $31 and can be reserved here.  It is shipped out at the end of July. The PDF tutorial is $16 and can be seen here.  The tutorial is emailed to you immediately after purchase. 

    *You will need stamp greetings, a paper trimmer (to cut your new designer paper), adhesives and inks to finish the cards. 

    See all of my available kits to go and tutorials here.  Opt in for more than one to save on shipping costs! 

    *If you'd like to subscribe to receive a kit automatically each month please use the button below.  My subscribers get a free surprise every few months along with the guarantee of a beautiful kit full of products too! 

    ~~~

    July Specials:

    New Online Exclusives are here!  

    ~~~

    Last Chance List has been updated!  see it all here. Don't miss out on the deals!

    ~~~

    Get my Turtle-y Cute PDF tutorial free with any online order in July!

    Leave a Reply

    Your email address will not be published. Required fields are marked *

  • How to add color to the Peaceful View stamp – video tutorial too!


    Today I'm sharing the second card I made during last week's live video.  Both featured the amazing and beautiful Peaceful View stamp set seen here.  

    I used Balmy Blue, Pecan Pie and White card stock.  Inks include Balmy blue, Old Olive, Granny Apple Green and Pecan Pie. I used a Blending Brush with Balmy Blue ink to lightly color the sky before stamping. 

    Notice the fence. If you look closely you'll see the woodgrain in the fence. This was done by using an Early Espresso Stampin' Write marker to add to the stamped fence directly on the cardstock. It was mostly Pecan Pie colored before.  

    How did I color the image?  I inked the trees with Old Olive ink first using the direct to stamp method. The I used Pecan Pie on the grass and fence.  I used a sponge dauber to remove ink from the plants on the bottom so I could add Green ink to them with a sponge dauber.  I used Pecan Pie ink and a sponge dauber to add color to the trunk as well.  I hope you'll watch the video below to watch this in action. 

    For the greetings I stamped the More Messages stamp a few times and used the coordinating die to cut them all out.  I had lots to choose from this way and can save them to use whenever I need it. Here I added Balmy Blue ink lightly to color the greeting.

    What I love about this new messages bundle is that the greetings and die-cuts are such a nice size; larger than ever before. See the bundle here. 

    Here's the free project sheet with measurements and supplies for you: Download Multi-colored Peaceful View

    Below is the video for this card and another where I show you how to use this stamp on pretty designer paper for a stunning background. I shared that yesterday here. 

    ~~~

    July Specials:

    New Online Exclusives are here!  

    ~~~

    Last Chance List has been updated!  see it all here. Don't miss out on the deals!

    ~~~

    Get my Turtle-y Cute PDF tutorial free with any online order in July!

    Leave a Reply

    Your email address will not be published. Required fields are marked *


Notice: LeeAnn Greff, Independent Stampin’ Up! Demonstrator, Manager. The content of this website is my sole responsibility as an independent Stampin’ Up! demonstrator and the use of, and content of, the classes, services, or products offered on this website is not endorsed by Stampin’ Up! Copyright 2025