/


Latest Post

Beautiful Winter Meadow card; a great layout to use those extra pieces


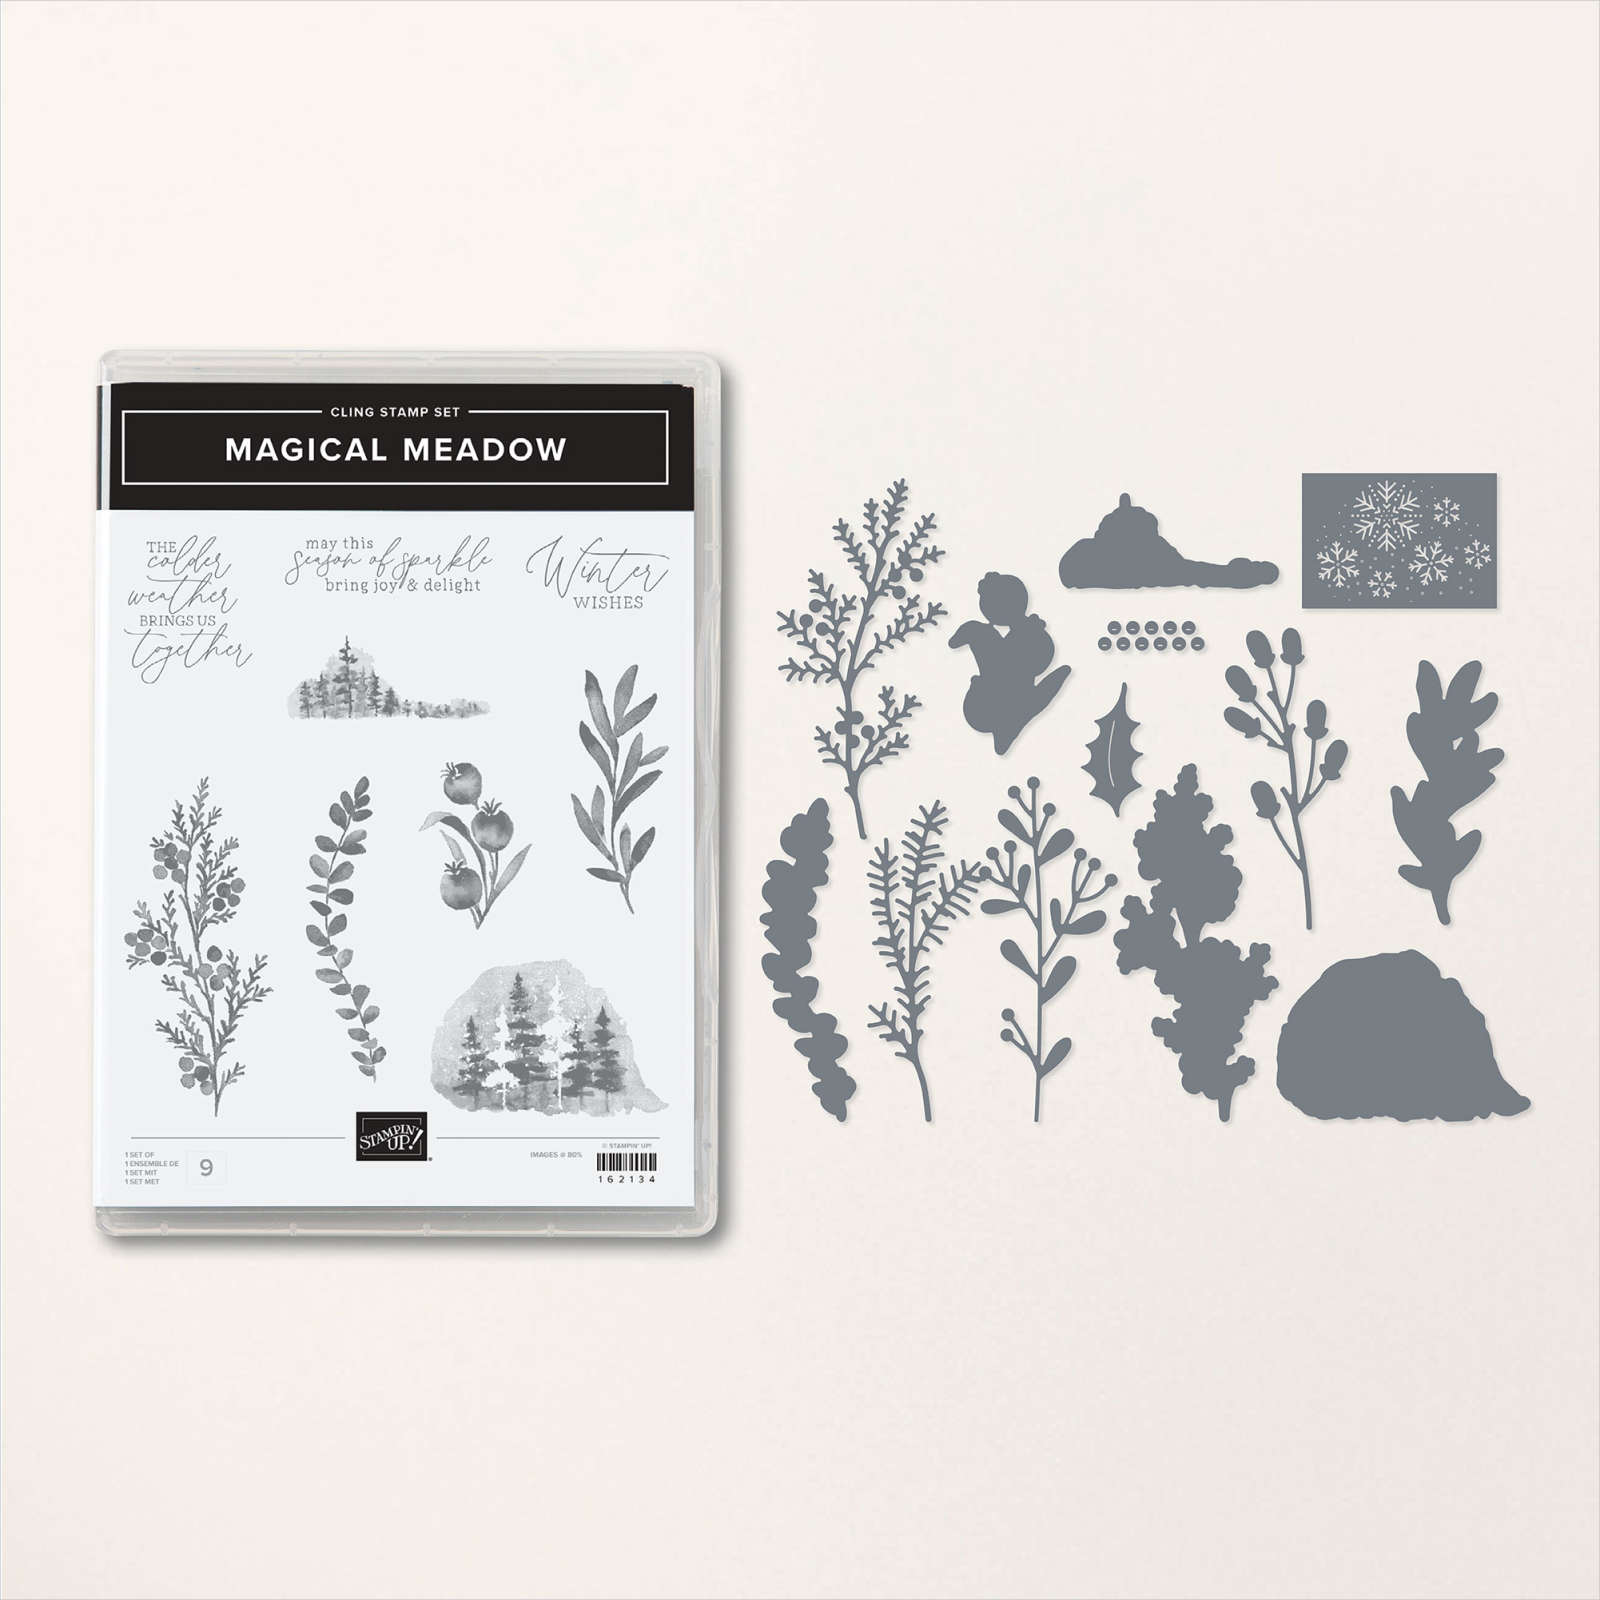
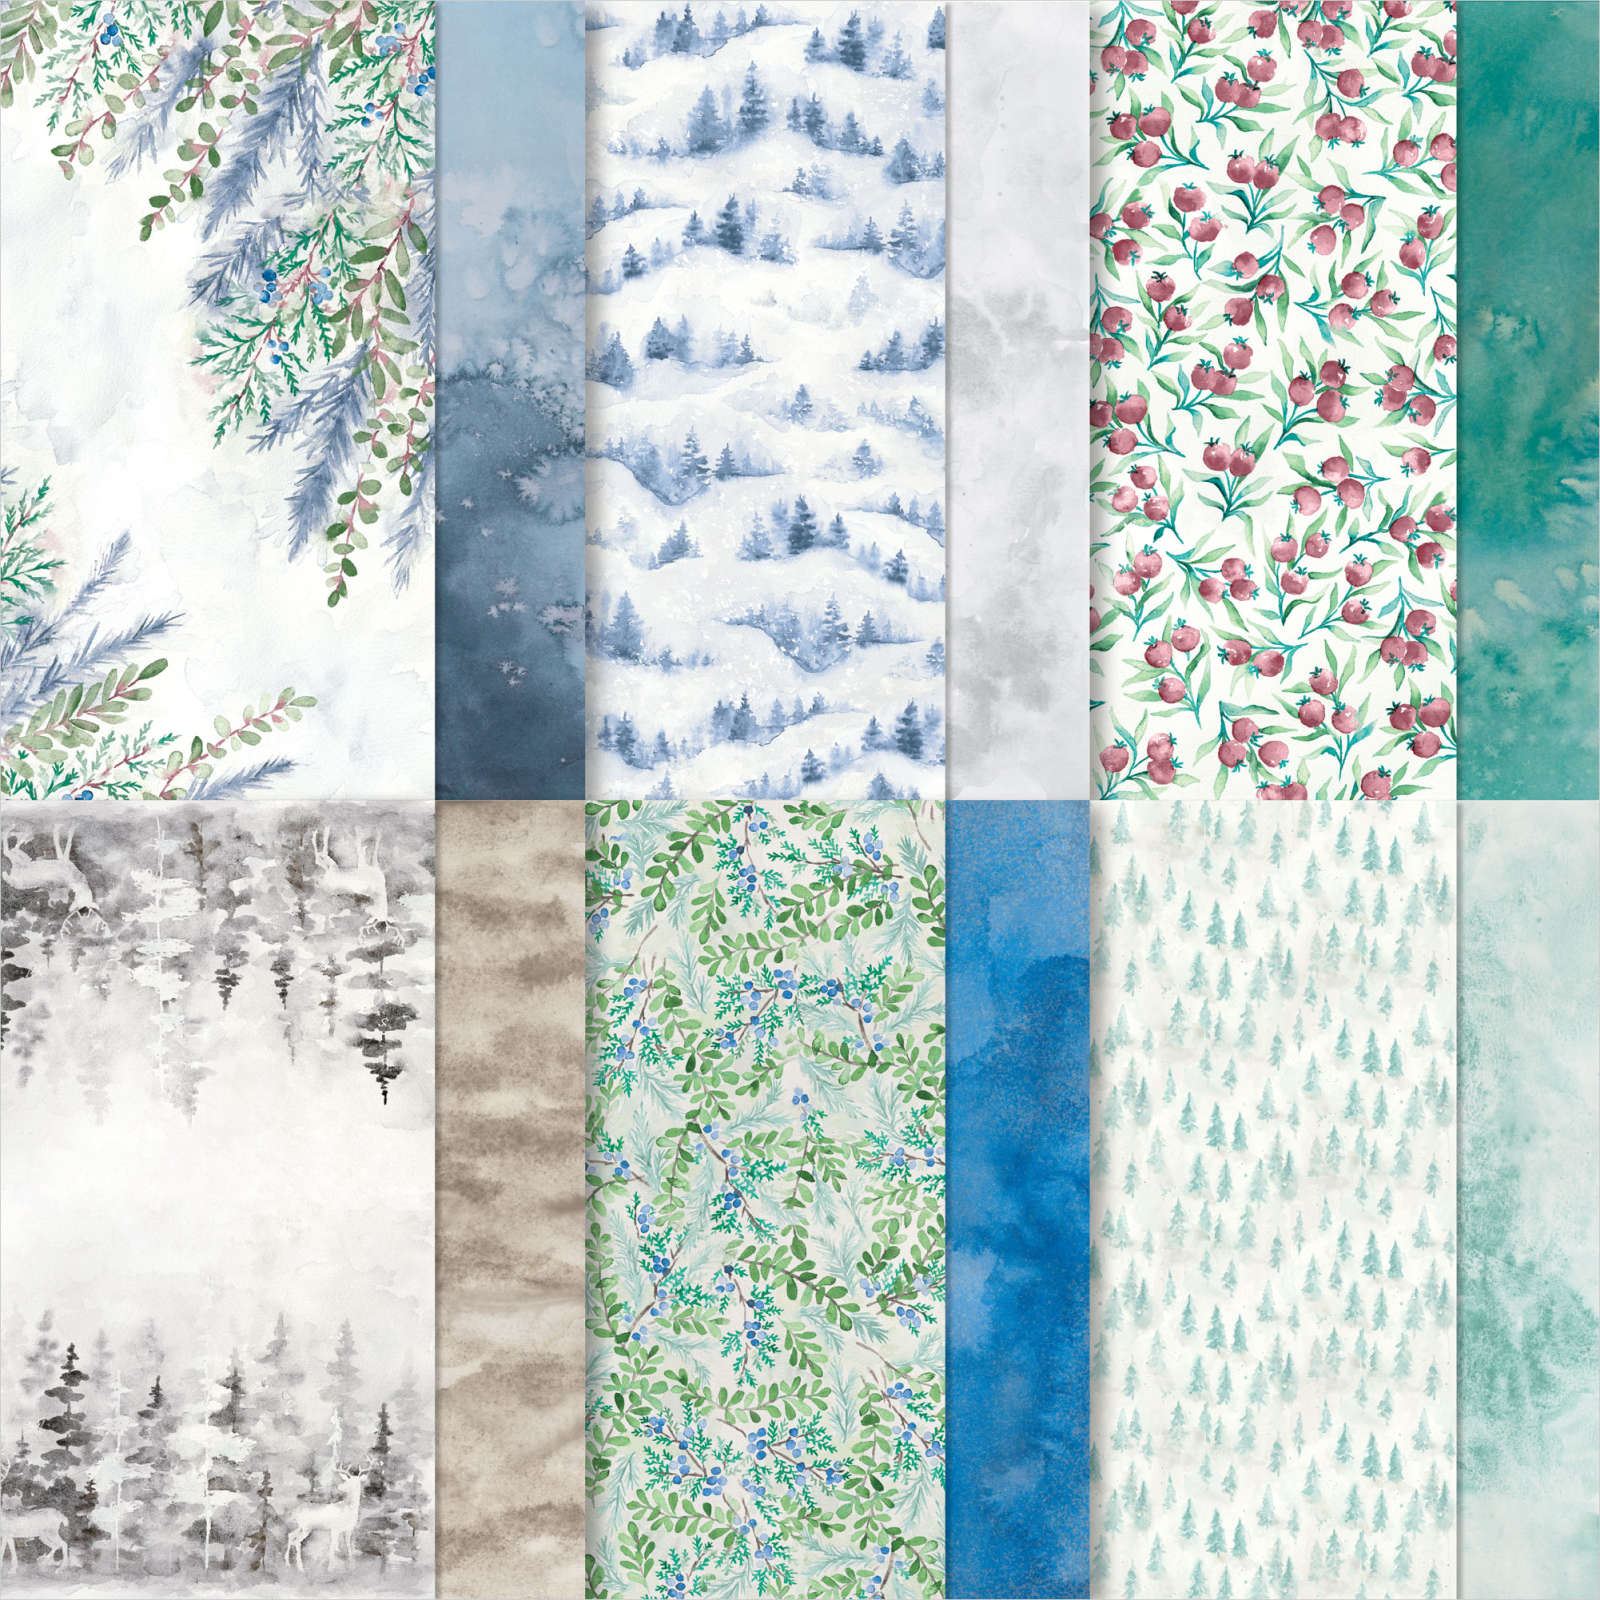
The Winter Meadow designer paper & the Magical Meadow stamp & dies bundle are among my favorites from the 2023 Holiday catalog. Pretty products produce pretty projects!  Say that three times! Ha! 

I was playing with the designer paper and had these two pieces among the scraps in my paper pack. I simply added a layer of Blueberry Bushel card stock to one piece and added them to the White card base offset from each other for balance.  Easy peasy! 

Measurements:

  • Card base 8 1/2" X 5 1/2" score at 4 1/4"
  • DSP 1 piece at 2 1/2" X 4" and 1 at 2" X 4 1/4"
  • Blueberry Bushel 2 3/4" X 4 1/4" 

Of course the pretty dies help a lot too. The greeting label is from the Nested Essential dies seen here and the leaves are both from the Magical Meadow bundle seen here.  

Next I added a greeting layer – heat embossed with Silver embossing powder & my Heat Tool.  Adding the White & Silver mesh ribbon in loops under it sure gives a great finishing touch! To add the loops of ribbon I created them and pressed them to the back of my greeting, after I added some Seal tape runner of course.  

I saw that this beautiful Winter Meadow designer paper is in low inventory; grab it while you can here. 

~~~

November Specials: 

*current host code: 4D2ZDS6Q

Click on the photo below to see all of the new online products


All Posts

  • Retro style circles layout; super easy! Catch the Live video tonight!


    Tonight at 7:30 pm Central Time I'm sharing how to make these retro style circle cards on Facebook Live.  Click here to join me.   You can also see this video below!

    Basically you need three sizes of circle dies or punches for the start of this layout.  Cut them in half and layer together with the edges meeting on one side. Adhere and add a long greeting between the two. 

    Watch how on my FB Live replay!

    Measurements:

    • 5 1/2" X 8 1/2" card base
    • 3 1/2" X 4 3/4" Whisper White; the greeting strip is about 5" long and either 1/2" or 3/4" wide depending on your greeting image.
    • 1" X 5 1/2" horizontal strip
    • Circles from the Stitched Shapes dies are the largest three circles. 

    You'll want ink, stamps and embellishments that coordinate with your Designer Paper.  Remember you could use card stock instead of DSP. 


    Products used:

    • Designer papers – Heartwarming Hugs, new Classic Christmas & Snowflake Splendor
    • Stamps – Tree Angle, Snowflake Wishes & Curvy Christmas
    • Colors – Real Red & Olive, Seaside Spray & Night of Navy, Sahara Sand & Cherry Cobbler  
    • Other: Stitched Shapes dies, Curvy Dies & Pick a Banner punch

    ~~~

    November Specials!

    Current Host code is GRC9VVUU


    All online orders receive my FREE Curvy Celebrations 22 project PDF Tutorial! 

    Leave a Reply

    Your email address will not be published. Required fields are marked *

  • Curvy Christmas & the Postage Punch


    Check out this easy card using the new Curvy Christmas stamp set and the Postage Punch!  

    It's super simple! Here's how I made it:

    1. Stamp the curvy trees image on the White CS using Shaded Spruce ink.  Color the trees with a Light Shaded Spruce Blends marker.  Add a tiny star using Cherry Cobbler ink on one tree. Adhere it to the Cherry Cobbler layer and to the main card.
    2. Punch out three pieces of Classic Christmas designer paper with the Postage Punch seen here.  Adhere to the White CS. 
    3. Stamp the greeting in Cherry Cobbler ink on a 1/2" strip of White CS.  Punch the ends with the Banners Pick a Punch. Add it to the card with mini dimensionals. 
    4. Finish with a few Holiday rhinestones. 

    You can see this stamp set here; it's only available through January 4th.  And the Classic Christmas Designer Paper is here while supplies last. 

    Remember that everyone who orders any of these products or places an online order with me in November will receive a free 22 project PDF tutorial featuring the Curvy Celebration products! 


    ~~~

    November Specials!

    Current Host code is GRC9VVUU


    All online orders receive my FREE Curvy Celebrations 22 project PDF Tutorial! 

    Leave a Reply

    Your email address will not be published. Required fields are marked *

  • Gift Wrapped Box Fold Card with video


    Check out this cute Christmas card we made at my October Card Clubs!  It's a box fold card; a super cute but easy fun fold. 

    The colors are Real Red with Granny Apple Green & White. The dies on the front are the Stitched Shapes and Hippos & Friends.

    It even folds flat for mailing!  As you can see the back is similar to the front; leaving some space to write or sign the card.  

    I used the Gift Wrapped punch bundle from the Holiday catalog.  You can see it here. 

    Check out the video and measurements below. 

    Here's the video: 


    Measurements:

    Real Red 4 1/4" X 11" scored at 5 1/2", 7", 9" and 10 1/2"
    Granny Apple Green 3 5/8" X 4 7/8" (2 pieces) plus scrap for die-cut
    Whisper White 3 1/2" X 4 3/4" (2 pieces) plus scrap for circle die-cut and bow

    ~~~

    November Specials!

    Current Host code is GRC9VVUU


    All online orders receive my FREE Curvy Celebrations 22 project PDF Tutorial! 

    Leave a Reply

    Your email address will not be published. Required fields are marked *


Notice: LeeAnn Greff, Independent Stampin’ Up! Demonstrator, Manager. The content of this website is my sole responsibility as an independent Stampin’ Up! demonstrator and the use of, and content of, the classes, services, or products offered on this website is not endorsed by Stampin’ Up! Copyright 2025