/


Latest Post

Beautiful Team Swaps; featuring a tree theme


Last weekend we held our monthly Flowerbug's Team meeting and swap.  I can't wait to share all of the cards with you!  Our theme was to use leaves, trees or water on a card and each and every one is amazing!!! I'll share a few each day this week.  

First is a card made by Annette featuring the Beauty of the Earth designer paper.  

The clean and simple design really shows off this beautiful designer paper – Beauty of the Earth.  It is on the retiring list right now; see it here.  The bottom strip of a line of trees is one of the papers in this pack.  What a perfect way to show it off and how well it coordinates with another sheet she used for her large circle.  The sentiment is from 'In the Moment' stamp set.  This was cased from Rachael Tessman.  

~~~

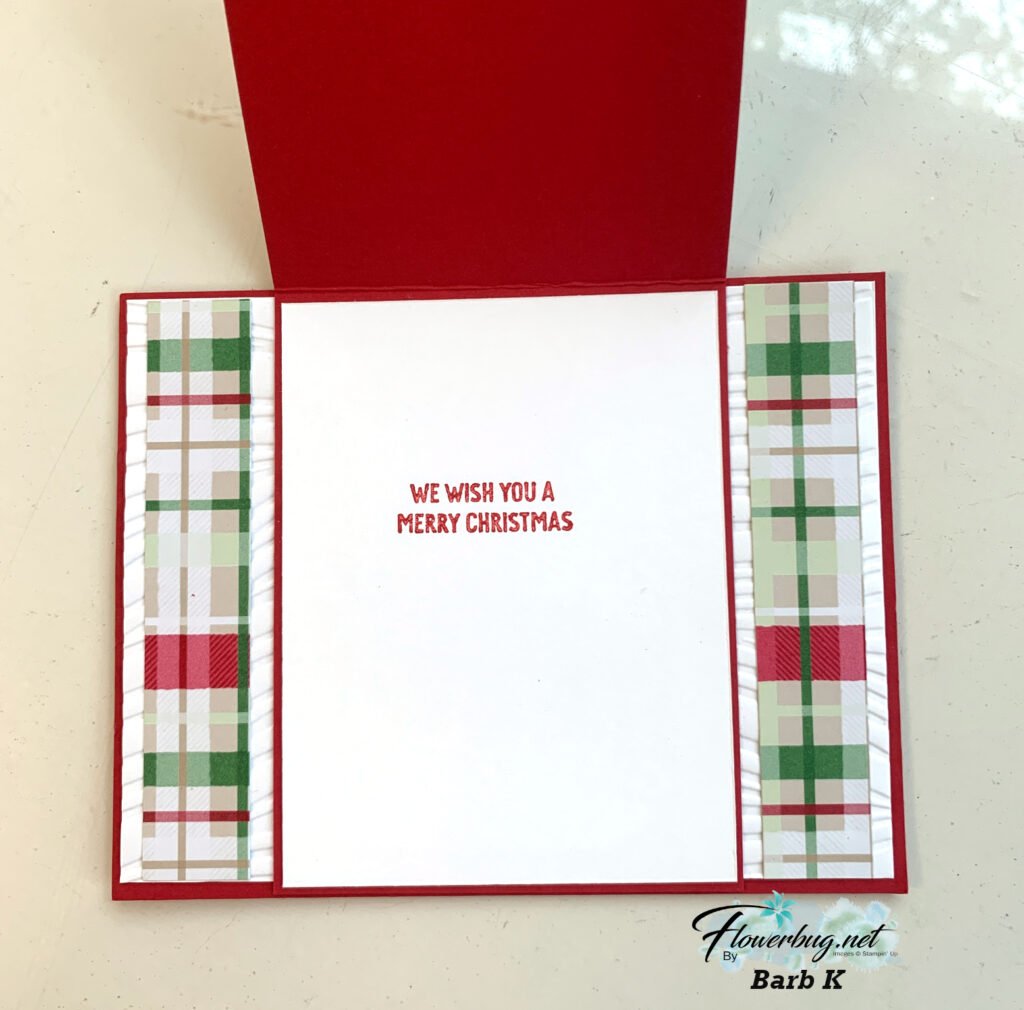
Next is a card created by Marilyn. She also used the pretty Beauty of the Earth designer paper. 

The card stock is Night of Navy and she used Old Olive accents with the Bough Punch.  The dies are the Stitched So Sweetly which are on the retiring list and one I'm soooo sad to see going away!  See it here.  

Her card is a fun fold – Card base is 5 1/2" X 8 1/2" scored at 2 1/8" & 4 1/4" on the 8 1/2" side.  The DSP is1 7/8" X 5 1/4"

~~~

Next is a pretty card made by Tracey.  She is featuring the Beauty of Friendship bundle seen here. 

Her main image is stamped on our 12 X 12" Linen paper seen here.  After stamping her tree and cloud she colored the background with Blends markers!  Who knew you could stamp & color on it so beautifully!?  

She adhered the linen (since it's adhesive-backed) to her paper first.  Then used the Take Your Pick tool to pull away some of the threads on the sides.  Isn't this amazing!  


I'll share more of our Flowerbug's incredible swap cards tomorrow.  

~~~

The Last Chance list is out!
Tons of items from the 2021-22 Annual Catalog are retiring and many are deeply discounted from 20-50% off.
 
Remember that these items are while supplies last and may run out. 
Click here to see it all online along with the discounts.

Host codes: E7S6DEAP

 *click here to order 

If your order is over $50 you'll receive free Polished Dots or In Color jewels and 3 hand made cards from me.


Don't forget about my loyalty rewards! 

Click here to download yours and earn a $50 shopping spree!  

All Posts

  • Best Tips for successful Shaker Cards with video tutorial!


    Who wouldn't like to receive a shaker card?!  They're fun, shakable and hard to resist playing with. 

    I made a bunch of these for our July Team card swap featuring 'window sheets'. I love the fact that I could get multiple, colorful die-cut flowers with the Extraordinary Floral Washi Tape and the coordinating die-cut. Just add it to another piece of cardstock and die-cut. So fast & EASY! 

    Notice the sponged green designer paper above. That is the Irresistible Designs 12" DSP seen here.  I added Olive ink to it with a Blending Brush; the printed embossed designs 'resist' the ink.  Pretty cool! 

    I used the Paper Tags stamp set – stamping the greeting directly onto the window sheet with Black Stazon ink. Then I turned it over to add a bit of Flirty Flamingo blends marker on the 'celebrate' part.  

    My colors include Flirty Flamingo, Old Olive and White for a fresh floral card design. Want to know the steps to achieve a shaker card?  Best to grab the free project sheet below or watch the video tutorial. 

    Here's the free project sheet with measurements for you. Click on the following link to print or download it.  Download Paper Tags Shaker Card


    Below is the video tutorial for this neat shaker card.  Watch to get the tips for success on making one plus another pretty card featuring the Extraordinary Floral washi tape. 

    ~~~

    July Specials:


    New Online Exclusives are here!  Click here

    ~~~

    Get my Turtle-y Cute PDF tutorial free with any online order in July!

    Leave a Reply

    Your email address will not be published. Required fields are marked *

  • Another ‘WOW’ card swap with the Beautiful Butterflies stained glass technique


    Today I have another stunning Team card swap made by Tracey featuring Window Sheets. She featured the Beautiful Butterflies bundle seen here:

    Her colors include Shy Shamrock with Petunia Pop, Black, White & Gold embossing. 

    Here's how she made this card:

    1. Texture the White layer with the Hybrid embossing folder; add to the Petunia layer and the card base. 
    2. Ink the butterfly image in Versamark and stamp on the Window sheet. Heat emboss with Gold embossing powder. Die-cut with the coordinating die.  *she did say some of the embossing powder on the edge frayed off when it went through the die-cut.  
    3. Color the back of the butterfly with Blends markers.  Adhere to the White cardstock layer with Foam Strip adhesive in the center only. Add the center 'body' die-cut.
    4. Heat emboss the greeting onto the Black strip with White embossing powder.  Finish with gems. 

    Here's the full bundle that includes stamps, dies and a Hybrid embossing folder. What is a 'Hybrid Embossing folder?  It's where you can cut AND emboss/texture at the same time!

    And look how she finished the inside!  She used the Baby Wipe technique to achieve a multi-colored butterfly. 

    Thanks so much for your gorgeous card Tracey! 

    ~~~

    July Specials:

    New Online Exclusives are here!  

    ~~~

    Last Chance List has been updated!  see it all here. Don't miss out on the deals!

    ~~~

    Get my Turtle-y Cute PDF tutorial free with any online order in July!

    Leave a Reply

    Your email address will not be published. Required fields are marked *

  • Amazing Trusty Tools bridge card swap with window sheet technique; so cool!!


    Look at this incredible card Jacki made for our Team swap in July.  This month's theme was to feature window sheets.

    She used the Timeless Plaid and the Notes & Totes stamp set here.  Her colors include Black, Misty Moonlight, Silver Foil and Pecan Pie. 

    Here's the view when you flip the top layer up:

    She paid special attention to both sides of her bridge, adding the card stock & DSP layers to both the inside and the front!

    That dotted die-cut background is part of this bundle!  She really made the most of the dies here!  See the dies here and the coordinating stamp set here. 

    This is what it looks like fully opened. The inside greeting is from the With You in Mind stamp set. 

    Measurements:

    • Black card base 5 1/2" X 8 1/2" score at 4 1/4" – from the top, cut to the score line on both sides at 1 1/4"
    • Window sheet – 5 1/2" X 4 1/4"
    • Misty Moonlight – greeting strip 2 3/8" X 1 1/8", center is 2 3/4" X 4", 4 sides are 1 1/8" X 4", center is 2 3/4" X 4", inside back is 5 1/4" X 4"
    • White inside 2 7/8" X 3 3/4", dotted die-cut 2 1/2" X 3 3/4", greeting strip 3 1/4" X 1"
    • DSP strips 6 pieces at 1" X 3 3/4"


    I'm so impressed; this is definitely a 'WOW' card!  Thanks so much Jacki! 

    ~~~

    July Specials:

    New Online Exclusives are here!  

    ~~~

    Last Chance List has been updated!  see it all here. Don't miss out on the deals!

    ~~~

    Get my Turtle-y Cute PDF tutorial free with any online order in July!

    Leave a Reply

    Your email address will not be published. Required fields are marked *


Notice: LeeAnn Greff, Independent Stampin’ Up! Demonstrator, Manager. The content of this website is my sole responsibility as an independent Stampin’ Up! demonstrator and the use of, and content of, the classes, services, or products offered on this website is not endorsed by Stampin’ Up! Copyright 2025