/


Latest Post

Back from Disney World – the 2024 Stampin’ Up! incentive trip


We had a wonderful time on the Stampin' Up! annual incentive trip to Disney World.  We got home late last night and even though we hoped to have a restful trip we were quite exhausted. These North Dakotans were not ready for 96 degree heat!  

I'll share a few of our favorite photos today and more of Stampin' Up! products tomorrow. 

This is what we saw on the TV screen when we arrived to our room: 

Below is the view from our room in the Grand Floridian Resort at Disney World:

This basket was found in our room at the end of the first night there.  A super neat felt basket (that folded flat) filled with some of our favorite snacks & beverages (a survey was sent to us last fall). 

The beautiful nightly fireworks we could see from our resort. We spent many evenings at the outdoor cafe visiting with our friends and enjoying them. 

I had to get a picture with Sara (SU CEO) with the paper chain background!  

Our friends, Dan & Lori Heiling, Susie & Deke Wood and us at Hollywood Studios.

We at at the 50's Primetime Cafe in Hollywood Studios.  

I'll share more photos tomorrow! 

Disclaimer: Less than 1% of Stampin’ Up! demonstrators earn the incentive trip.

~~~

May Specials

Starter kit deal! 

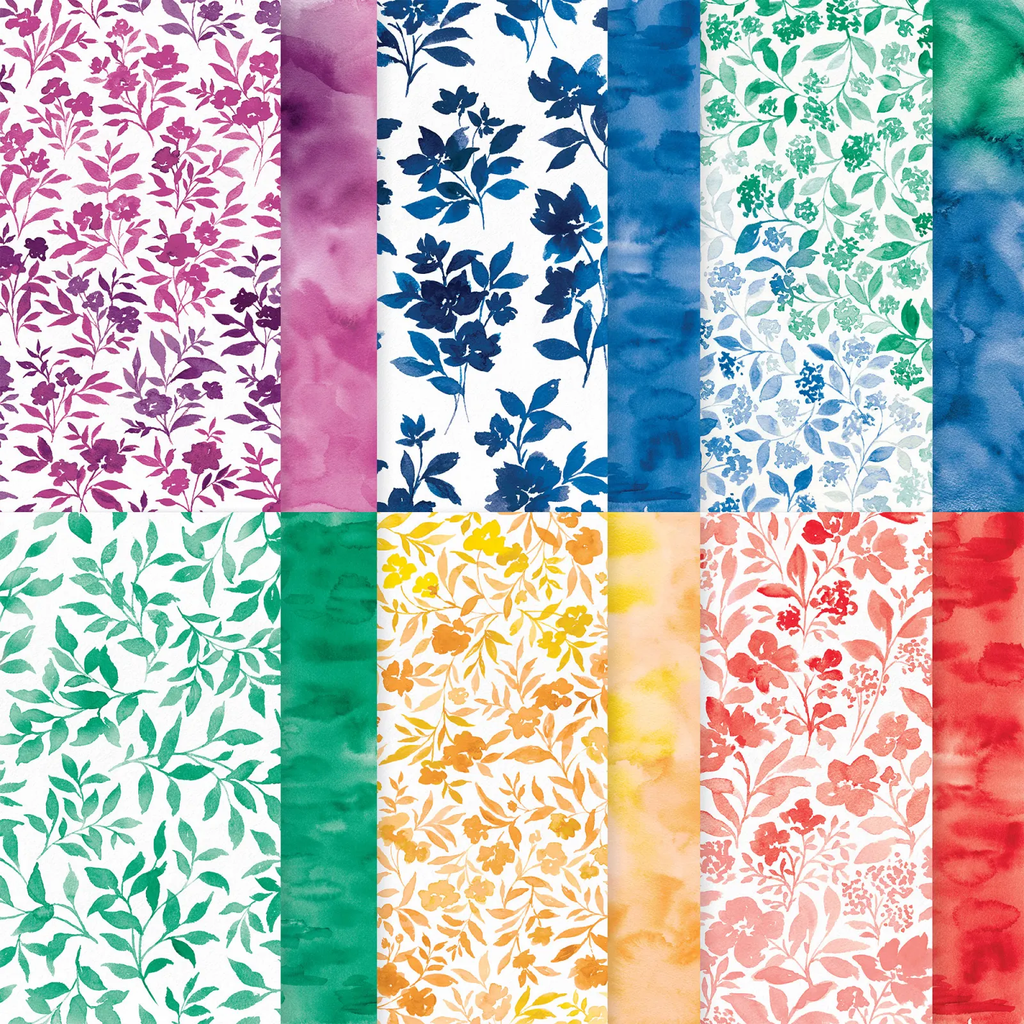
Reserve my new Designer Paper Share here

Get $166 in product of your choice for just $99 with free shipping! Click here!


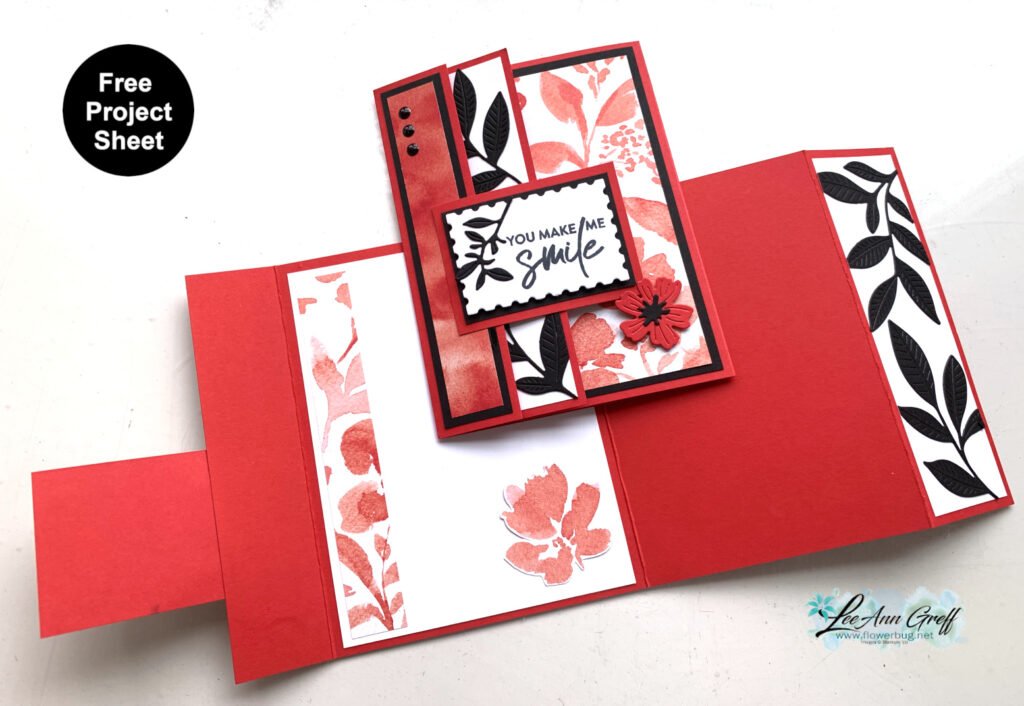
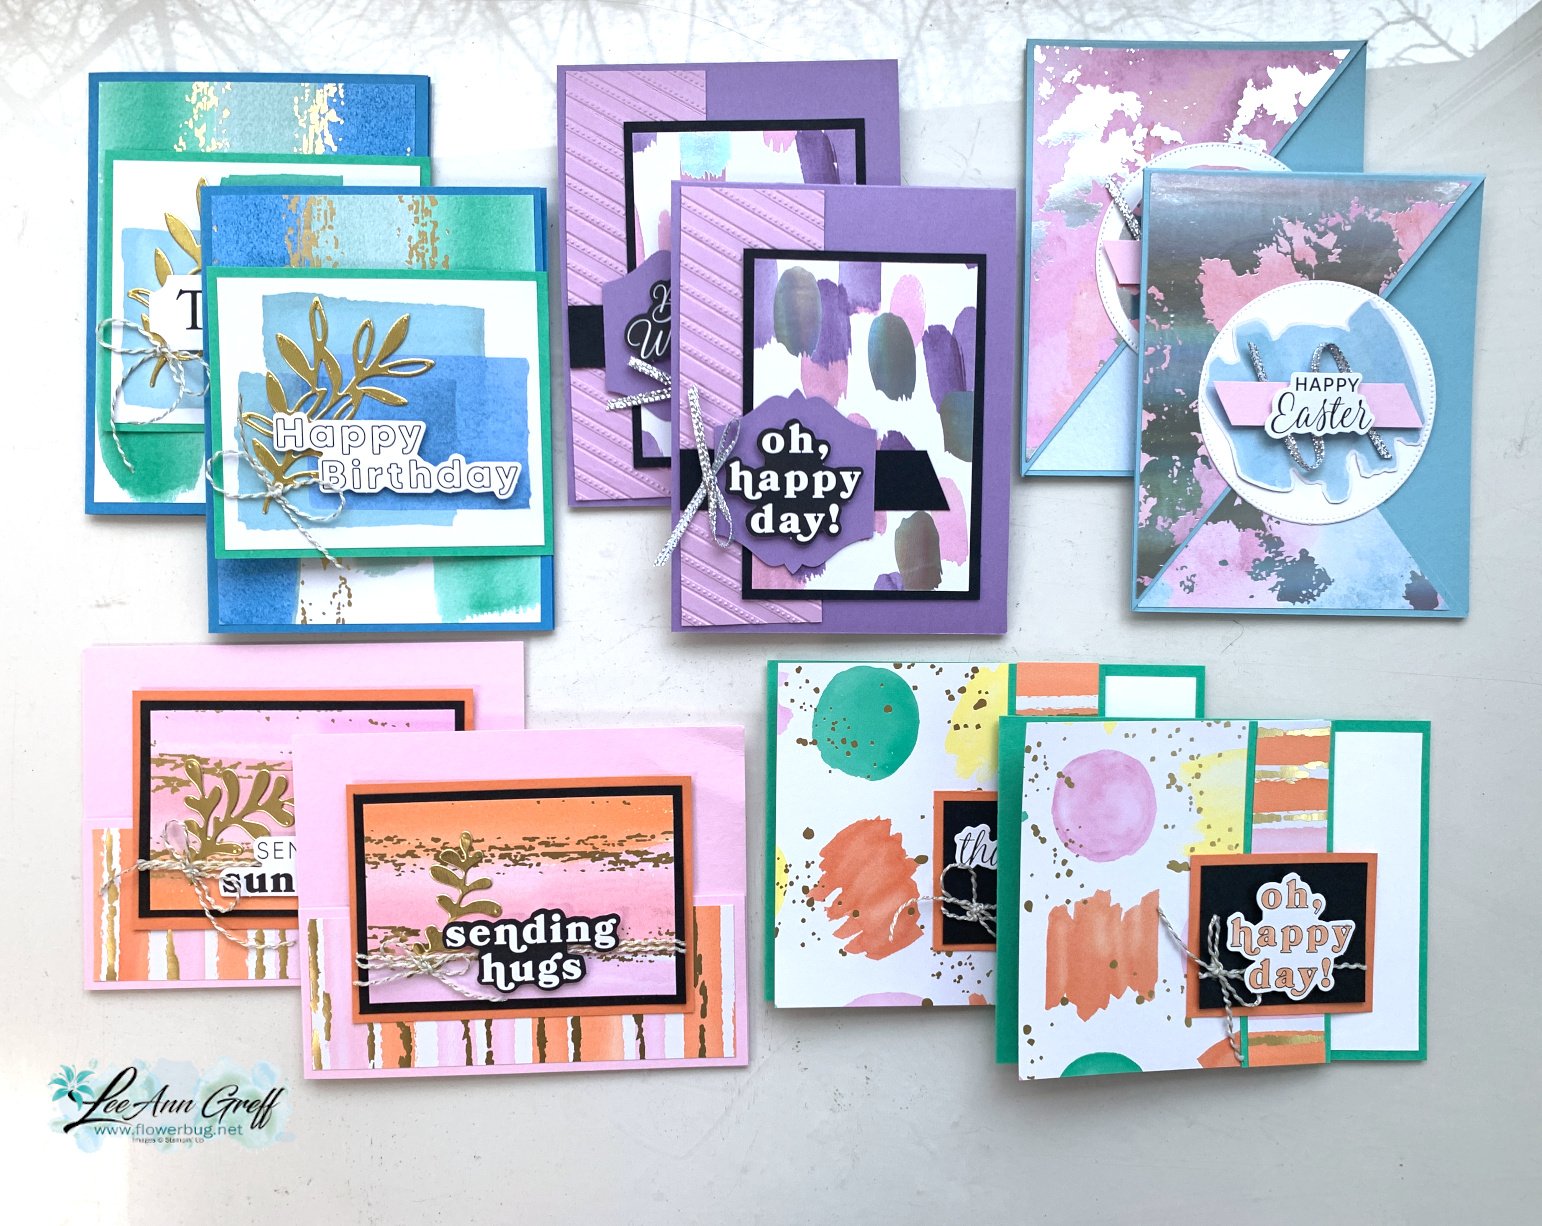
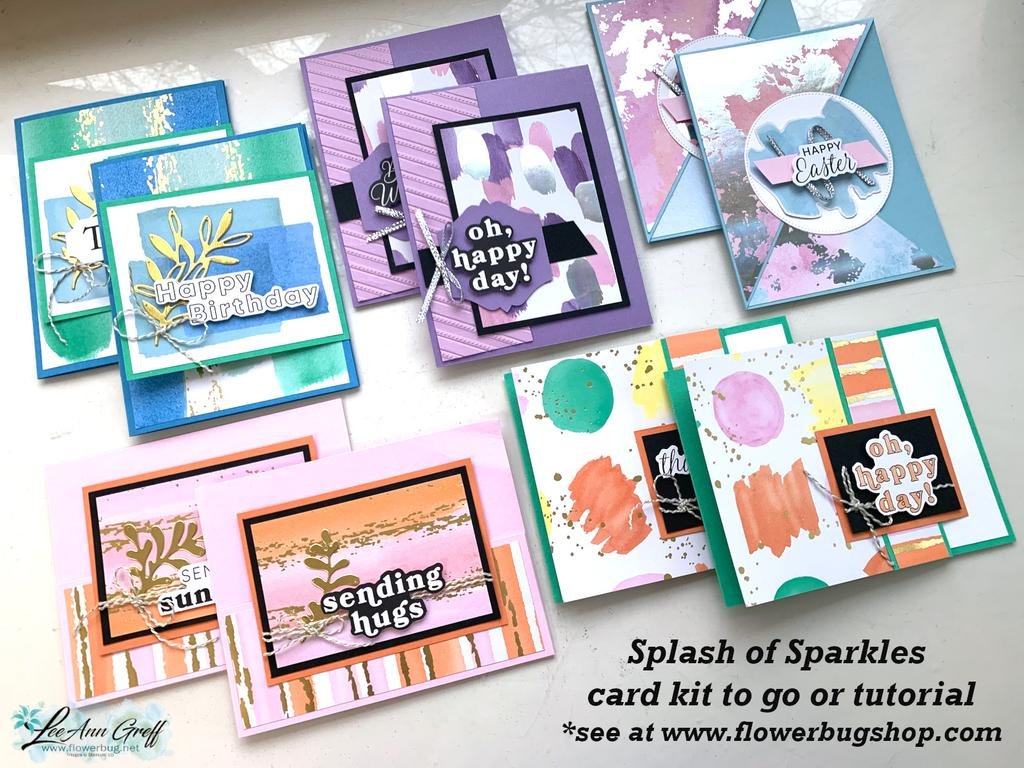
Earn free card kits in May with online orders! Get 4 kits with a $60 order and orders over $80 receive all 6 cards. All you need are greetings, gems and adhesives to assemble. 

Order here 


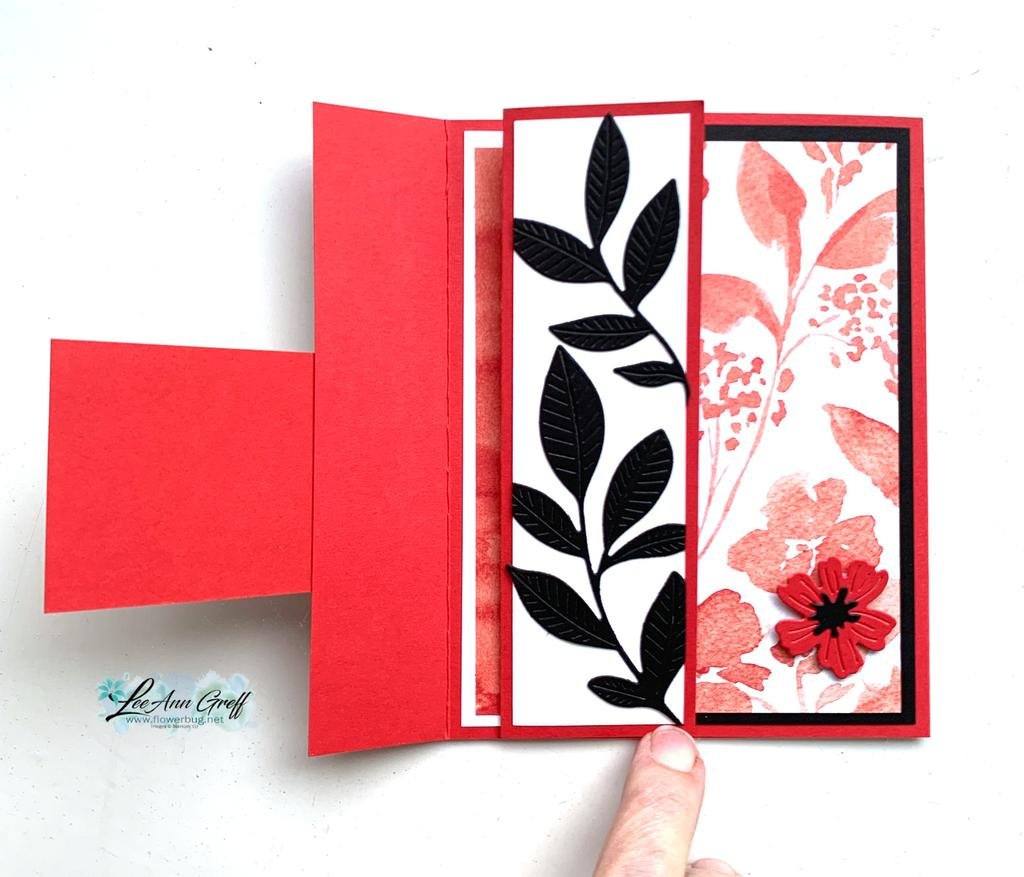
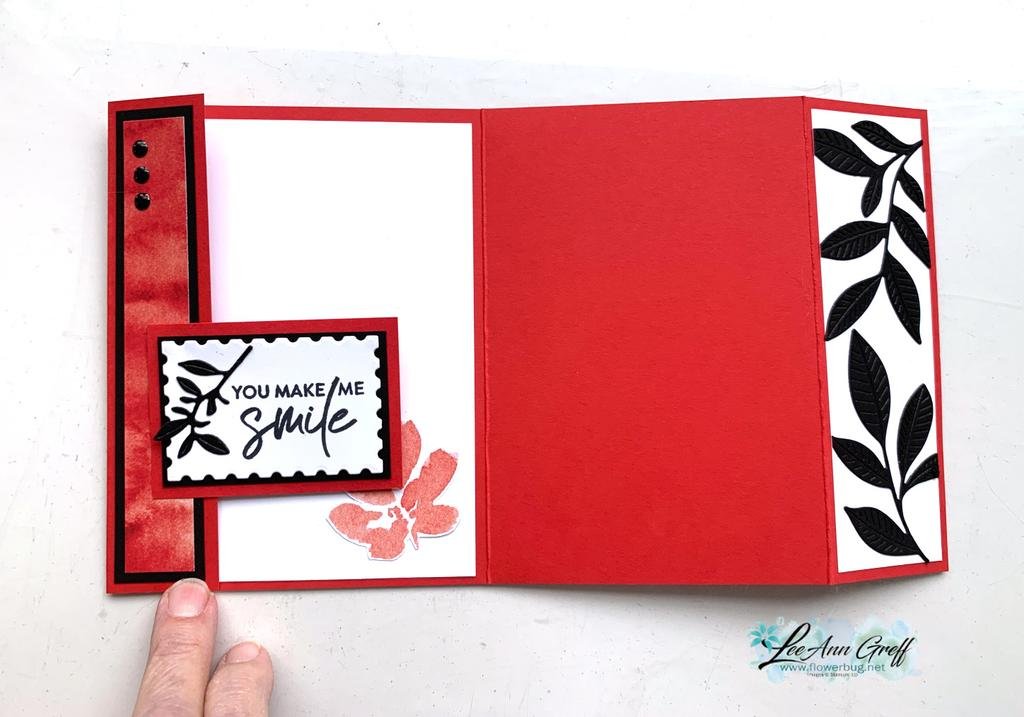
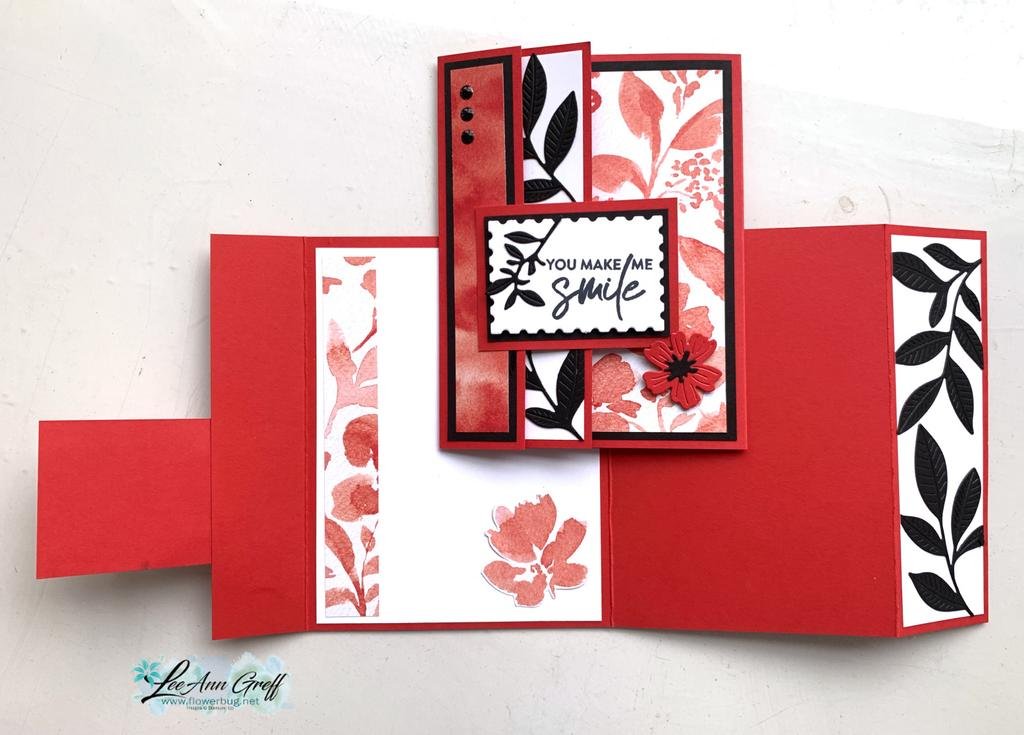
Get my Florals in Bloom PDF tutorial free with any online order in May!

Get a free PDF tutorial of your choice with any order over $55 at my shop here 

All Posts

  • Beautiful Embossed card swaps with foil accents


    Our Team swap theme was to use foil or heat embossing on our cards. This was a fun theme that is especially easy around the holidays.

    Today I’m sharing Jonna’s stunning card in Black, Silver & White:

    It’s a ‘Wow’ card for sure! She textured the Basic Gray card layer with the Sunflower 3D embossing folder seen here first and then rubbed it with Versamark ink. Then she heat embossed it with Silver embossing powder. Just gorgeous!

    Her measurements are as follows:
    – Embossed layer 3 1/2″ square
    – Black layer 3 3/4″ square, Black greeting layer 3 3/4″ X 1 1/4″
    – White is 4″ X 5 1/4″, White greeting layer is 3 1/2″ X 1″

    The greeting is from the Branching Out stamp set.

    It’s a beautiful card Jonna!

    ~~~

    The kits below will ship out this week so you have plenty of time to finish them by December. And they’re quick & easy too!

    The Christmas Tags & More cards are easy because there isn’t any stamping. The greetings are from the gold foil ephemera pack included in the kit.

    This kit to go includes a share of the festive designer paper, the ribbon, the peppermint gems, the ephemera greetings, the PDF tutorial and video too. Plus the pre-cut 10 cards that are all fun folds. All for $30 plus shipping. It’s a fabulous deal!

    Don’t wait long; I have just a few left. Go here to get yours. *You will need to cut your new designer paper for the cards but my directions make that simple.

    ~~~

    The other kit I created this month is also easy but does require stamped greetings. But there is very little prep & just a little trimming of the card bases to create these beautiful wintery cards:

    These cards could be winter or holiday; it’s your choice when you stamp the greetings.

    This kit originated from a former Paper Pumpkin kit but I jazzed up the cards and added more to create 12 gorgeous cards. This kit includes 12 envelopes and a share of Peppermint gems plus the PDF tutorial.
    I have a few left so grab yours soon. This kit is $29 and you can see it here.

    **Remember to check out all of my kits to go and tutorials here at my shop; choosing more than one will save on shipping.

    ~~~

    ~~~

    November Specials

    New Online products are available on November 4th.
    See them here.

    Get the Peaceful Garden suite tutorial FREE with any online order in November!

    Leave a Reply

    Your email address will not be published. Required fields are marked *

  • A great way to add multiple pieces with the Press & Seal technique


    I shared this pretty card on last week’s video featuring new products and a neat and easy technique. If you’ve ever struggled to add multiple pieces perfectly, as you’ve laid them out, this will help you so much!

    My colors include Pretty Peacock, Lost Lagoon and White. The large die-cut is from the Perennial Postage dies and the greeting & leaves dies are from the Creative Haven dies seen here.

    Tips on using Press & Seal to adhere die-cuts perfectly in place:
    I placed the center greeting piece in the center of the Postage die-cut. Then I tucked each die-cut leaf under and around it placing them just where I wanted them. Next I lifted the greeting piece off and pressed a piece of my Press & Seal kitchen wrap onto the die-cut leaves. Once they were all stuck on the wrap I turned them over and added adhesive to the back. I then turned it over and adhered it to my White layer. Let it dry or set a bit and then carefully peel off the Press & Seal wrap.

    I love this technique!!

    I created a free project sheet for this card with measurements, directions and a product list. You can see or download it here.

    Below is the video tutorial for this card and one more pretty Easel card too.

    The kits below will ship out this week so you have plenty of time to finish them by December. And they’re quick & easy too!

    The Christmas Tags & More cards are easy because there isn’t any stamping. The greetings are from the gold foil ephemera pack included in the kit.

    This kit to go includes a share of the festive designer paper, the ribbon, the peppermint gems, the ephemera greetings, the PDF tutorial and video too. Plus the pre-cut 10 cards that are all fun folds. All for $30 plus shipping. It’s a fabulous deal!

    Don’t wait long; I have just a few left. Go here to get yours. *You will need to cut your new designer paper for the cards but my directions make that simple.

    ~~~

    The other kit I created this month is also easy but does require stamped greetings. But there is very little prep & just a little trimming of the card bases to create these beautiful wintery cards:

    These cards could be winter or holiday; it’s your choice when you stamp the greetings.

    This kit originated from a former Paper Pumpkin kit but I jazzed up the cards and added more to create 12 gorgeous cards. This kit includes 12 envelopes and a share of Peppermint gems plus the PDF tutorial.
    I have a few left so grab yours soon. This kit is $29 and you can see it here.

    **Remember to check out all of my kits to go and tutorials here at my shop; choosing more than one will save on shipping.

    ~~~

    ~~~

    November Specials

    New Online products are available on November 4th.
    See them here.

    Get the Peaceful Garden suite tutorial FREE with any online order in November!

    Leave a Reply

    Your email address will not be published. Required fields are marked *

  • New! Delicate Framing Easel card with free project sheet


    I shared this pretty card on last week’s Live video. I also have a free project sheet for you as well.

    It features one of our new online products called Delicate Framing; a beautiful greeting set.

    My colors include Lost Lagoon, White & Gold foil. The other products include Creative Haven dies (new), Everyday Arches dies, Gold & Black twine & the Textured Notes stamp set (leaves).
    Here are the Creative Haven dies:

    I focused on these two new products in my projects – the Creative Haven dies seen above for the leaves and the Delicate Framing stamp set for it’s greetings. Both are new this month.

    Aren’t the greetings wonderful? See the Delicate Framing set here.
    As you can see, it’s an easel card which is quite simple to make. Add a second score line in the middle of your card base front and add something to the inside to hold it up.

    You can print or download the free project sheet here. *I recommend saving them to a file for easy access.

    Below is the video tutorial for this pretty card and one more featuring these products.

    The kits below will ship out this week so you have plenty of time to finish them by December. And they’re quick & easy too!

    The Christmas Tags & More cards are easy because there isn’t any stamping. The greetings are from the gold foil ephemera pack included in the kit.

    This kit to go includes a share of the festive designer paper, the ribbon, the peppermint gems, the ephemera greetings, the PDF tutorial and video too. Plus the pre-cut 10 cards that are all fun folds. All for $30 plus shipping. It’s a fabulous deal!

    Don’t wait long; I have just a few left. Go here to get yours. *You will need to cut your new designer paper for the cards but my directions make that simple.

    ~~~

    The other kit I created this month is also easy but does require stamped greetings. But there is very little prep & just a little trimming of the card bases to create these beautiful wintery cards:

    These cards could be winter or holiday; it’s your choice when you stamp the greetings.

    This kit originated from a former Paper Pumpkin kit but I jazzed up the cards and added more to create 12 gorgeous cards. This kit includes 12 envelopes and a share of Peppermint gems plus the PDF tutorial.
    I have a few left so grab yours soon. This kit is $29 and you can see it here.

    **Remember to check out all of my kits to go and tutorials here at my shop; choosing more than one will save on shipping.

    ~~~

    ~~~

    November Specials

    New Online products are available on November 4th.
    See them here.

    Get the Peaceful Garden suite tutorial FREE with any online order in November!

    Leave a Reply

    Your email address will not be published. Required fields are marked *


Notice: LeeAnn Greff, Independent Stampin’ Up! Demonstrator, Manager. The content of this website is my sole responsibility as an independent Stampin’ Up! demonstrator and the use of, and content of, the classes, services, or products offered on this website is not endorsed by Stampin’ Up! Copyright 2025