/


Latest Post

Baby Wipe technique and the easiest Shaker Card ever! Tips for success & Video Tutorial


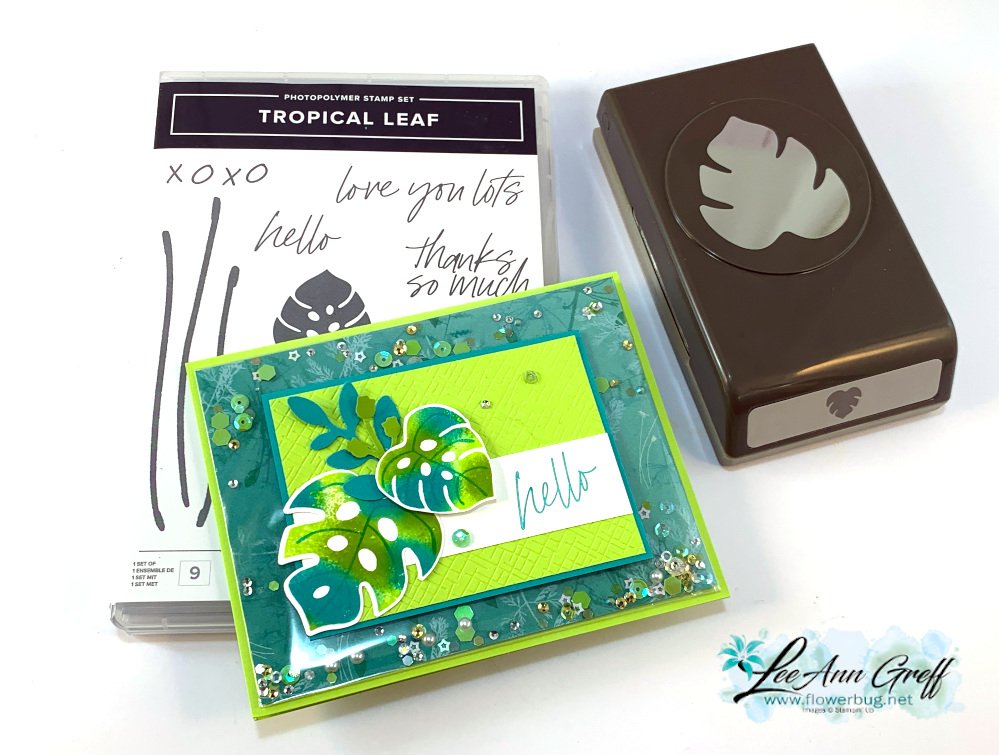
This card was cased from my good friend Susie Wood; creating comes naturally to her.  She's fast and super talented.  See her cute card here.  

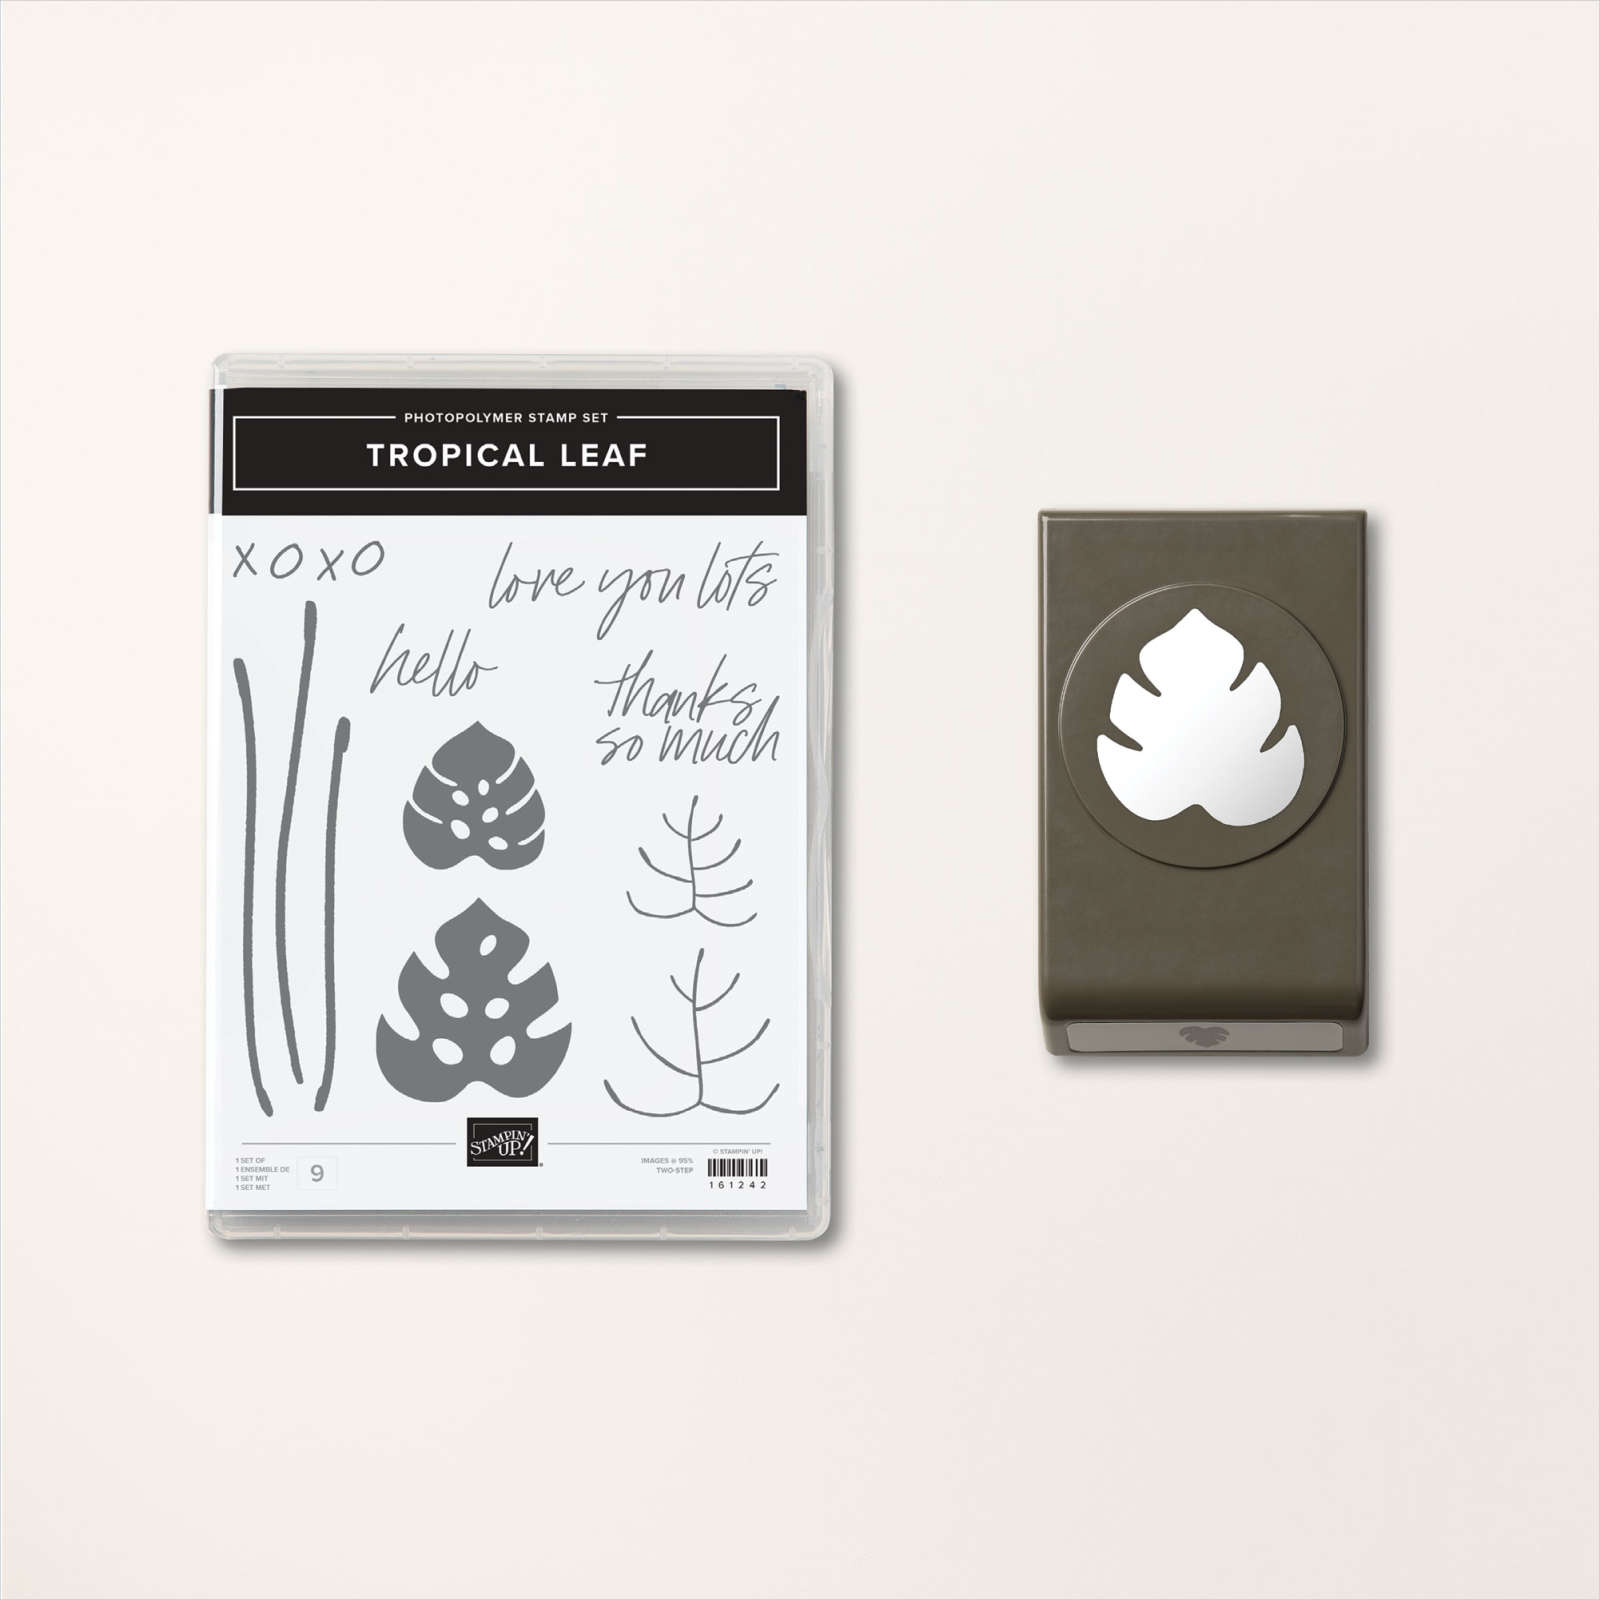
I used the Tropical Leaf bundle in the Online Exclusives section of our online store.  I also wanted to feature the baby wipe technique. 

The colors include Parakeet Party, Bermuda Bay and a tiny bit of Granny Apple Green.  The designer paper inside the clear envelope is Pretty Prints.  Here's how I created the clear envelope shaker:

My Pretty Prints designer paper layer is 5 1/4" X 4" and our clear envelopes are about 1/2" larger.  For the shaker elements to stay on the front side of the envelope it has to be tight and smaller.  So I added tear & tape to the back edge and folded the extra over tightly. Now, insert your shaker elements on the front pocket and fold down the end flap. Wallah!  You have a shaker card front!  

This DSP is from the Pretty Prints; soon to retire from the Annual catalog.  See it here. 
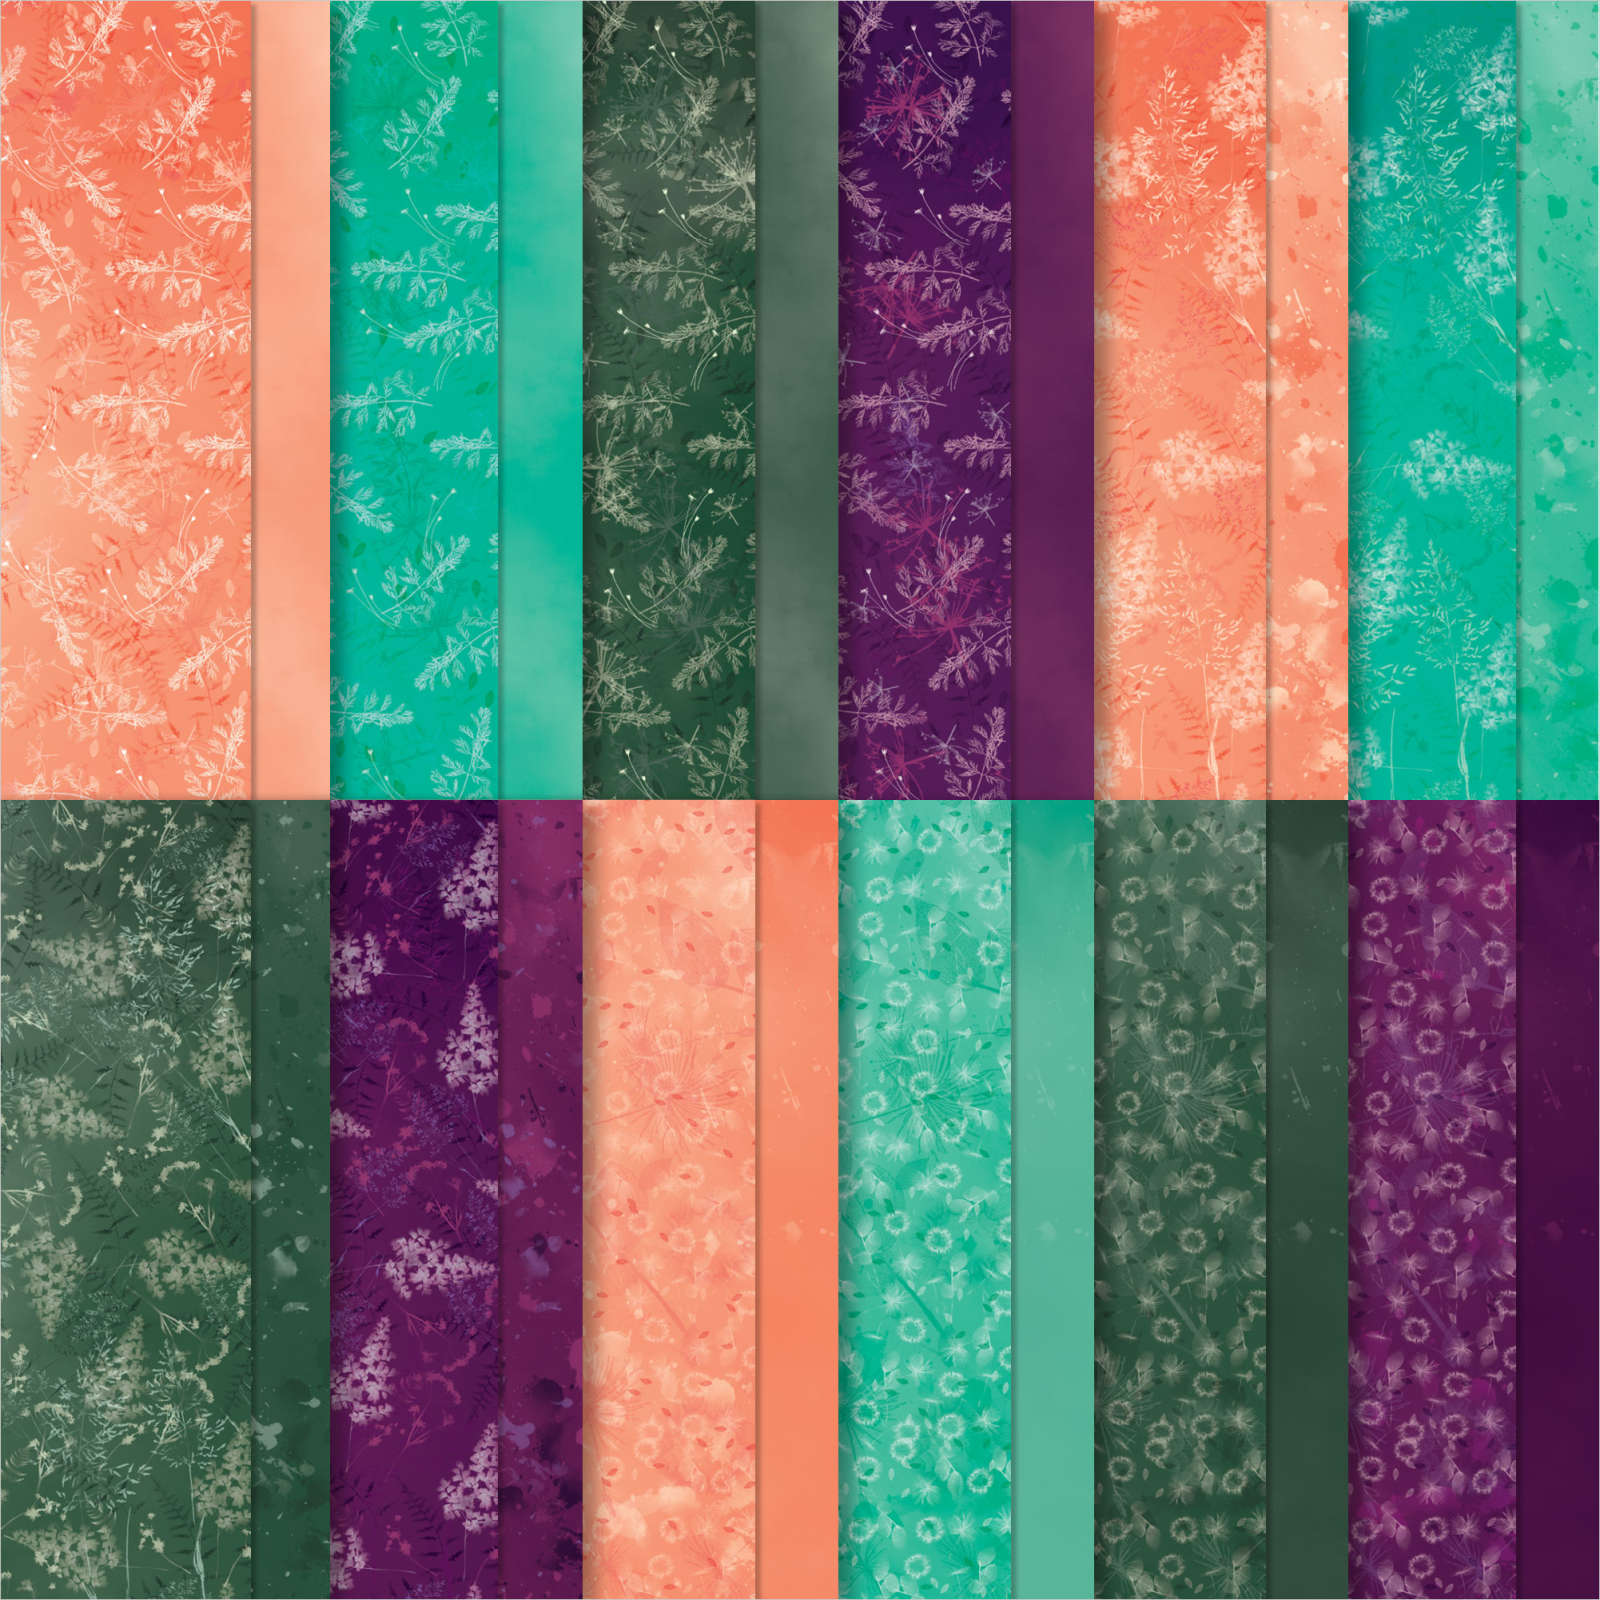
It includes some of my favorite colors – Bermuda Bay, Blackberry Bliss, Calypso Coral and Evening Evergreen.  

The CS layers on the front are added on top of this shaker element so you still get the feel of a real card; not all slippery.  Watch the video here or below to see how it's done.  It's the 2nd project of 3. 

You can see this unique Tropical Leaf bundle here: The font of the greetings in this Tropical Leaf stamp set are so unique; love it! 
Now to create the baby wipe leaves I made my own ink pad with a folded baby wipe.  

Tips for success of the baby wipe technique:

  1. Fold a baby wipe into a thick layer; at least 4 layers thick. Make your 'pad' as large as your largest stamp image.  Place it on a plate.
  2. Drop multiple drops of each color of ink refill onto the baby wipe, leaving room between colors for another color.
  3. I recommend at least 2 colors and up to 4 at the most. 
  4. Choosing colors?  Find complimentary colors in similar shades – blues/greens, yellows/oranges, oranges/pinks etc.  
  5. Choosing stamps? Solid images work best; outline images will not show off your colors well. 
  6. Ink your stamp in the new colored pad by tapping up and down in the same approximate place. Traveling while inking may muddy your colors. 
  7. Huff on the image and stamp.
  8. Depending on how much ink you added you can use your new 'ink pad' multiple times. Add more ink drops as needed.  

Here's how the inside was stamped:

Products used:

  • Tropical Leaf bundle
  • Pretty Prints DSP
  • Parakeet Party, Bermuda Bay and Granny Apple card stock and ink refills
  • For Everything and Sparkle & Shine sequins (Annual Catalog)
  • Clear envelopes (Annual Catalog)
  • baby wipe 
  • Bough Punch a big favorite!
  • Basics 3D embossing folder 

In the video below I demonstrate this fun baby wipe technique; Click here or on the photo below to watch the video.

~~~

March Specials:

See the new Online Exclusives here! 

*current host code: BFE4C2KM

Get a free class kit with online orders over $55 when using the host code above!

Earn free products with my loyalty rewards! 

Click here to download yours and earn a $50 shopping spree!

All Posts

  • Happy Valentine’s Day! Do you have a favorite??


    Happy Valentine's Day!  

    I shared this on FB last night and hoped you would to pick a favorite too!  I'm curious what the top pink Stampin' Up! color is….

    I have a ton of Valentine's swaps I want to share with you too.  Most of these are made by my stamping friends. I cannot give credit to all of them as their post-it or business card was lost as my local customers browsed through them.  

    My friend Susie Wood made this adorable Hello Ladybug card.  She used the Checks & Dots embossing folder on the Red layer. 

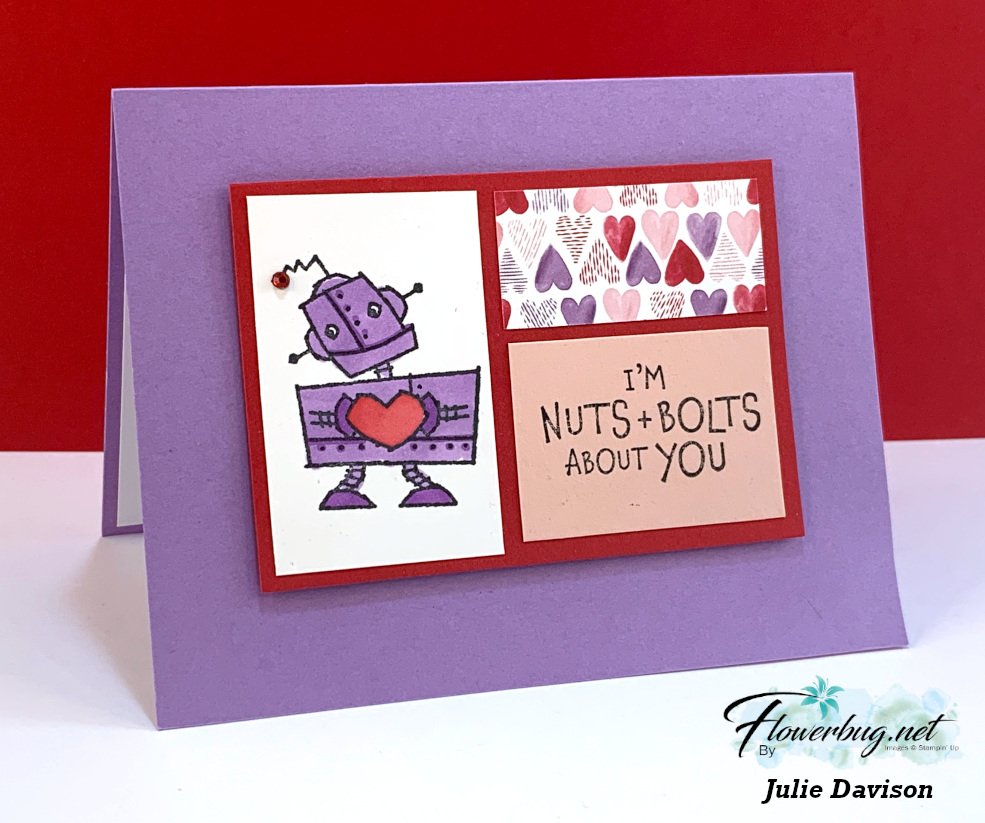
    This next one features the Nuts & Bolts stamp set & is made by Julie Davison.  

    This cute card lost it's post-it so I cannot give credit.  I love how the panels are cut apart but the Sweet Talk designer paper still shows it's pattern.  

    This next card was made by Jodi Reinert and features the Love & Happiness bundle seen here.  Love the textures! 

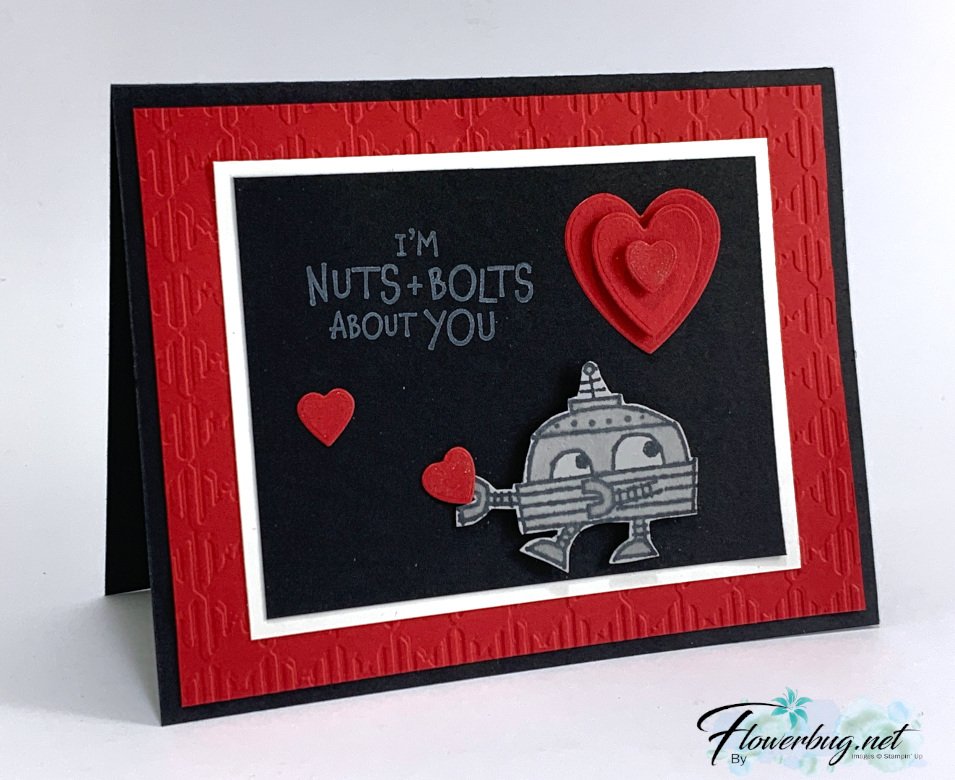
    This next card is so cute!!  It was also made by my friend Susie Wood. I love the chalkboard effect of stamping on Black with White Craft ink.  Nuts & Bolts is the stamp set & the Gingham embossing folder was used on the background. 

    Lastly is a sweet card made by Jennifer Cotton.  She used the Stitched So Sweetly dies and the Sweet Conversations stamp set.  

    ~~~

     Hot Deals in February:

    Choose $125 in product PLUS any 2 stamp sets free in February!

    It's just $99. Get FREE shipping too!

    Click here to get yours.


    Host codes: 3WCHFFUW

     *click here to order 


    Use the host code above & get a free Easel Calendar kit

    & the Gingham embossing folder with a $55 order in February, 2022! 

    Leave a Reply

    Your email address will not be published. Required fields are marked *

  • Surprise! There’s an extra FREE stamp set in March’s ‘Beyond the Horizon’ kit!


    The Beyond the Horizon Paper Pumpkin Kit for March includes watercolor prints and designs inspired by the beautiful nature around us to create nine cards and coordinating envelopes. And paper pieces that perfectly coordinate with the amazing New Horizons Suite Collection seen here in the January–June 2022 Mini Catalog.

    Don’t forget the extra FREE stamp set in March (yes—that’s two stamp sets in one kit!) as our way of saying THANK YOU to all of our wonderful Paper Pumpkin subscribers.

    Details on this kit: 

    • This month’s kit contains enough elements to create 9 cards—3 each of 3 designs—and 9 coordinating envelopes. This all-inclusive kit includes printed card bases, die-cut paper pieces, embellishments, adhesive, and more!
    • The Beyond the Horizon Paper Pumpkin Kit includes a Misty Moonlight Classic Stampin’ Spot!
    • This kit’s stamp set is perfect for any occasion. With sentiments that say “thanks”, “hello”, “thinking of you,” and so many more, you’ll be able to use this stamp set year round.
    • And don't forget; this month’s kit comes with a BONUS stamp set for FREE! *value of $18

    There will be a change in Paper Pumpkin pricing going forward.  Here's what Stampin' Up! has recently stated:

    Despite Covid’s continued strain on the global economy, Stampin’ Up! has been working diligently to maintain the lowest possible price for our Paper Pumpkin subscription box, including absorbing costs to prevent price increases. However, as we continue to see greater cost increases to raw materials, shipping, and overhead, we have made the decision to increase pricing in order to maintain the high quality and value of the monthly kit. On 1 March 2022, Paper Pumpkin kits will see a slight increase in price. 

    But, there is a way to get the current prices for Paper Pumpkin and save money going forward.  Prepaid codes–both redeemed and unredeemed–purchased before the 1 March price change will maintain their full value. No additional payment will be required.

    So here's my suggestion for you:

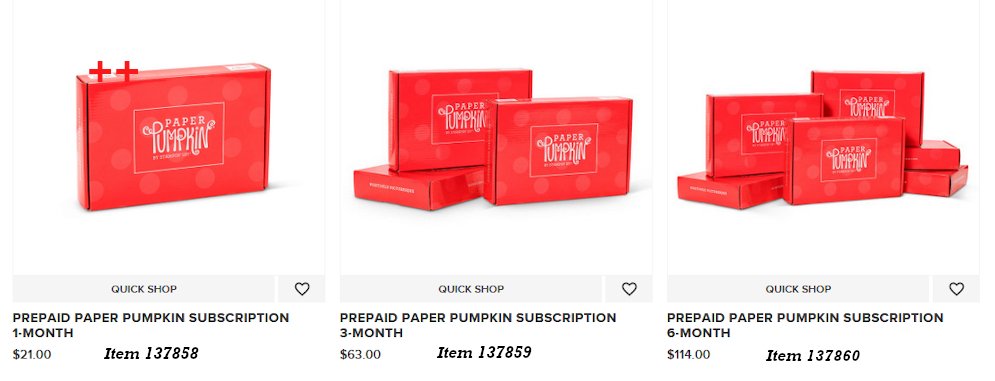
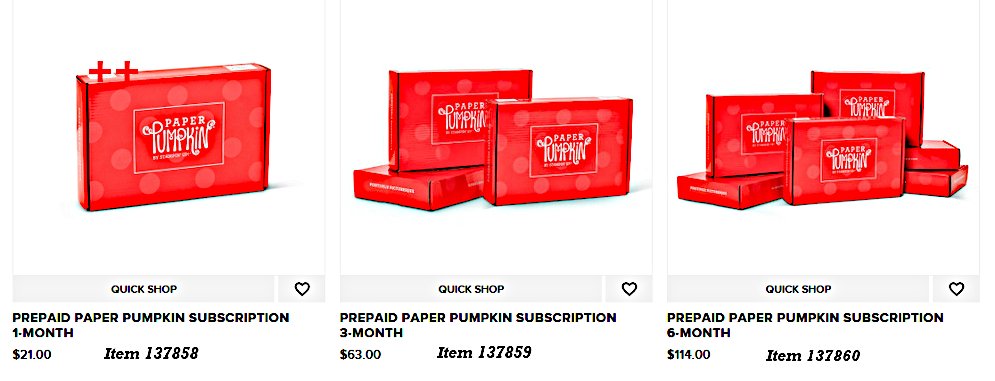
    Purchase a pre-paid subscription in February for 3 month, 6 months, or 12 months and get it at the current lower price for that entire time period! Go here to order yours.

    Here's the pricing through February:

    Plus with a pre-paid subscription you can earn free Sale-a-Bration choices at the same time.  It's a WIN WIN choice! 

    And besides the free Sale-a-Bration choice you'll also receive free gifts (Gingham embossing folder & a calendar kit!) from me with your online order in February. See details below. 

    Watch this short video to see what is included in each kit:

    Top reasons to get our Paper Pumpkin kits:

    1. You are in full control over which kits you receive. You can skip a month at any time! 
    2. There are videos for each month's kit!  See them all here. 
    3. You'll get over 10 bonus/alternative projects from me each month!
    4. Each kit comes with an ink spot & a stamp set. 
    5. The kits are all inclusive; nothing else is needed to create the projects but a scissors. 
    6. There are FB groups where people share alternative projects each month. 
    7. The kits are perfect for quick projects with no prep or extra work. 
    8. It's a fun surprise each month!  But they share hints before the kit mails too!

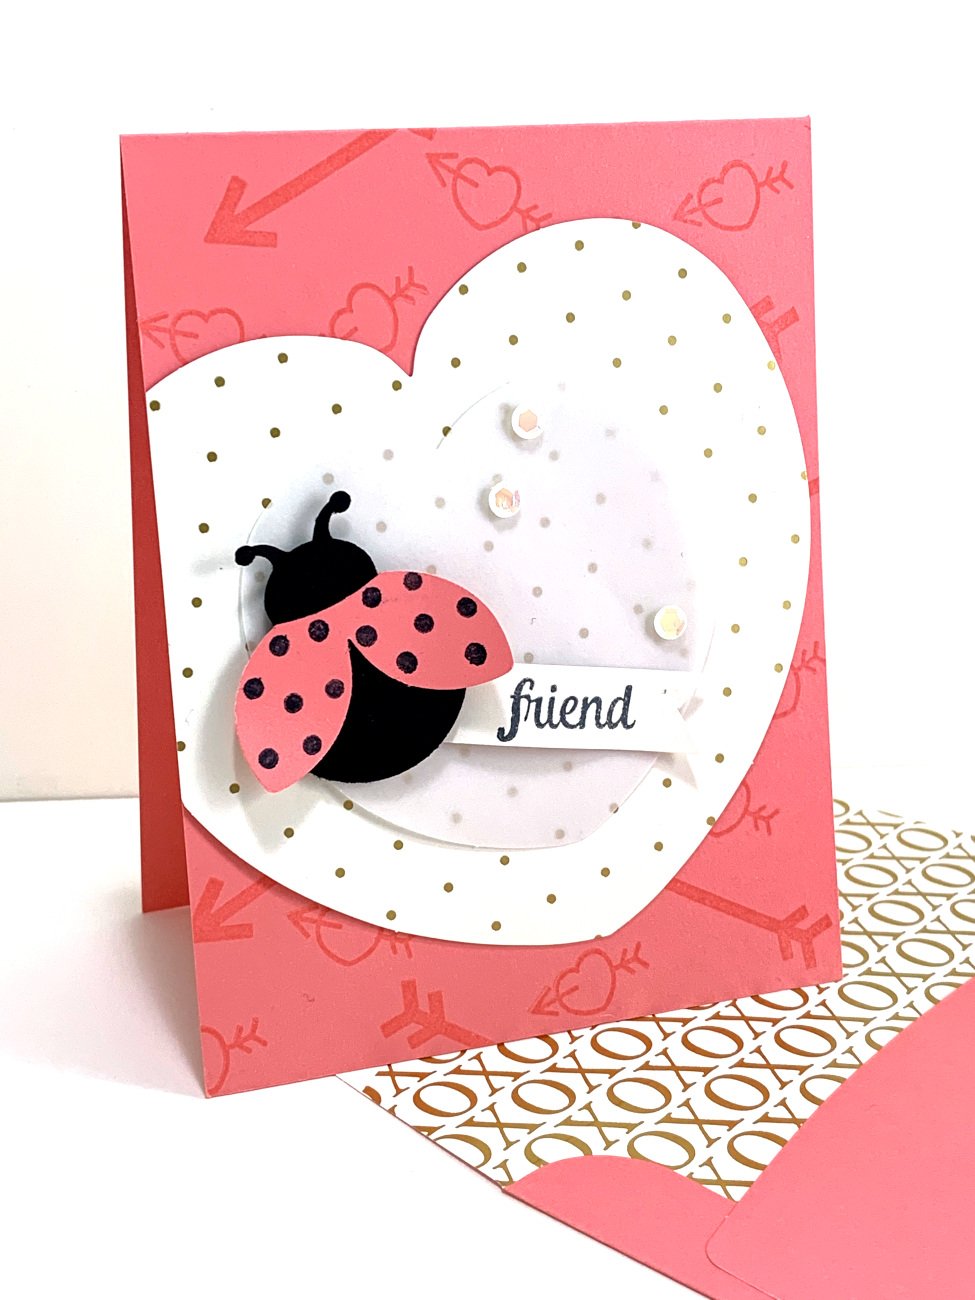
    Here's the bonus project I created with the Hugs & Kisses February kit.  It's so fun to use the elements in the kit to create something fun & different!


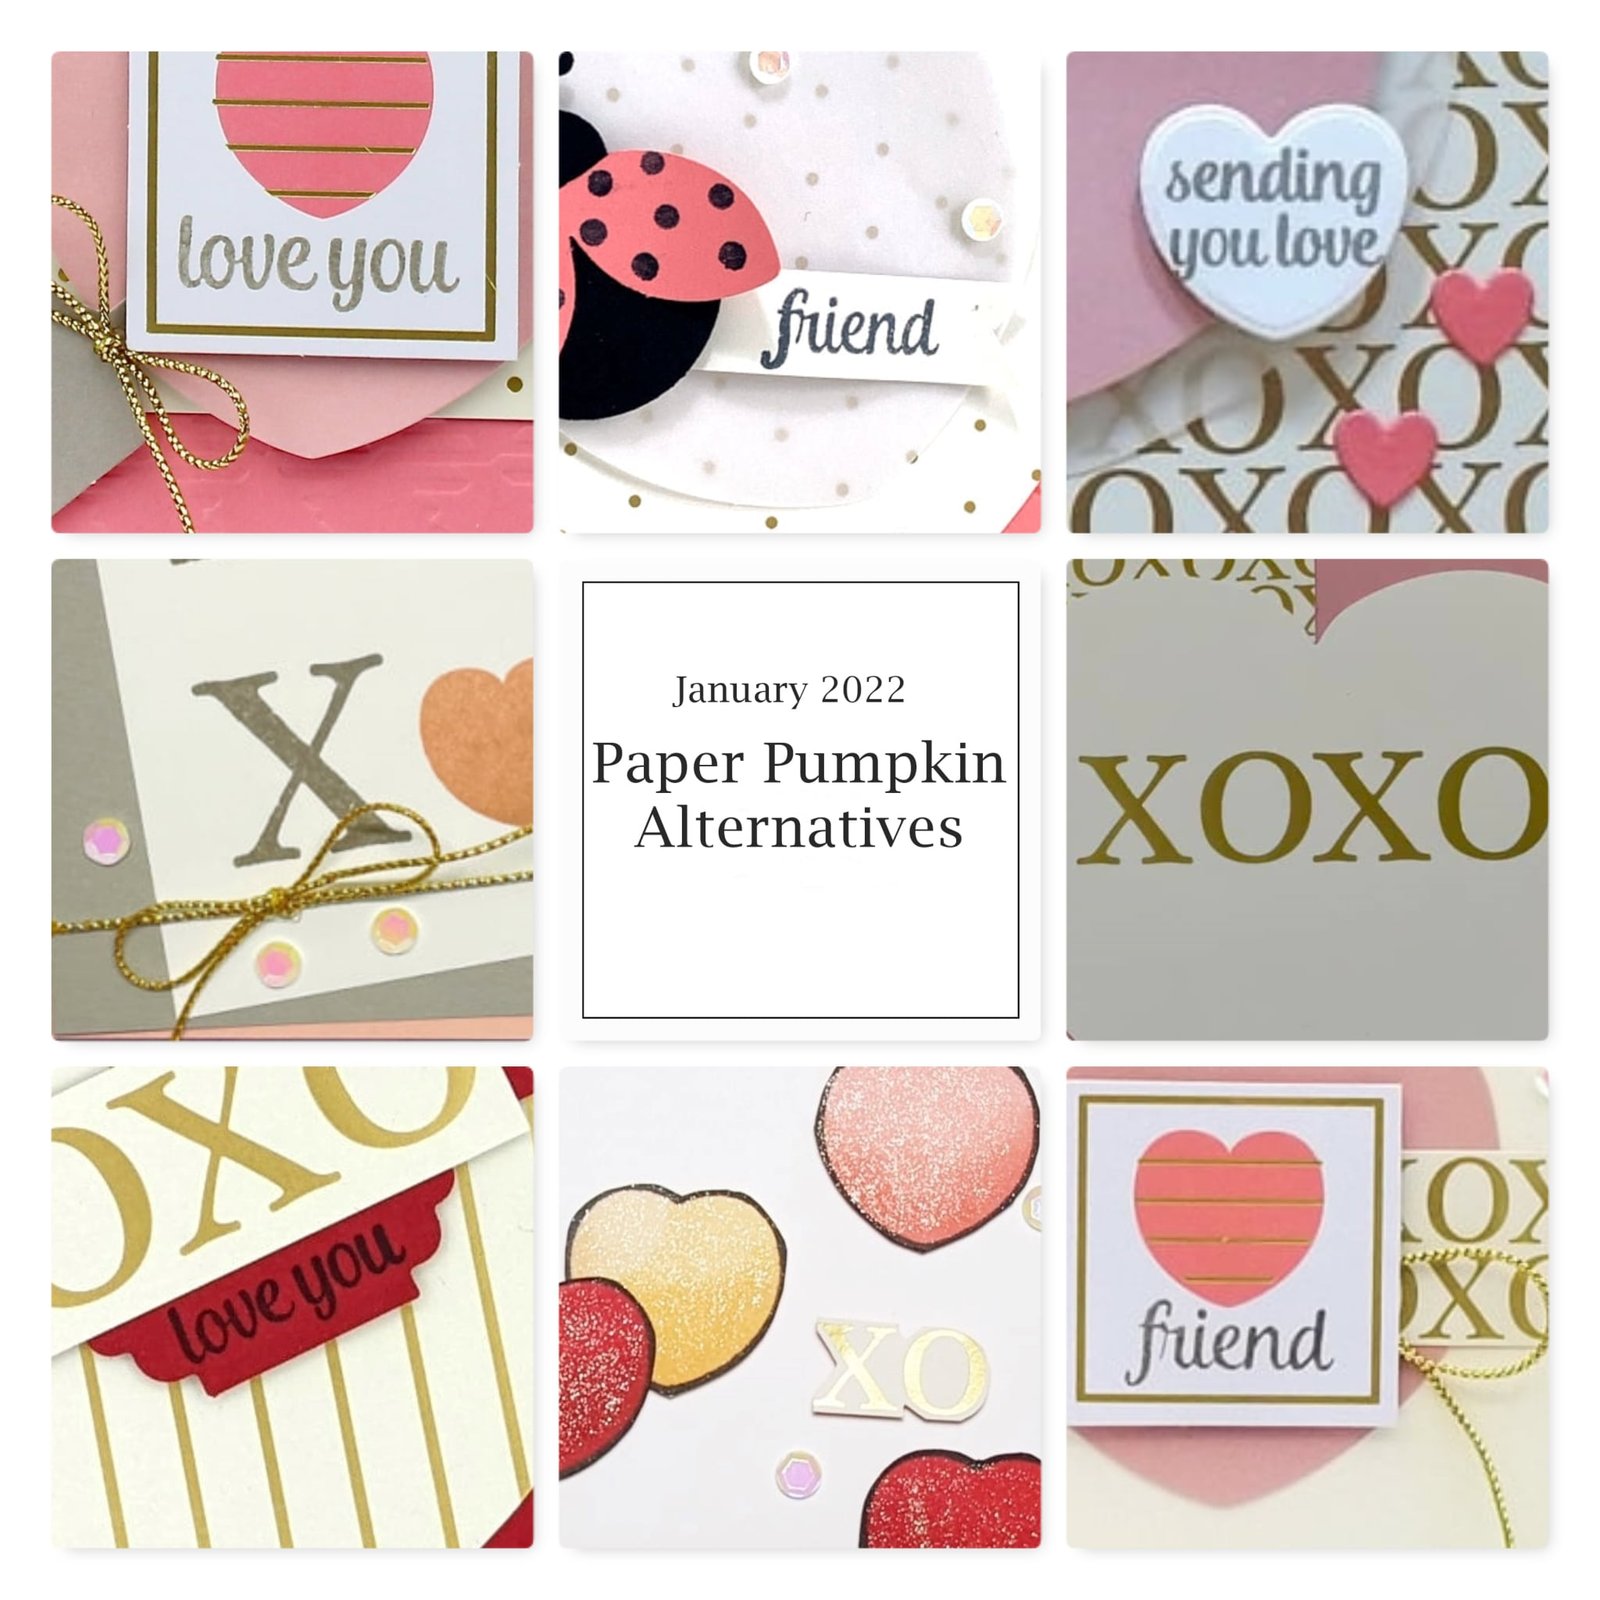
    Here's a graphic showing most of the alternative projects my subscribers received:


    ~~~

     Hot Deals in February:

    Choose $125 in product PLUS any 2 stamp sets free in February!

    It's just $99. Get FREE shipping too!

    Click here to get yours.


    Host codes: 3WCHFFUW

     *click here to order 


    Use the host code above & get a free Easel Calendar kit

    & the Gingham embossing folder with a $55 order in February, 2022! 

    Leave a Reply

    Your email address will not be published. Required fields are marked *

  • Great silhouette cards with Simply Marbelous DSP with Honeybee Home bundle


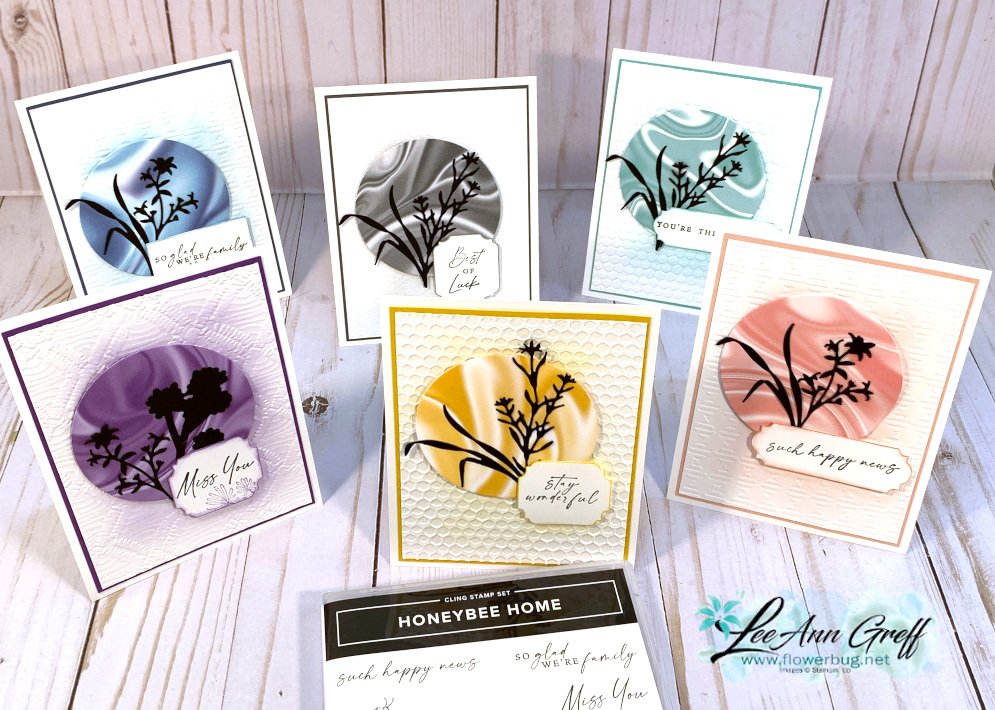
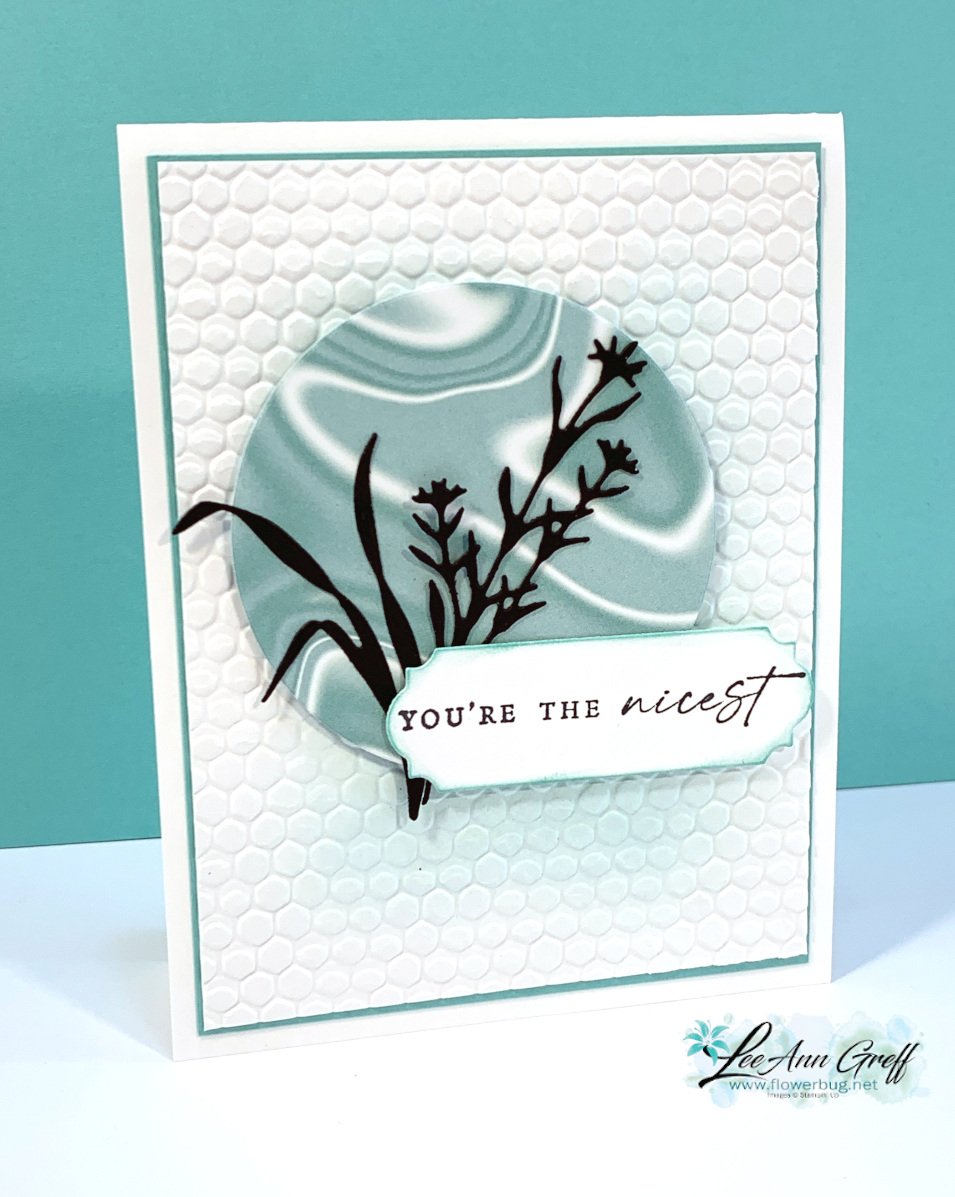
    I saw a group of cards made by France Labrecque and I just had to make some.  Look!

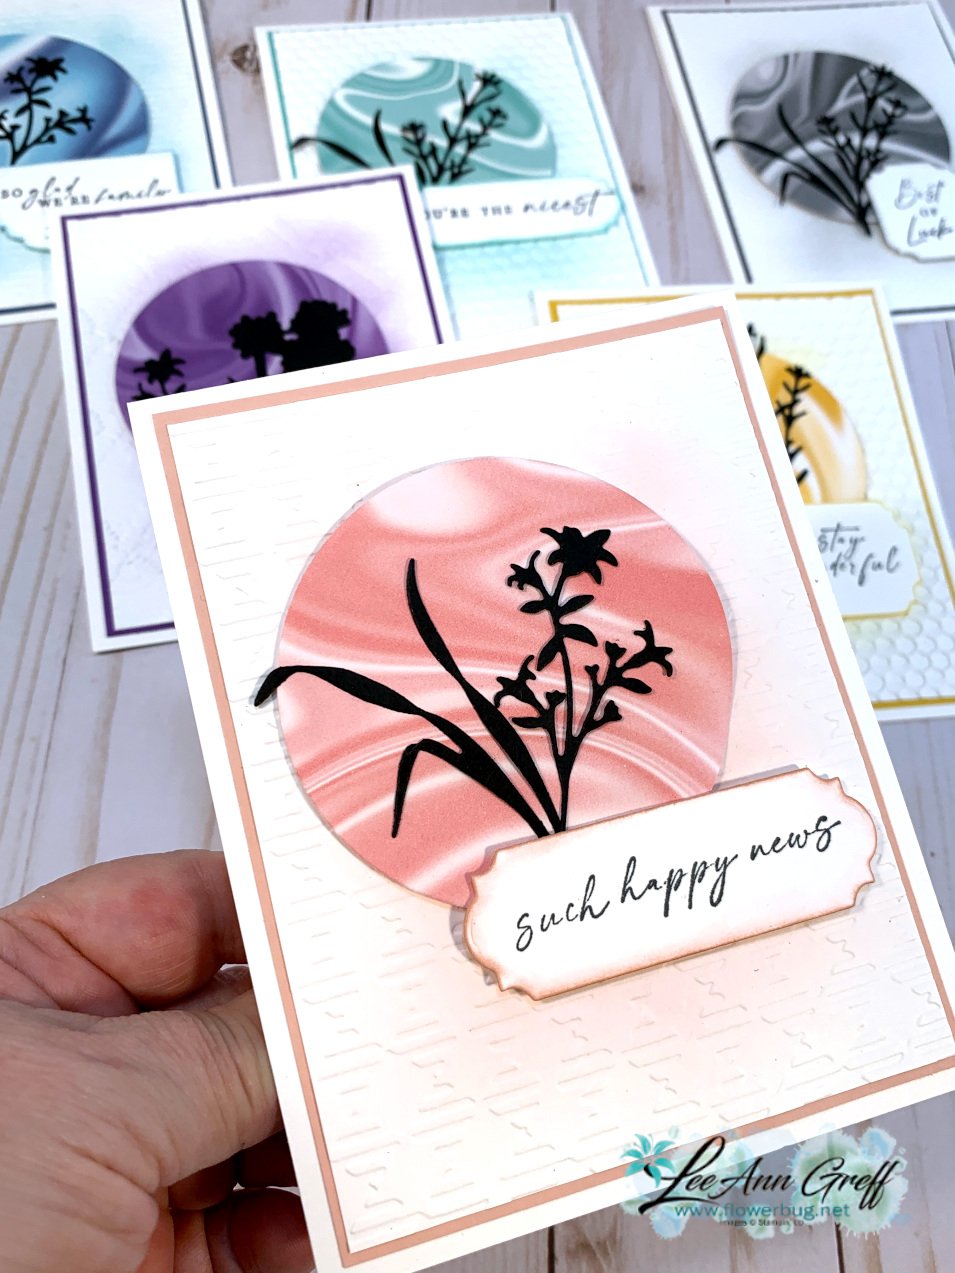
    I changed them up a bit but kept the same premise of a die-cut circle with these gorgeous Honeybee Blooms dies in silhouette.  I added a bit of color on the White layer before texturing them.  The card above features the Gingham embossing folder.

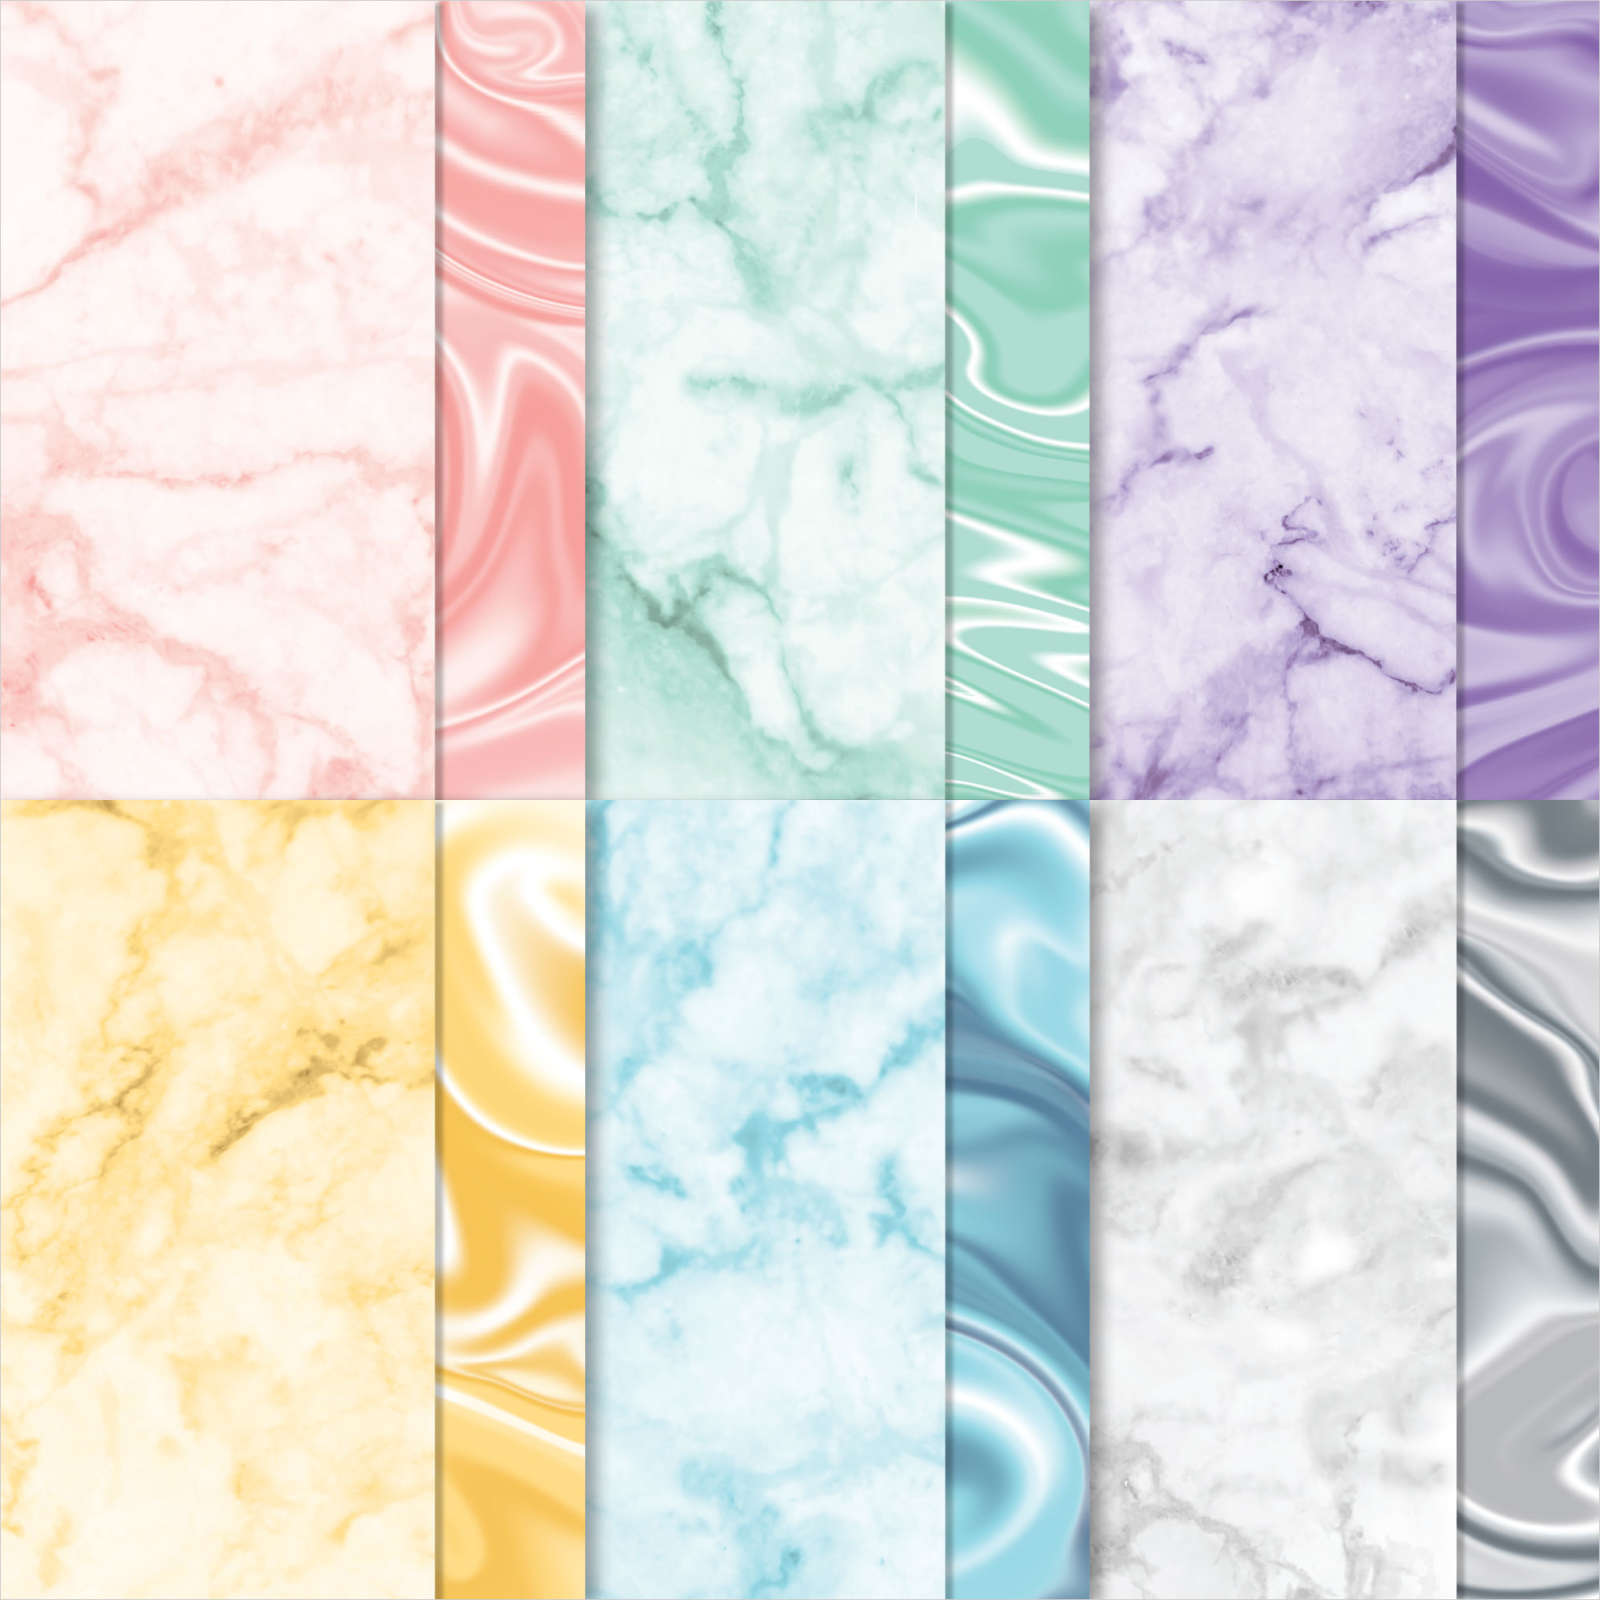
    Here are the 6 cards I made; one with each color of Designer Paper in the Simply Marbelous DSP pack.  This beautiful paper is FREE through February, 2022 with any $50 Stampin' Up! order.  See it here. 

    I cannot decide which color is my favorite but I lean towards the yellow or blue. 

    The embossing folder on the card above is called Macrame; it's in the 2022 Stampin' Up! Annual Catalog or seen here. 

    For each card I used one of the greetings in the Honeybee Home stamp set which is part of the Honeybee Home bundle seen here.  The greeting dies are from the Ornate Frames dies in the Annual catalog seen here.  

    This incredible Simply Marbelous 6 X 6" DSP is still available; if you want it I'd get it now while they still have a supply.  It's always possible it could run out before the end of February. 

    One neat thing about this pretty designer paper is each sheet has a softer, less distinct pattern and this beautiful swirly pattern. And each color is a combination of light & dark hues so it works with many, many shades of each color!  

    Which is your favorite?  

    Here's the video!  Click on the picture below to watch it. These cards are the 3rd project I share. 

    ~~~

     Hot Deals in February:

    Choose $125 in product PLUS any 2 stamp sets free in February!

    It's just $99. Get FREE shipping too!

    Click here to get yours.


    Host codes: 3WCHFFUW

     *click here to order 


    Use the host code above & get a free Easel Calendar kit

    & the Gingham embossing folder with a $55 order in February, 2022! 


    Get a free calendar kit with any size order in February!

    Leave a Reply

    Your email address will not be published. Required fields are marked *


Notice: LeeAnn Greff, Independent Stampin’ Up! Demonstrator, Manager. The content of this website is my sole responsibility as an independent Stampin’ Up! demonstrator and the use of, and content of, the classes, services, or products offered on this website is not endorsed by Stampin’ Up! Copyright 2025