/


Latest Post

Artist of the Month projects with the Bag of Bones suite!


Our Artist of the Month for September was Candy who chose the Bag of Bones bundle. She did an incredible job on her projects! 

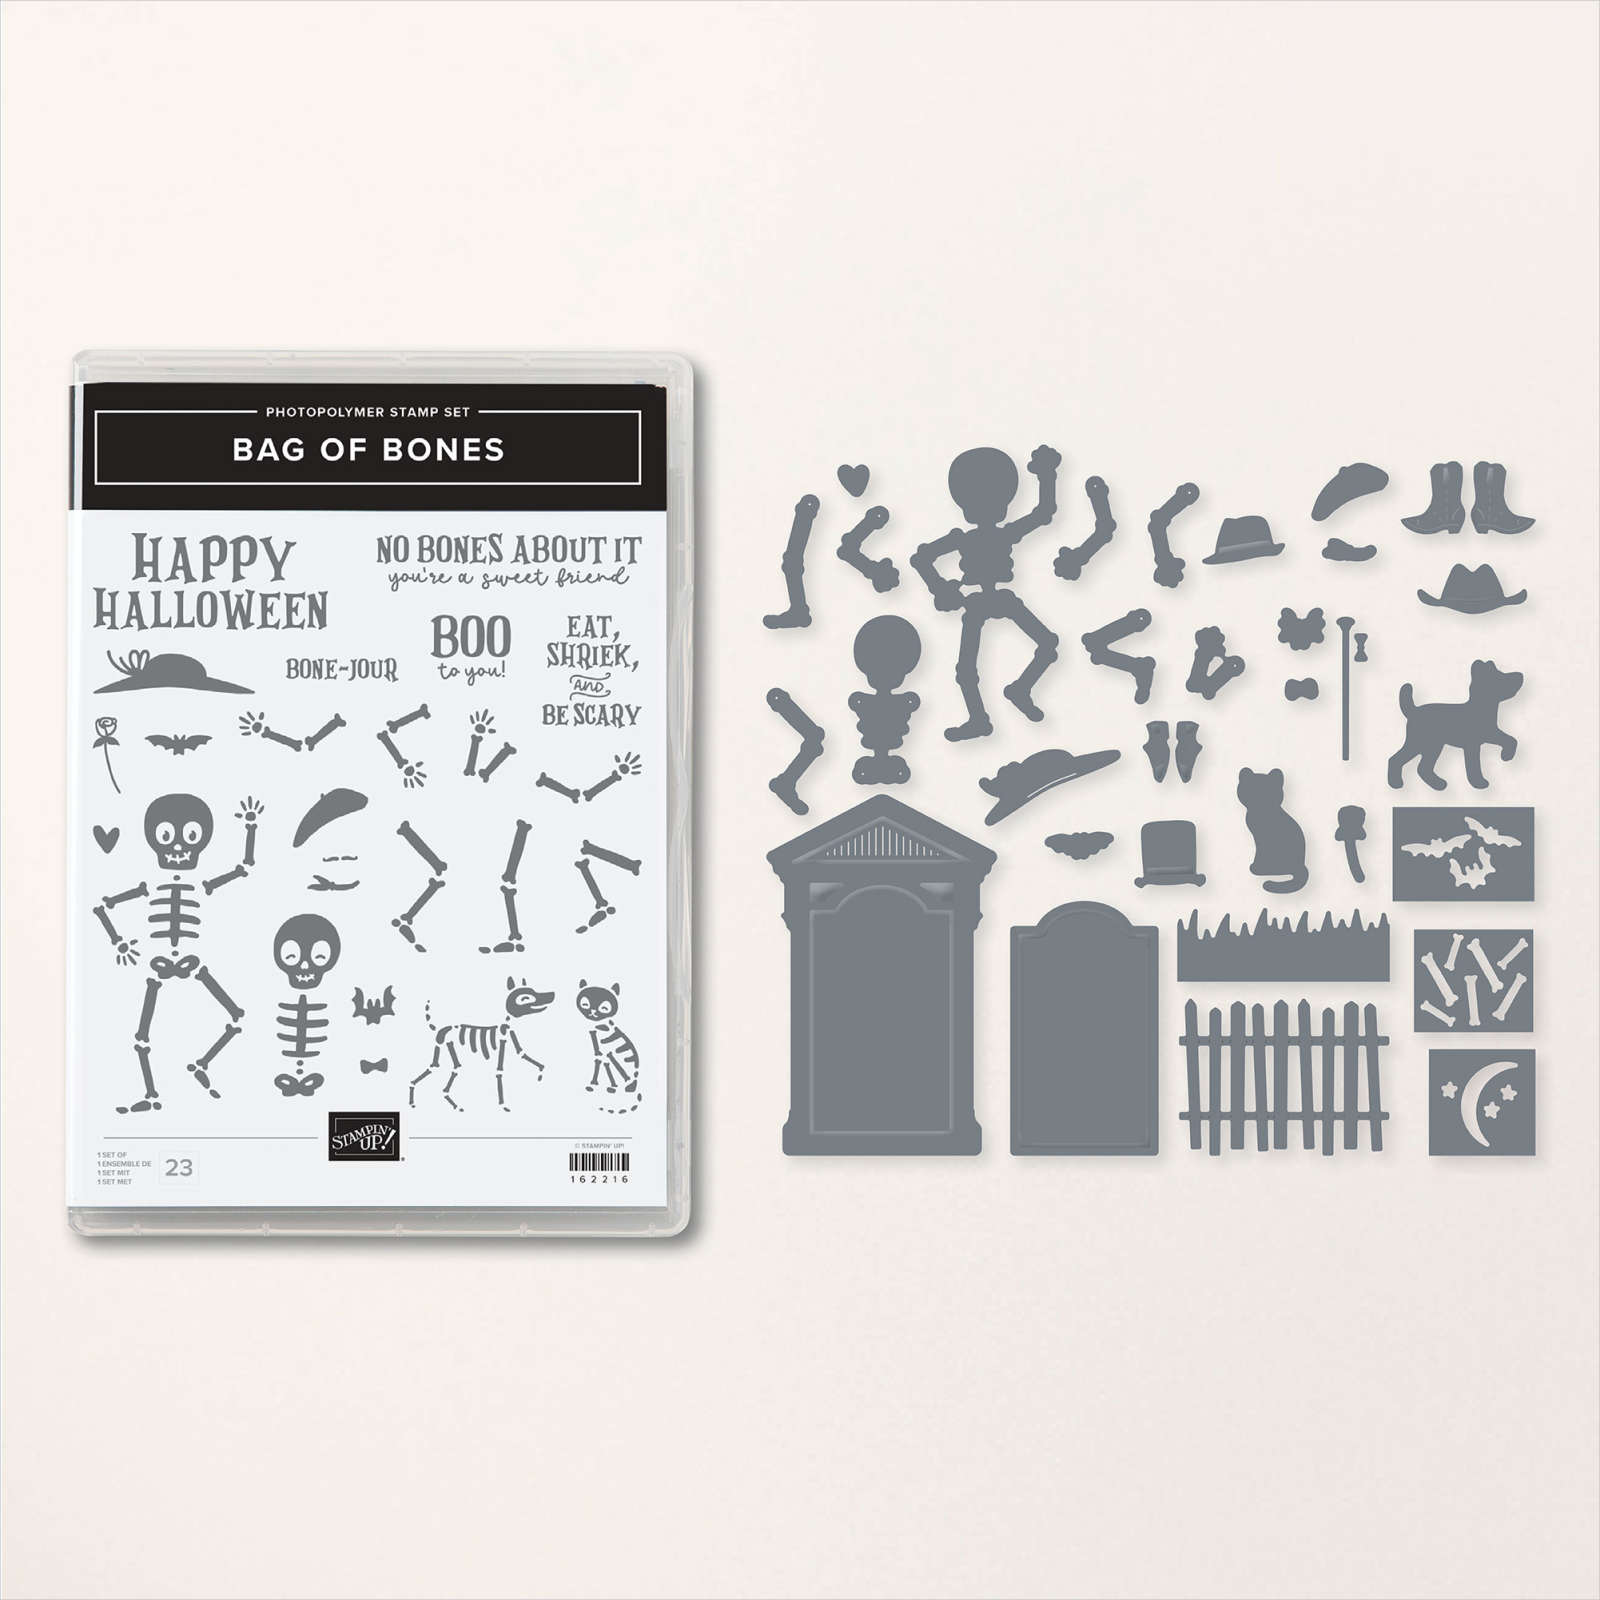
The suite is no longer available because the Glow in the Dark bats & ghosts have been discontinued. This means you can still get everything else individually. 

First is a card showing off both the Bag of Bones bundle and the Them Bones designer paper.

She tore her paper and pieces it on her card base.  Then she stamped the skeleton using Versmark onto Black card stock heat embossing it with White embossing powder. Love the boots and hat on him!  The circles are die-cuts from the new Deckled Circle dies in the 2023 Holiday catalog.  

Here's the Them Bones designer paper: 

Next is a neat monochromatic card in Basic Gray and Gray Granite.  She stamped the background with the skeleton bones!

The tombstone, fence, bats, cat and dog are all die-cuts from the Bag of Bones bundle. The dog and cat are stamped on our Glow in the Dark specialty paper.  You must use Stazon in for this or it may run. She sponged on gray ink onto the tombstone and fence for a 'spooky' look.  

Next is a cute treat holder made with that same tombstone die-cut.  She simply added a few strips of card stock inside the two die-cuts to create a pouch.  


This card is so fun; she featured a panel from the Them Bones designer paper to show off the dancing skeleton.  Love his suspenders, hat and bow tie!!  

These skeletons are all heat embossed with White embossing powder onto Black card stock. You can see a few of the glow in the dark bats and ghosts here.  Unfortunately they are sold out now and will not return.  

Here's a slimline card showing off more of the Them Bones designer paper.  Her colors are Basic Gray, Pumpkin Pie and Cajun Craze. 

Isn't it cute how the skeleton on the bottom has his dog on a leash?!  

This next card shows off a neat background effect.  She used the Deckled Circle dies 

The background is made by sponging on the houndstooth mask (Abundant Beauty decorative masks) then debossed it with the Distressed Tile embossing folder. She then dragged the Blackberry Bliss ink pad across it.  Cool!  

Didn't she create a fabulous group of projects. She truly showcased this Halloween suite wonderfully!  Fantastic job Candy!!!


~~~

October Specials: 

Amazing Starter Kit choices! 

Choose one and enjoy the 20% discount on all future orders! Click here

Today through Wednesday is free shipping on Stampin' Up! orders over $75!  It's a great time to pick up those items you've had on your list. 

*current host code: HTHK4TQU or VEH4FKBV

*Get free glitter gems with online orders over $55 (Please use a host code)

All Posts

  • Colorful Autumn Trees card with a baby wipe technique


    Fall is in the air here in North Dakota.  Look at this gorgeous & colorful autumn tree!  

    It’s made with the new Autumn Trees bundle seen here.  Here’s how I did the tree:

    1. I stamped the tree onto Crumb Cake card stock using Crumb Cake ink.
    2. Then die-cut it with the tree die from the bundle. 
    3. Next I inked up a baby wipe with fall colors of Garden Green, Crushed Curry, Pumpkin Pie and Cajun Craze.  I rolled it up and pressed it onto the tree die-cut repeatedly. 
    4. Lastly I used a Crumb Cake Blends marker to add more detail to the trunk.  

    I used the Birch Wood embossing folder on the Vanilla background and lightly blended Cajun Craze ink over it.  The greeting is from the More Messages bundle. 

    Thanks for stopping in today!  

    ~~~

    ~~~

      To see all of the new Online items click here.  Or download & save the Download Online Exclusives flyer 

    Get a free project tutorial with any online order in September! 

    ~~~

    Leave a Reply

    Your email address will not be published. Required fields are marked *

  • Stack, cut & shuffle card with Gathering Together DSP – free project sheet too!


    Here’s another beautiful autumn themed card I shared on last week’s Live video.  

    Have you ever made a triple stack, cut & shuffle card?  It’s a great way to make multiples of a card layout and use your designer paper.  Simply cut three different patterns of designer paper at 3 3/4″ X 5″.  Stack them together and cut all at the same time.  This way they’ll all fit together well once you shuffle them into 3 piles. What’s neat is that you don’t really have to measure your cuts! Watch the video below to see how it’s done.

    The designer paper here is the new Gathering Together seen here. It’s gorgeous with Champagne foil accents. This paper is part of our Online Exclusives.  To see all of these just released new items click here.  Or download & save the Download Online Exclusives flyer 

    My colors include Early Espresso, Crushed Curry and Cajun Craze.  The greeting and stamped die-cuts are from the Gathering Moments bundle seen here. The greeting die-cuts are from the Traditional Labels dies seen here. They’re my new favorite set of label dies!  

    I created a free project sheet for this card.  Click on the following link to print or download it.  Download Gathering Moments Stack & Shuffle card

    Below is the video tutorial for this card and a neat fun fold card.  I hope you try making these stack, cut & shuffle cards! 

    ~~~

    ~~~

    ~~~

      To see all of the new Online items click here.  Or download & save the Download Online Exclusives flyer 

    Get a free project tutorial with any online order in September! 

    Leave a Reply

    Your email address will not be published. Required fields are marked *

  • Center pop-out Fun fold card with video & free project sheet


    This fun fold card I’m sharing today is super fun to open and to make.  It looks like a normal card from this photo: 

    But look how it opens!  The center pops out for a nice surprise.  

    My colors include Cajun Craze, Early Espresso & Basic Beige.  The designer paper is from the Gathering Together pack seen here.  

    This designer paper is part of our Online Exclusives.  To see all of these new items click here.  Or download & save the Download Online Exclusives flyer 

    I used the Branching Out stamp set for the greeting and the fabulous new Traditional Labels dies seen here.  

    In the photo below you can see the scored bridge strip that pops out the center.  To understand how to assemble this card please watch the video below.  It will make sense then!  

    Here is the free project sheet with measurements.  Click on the following link to print or download it. Download Gathering Moments center pop-up card 

    Below is the video tutorial for this card and one more.  I hope you try making one! 

    ~~~

    ~~~

      To see all of the new Online items click here.  Or download & save the Download Online Exclusives flyer 

    Get a free project tutorial with any online order in September! 

    Leave a Reply

    Your email address will not be published. Required fields are marked *


Notice: LeeAnn Greff, Independent Stampin’ Up! Demonstrator, Manager. The content of this website is my sole responsibility as an independent Stampin’ Up! demonstrator and the use of, and content of, the classes, services, or products offered on this website is not endorsed by Stampin’ Up! Copyright 2025