/


Latest Post

Another sample using DSP strips; the pretty Velvet Meadow DSP


I shared a card using a strips technique a few days ago and wanted to share the card that inspired it today.
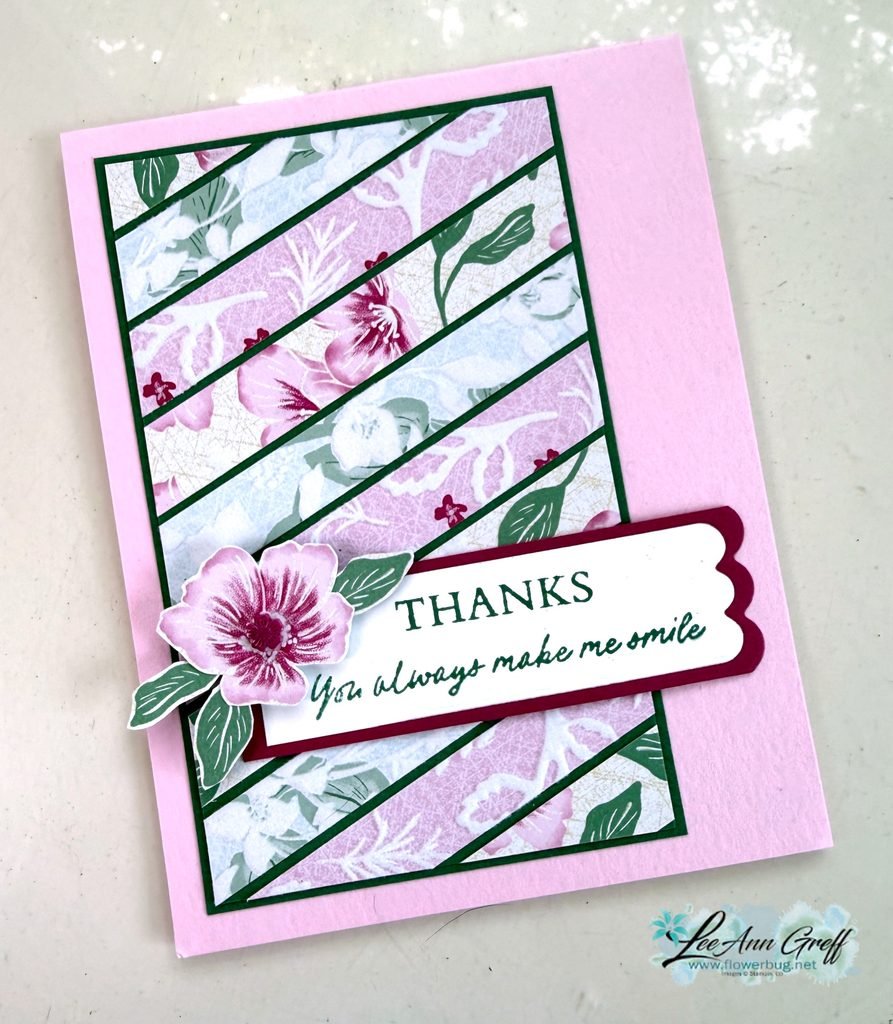
Here are the products I used: Velvet Meadow DSP, Bubble Bath, Berry Burst & Peaceful Pine CS. The greeting is from the Flowering Meadow stamp set and the scalloped tags are from the Scalloped Blooms dies seen here.

When using up your strips you can adhere them diagonally across your card stock, leaving a small space between each. Once this CS is filled in, trim off the excess on the edges.
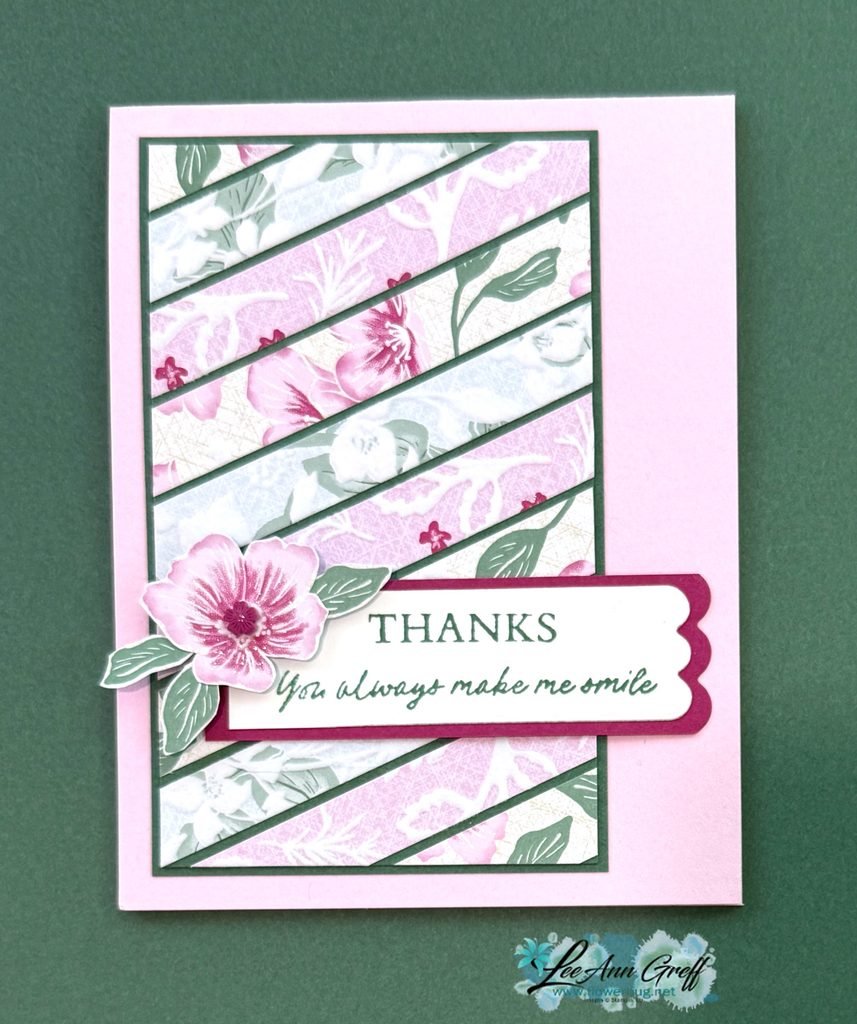
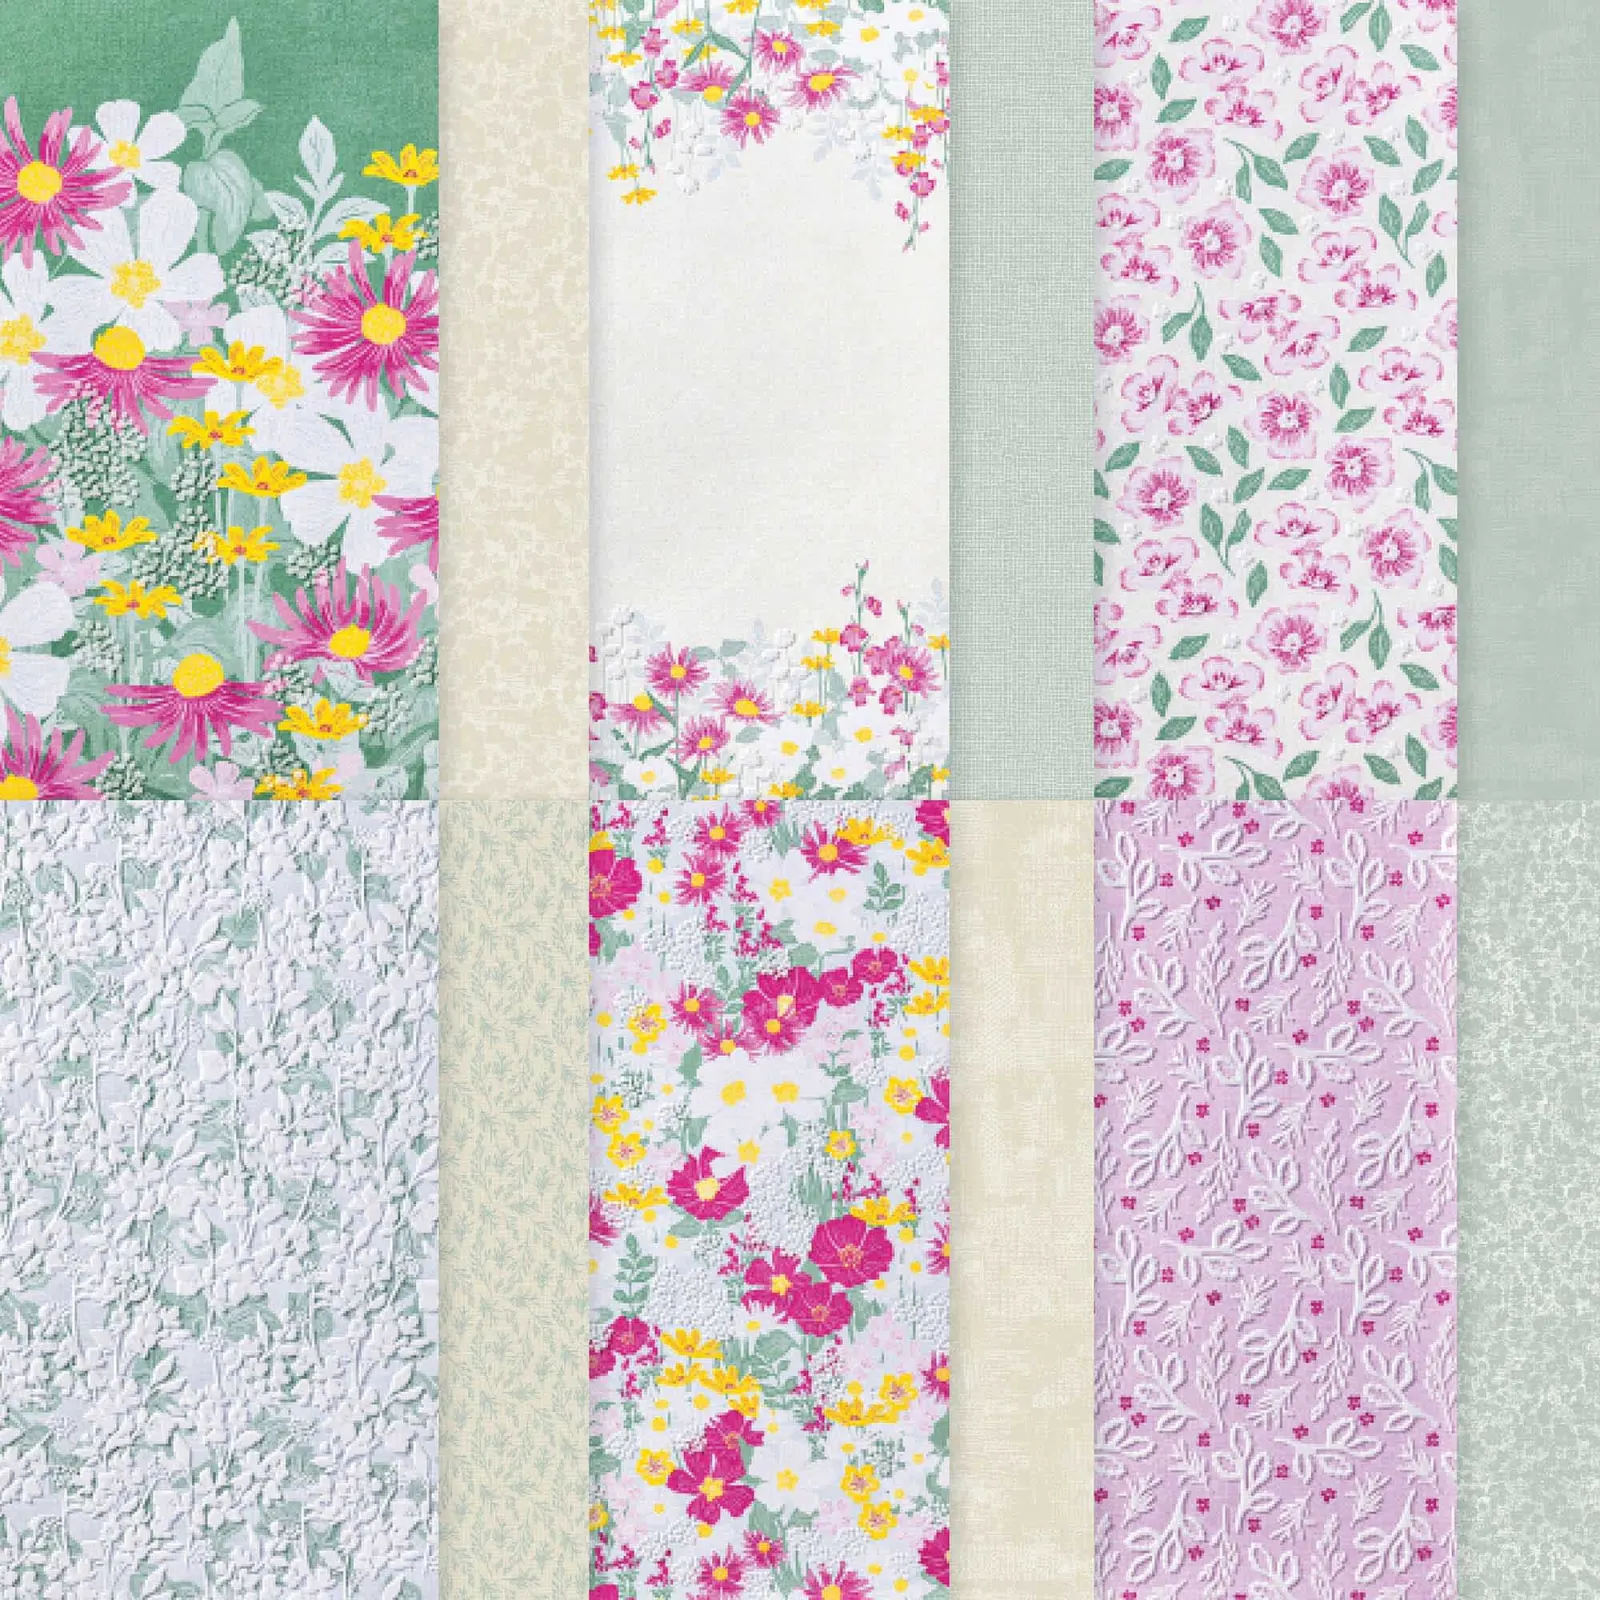
The Velvet Meadow specialty paper has a fuzzy, flocked feel to the flowers and some leaves. It’s luxurious! Check it out here.
I fussy cut the flower and leaves to add to the greeting.
July Stampin’ Up! specials:

There are new Online Exclusives out this month! They include florals, Fall, Halloween and Christmas! See them all here.

Here are a few links & graphics of two of the suites:
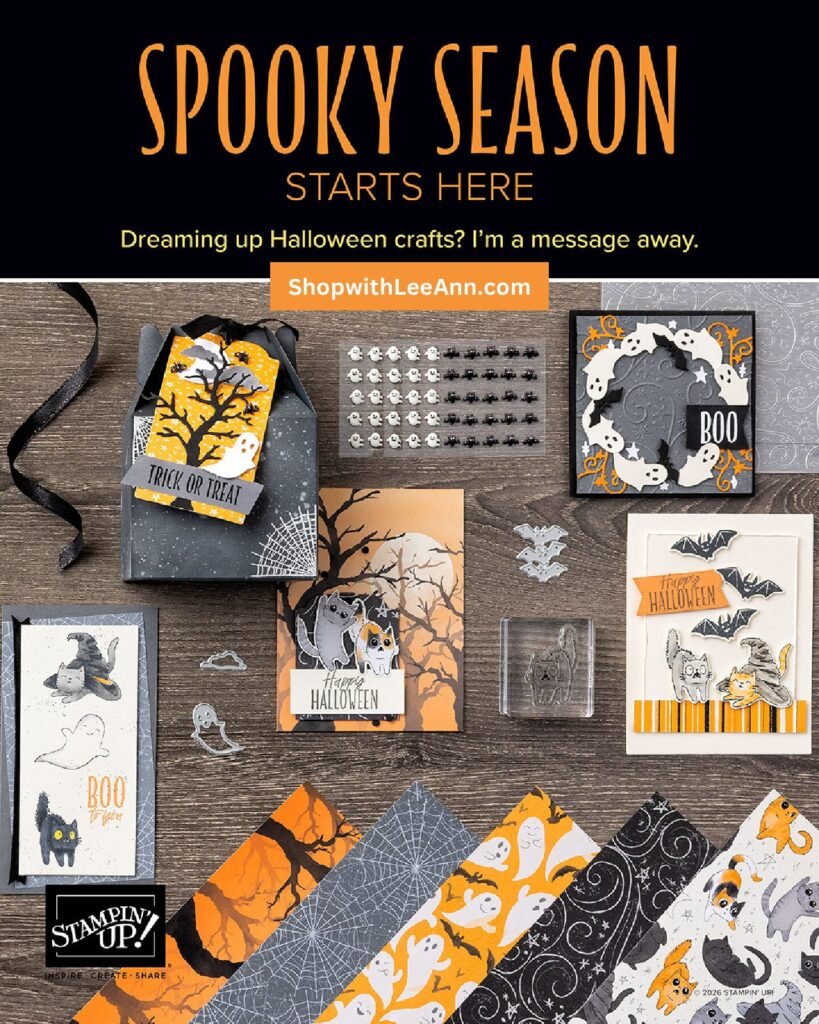
You can see the Spooky Season suite here.
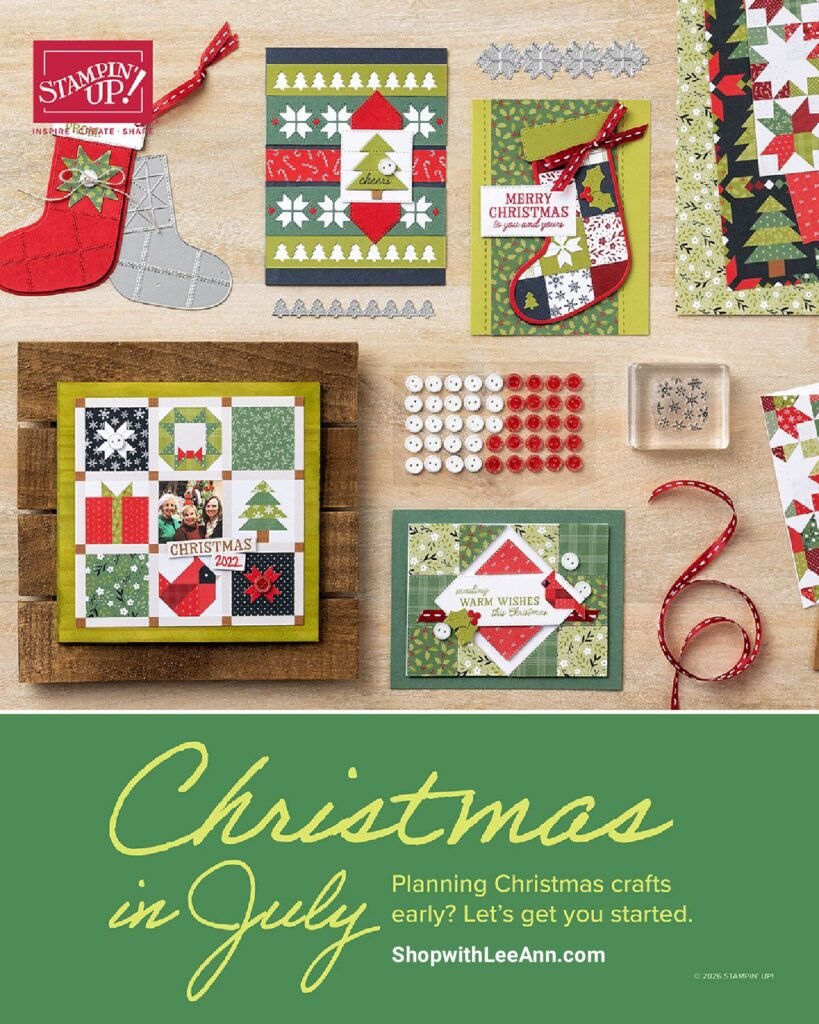
See all of our Christmas products here!

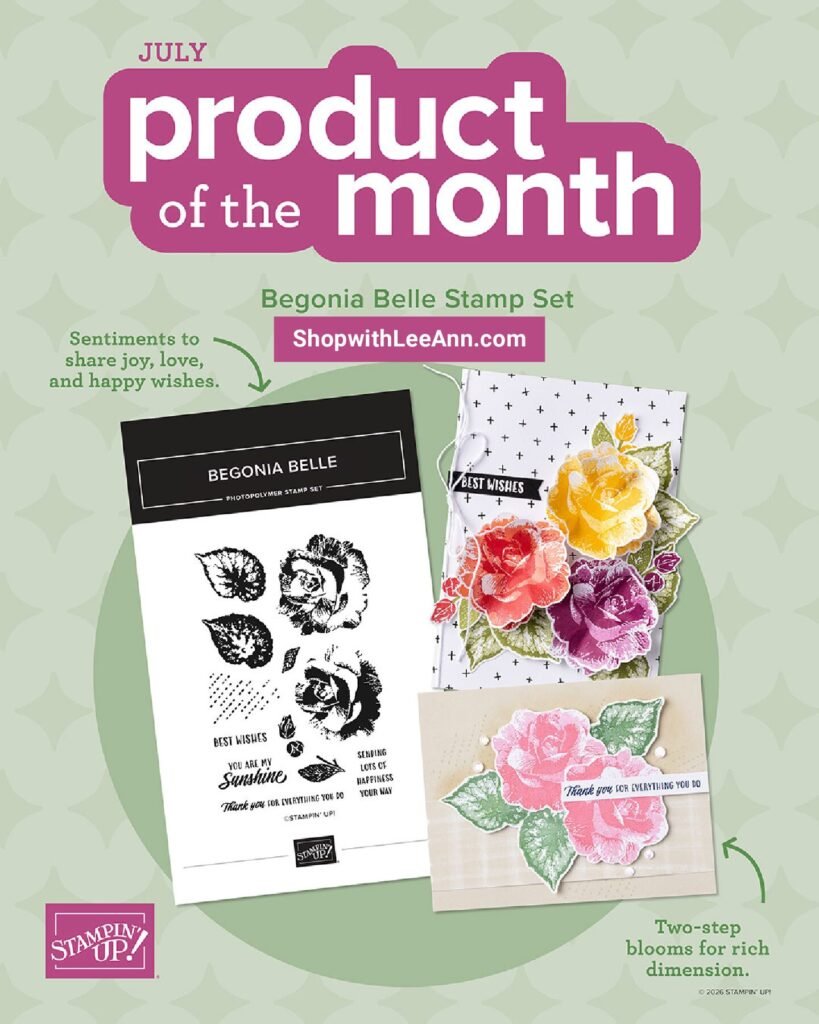
Our newest Product of the Month is this beautiful Begonia Belle stamp set: It’s just $5 once you hit the $75 mark in your shopping cart!
See it here
We have two new kits in our Kit Collection:
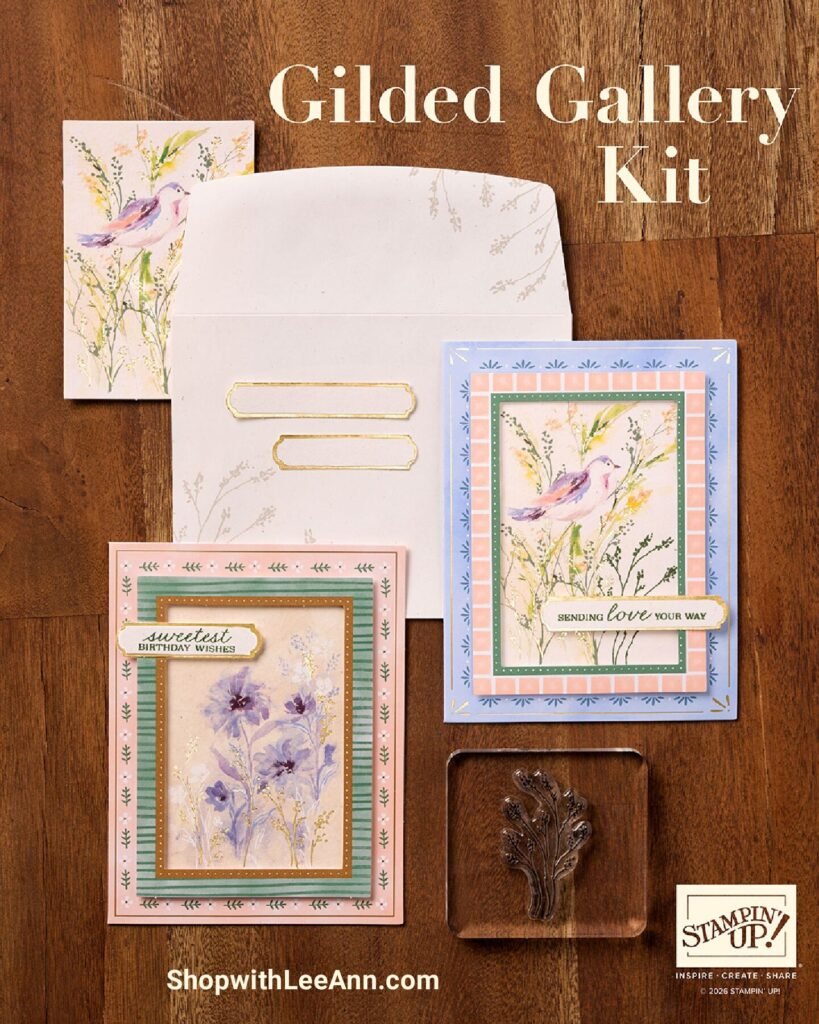
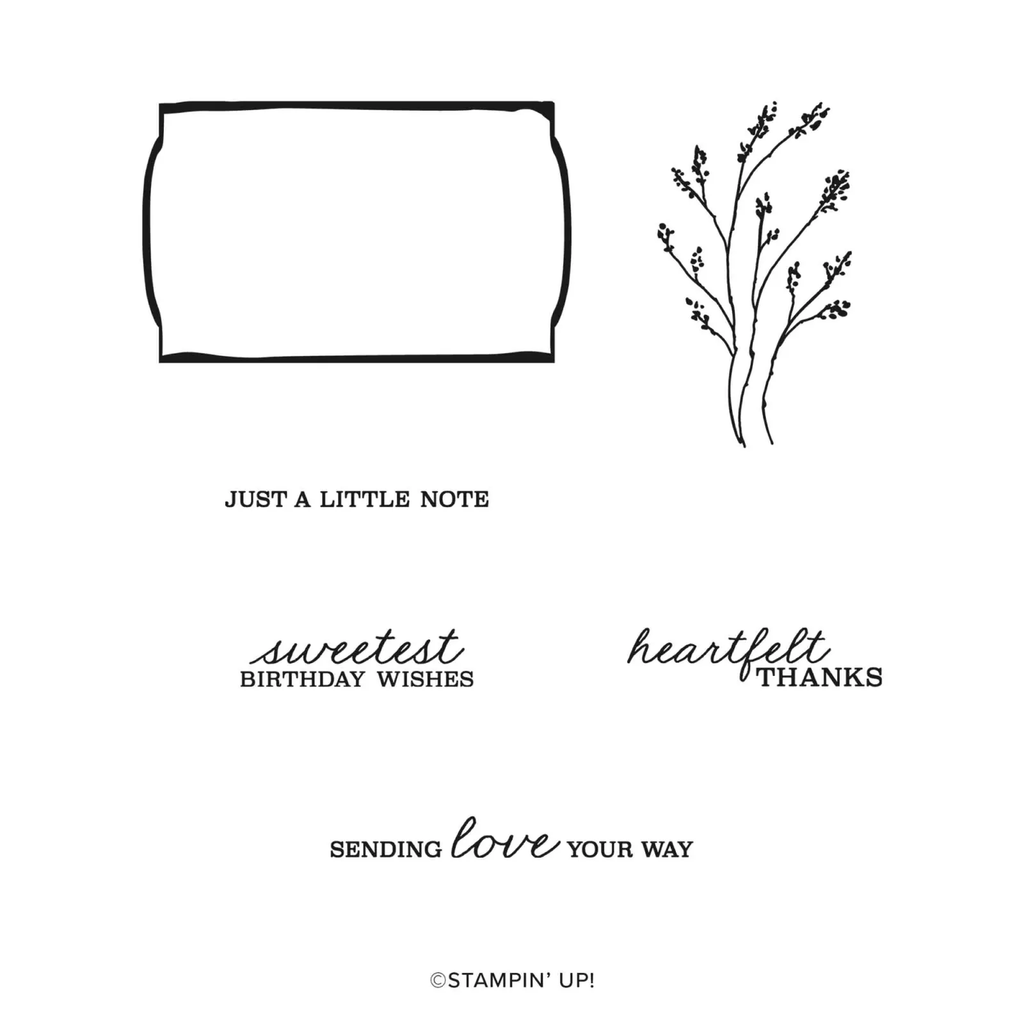
The Gilded Gallery card kit can be seen here. It’s $25, makes 10 cards with envelopes and includes a beautiful stamp set and ink spot.
The other kit is a fun scrapbook album called Daisy Days:
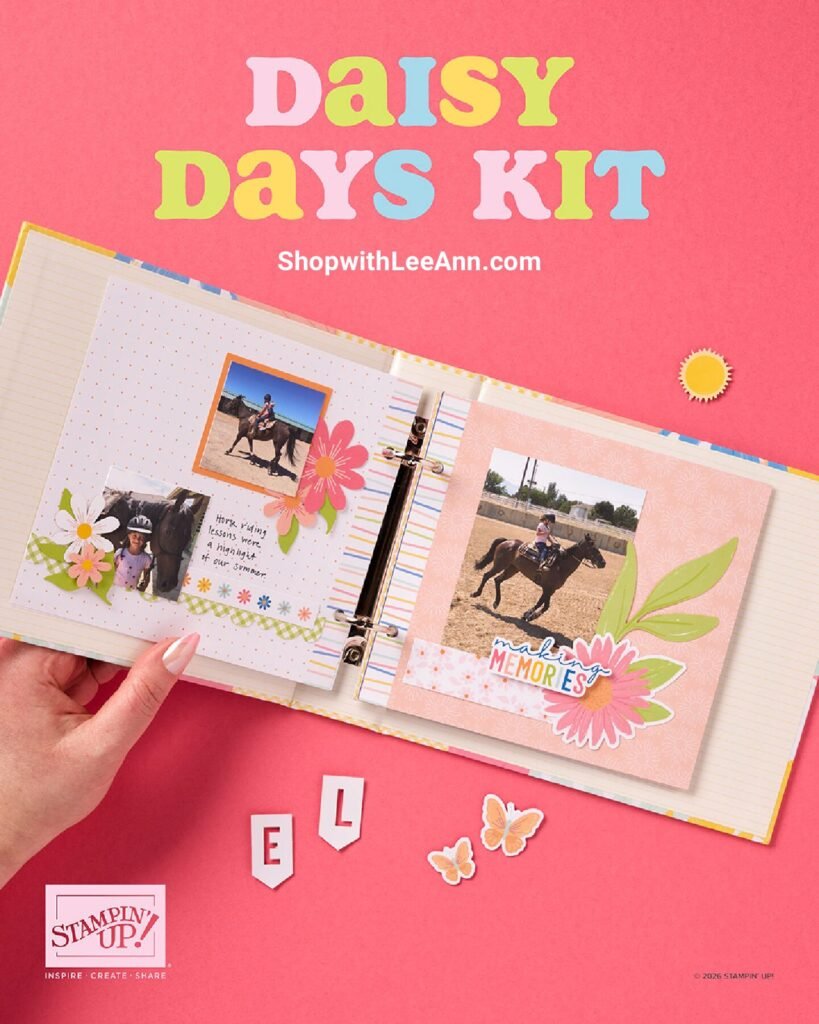
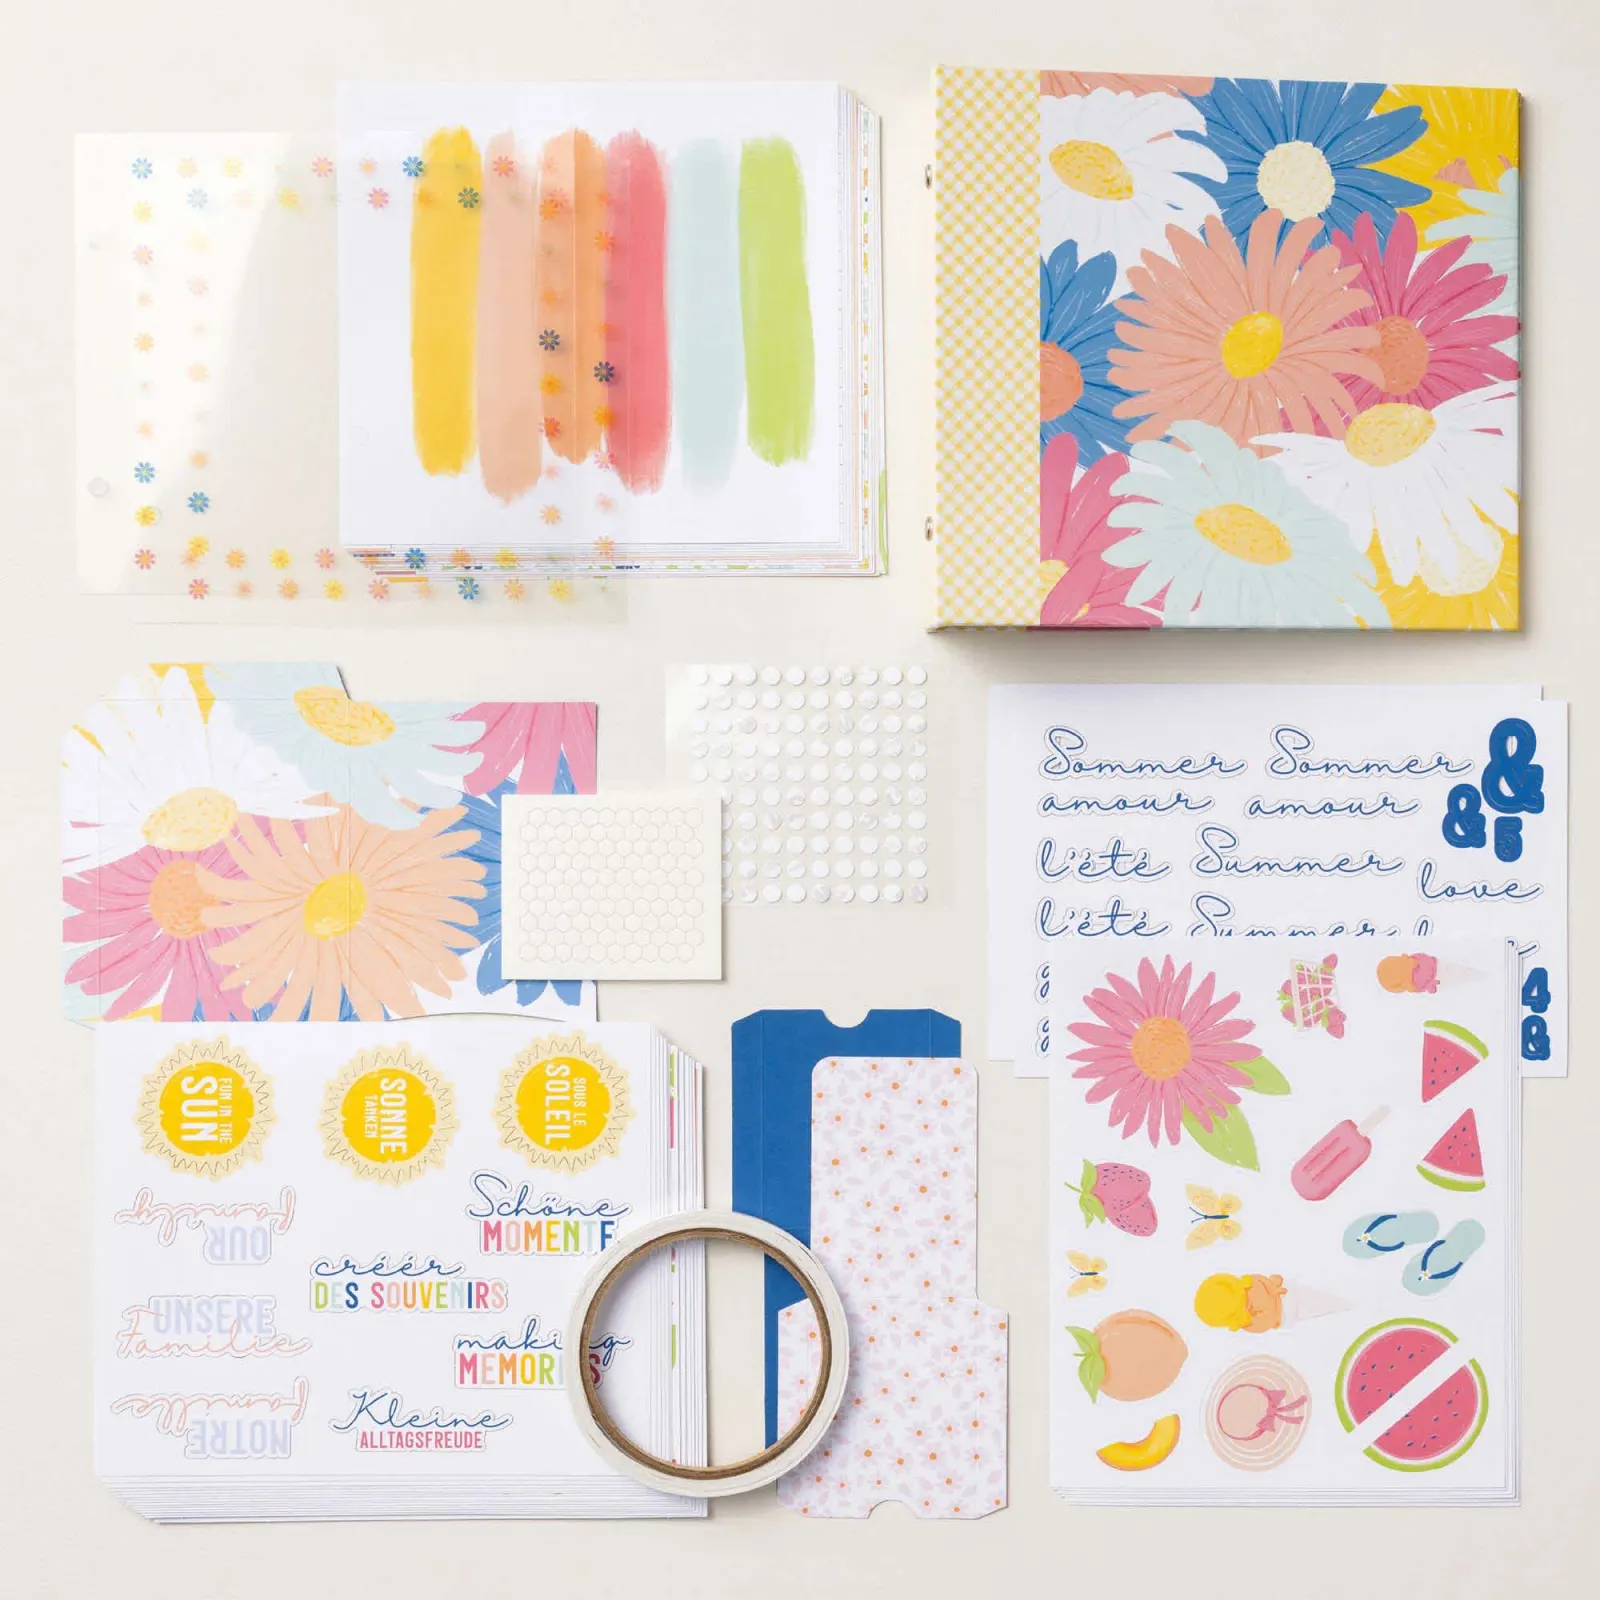
See it here. It includes the following:

DETAILS
– Makes 1 album with 28 pages
– Album size: 7-3/4″ x 7″ x 1-7/8″
– Page size: 6.5″ x 6″
– Colors: Blueberry Bushel, Crisp Cantaloupe, Crushed Curry, Granny Apple Green, Pool Party, Strawberry Slush, Timid Tiger
– Sentiments printed in English, French, and German

– Step-by-step instructions
– Precut images and sentiments
– Printed pockets
– Acetate sheets
– Adhesive
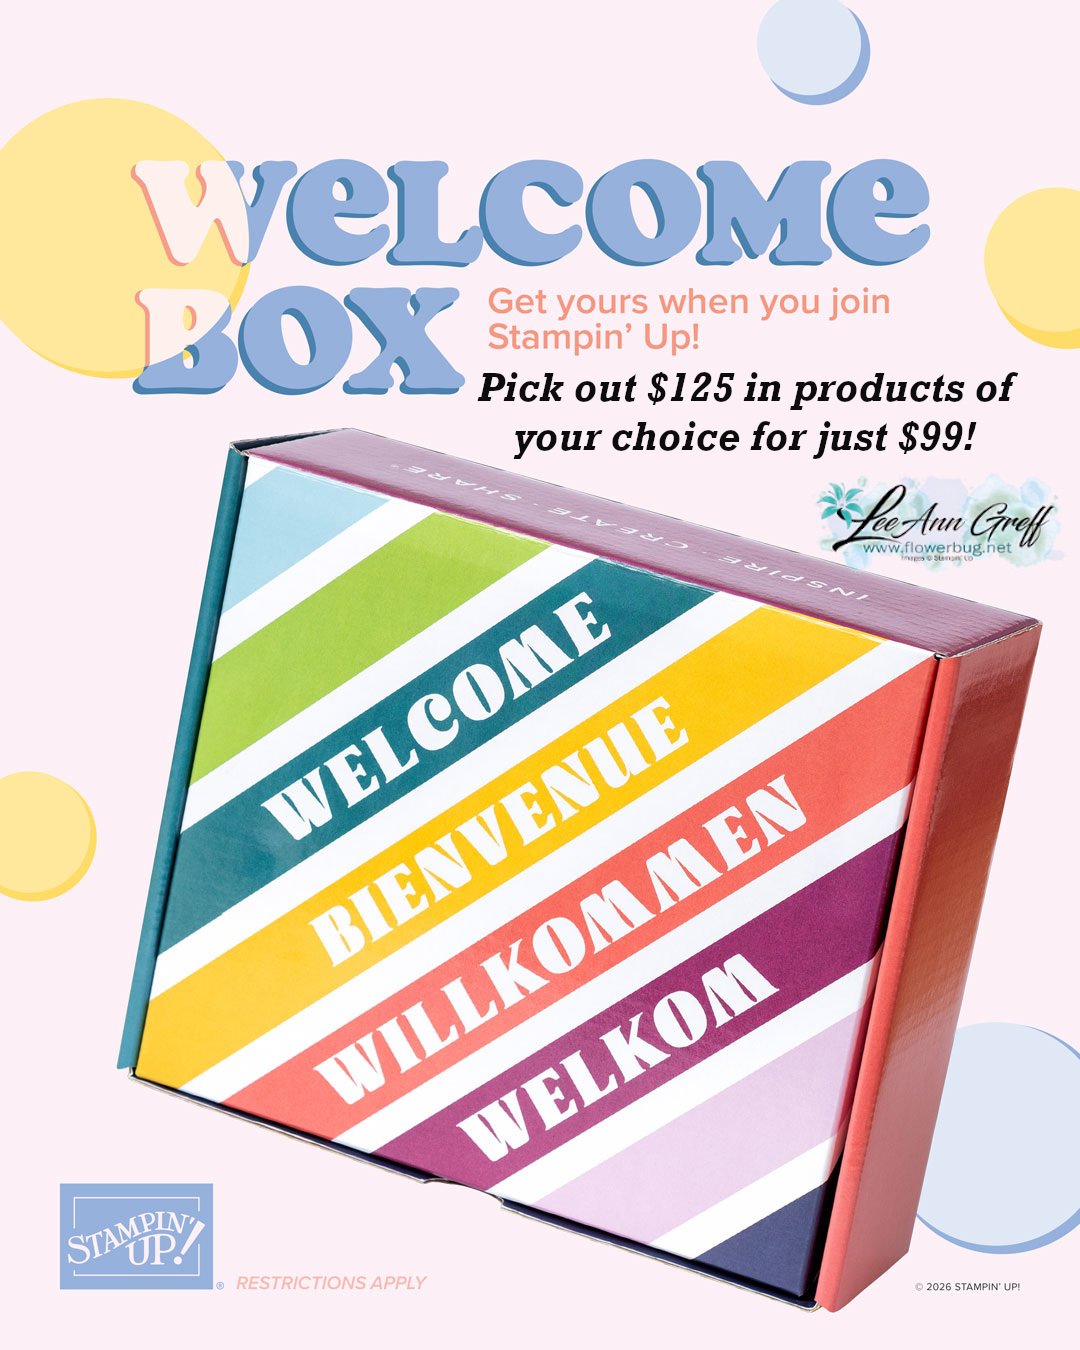
And lastly is the new Welcome box!

This is super exciting news! All first-time demonstrators (beginning July 1, 2026) will receive a surprise Welcome Box—a gesture of appreciation and a warm welcome into the global Stampin’ Up! creative community.
Here is a video that shows what’s inside. But here are the details:

What’s Inside the Welcome Box

  • A handwritten welcome letter from Sara
  • Stampin’ Up!-branded swag:
    • Pen
    • Pop-up pencil case
    • Pop-up waste basket
  • An exclusive card kit including:
    • Kit-sized stamp set
    • Full-size clear block
    • Classic Stampin’ Spot
    • Supplies to create eight “hello” cards

Here’s the link to join my Team; it’s just $99 and you can choose up to $125 in products of your choice!

Important Notes

  • The Welcome Box is exclusive to first-time demonstrators. Beginning July 1, 2026, anyone joining for the first time will receive a Welcome Box.
  • Current demonstrators have a one-time opportunity to order a Welcome Box after it launches. See below for details.
  • Rejoining demonstrators will receive all other joining perks (including the coupon code) but not a Welcome Box.

All Posts

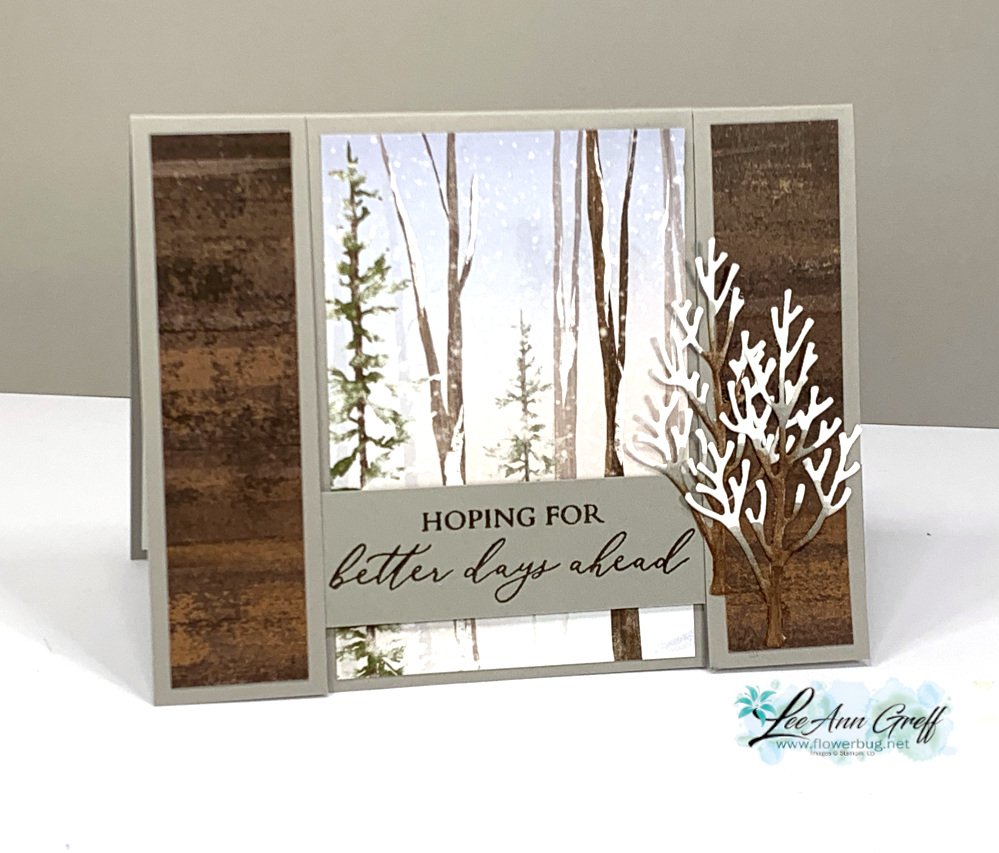
  • One Horse Open Sleigh Spanner fun fold card


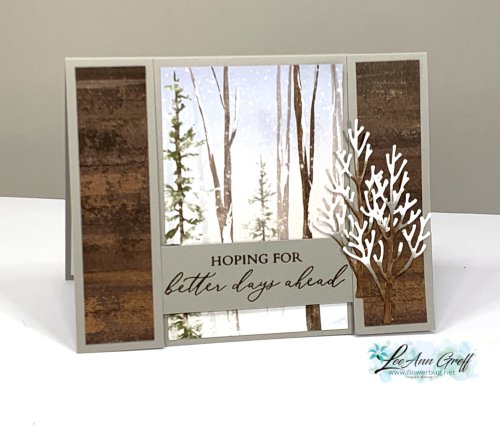
    I was surprised to see the One Horse Open Sleigh designer paper back in stock.  It was unavailable last week but it's back now.  I featured it in one of my July card kits to go.  See it here online.
    This designer paper is so pretty; it's filled with beautiful scenes and soft prints. 

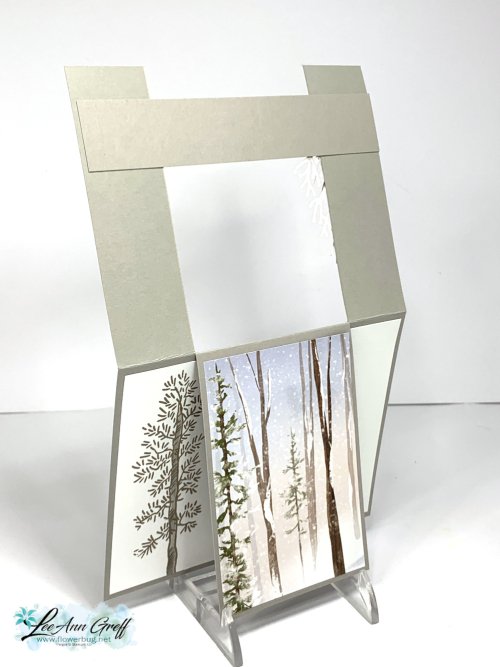
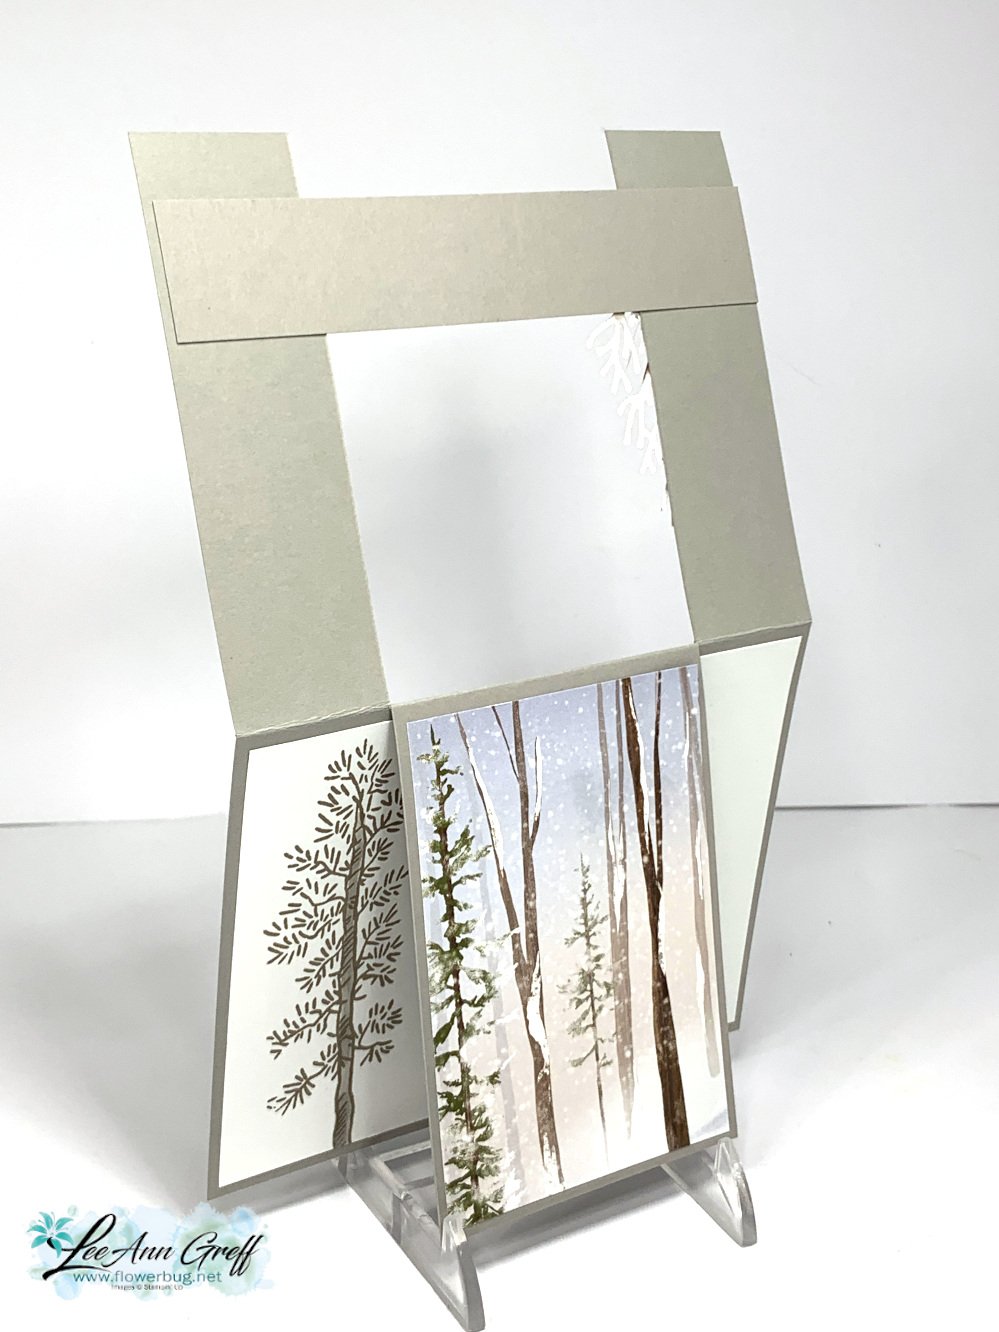
    It's called a spanner card because of it's unique fold – the horizontal layer spans the card from side to side.  

    I added a few die-cut trees on the right side.  I colored them with Blends markers – adding brown and Gray Granite to the white. The greeting is from the Lasting Joy stamp set. 

    The Gray Granite card base is a simple 5 1/2" X 8 1/2" scored at 4 1/4".  Then you cut up to the score line at the 1 1/4" mark on front; on both sides. 

    I added designer paper to the center panel and also to both side panels.  The horizontal piece 'spans' under the to side panels like this: 

    Measurements:

    • Card base 5 1/2" X 8 1/2" score at 4 1/4".  Cut up to the score line at 1 1/4". 
    • Horizontal layer 5 1/2" X 1"
    • Designer paper 2 3/4" X 4" and two pieces 1" X 4" for the sides. 

    This card was included in both my PDF tutorial and the pre-cut card kit to go; each card is a fancy fold.  I have just two kits left.  You can see them both here along with other kits and tutorials.  

     ~~~

    July Specials: 

    Bonus Days!

    Get a $5 coupon for each $50 order you place in July.  Redeem in August!


    Clearance Rack update!

    See all items available here

     NEW Online Exclusives will be available

    See them all here

    ~~~

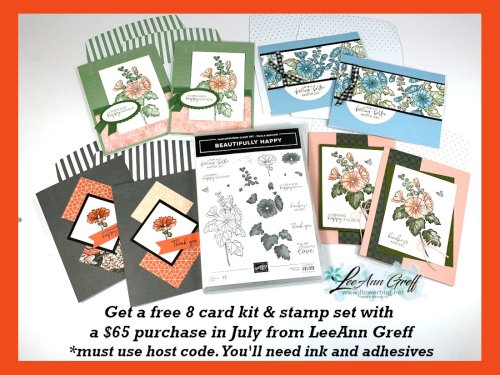
    I have 3 free card kits left!  It includes a Beautifully Happy stamp set 

    with online orders over $65; must use a host code.

     *current host code: XNYX2DWG

    Leave a Reply

    Your email address will not be published. Required fields are marked *

  • Check out these projects featuring Clearance Rack deals


    There are quite a few amazing deals on the Clearance Rack now and I thought I'd highlight a few of my favorites:  

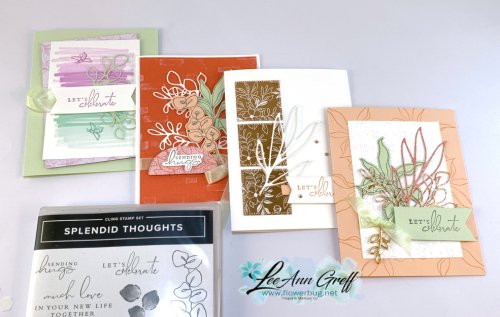
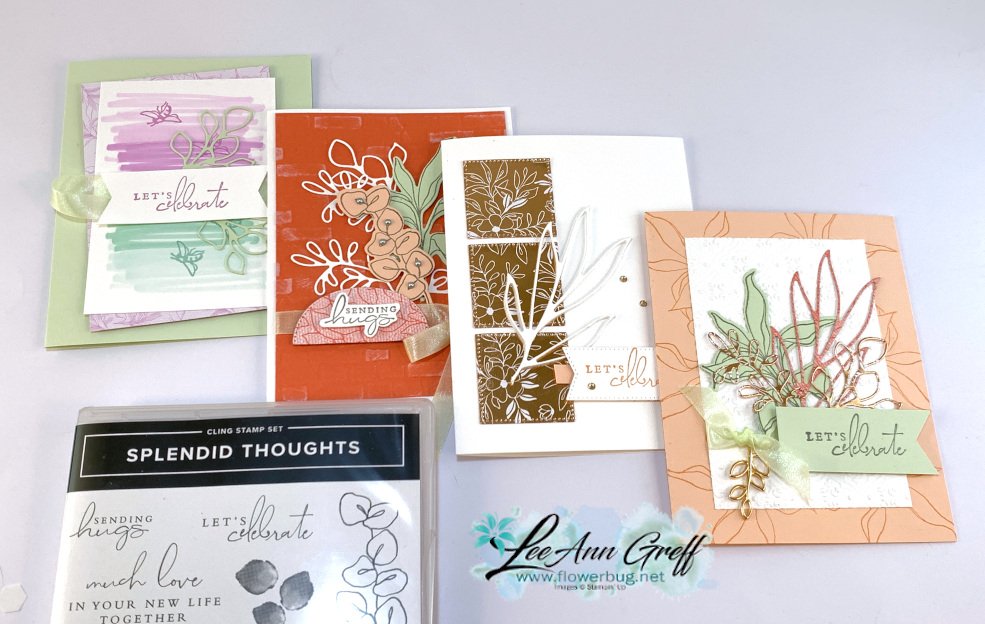
    First is the beautiful Splendid Thoughts stamp set for just $16 and the coordinating Splendid Stem dies for just $8.25. I shared these projects last year: 


    I am surprised that the stamp set and dies are both there along with the pretty Soft Seafoam ribbon and the Open Leaf Trinkets. *Both are now just $1.25! Click on the blue highlighted words to see these items in the Clearance Rack. 


    Remember the Clearance Rack changes every day; do not delay if you want anything! *Remember to use this host code when ordering.  XNYX2DWG

    ~~~

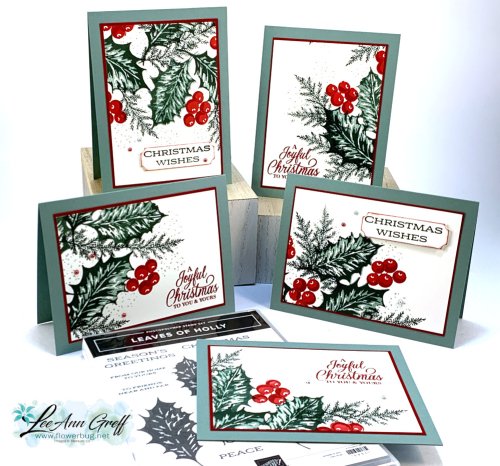
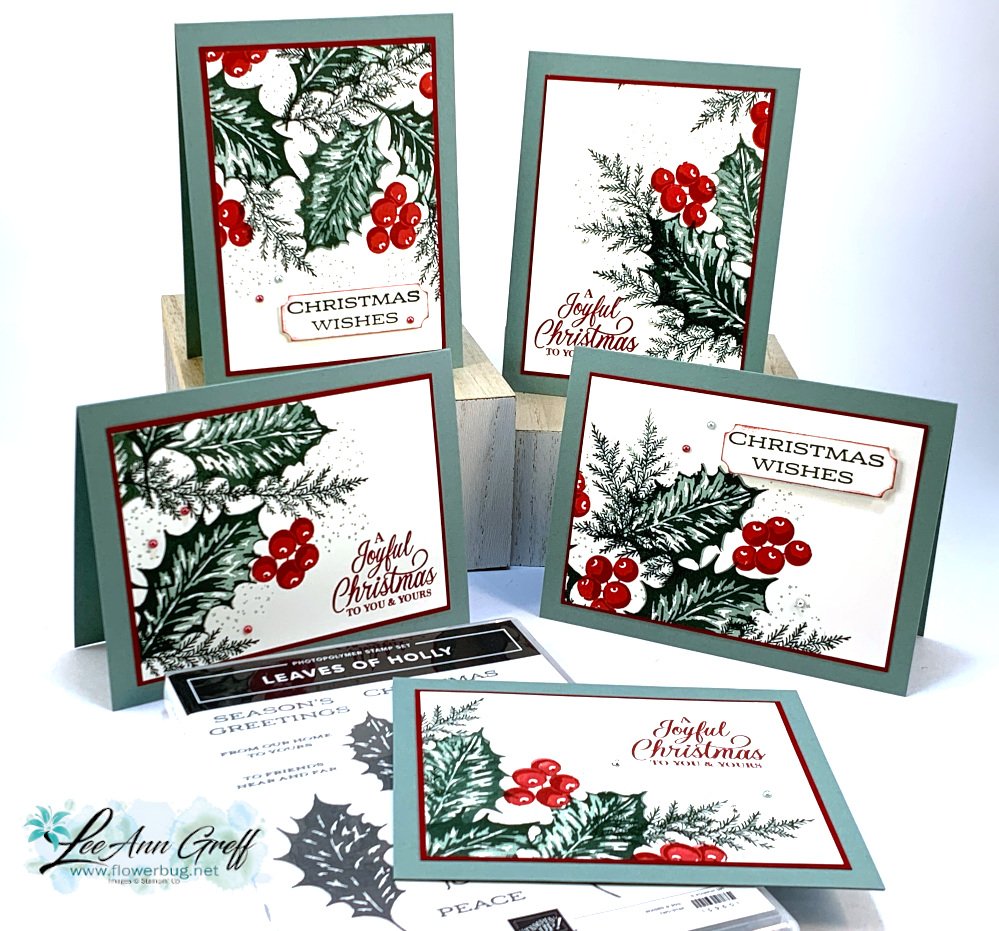
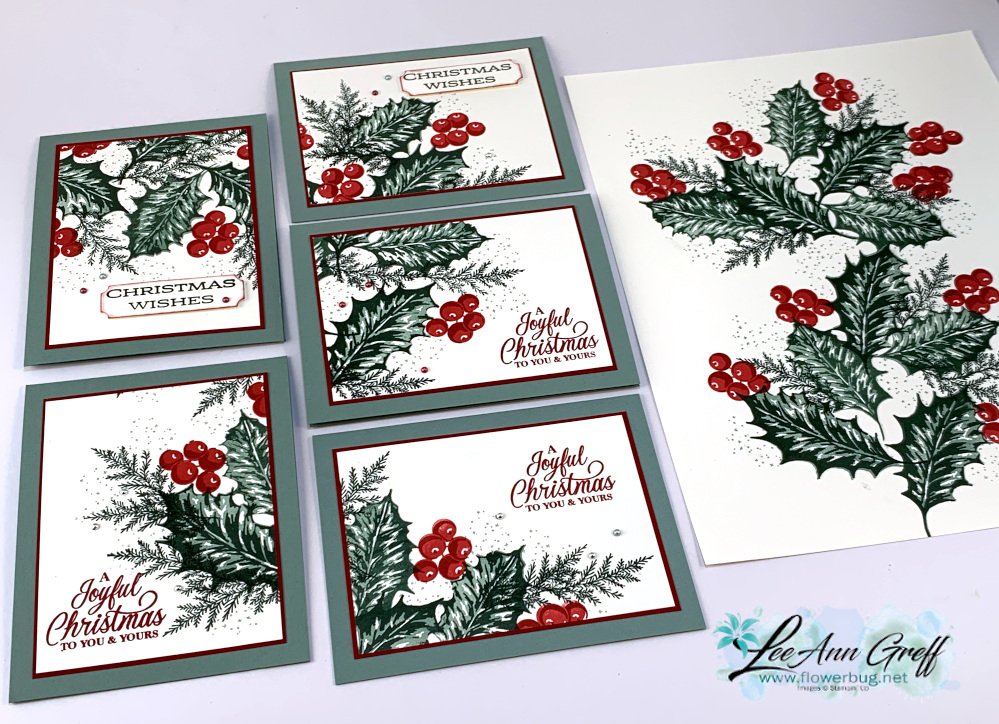
    Next is the Leaves of Holly stamp set.  It was $22 and is now just $15.25 on clearance. 

    I created these beautiful Christmas cards on a video last year.  

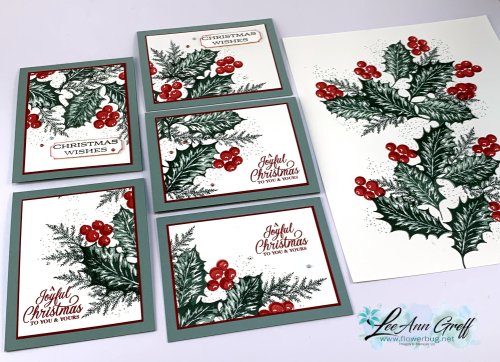
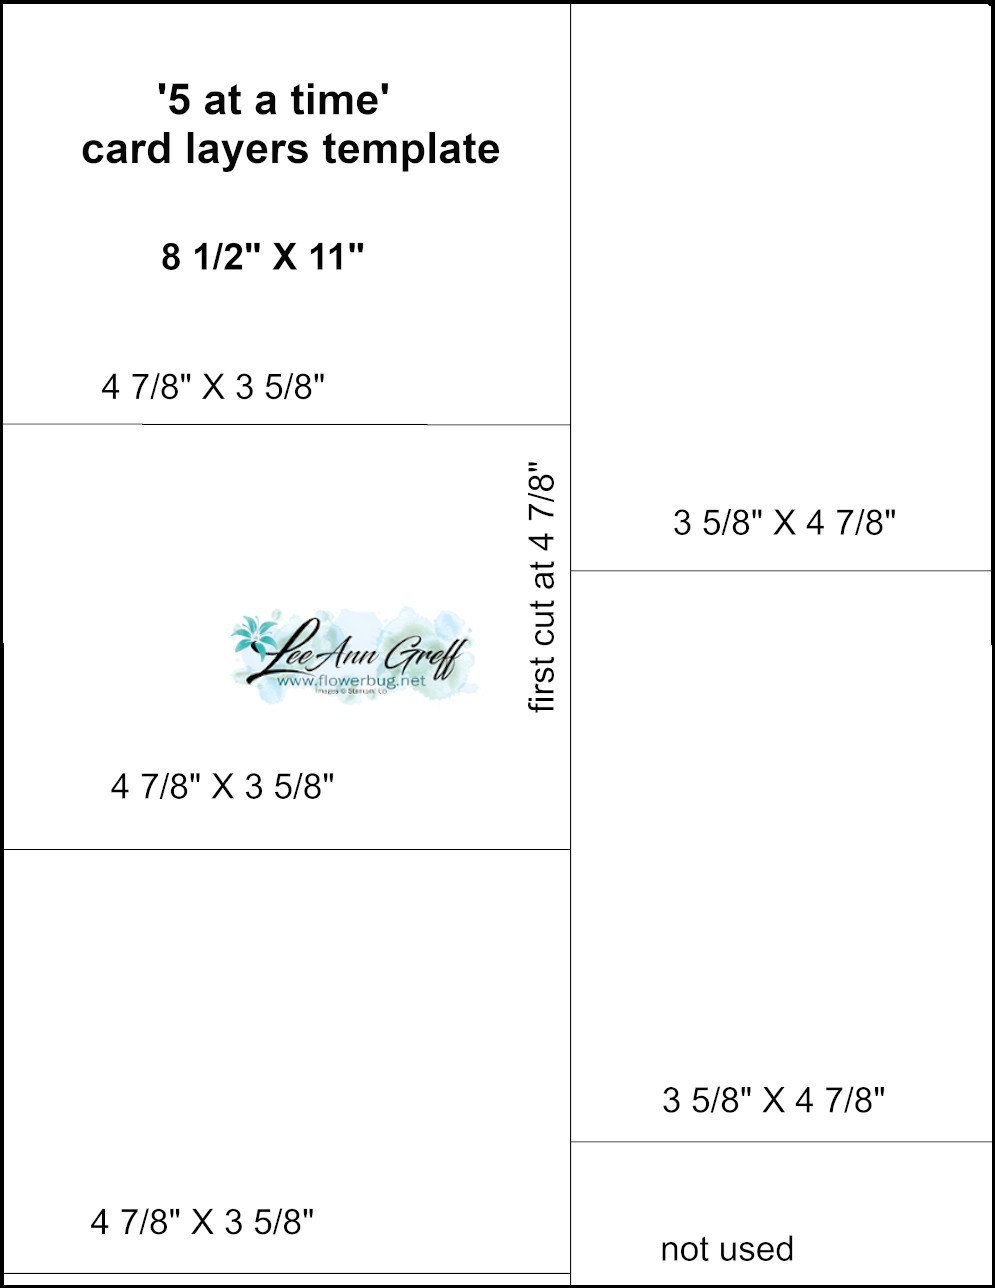
    I call it the 5 at a time technique.  You stamp one sheet of neutral paper and then cut it into 5 pieces using my template below.  And the neat thing is the layers under the stamped White card stock are also cut using a template. Just 2 sheets of card stock to make 5 card fronts!  *Watch the video below or click here. 


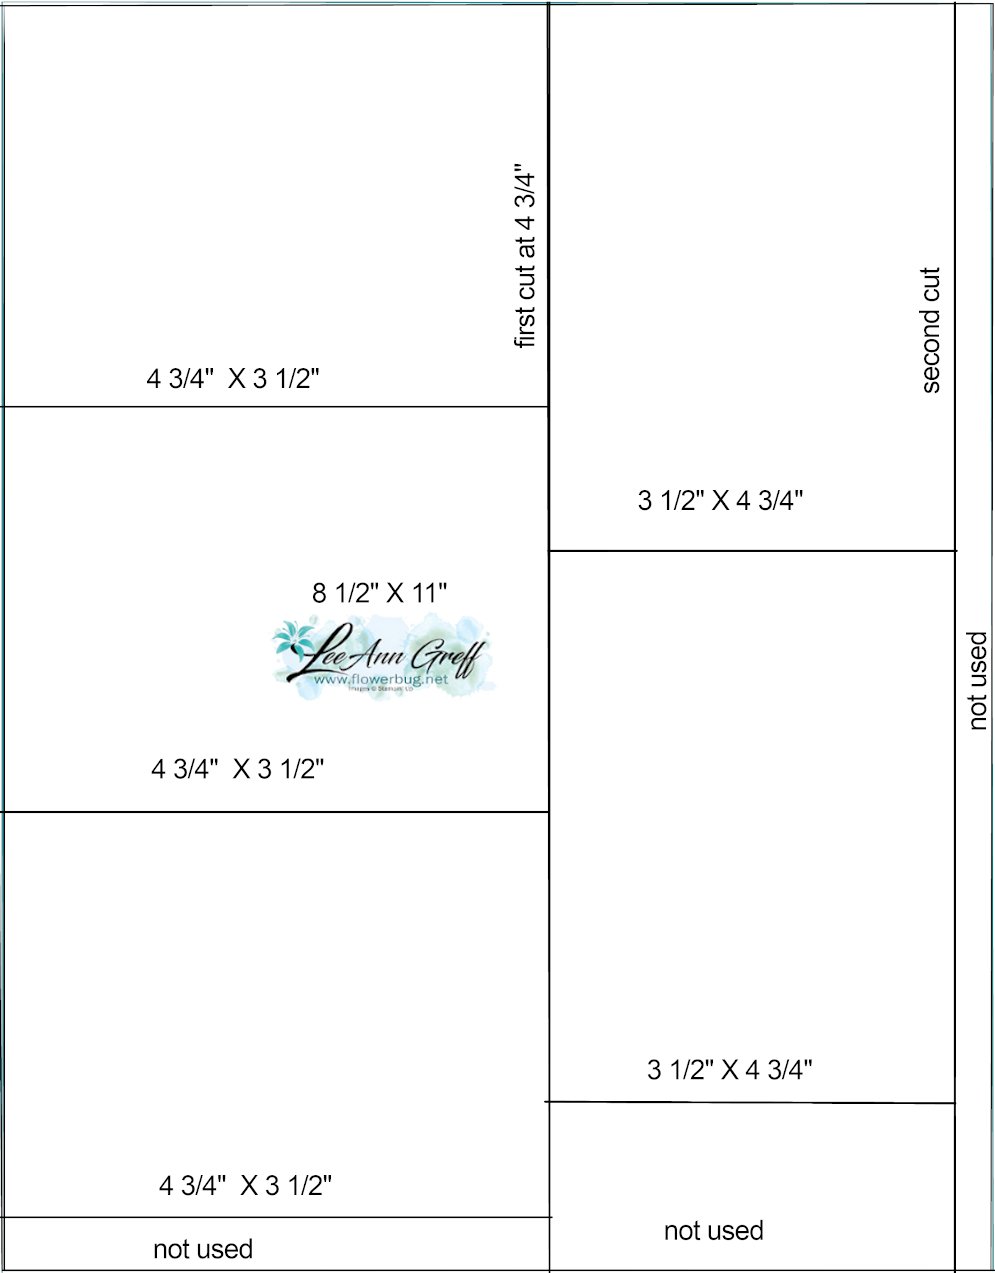
    See how I stamped down the center of the White card stock on the photo above?  Next I cut it using the template below: 

    The first template is what you stamp on.  The one below is for the layers under the stamped pieces. It's just 1/8" larger for a nice thin layered accent.  

    Next is the template for the colored layers on each stamped layer.  

    Watch the video below to see how it's done.  Think about your favorite stamp sets and how fast you can create beautiful cards using these templates!  

     ~~~

    July Specials: 

    Bonus Days!

    Get a $5 coupon for each $50 order you place in July.  Redeem in August!


    Clearance Rack update!

    See all items available here

     NEW Online Exclusives will be available

    See them all here

    ~~~

    I have 3 free card kits left!  It includes a Beautifully Happy stamp set 

    with online orders over $65; must use a host code.

     *current host code: XNYX2DWG

    Leave a Reply

    Your email address will not be published. Required fields are marked *

  • Pinwheel Tower Fancy Fold card with video & free projects sheet!


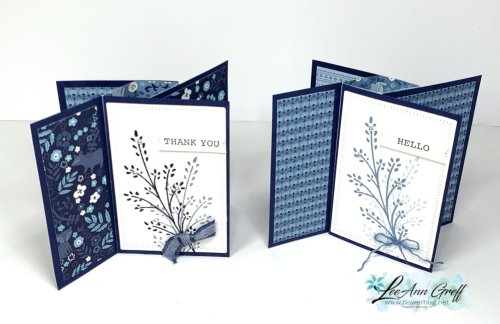
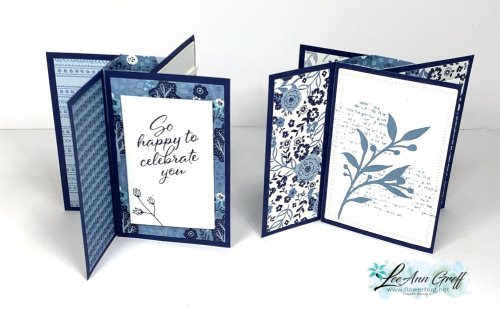
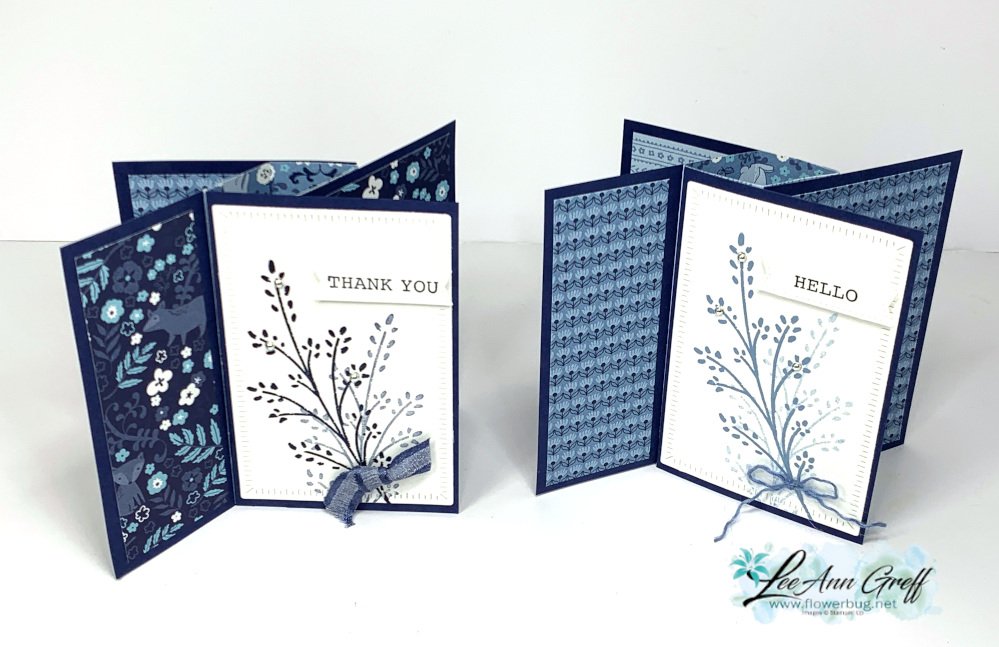
    Here's another card we made at my July Card Clubs.  I always try to feature one fun fold card and this was a doozy!  

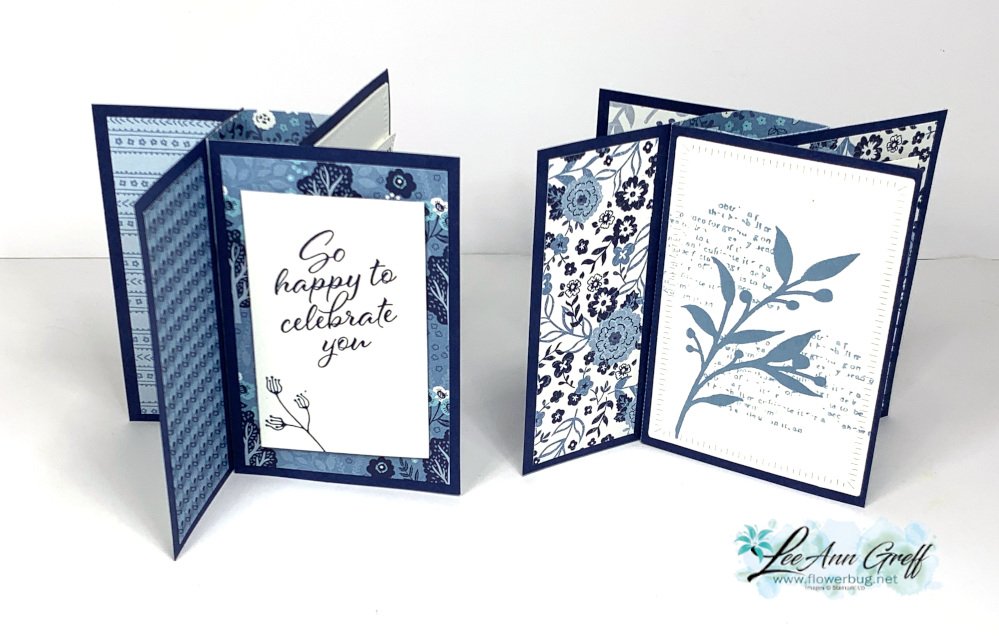
    When they saw the many pieces they were a bit worried it would be hard.  But as we made it together they loved it!  Be sure to watch the video here or below; it's so much easier than it looks!  

    This card is super fun to play with; it reminds me of a 'never ending' card.  You can turn and turn it and see something new each time. But the finished card lays flat and is 5 1/2" X 4 1/4" so it fits nicely in an envelope.  

    Besides the Gorgeously Made stamp set (seen here) I chose the Layering Leaves (seen here) for the pretty greetings and leaf images. 

    I chose to feature the Countryside Inn designer series paper seen here with it's many shades of Blue.  I chose to use Night of Navy and White card stock, Navy and Boho Blue inks. 

    You can find the measurement, photos, directions and supplies list here on this free project sheet. Download July 23 Pinwheel Tower card

    Each of the 4 panels of Navy card stock is adhered to the center 'tower' made from a 4 1/4" square of designer paper. Once you have your card base created it's simple to add the 6 pieces of DSP and your stamped panels. 

    I also used the Radiating Stitches dies seen here (online exclusive) and the Stylish Shapes dies for the greeting.  The ribbon is the Night of Navy 3/8" bordered ribbon.  

    Click here or on the photo below to watch the video.  It's the second project featured.  

     ~~~

    July Specials: 

    Bonus Days!

    Get a $5 coupon for each $50 order you place in July.  Redeem in August!


    Clearance Rack update!

    See all items available here

     NEW Online Exclusives will be available

    See them all here

    ~~~

    I have 3 free card kits left!  It includes a Beautifully Happy stamp set 

    with online orders over $65; must use a host code.

     *current host code: XNYX2DWG

    Leave a Reply

    Your email address will not be published. Required fields are marked *


Notice: LeeAnn Greff, Independent Stampin’ Up! Demonstrator, Manager. The content of this website is my sole responsibility as an independent Stampin’ Up! demonstrator and the use of, and content of, the classes, services, or products offered on this website is not endorsed by Stampin’ Up! Copyright 2025