/


Latest Post

A WOW fun fold card with Dragonfly Dreams!


This weekend my Flowerbug's Team held our monthly card swap & Team gathering.  Our theme was window cards and I'll be sharing them all week long!

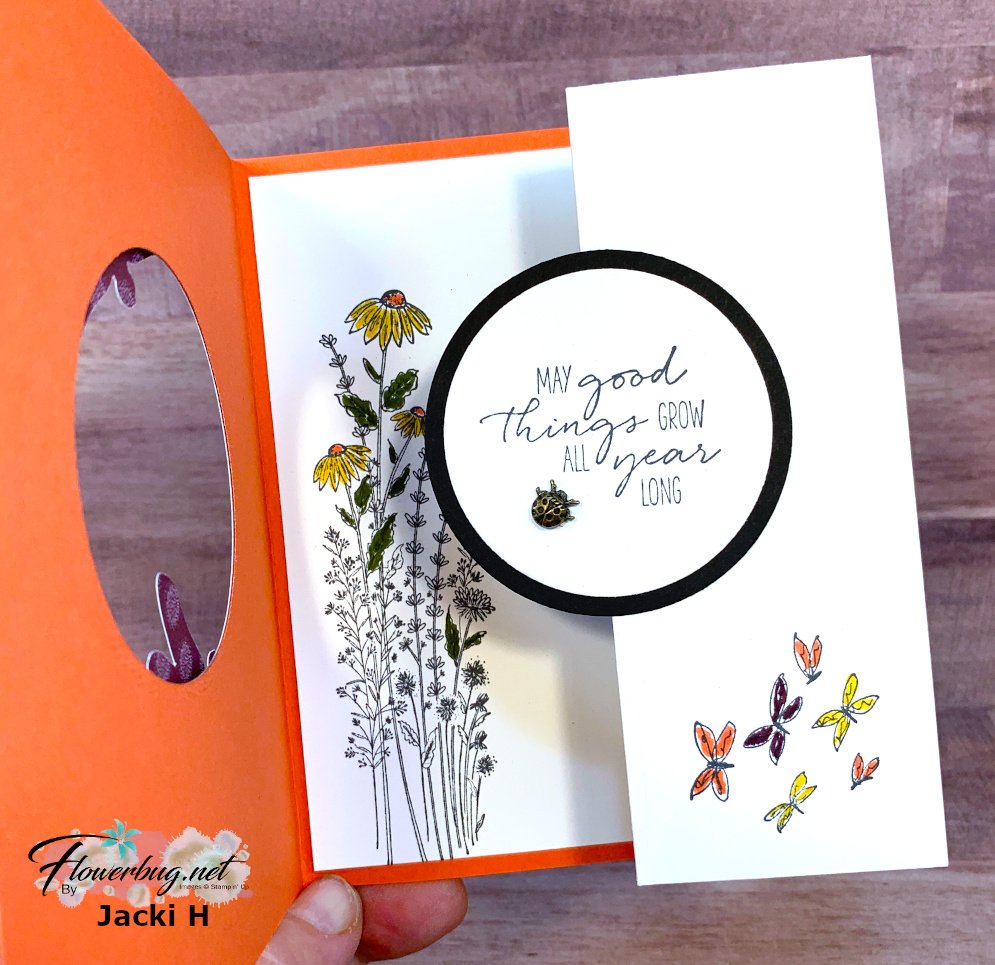
Check out this special Z fold card Jacki made!  
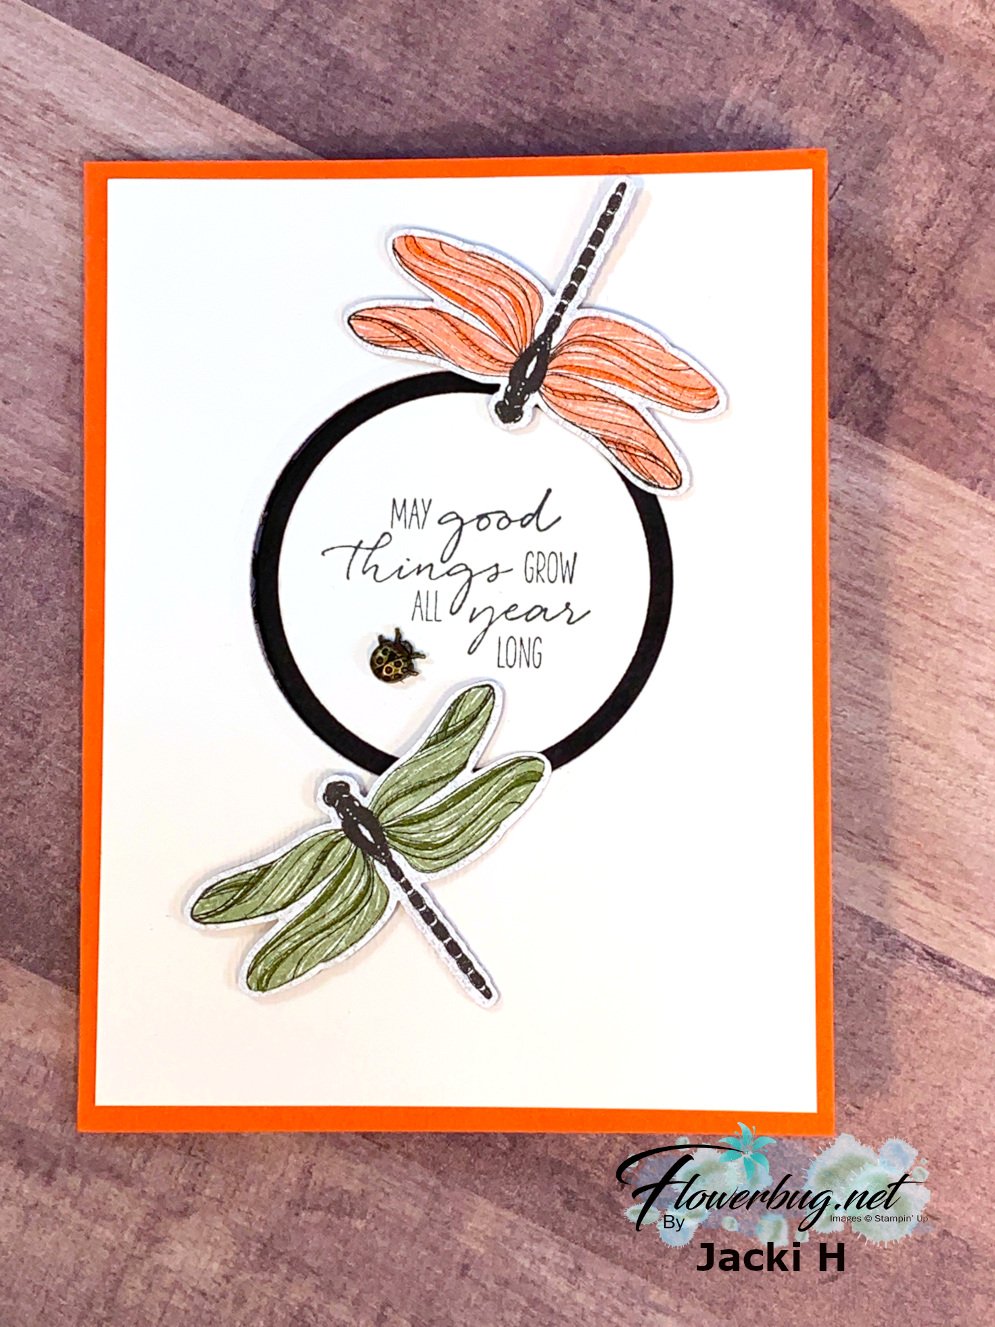
Her colors are Terracotta Tile, Black & White and the Dandy Garden Designer paper seen here.  Did you know that the Dragonfly Punch coordinates with this Designer Paper?  She punched her dragonflies directly out of the paper!  No stamping for these at all! See the Dragonfly Garden bundle here. 

Check out the whole suite of products here. 

This card features almost two full card bases with just a few score lines. It looks a lot harder than it is.  

  • Terracotta Tile – 5 1/2" X 8 1/2" scored at 4 1/4"
  • Whisper White – front is 4" X 5 1/4", inside fold is 5 1/4" X 8" scored on the long edge at 4" X 6". 
  • Designer paper – 1 3/4" X 5" 

Her 'window' in the front is 2 3/8" and the black circle on the inside fold is the same.  The White greeting circle is 2 1/8".  All of these circles are cut with the Circle dies in the Annual Catalog. 

Steps to assemble this card:

  • You'll adhere the White front to the main card base and then cut your window. 
  • Stamp on the inside White card before adhering to the inside of the main card.
  • Add the Designer paper to the inside fold.
  • Die-cut the greeting circles and adhere together. 
  • Fold the card closed and add the circle to the inside fold 'through' the front window.  Perfect placement!   
More window cards posted tomorrow and all week long! 

~~~

Current Host code is 39A9QQZP

Order online here

All online orders receive a free PDF of the new Butterfly Bouquet bundle

with 15 projects!

~~~

Get a free adhesive package from me with an online order over $50 using the host code above. 3 sheets of Dimensionals and 1 for die-cuts!

*If your order is over $150 do not use the code; you'll still receive a gift! 

Below are the Multipurpose Glue stands we're making. They're $6 each and available in my Shop here.  

All Posts

  • Quick Framed Panel card; three ways!


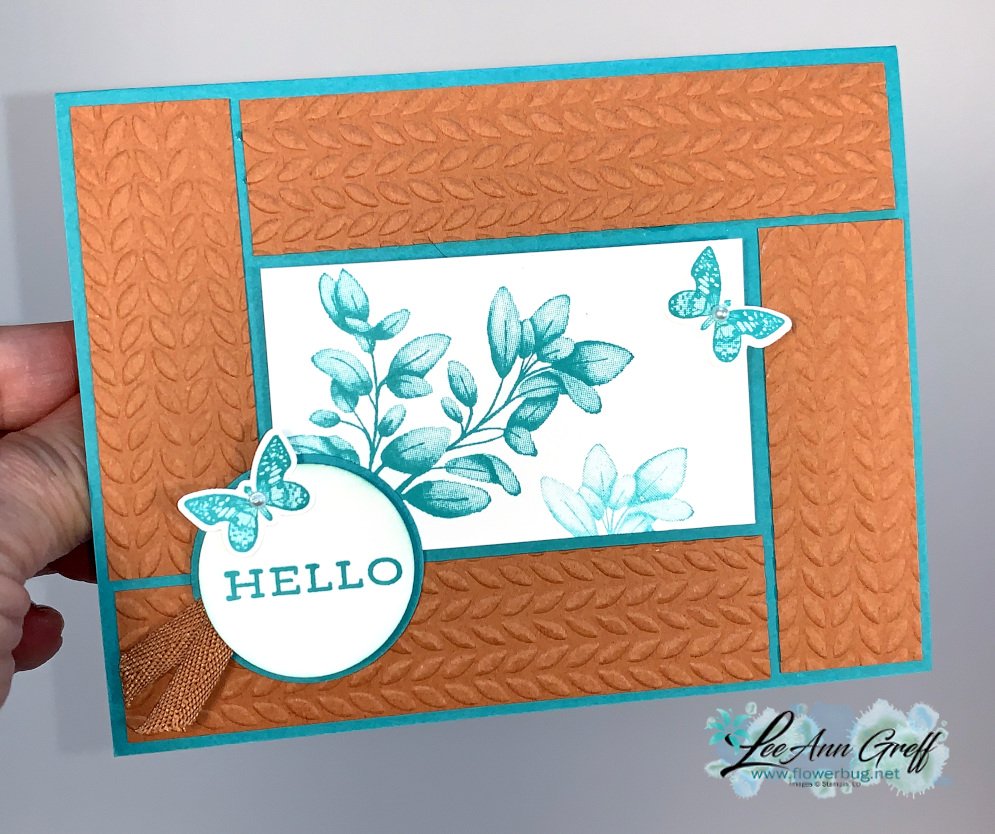
    For last week's Stamp with Me Facebook Live I chose to make framed panel cards.  There are likely many ways to frame a stamped panel but I chose to highlight three of them – Stamped, Textured and Designer Paper.  Look!

    On these first two cards I stamped leaves on card stock using White Craft ink.  The colors above are the new 2020-22 In Colors in Just Jade and Misty Moonlight.  I used the Layered with Kindness (retiring!; see it here) and the brand new Forever Fern stamp sets.  The punch is Label Me Fancy seen here

    Just look at the detail on the Distinktive images here on the Forever Fern stamp set.  I'm in the middle of creating a new Wonder template for 8 quick, beautiful cards using this stamp set.  I cannot wait to share it with you!  

    I do not have the new Misty Moonlight ink yet so I used Night of Navy, stamped off once.  It's close!

    Measurements:

    • Card base 5 1/2" X 8 1/2" scored at 4 1/4"
    • long pieces are 1" X 4 1/4"
    • short pieces are 1" X 3"
    • stamped panel is 1 3/4" X 3"
    • Navy layer is 1 7/8" X 3 1/8" 

    This next card is the new Cinnamon Cider with Bermuda Bay.  I also used the new Forever Fern stamp set here.  The butterflies are from Butterfly Wishes set.

    The next card is Seaside Spray with Night of Navy and features the Layered with Kindness and Butterfly Wishes. which coordinated with our Butterfly Duet punch. The Ornate Floral embossing folder is new and in the upcoming Annual catalog but it's available now.  

    Lastly is one made with Garden Lane designer series paper (on sale right now) in Garden Green & Mint Macaron. 

    Each week I share the measurements for our Monday stamp sessions a day or two early. Everyone preps their card supplies and create right along with me on my Facebook Page.  They're loving my quick & simple cards; we make 3 each week on Monday nights at 7:30 pm CT. You can see the cards we're making tonight!  Join us here! 

    ~~~

    June Specials

    Tomorrow is the last day to get any of the Last Chance items!  


    Get my Lovely You pdf tutorial free with any online order in June

    It includes directions, photos and measurements for 10 cards!


    June Host code is 7H2FW9FG

    Get a free pkg. of Elegant Faceted Gems from me if your order is over $55. 

    Order online here


    Leave a Reply

    Your email address will not be published. Required fields are marked *

  • Gorgeous Delicate Lace Thinlits on sale; while supplies last!


    This pretty card is a project we made at my Card Clubs in May.  I found it on Pinterest.  I just had to use some of these retiring items one more time before they're gone for good!  

    Retiring items:

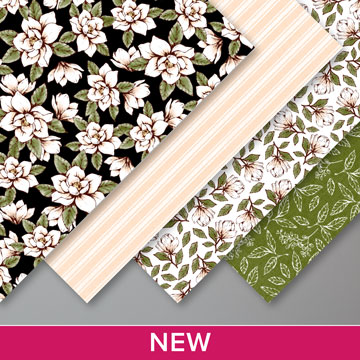
    The Petal Pink & Champagne ribbon and the Magnolia Lane designer paper is sold out now but they do still have the bulk package.  It includes 20 sheets of two different double sided patterns of this pretty paper including the one I used here!  You can see it here. 

    My favorite deal on the Last Chance list are these gorgeous edgelit dies (seen here).  I cannot believe they're just $11.60 instead of $29 originally.  Remember they're on the list while supplies last! 


    ~~~

    May Specials


    Get my 'ALL Fun Fold cards tutorial' free with any online order.

    It includes directions, photos and measurements for 18 fancy card folds!


    May Host code is EYDJ4MQN

    Get a free pkg. of Noble Peacock rhinestones from me if your order is over $55. 

    Order online here

    Leave a Reply

    Your email address will not be published. Required fields are marked *

  • A Good Man double point fold card; it’s super easy!


    It was so nice to be able to meet and stamp with many of my Club members this month.  Our state has eased the guidelines for meetings so most of my gals chose to join me for Club this month.  Many of us really needed to get together and play/stamp again. 

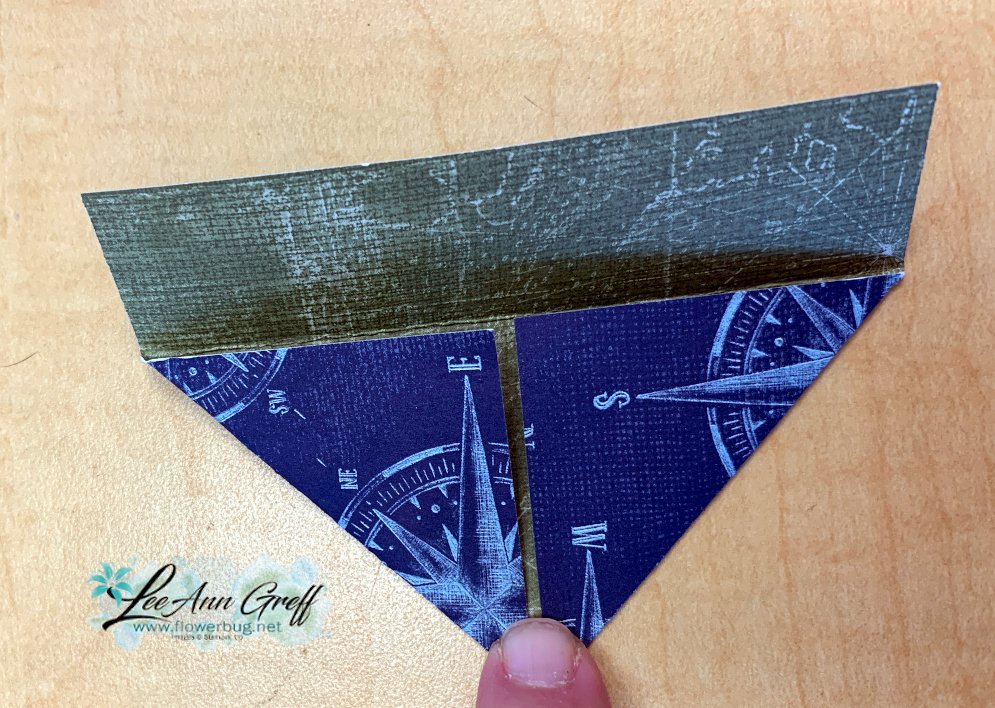
    One of our cards was this Double Point fold card; it's super cool and so very easy!

    And it really makes the best use of your designer paper.  Not a bit of waste!  Each card needs two pieces of 3" X 4" designer paper.  Score it at 1" along the long edge and then fold each corner to the center of the fold like this: 

    I used the Come Sail Away designer series paper here; it's still available while supplies last here. 

    Here's a quick video for you on putting this card together.  I used the A Good Man stamp set and as you can see; you don't have to color in some of these sketch style images.  They're beautiful just as they are!

    Don't forget to subscribe to my YouTube channel while you're there!

    ~~~

    May Specials


    Get my 'ALL Fun Fold cards tutorial' free with any online order.

    It includes directions, photos and measurements for 18 fancy card folds!


    May Host code is EYDJ4MQN

    Get a free pkg. of Noble Peacock rhinestones from me if your order is over $55. 

    Order online here

    Leave a Reply

    Your email address will not be published. Required fields are marked *


Notice: LeeAnn Greff, Independent Stampin’ Up! Demonstrator, Manager. The content of this website is my sole responsibility as an independent Stampin’ Up! demonstrator and the use of, and content of, the classes, services, or products offered on this website is not endorsed by Stampin’ Up! Copyright 2025