/


Latest Post

A fun way to add color to the Happy Place stamp with video tutorial


I shared how to add color to the large ‘Happy’ from the Happy Place stamp set on last week’s Live video. What do you think?

We made this cute card at my September card clubs. The colors include Lost Lagoon, Calypso Coral & White. You might wonder how I achieved the two-toned inking on the Happy image. I used inks – Lost Lagoon for the water and Calypso Coral for the sky. For this sample I used large ink pads. But for my Clubs we used smaller ink spots. It was a lot easier this way!

You might also wonder where I got the rectangle Perennial Postage die shape. I had to die-cut a larger rectangle twice to get this size. It was pretty easy and I share how in the video below.

We textured the Lost Lagoon layer with the Wave 3D embossing folder and the curvy leaf dies are from the Label Me Grateful dies seen here. I love them! The inside greeting is from the With You in Mind stamp set.

It’s an easy fold that shows off the inside of the card and the designer paper we added. This DSP is the Subtles 6″ designer paper which has some great patterns.

I really enjoyed playing with this fun stamp set. I’ll share another project from the video tomorrow. See the Happy Place set here.

I created a free project sheet for you with measurements, photos, directions and a supply list with links. Click on this link to print or download it.

Below is the video tutorial for this card and one more. Don’t forget to subscribe to my YouTube Channel while you’re there!

~~~

  To see all of the new Online items click here.  Or download & save the Download Online Exclusives flyer 

Get a free project tutorial with any online order in September! 
All Posts

  • More fun cards with leftover paper strips


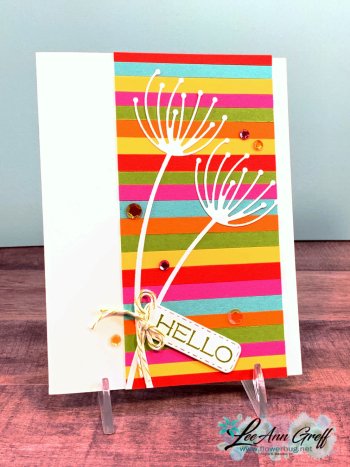
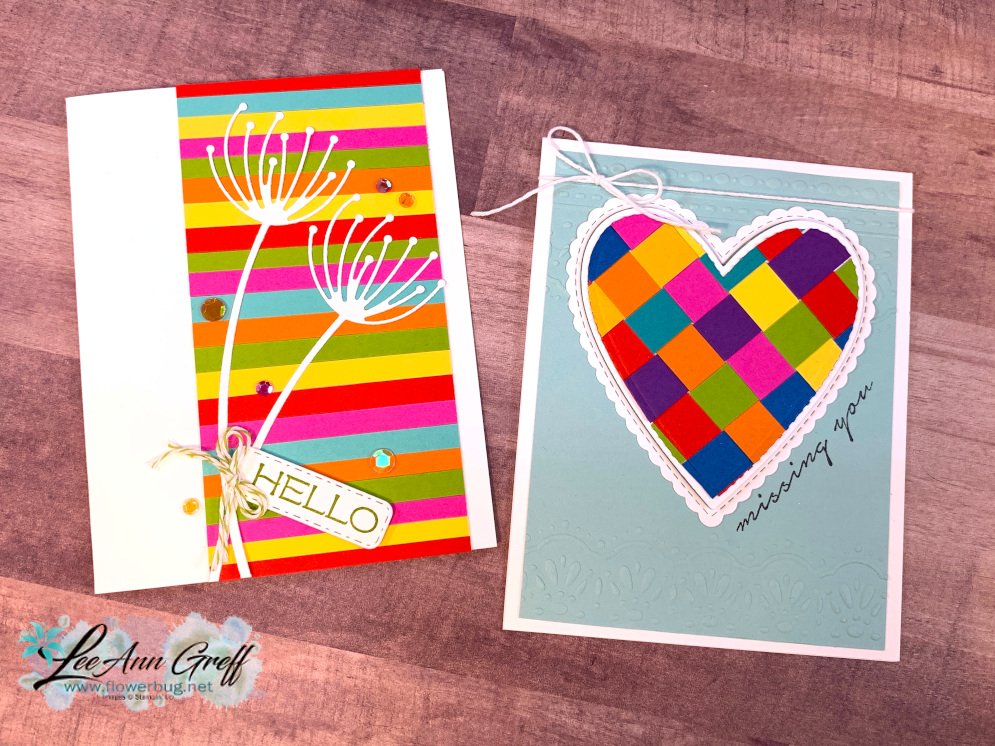
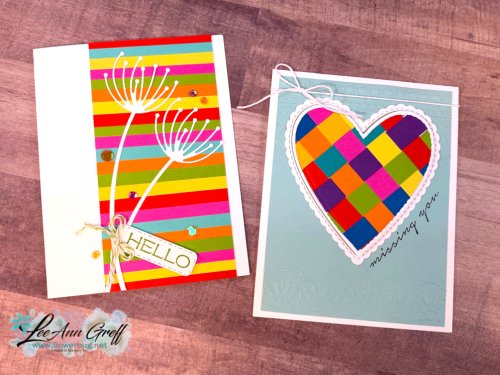
    I wanted these cards to be bright and happy so I chose my brightest colors of strips! 

    This first card has 1/4" strips adhered to a White layer 2 1/2" wide.  

    After I had the White piece covered with strips I trimmed off the excess on the edges and added it to the White card base.  Then I added the pretty dandelion White die-cuts (from the Dandy Wishes dies here).  That stitched greeting tag is from the Hydrangea Dies seen here.  Artistry Blooms adhesive-backed sequins finish it off as well as a twine bow.

    ~~~

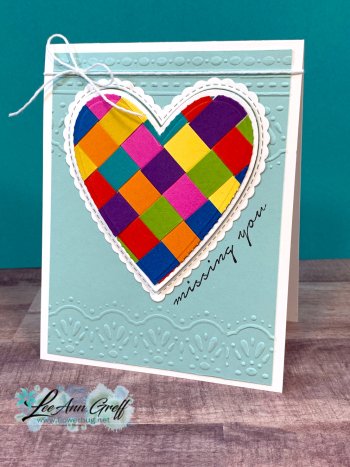
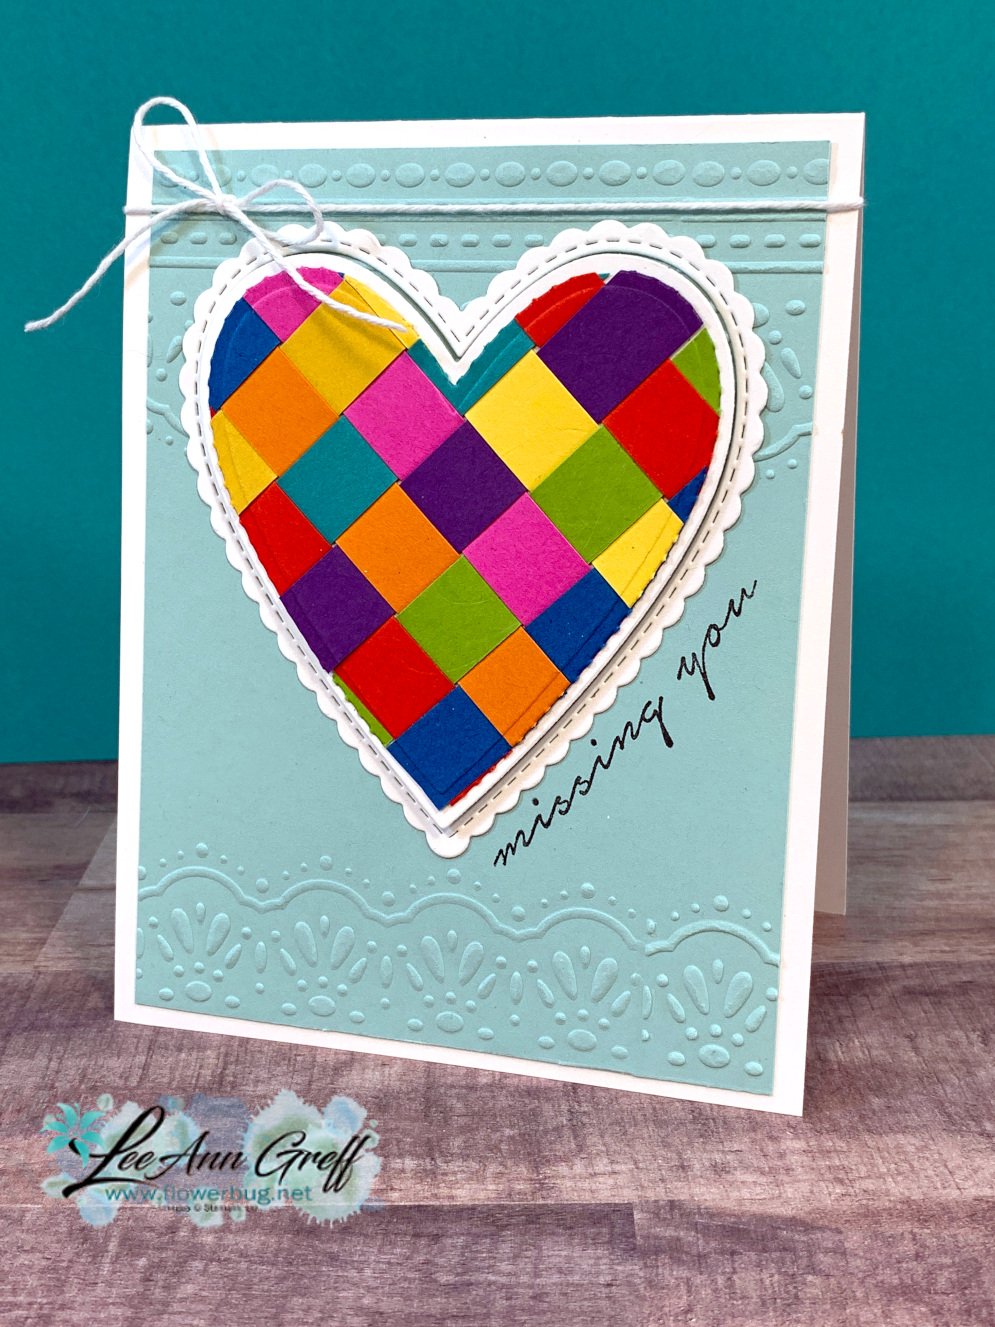
    Next is a card with a woven heart.  I think it's pretty neat!  And it looks difficult but it's just a few extra steps to die-cut the shape. *Watch the video below to catch my tips on paper weaving. 


    I share a good demo on this technique in the video below.  The strips are 1/2" and the heart shape is die-cut with the retiring Stitched Be Mine dies seen here.  There are 16 dies with lots of heart shapes & borders in many sizes.  

    The pretty textures are from the Little Details embossing folders seen here.  It's just $3.20 right now; while supplies last! 

    Here's the video for all 10 of my paper strips projects!  

    ~~~

    April Specials!

    Click here for the Annual Catalog Retiring List; many discounted items while supplies last! 

    Current Host code is PX6ZWGM7

    Order online here

    ~~~

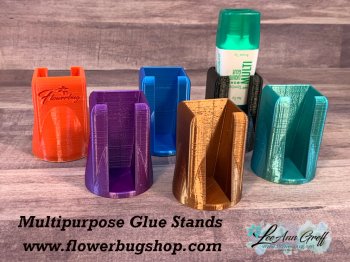
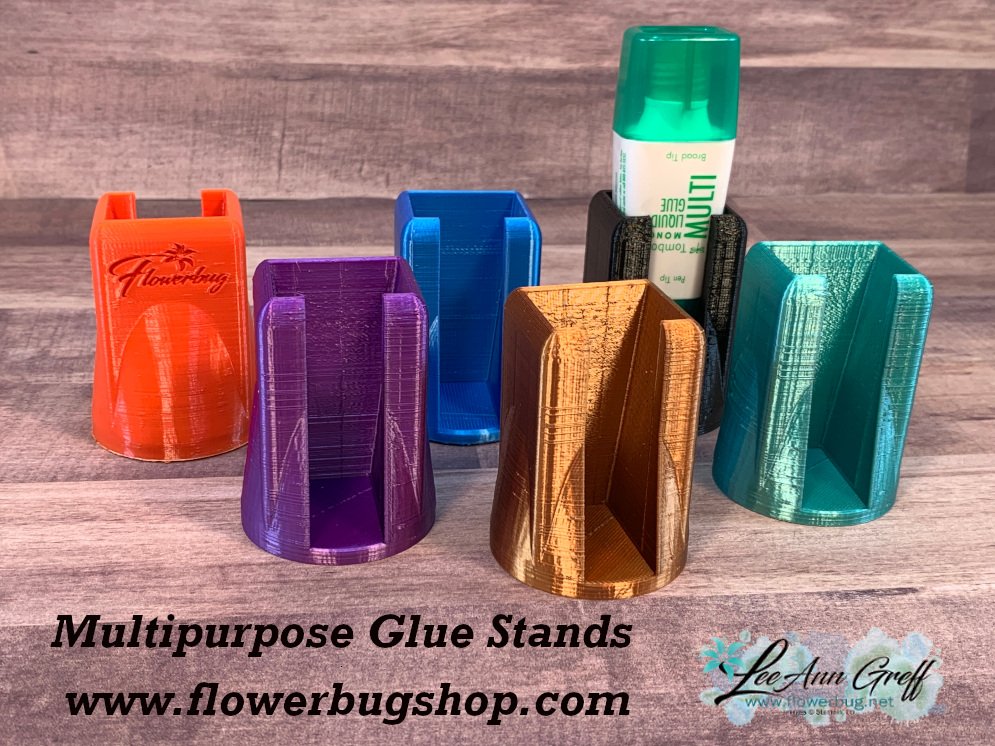
    Get a free multipurpose glue stand with an online order over $60 using the host code above. You'll receive a color of my choice unless you let me know your preference. *if you'd rather have gems; let me know.

    *If your order is over $150 do not use the code; you'll still receive a gift! 

    You can also order them in my Shop here. 

    Leave a Reply

    Your email address will not be published. Required fields are marked *

  • Quick cards for Men using paper strips!


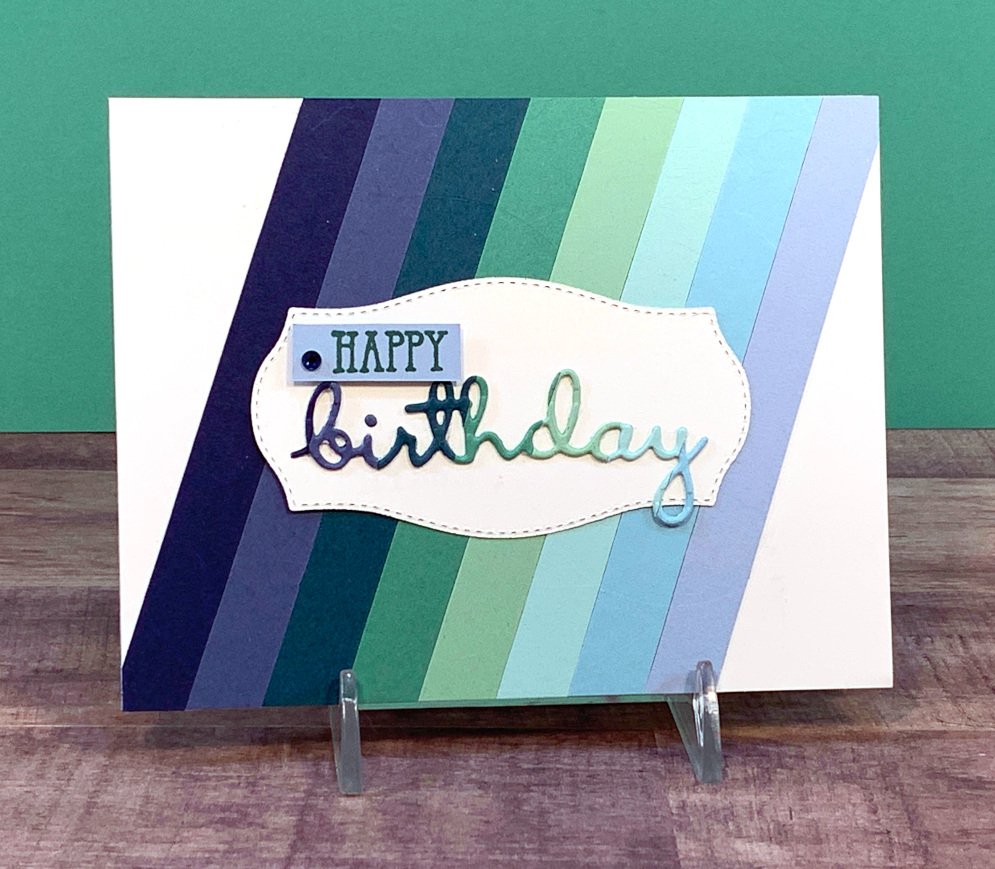
    I thought paper strips were a perfect way to create cards for men.  So I chose some 1/2" strips of blues and greens and adhered them to a piece of White 4 1/4" X 5 1/2" card stock at an angle. 

    Add them at an angle, graduating colors as you go if you wish.  Once you're added strips trim off the excess on the edges.  

    Next I used the retiring Well Written 'birthday' dies seen here and cut it out of the stripes piece.  I wanted the greeting to reflect the same colors in the background.  So easy!  

    I adhered it to the Tasteful Labels die-cut with Multipurpose Glue. I stamped 'Happy' from the coordinating stamp set Well Said seen here and fussy cut it to add to the card.  

    ~~~

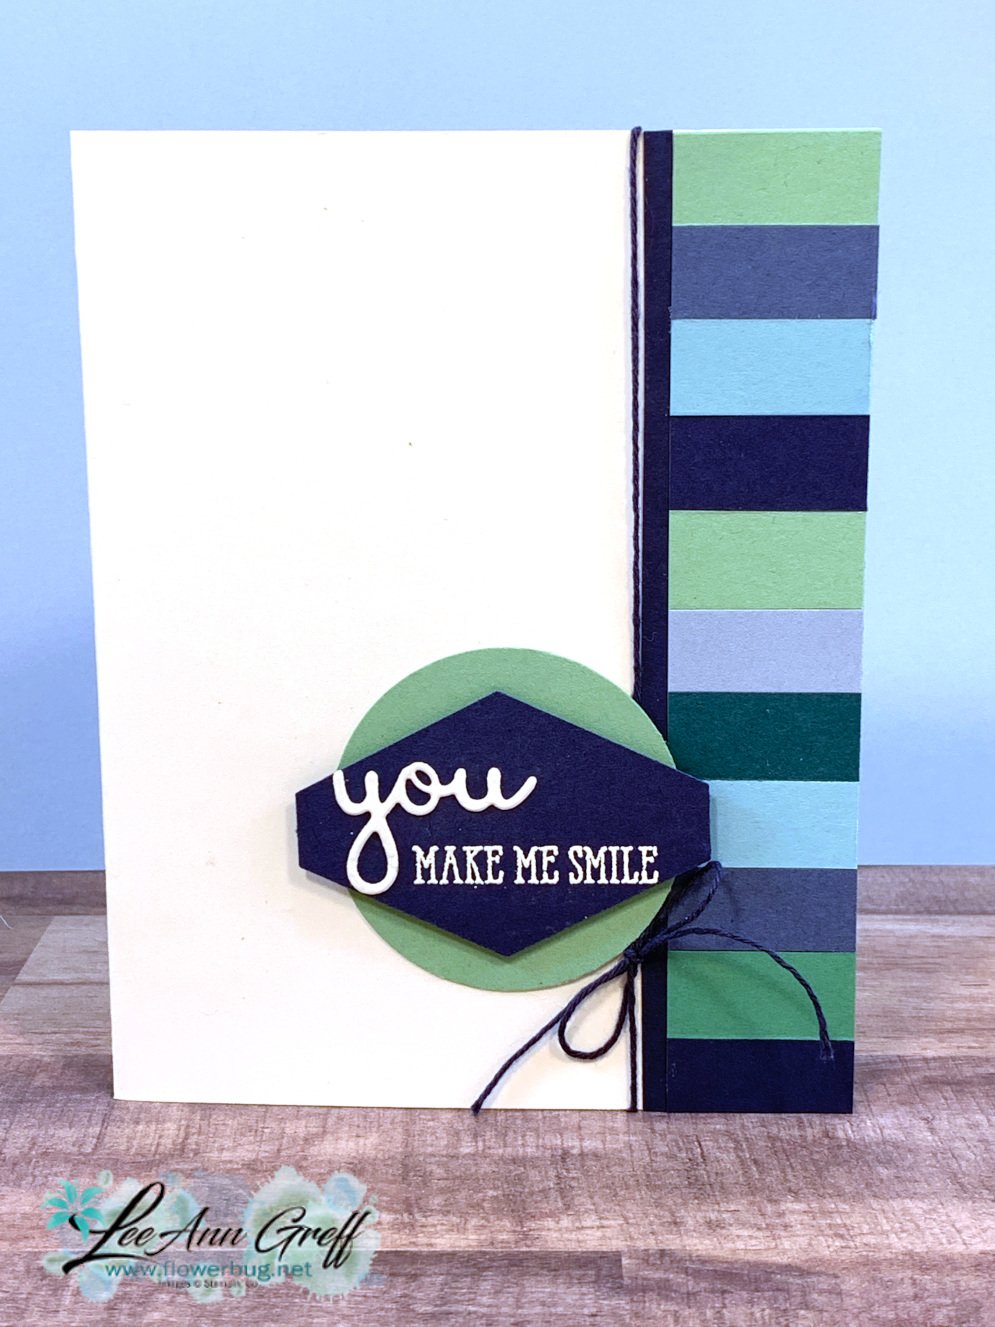
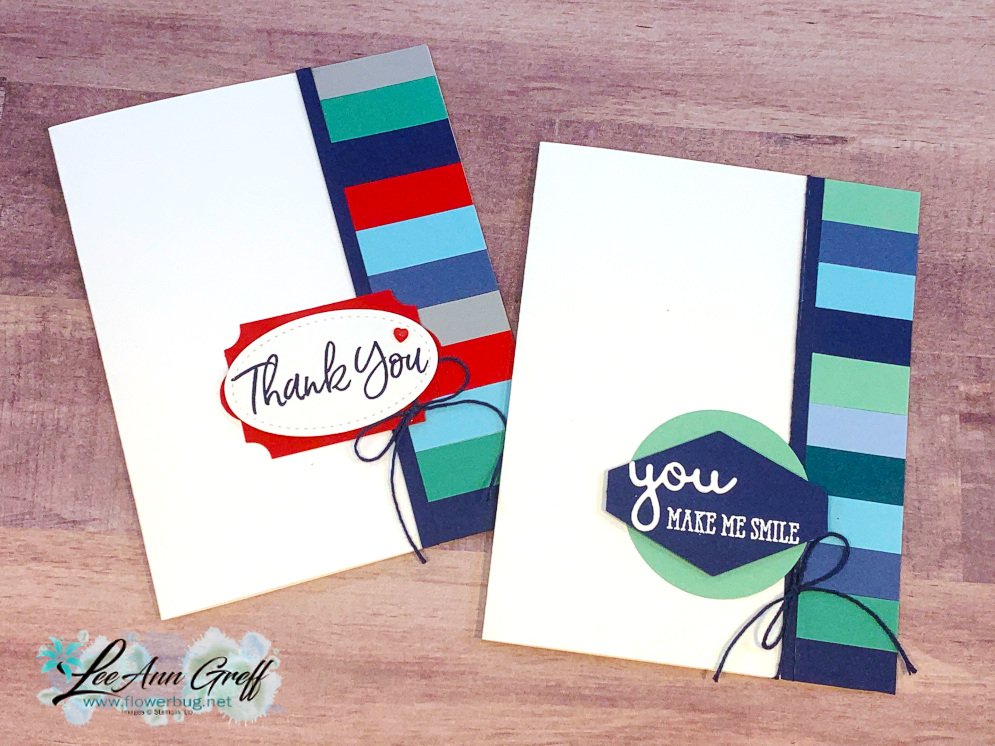
    Next is another card with the exact same colors but totally different.  I adhered 1/2" strips to the edge of a White card base.  I didn't worry about the outer edge until I was done; trimming it off afterwards.  I focused on the left edge being even.   

    I added a skinny 1/8" strip of Night of Navy to cover up any unevenness on my left edge.  A length of Navy twine wrapped around and into a bow finishes it off. 

    The 'you' is from the Well Written dies and the 'make me smile' is rom the Well Said stamp set (heat embossed in White) on a Navy Tailored Tag punch.


    Here's the video for all 10 paper strips projects!  

    More details on my paper strips projects tomorrow! 

    ~~~

    April Specials!

    Click here for the Annual Catalog Retiring List; many discounted items while supplies last! 

    Current Host code is 3PA3P32V

    Order online here

    ~~~

    Get a free multipurpose glue stand with an online order over $60 using the host code above. You'll receive a color of my choice unless you let me know your preference. *if you'd rather have gems; let me know.

    *If your order is over $150 do not use the code; you'll still receive a gift! 

    You can also order them in my Shop here. 

    All online orders will receive a free 14 project PDF tutorial

    Leave a Reply

    Your email address will not be published. Required fields are marked *

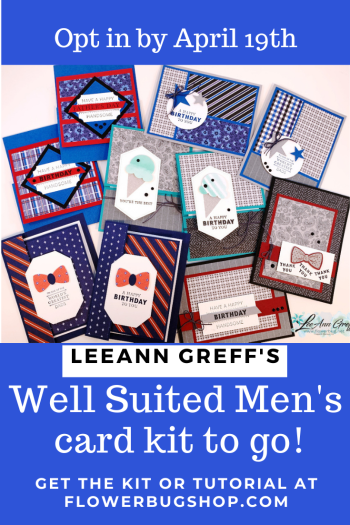
  • Men’s cards kit to go with the Well Suited suite.


    I decided to offer card kits for both men and women this month.  With Mother's and Father's day coming up it's nice to have cards for the special people in our lives.  

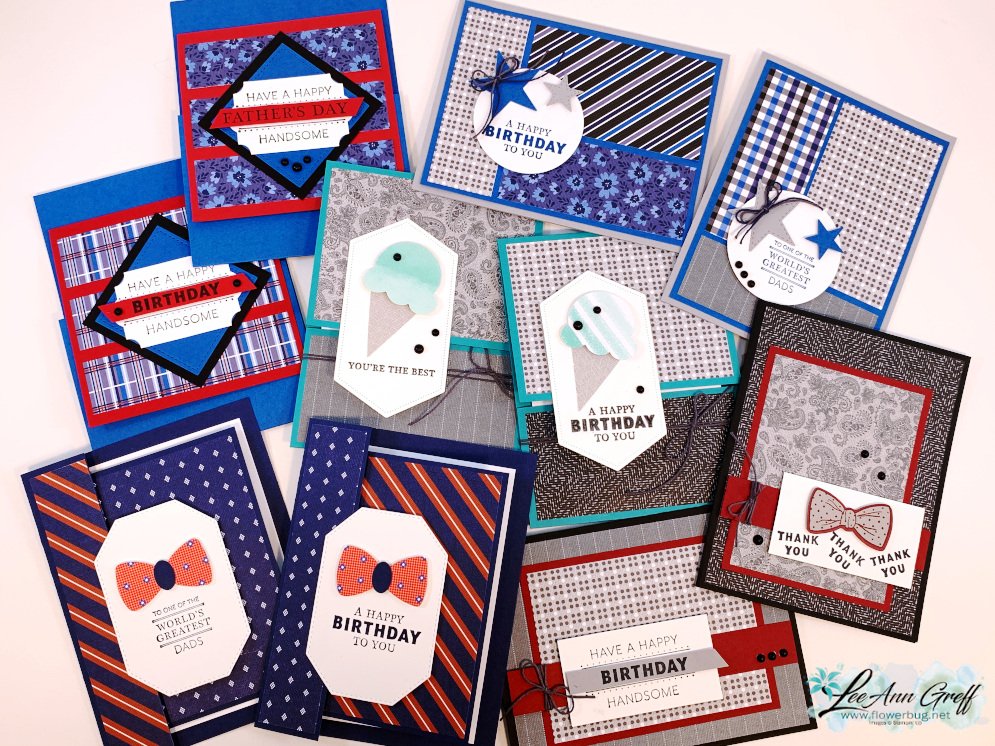
    Today I'm highlighting the 10 men's cards showcasing the Well Suited designer paper; many of which are fun folds. Look!

    Many of us find men's cards more challenging to make.  But these sure came together easily!  I chose a few layouts and fun fold cards and walla; done!  

    I always create a full PDF tutorial for these kits that includes photos, step by step directions, measurements and a supplies list. Choose that option or the Kit to Go which includes the free tutorial. #BestDeal 

    You'll receive the following in this kit to go:

    • 1/2 pkg. Well Suited Designer Paper (6" X 12")
    • 2 colors of twine 
    • Black Matte dots
    • free PDF tutorial (photos, measurements, supplies and step by step directions) 

    I used the Handsomely Suited stamp set for the greetings but you can easily substitute any stamps you already own.  However if you want to purchase it, here's a link to the stamp set & here's the link to the bundle.  Or add it to your kit at an additional 10% off!  

    Remember the kit offer ends after April 19th!  You have a few options with these cards:

    • Choose the PDF tutorial only here $15
    • Choose the 10 cards pre-cut kit with tutorial $28 (plus $8 shipping) here.
    • Add on the Well Suited bundle with the card kit/PDF and save an extra 10% off!  Email me at lagreff60@gmail.com for this option. 
    • I am also offering a second kit in April; the Hydrangea Hill cards.  See that here.  More on that tomorrow. 
    • Choose both April card kits to go here. 

    You'll receive the PDF instructions in an email immediately after payment.  The actual kit will be mailed to you Priority Mail at the end of April (barring any back-orders).  


    ~~~

    April Specials!

    Click here for the Last Chance Retiring List; many discounted items

    while supplies last! 

    Current Host code is 3PA3P32V

    Order online here

    ~~~

    Get a free multipurpose glue stand with an online order over $60 using the host code above. You'll receive a color of my choice unless you let me know your preference. *if you'd rather have gems; let me know.

    *If your order is over $150 do not use the code; you'll still receive a gift! 

    You can also order them in my Shop here. 

    All online orders will receive a free 14 project PDF tutorial

    Leave a Reply

    Your email address will not be published. Required fields are marked *


Notice: LeeAnn Greff, Independent Stampin’ Up! Demonstrator, Manager. The content of this website is my sole responsibility as an independent Stampin’ Up! demonstrator and the use of, and content of, the classes, services, or products offered on this website is not endorsed by Stampin’ Up! Copyright 2025