/


Latest Post

A fun way to add color to the Happy Place stamp with video tutorial


I shared how to add color to the large ‘Happy’ from the Happy Place stamp set on last week’s Live video. What do you think?

We made this cute card at my September card clubs. The colors include Lost Lagoon, Calypso Coral & White. You might wonder how I achieved the two-toned inking on the Happy image. I used inks – Lost Lagoon for the water and Calypso Coral for the sky. For this sample I used large ink pads. But for my Clubs we used smaller ink spots. It was a lot easier this way!

You might also wonder where I got the rectangle Perennial Postage die shape. I had to die-cut a larger rectangle twice to get this size. It was pretty easy and I share how in the video below.

We textured the Lost Lagoon layer with the Wave 3D embossing folder and the curvy leaf dies are from the Label Me Grateful dies seen here. I love them! The inside greeting is from the With You in Mind stamp set.

It’s an easy fold that shows off the inside of the card and the designer paper we added. This DSP is the Subtles 6″ designer paper which has some great patterns.

I really enjoyed playing with this fun stamp set. I’ll share another project from the video tomorrow. See the Happy Place set here.

I created a free project sheet for you with measurements, photos, directions and a supply list with links. Click on this link to print or download it.

Below is the video tutorial for this card and one more. Don’t forget to subscribe to my YouTube Channel while you’re there!

~~~

  To see all of the new Online items click here.  Or download & save the Download Online Exclusives flyer 

Get a free project tutorial with any online order in September! 
All Posts

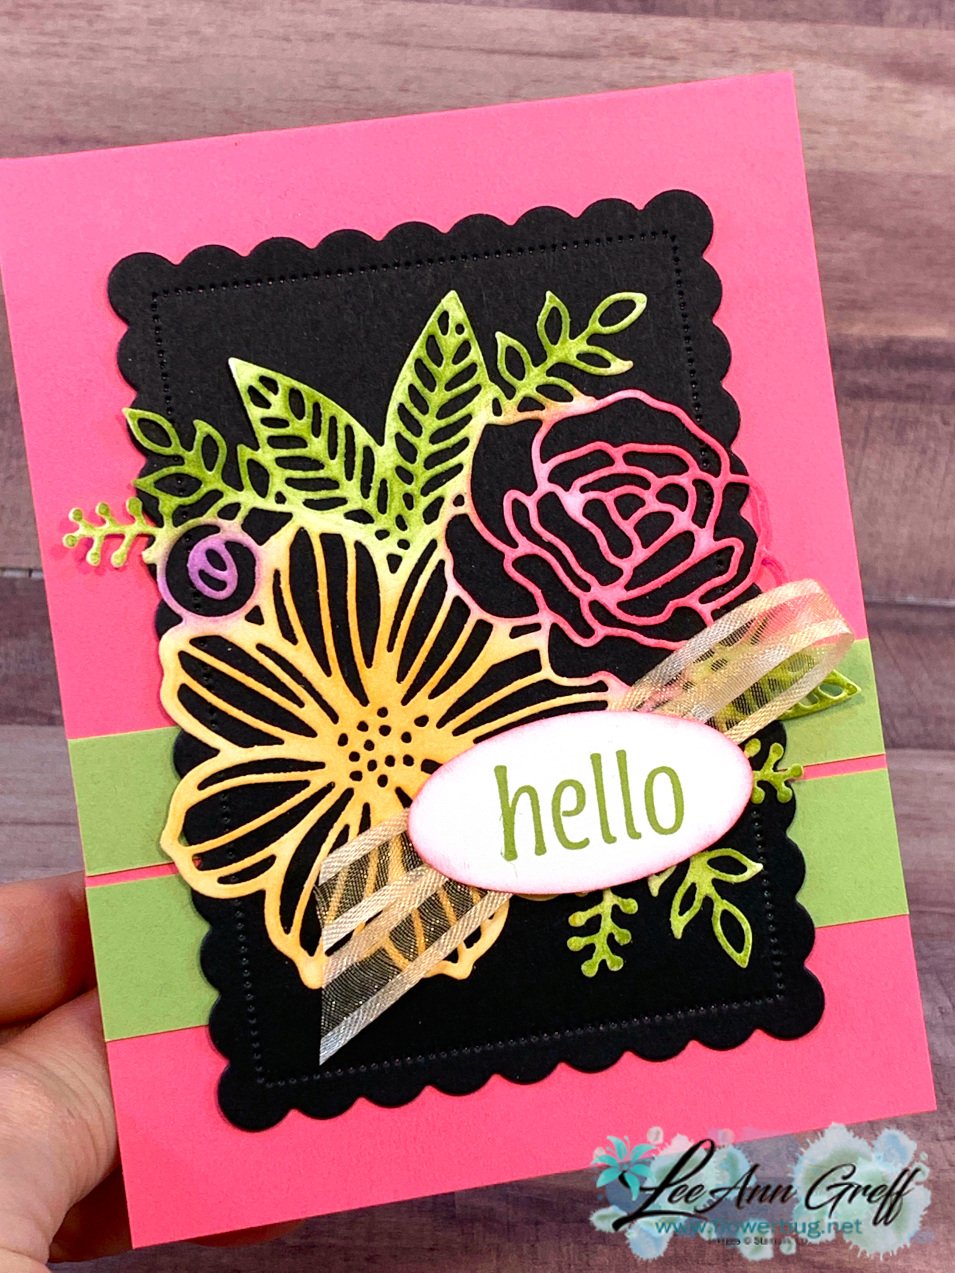
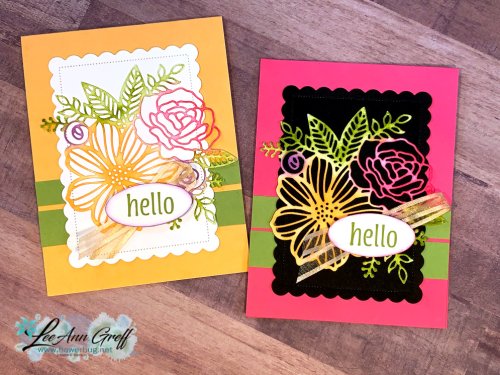
  • Artistic Dies & sponging; super simple but WOW!


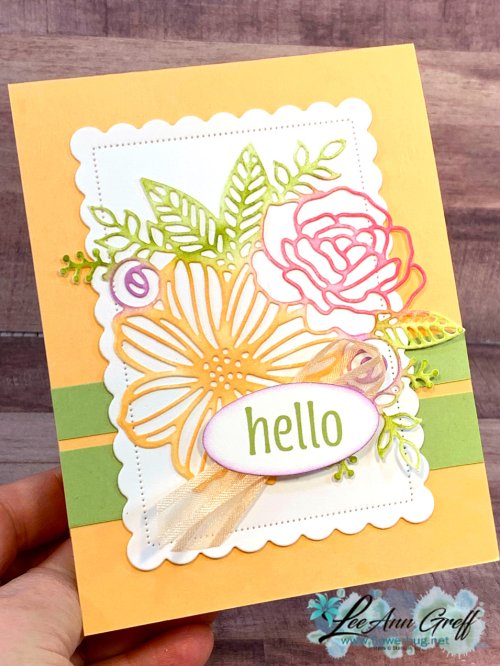
    I couldn't decide which to use behind the sponged die-cut so I made both White & Black.   You can see that video here from Tuesday's FB live earlier this week.  

    Which one do you prefer? 

    The reviews were mixed.  Most prefer the Black because the colors pop more.  But others liked the White for a softer look. 

    The card bases are Pale Papaya and Polished Pink. The strips are Pear Pizzazz. I used sponge daubers in Pear, Papaya, Fresh Freesia and Polished Pink to add color to the pretty die-cut.  See these dies here and the bundle here.  

    The pretty scalloped die-cut is from the Scalloped Contour dies seen here.  The oval is from the Double Oval punch. 

    Below is the video where I demo'd this card.  Don't forget to follow my FB page here and my YouTube channel here so you won't miss anything!

     ~~~

    May Specials & Promotions!

    Get $55 in free product with purchase of the Stampin' Up! Starter Kit!  Choose $155 in product of your choice for just $99 and get FREE SHIPPING as well! 


    Earn an extra $25 in free product if your order is over $250!  That means you get $50 in free product!  *combine your order with a friend.

    Get a NEW embellishment from the Annual Catalog with an online order

    over $50 before tax & shipping. 

    Host code: JDZNQ7PP  Click here to order

    Use this host code if your order is under $150. If it's over you'll still get the jewels but you'll also earn host benefits! Better yet, choose the Starter Kit and get $55 in FREE product and FREE Shipping as well!  Click here!

    *All online orders in May receive a free PDF full of project ideas with 2 new catalog suites! 

    Leave a Reply

    Your email address will not be published. Required fields are marked *

  • Can you tell which is stamped and which is Designer paper?


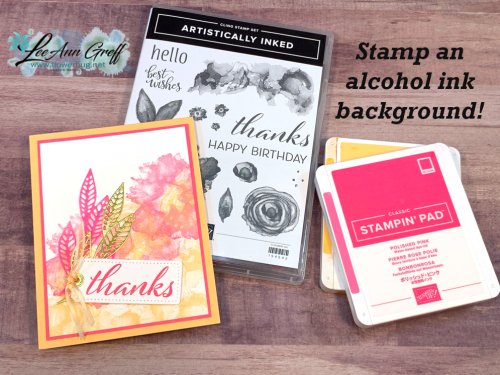
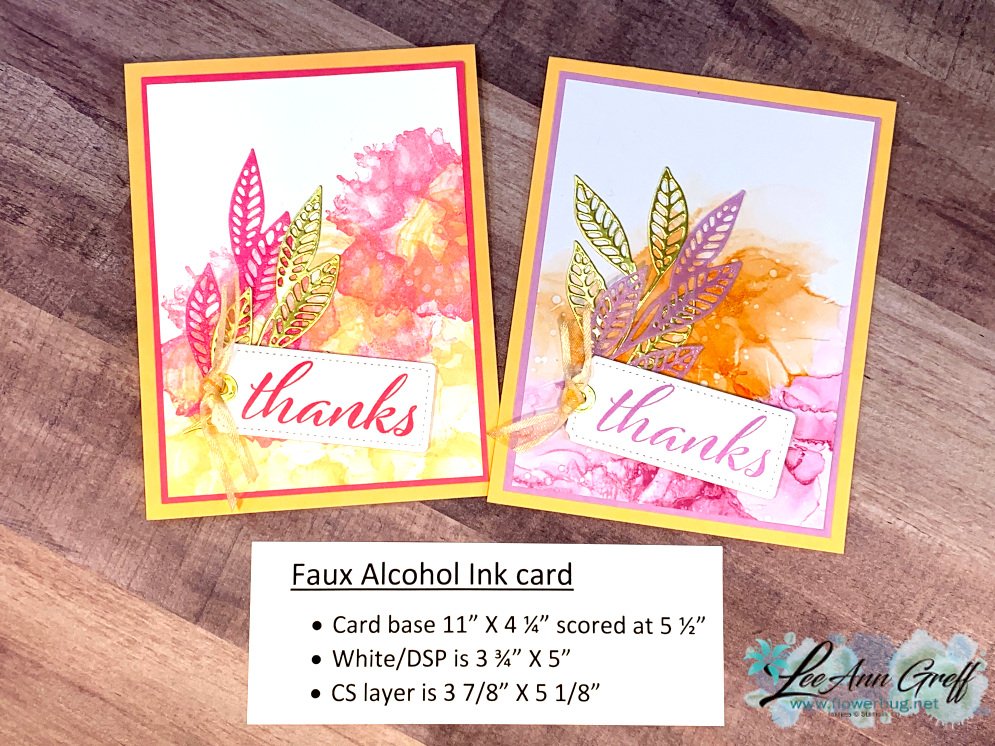
    I made these on FB live this week using the Expressions in Ink suite.  Can you tell which background is stamped and which is Designer Paper?  

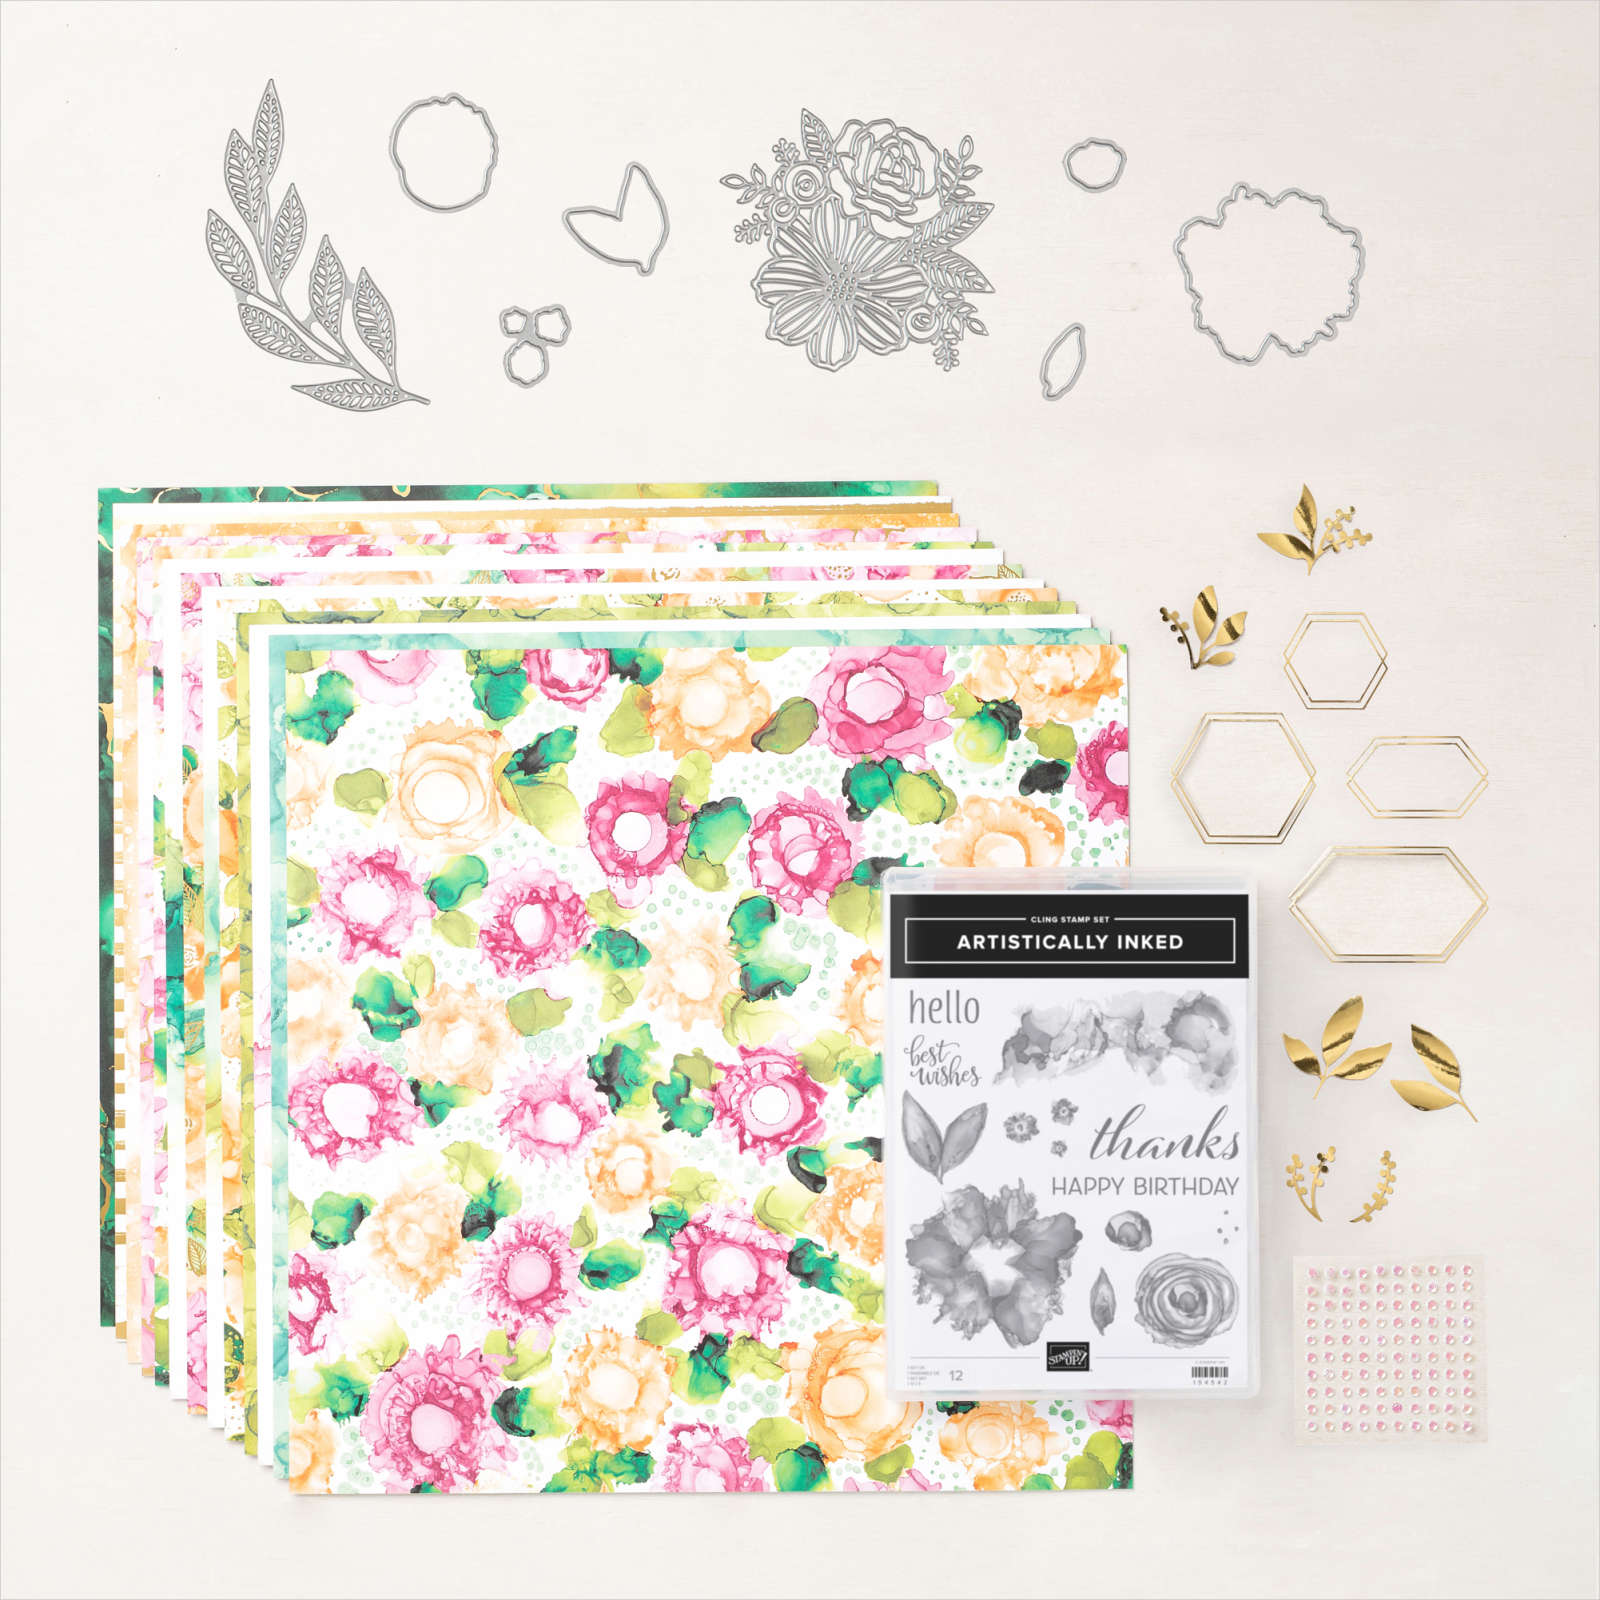
    My top favorite suite in the new Annual catalog is the Expressions in Ink.  See it here or on page 96-97.  It's filled with stamps & paper that mimic alcohol ink backgrounds.  Toss in the beautiful gold accents and it's stunning!  

    Here's a close up of the card.  Can you tell if I stamped it or if it's designer paper?  

    Yes; I did stamp it!  These images are so neat!  I can see lots of uses for both the greetings and the faux alcohol ink stamps.  See how in the video below. Mmm; I think I'll try a one sheet wonder with these…..! 

    And look at the leaves die-cuts!  I cut them from In Color Shimmer Vellum & Gold Foil paper.  The tag is from the Tailor Made Tags dies. 

    Here's the FB Live replay video.  Sorry the text isn't flipped so you can read it.  FB changed their settings and the tool icon is gone.  

     ~~~

    May Specials & Promotions!

    Get $55 in free product with purchase of the Stampin' Up! Starter Kit!  Choose $155 in product of your choice for just $99 and get FREE SHIPPING as well! 


    Earn an extra $25 in free product if your order is over $250!  That means you get $50 in free product!  *combine your order with a friend.

    Get a NEW embellishment from the Annual Catalog with an online order

    over $50 before tax & shipping. 

    Host code: JDZNQ7PP  Click here to order

    Use this host code if your order is under $150. If it's over you'll still get the jewels but you'll also earn host benefits! Better yet, choose the Starter Kit and get $55 in FREE product and FREE Shipping as well!  Click here!

    *All online orders in May receive a free PDF full of project ideas with 2 new catalog suites! 

    Leave a Reply

    Your email address will not be published. Required fields are marked *

  • Inspired Thoughts Bundle; a beautiful scene


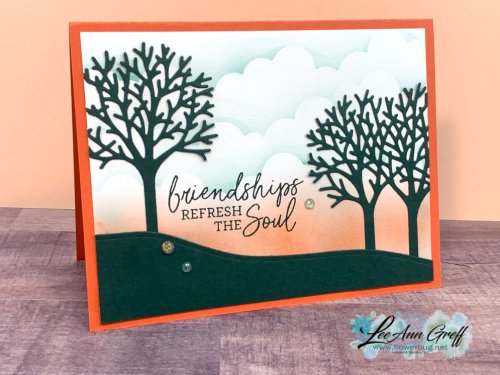
    I created this card for an online swap I participated in last month.  I just love it!

    The main 4 trees die-cut can be cut apart which opens a whole world of possibilities! 

    Here's how I made it:

    1. Die-cut the trees and hill using the Inspiring Canopy dies (seen below).  
    2. Cut the 4 trees apart at the bottom connection point. Set aside.
    3. Sponge clouds using Pool Party ink onto the 4" X 5 1/4" Basic White CS.  I used the Basic Border dies (cloud).
    4. Sponge Calypso Coral ink onto the bottom third of this piece. 
    5. Adhere the trees to the edge of each side. 
    6. Add the hill piece; trim off excess from hill and trees. Adhere to the Calypso Coral card base. 
    7. Finish with Genial Gems.  

    You can see the beautiful Inspired Thoughts bundle here.  

     ~~~

    May Specials & Promotions!

    Get $55 in free product with purchase of the Stampin' Up! Starter Kit!  Choose $155 in product of your choice for just $99 and get FREE SHIPPING as well! 


    Earn an extra $25 in free product if your order is over $250!  That means you get $50 in free product!  *combine your order with a friend.

    Get a NEW embellishment from the Annual Catalog with an online order

    over $50 before tax & shipping. 

    Host code: JDZNQ7PP  Click here to order

    Use this host code if your order is under $150. If it's over you'll still get the jewels but you'll also earn host benefits! Better yet, choose the Starter Kit and get $55 in FREE product and FREE Shipping as well!  Click here!

    *All online orders in May receive a free PDF full of project ideas with 2 new catalog suites! 

    Leave a Reply

    Your email address will not be published. Required fields are marked *


Notice: LeeAnn Greff, Independent Stampin’ Up! Demonstrator, Manager. The content of this website is my sole responsibility as an independent Stampin’ Up! demonstrator and the use of, and content of, the classes, services, or products offered on this website is not endorsed by Stampin’ Up! Copyright 2025