/


Latest Post

A fun way to add color to the Happy Place stamp with video tutorial


I shared how to add color to the large ‘Happy’ from the Happy Place stamp set on last week’s Live video. What do you think?

We made this cute card at my September card clubs. The colors include Lost Lagoon, Calypso Coral & White. You might wonder how I achieved the two-toned inking on the Happy image. I used inks – Lost Lagoon for the water and Calypso Coral for the sky. For this sample I used large ink pads. But for my Clubs we used smaller ink spots. It was a lot easier this way!

You might also wonder where I got the rectangle Perennial Postage die shape. I had to die-cut a larger rectangle twice to get this size. It was pretty easy and I share how in the video below.

We textured the Lost Lagoon layer with the Wave 3D embossing folder and the curvy leaf dies are from the Label Me Grateful dies seen here. I love them! The inside greeting is from the With You in Mind stamp set.

It’s an easy fold that shows off the inside of the card and the designer paper we added. This DSP is the Subtles 6″ designer paper which has some great patterns.

I really enjoyed playing with this fun stamp set. I’ll share another project from the video tomorrow. See the Happy Place set here.

I created a free project sheet for you with measurements, photos, directions and a supply list with links. Click on this link to print or download it.

Below is the video tutorial for this card and one more. Don’t forget to subscribe to my YouTube Channel while you’re there!

~~~

  To see all of the new Online items click here.  Or download & save the Download Online Exclusives flyer 

Get a free project tutorial with any online order in September! 

All Posts

  • Quick & Easy treats box with measurements!


    Today is the last day of September and the specials end today!  

    September Specials

    Order online here

    Host codes: KSAEED9Y or JPJ4FKYJ

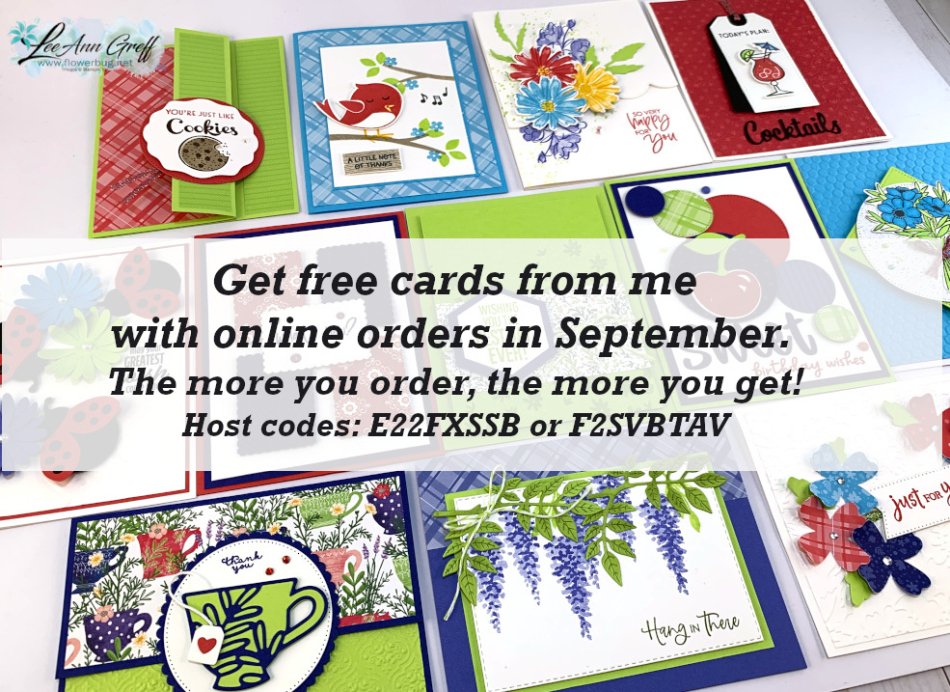
    Get free cards from me with online orders!

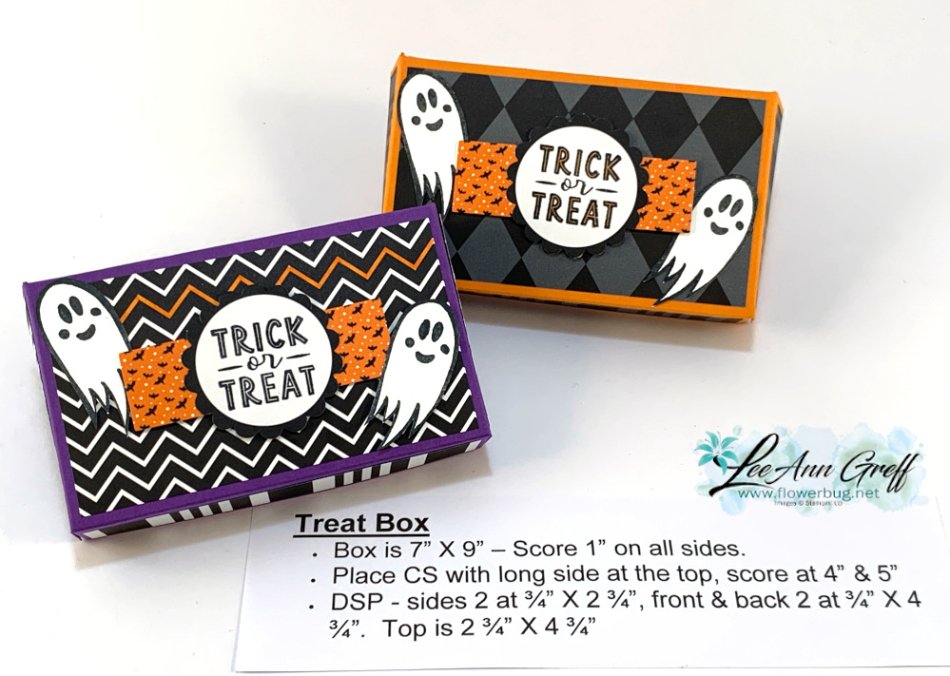
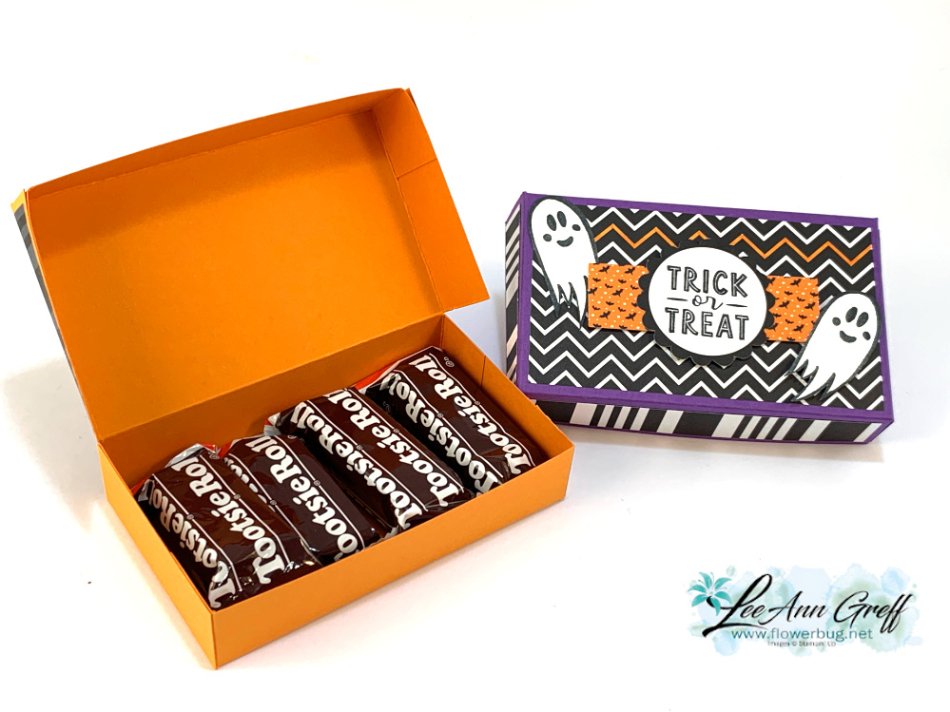
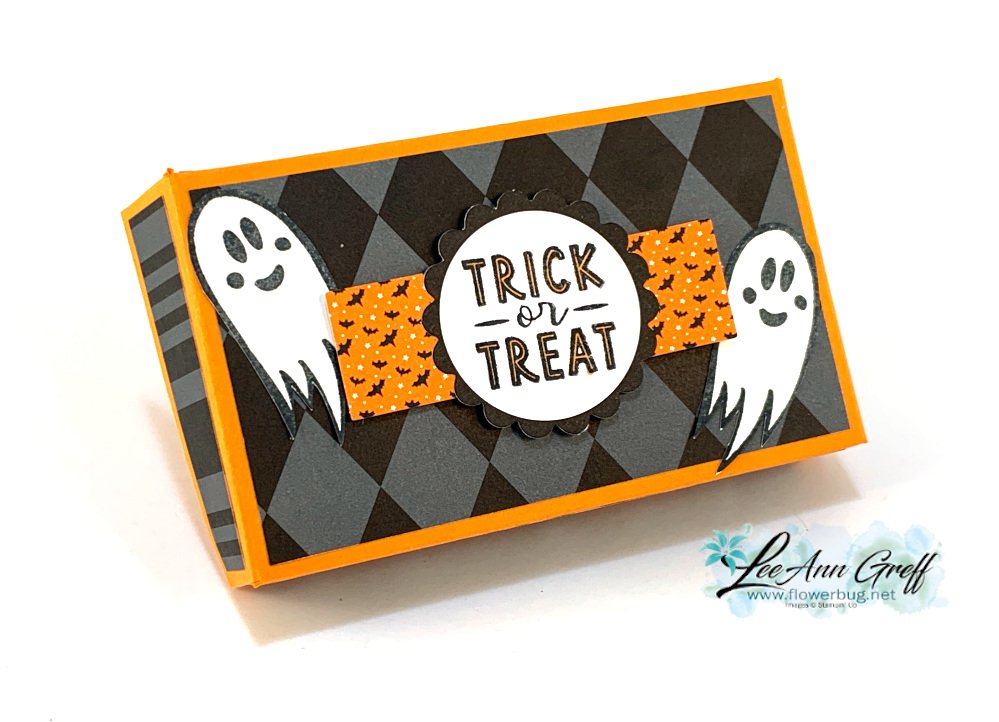
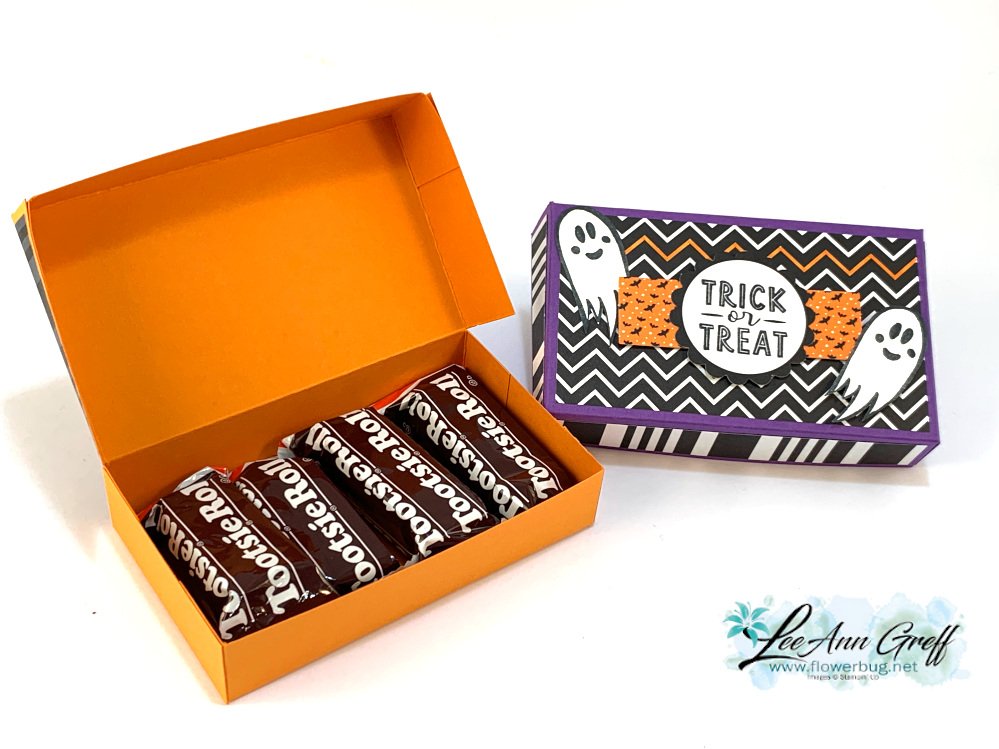
    I shared this cute & easy box on Tuesday's FB Live.  It's quite simple to make and fits a bunch of treats too!  

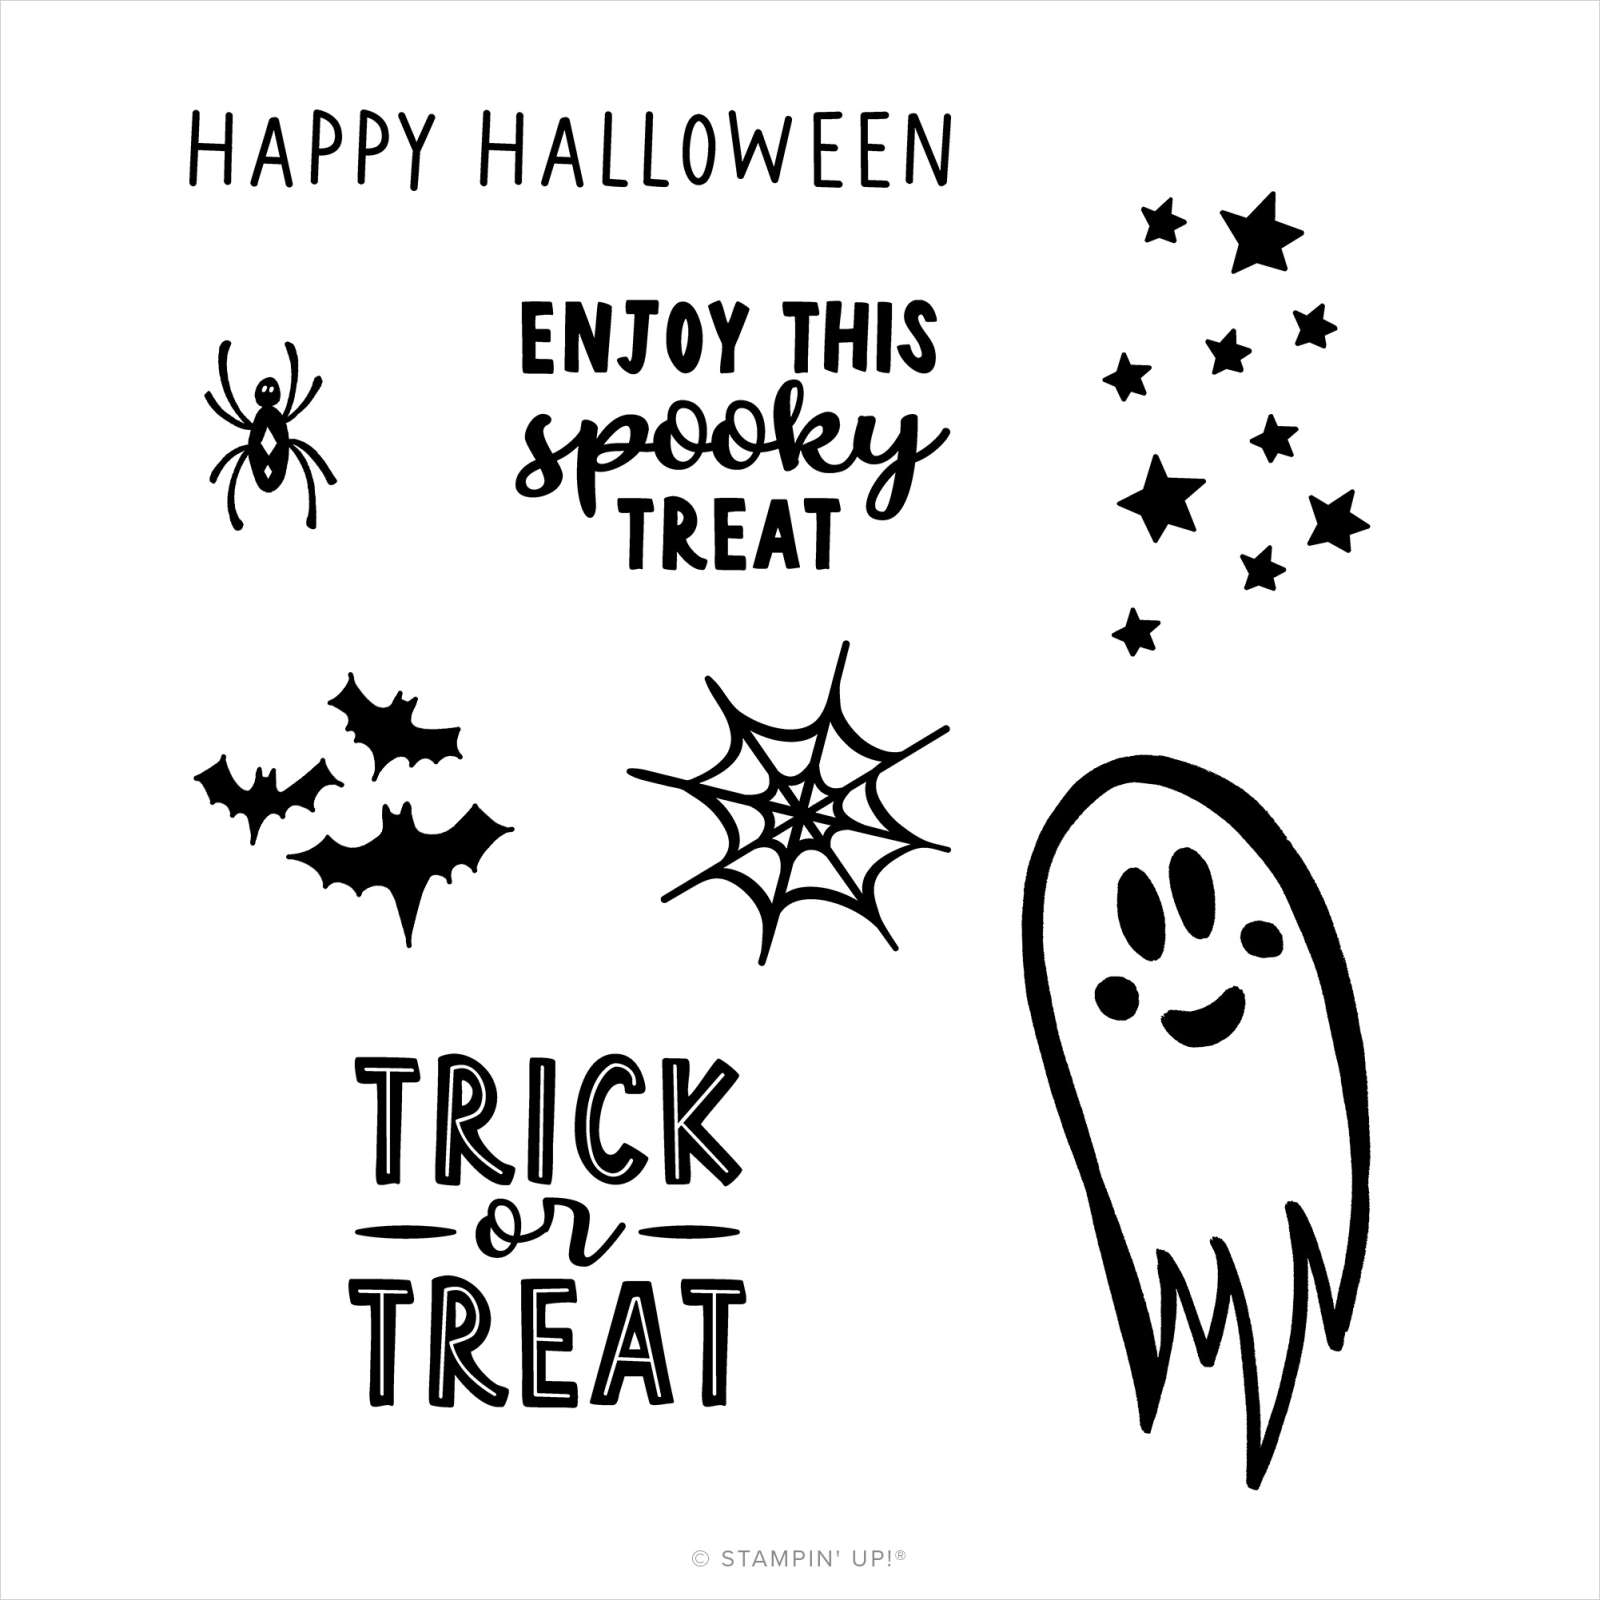
    I decided to feature this month's Paper Pumpkin kit I just received.  It's called Spooky Treats.  I used the ghost and greeting images from the stamp set plus the greeting element and the bats paper from the kit.  I chose the Black & White designs paper for the designer paper.

    The finished box measures 3" X 5" in size.

    Here are the measurements: 

    • Box card stock 7” X 9” – Score at 1” on all sides.
    • Place CS with long side at the top, score at 4” & 5”
    • DSP – sides 2 at ¾” X 2 ¾”, front & back 2 at ¾” X 4 ¾”. Top is 2 ¾” X 4 ¾”

    For the second box I chose to use Gorgeous Grape for my box instead of Pumpkin Pie.  The designer paper is also the Black & White designs.  


    This Spooky Treats Paper Pumpkin kit is still available while supplies last!  You can choose between the full kit here for $20.50 or the refill here (without the stamp set & ink) for $11.  

    You have a few choices when purchasing Paper Pumpkin.  You can subscribe to get one kit each month here.  Or purchase a pre-paid subscription here.  You can choose from a 1, 3, 6 or 12 month pre-paid subscription. 

    ~~~

    Earn free products with my loyalty rewards! 

    Click here to download yours and earn a $50 shopping spree!

    Leave a Reply

    Your email address will not be published. Required fields are marked *

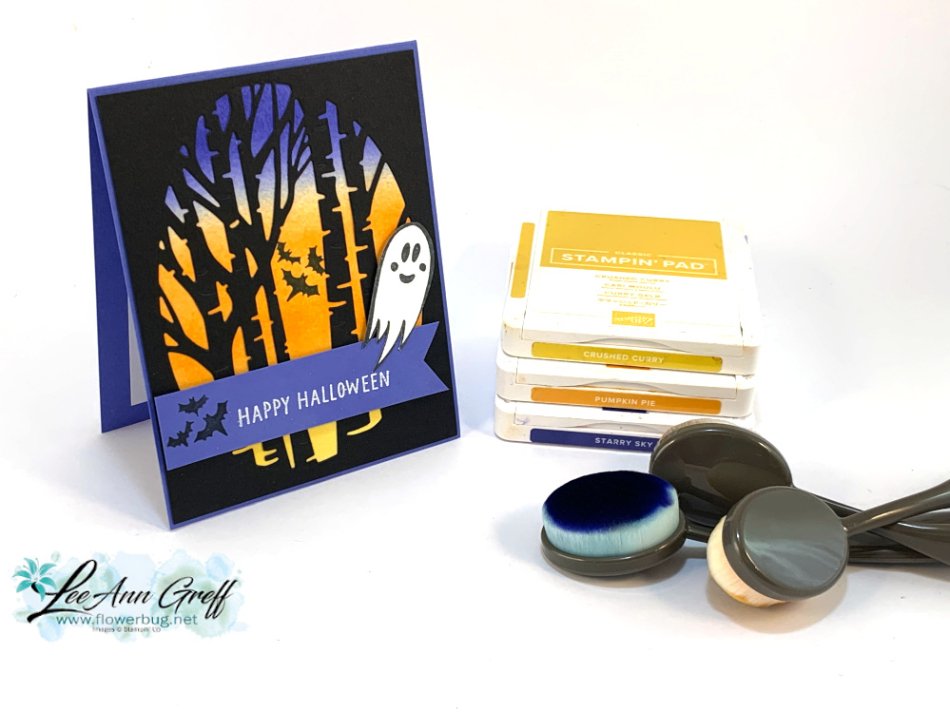
  • Spooky Treats alternative card with Aspen Tree dies


    Here's one of the projects I shared on Tuesday's FB Live video this week.  I focused on the Spooky Treats Paper Pumpkin kit.  

    Good news!  This kit is still available – you can get the full kit here.  Or if you're a subscriber you can get the refill here.  

     In the video seen here, I share a bunch of alternative projects with both my Paper Pumpkin subscribers AND my Flowerbug's Team. 

    Here's the stamp set that is included in the kit; it's so cute!

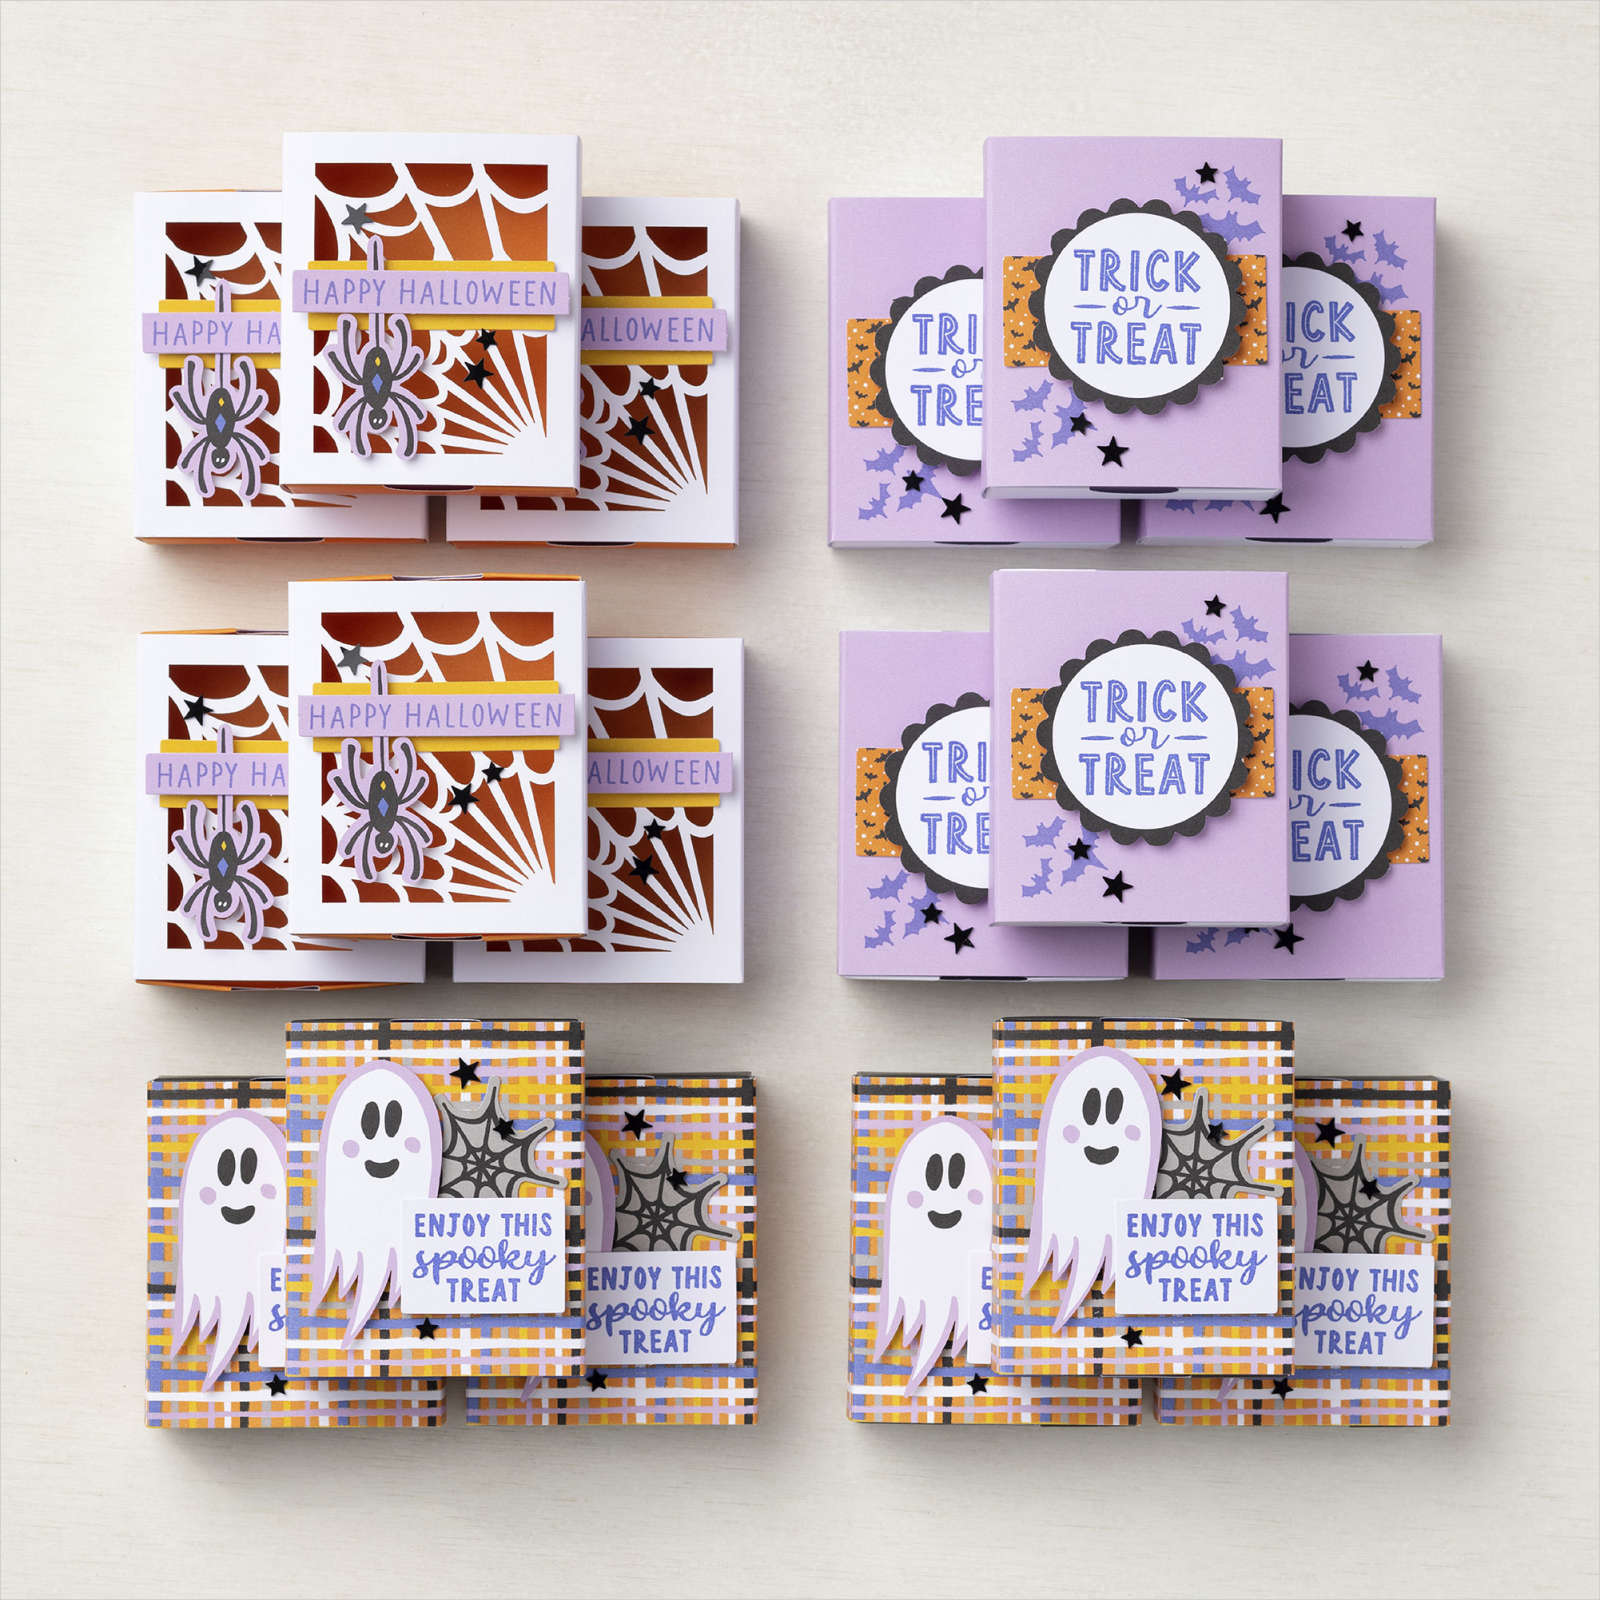
    Here's what the Spooky Treats kit makes if you follow the kit directions as directed. It includes 18 nice size treat boxes; perfect to add your candy or Halloween treats in.  

    I look forward to getting these kits in the mail each month.  I know that October's kit is Christmas cards.  We always get a hint on what it will be. That way you can opt out or even choose to get more than one kit!

    You have a few choices when purchasing Paper Pumpkin.  You can subscribe to get one kit each month here.  Or purchase a pre-paid subscription here.  You can choose from a 1, 3, 6 or 12 month pre-paid subscription.  

    You can see how I stamped the inside below.  The card base is Orchid Oasis. 

    I used three inks and our blending brushes to create the smooth background under the Aspen Tree dies. I share a few tips on getting smooth results in the video.  

    Click on the photo below to watch the video: 

    ~~~

    September Specials


    New weekly deals come out on September 1st, 8th, 15th & 22nd! 

    Order online here

    Host codes: KSAEED9Y or JPJ4FKYJ

    Get free cards from me with online orders!

    Earn free products with my loyalty rewards! 

    Click here to download yours and earn a $50 shopping spree!

    Leave a Reply

    Your email address will not be published. Required fields are marked *

  • Apple Harvest Fun Fold card


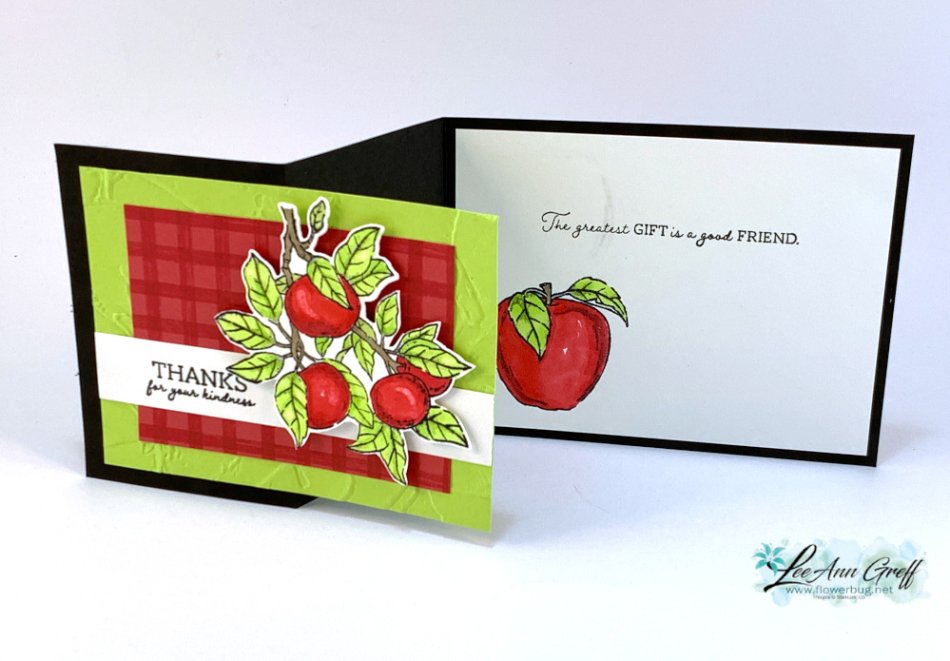
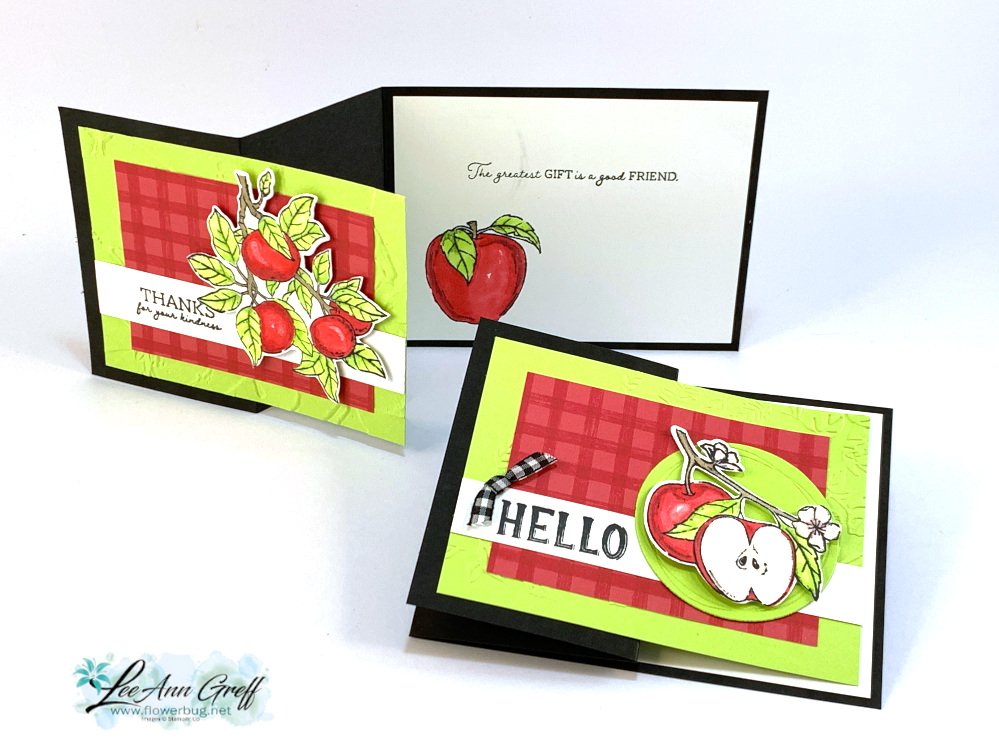
    We made this sweet Apple Harvest card at my card clubs in September.  I love the bright colors paired with Black! 

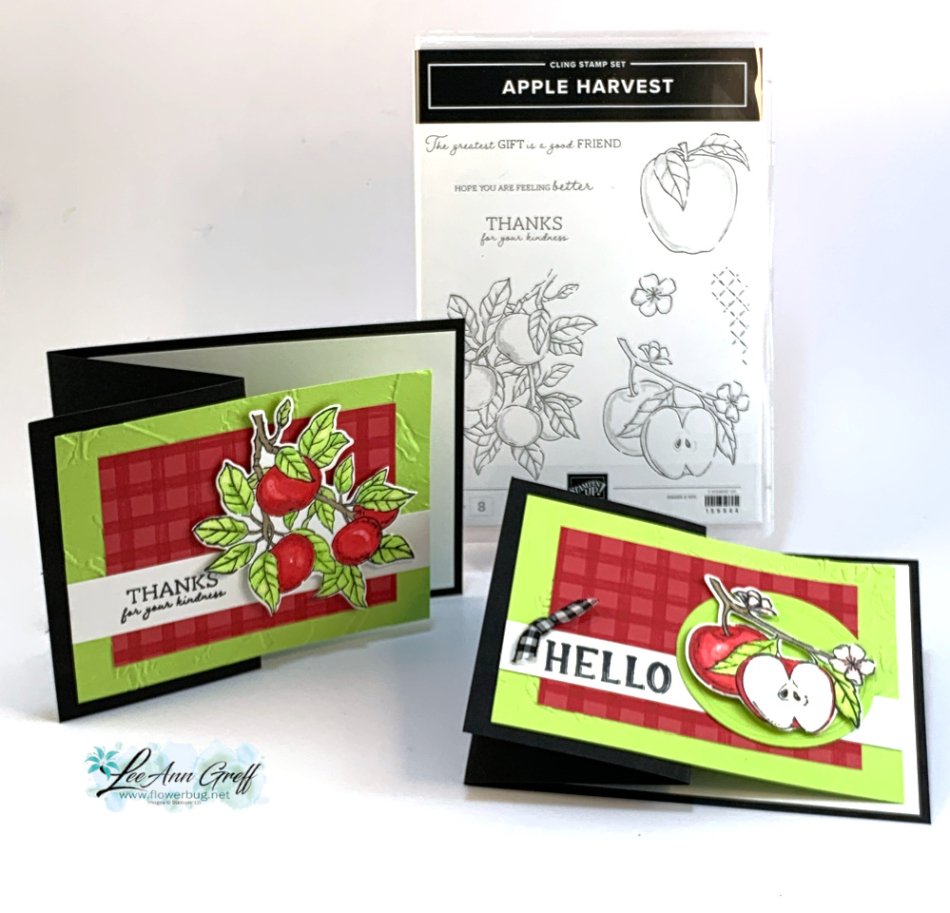
    The colors include Parakeet Party, Real Red and Black.  As you can see I gave them a choice of apple images on the front. The left card above has the large apple bunch and the right card below has a pair of apples with blossoms.  And inside the card is a single apple. 

    The Apple Harvest stamp set is in the 2022 Holiday catalog.  The new Apple Blossom dies that coordinate with it are available in September with our Perfect Partners promotion.  See them here. 

    All were colored with Blends markers – Parakeet Party, Crumb Cake & Sweet Sorbet.  I added a bit of color lifter on the large red apples to achieve a look of shine & reflection.

    This card fold is super simple.  Just add an extra score line to your Black card base.  

    Measurements:

    • Black – 11" X 4 1/4" scored at 2 3/4" & 5 1/2"
    • Parakeet Party 5" X 3 3/4", circle is 2 1/2"
    • Cottage Gingham DSP 4" X 3"
    • White 3/4" X 5" strip & 5 1/4" X 4" inside 

    ~~~

    September Specials


    New weekly deals come out on September 1st, 8th, 15th & 22nd! 

    Order online here

    Host code links: KSAEED9Y or JPJ4FKYJ

    Get free cards from me with online orders!

    Earn free products with my loyalty rewards! 

    Click here to download yours and earn a $50 shopping spree!

    Leave a Reply

    Your email address will not be published. Required fields are marked *


Notice: LeeAnn Greff, Independent Stampin’ Up! Demonstrator, Manager. The content of this website is my sole responsibility as an independent Stampin’ Up! demonstrator and the use of, and content of, the classes, services, or products offered on this website is not endorsed by Stampin’ Up! Copyright 2025