/


Latest Post

A fun way to add color to the Happy Place stamp with video tutorial


I shared how to add color to the large ‘Happy’ from the Happy Place stamp set on last week’s Live video. What do you think?

We made this cute card at my September card clubs. The colors include Lost Lagoon, Calypso Coral & White. You might wonder how I achieved the two-toned inking on the Happy image. I used inks – Lost Lagoon for the water and Calypso Coral for the sky. For this sample I used large ink pads. But for my Clubs we used smaller ink spots. It was a lot easier this way!

You might also wonder where I got the rectangle Perennial Postage die shape. I had to die-cut a larger rectangle twice to get this size. It was pretty easy and I share how in the video below.

We textured the Lost Lagoon layer with the Wave 3D embossing folder and the curvy leaf dies are from the Label Me Grateful dies seen here. I love them! The inside greeting is from the With You in Mind stamp set.

It’s an easy fold that shows off the inside of the card and the designer paper we added. This DSP is the Subtles 6″ designer paper which has some great patterns.

I really enjoyed playing with this fun stamp set. I’ll share another project from the video tomorrow. See the Happy Place set here.

I created a free project sheet for you with measurements, photos, directions and a supply list with links. Click on this link to print or download it.

Below is the video tutorial for this card and one more. Don’t forget to subscribe to my YouTube Channel while you’re there!

~~~

  To see all of the new Online items click here.  Or download & save the Download Online Exclusives flyer 

Get a free project tutorial with any online order in September! 

All Posts

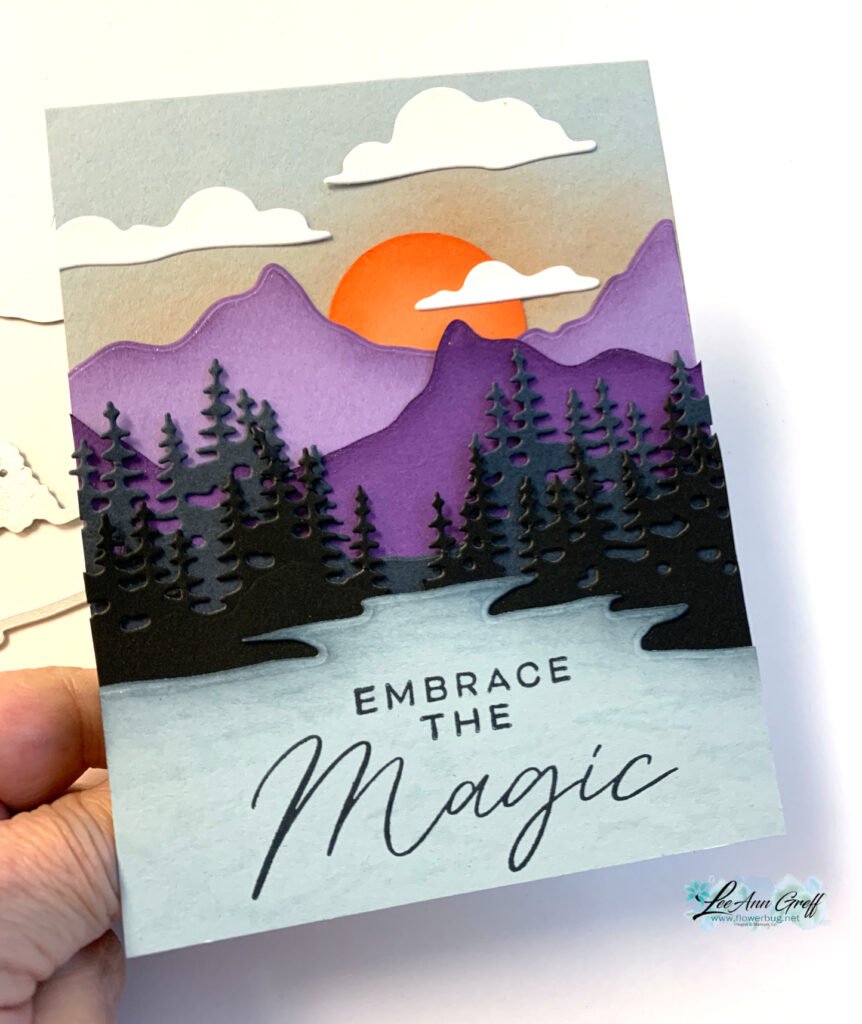
  • Wow! Look at this incredible Light & Wonder scene


    Here’s a gorgeous card I shared on last week’s Live video: Are you following me on YouTube here? Or Facebook here? Don’t miss out on my weekly videos!

    My colors include Cloud Cover, Black, Misty Moonlight, Gorgeous Grape, Highland Heather, White & Timid Tiger. Inks are Highland Heather, Cloud Cover, Black & Timid Tiger.


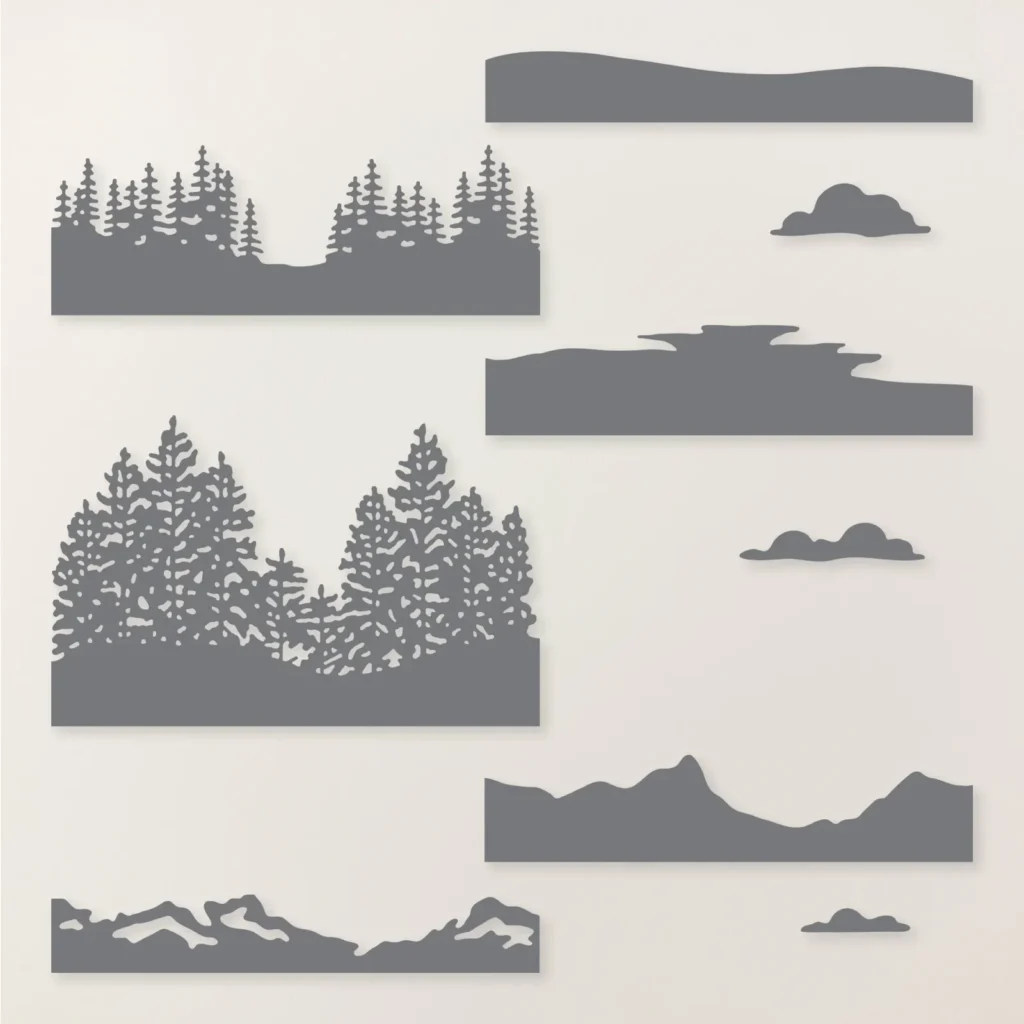
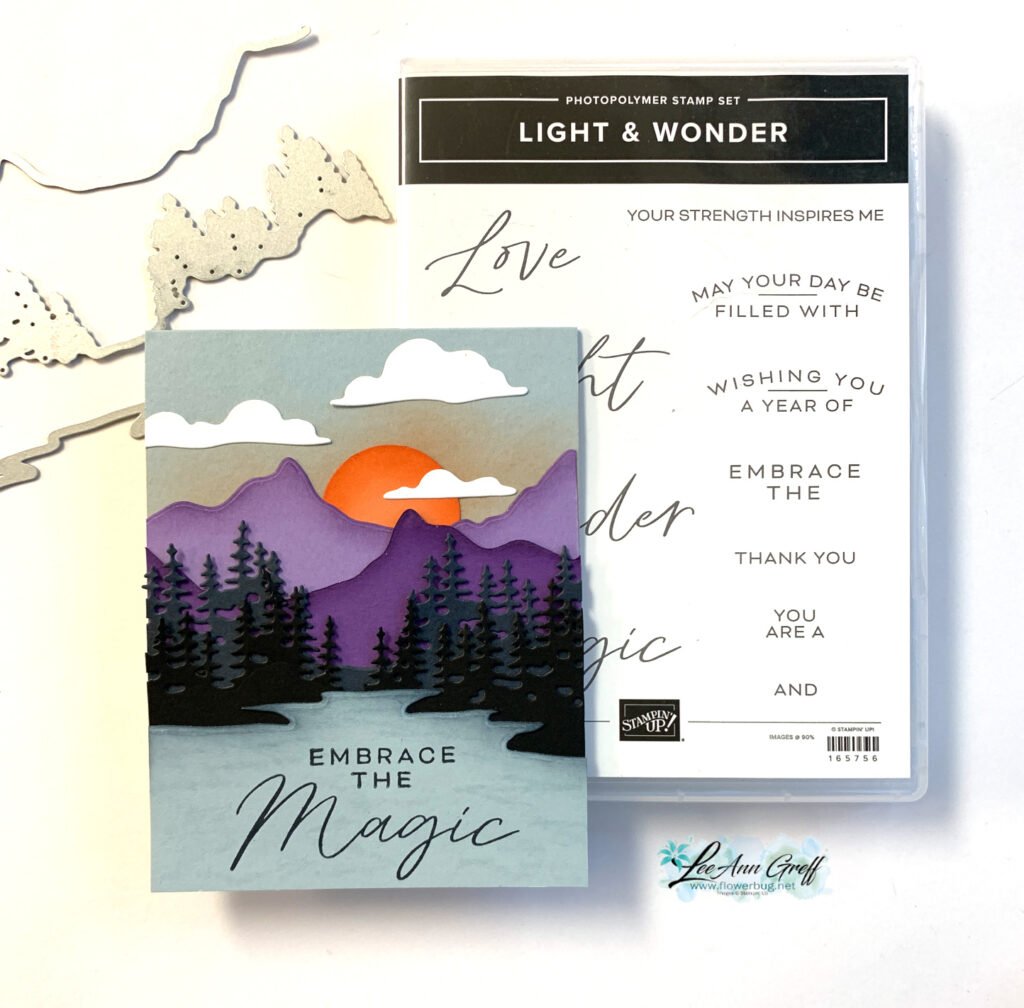
    It’s made with the Light & Wonder bundle seen here. The dies are amazing at creating scenes! Look at the layered mountains, trees and that water die-cut!
    Sponging makes a big difference! I sponged the top of the mountains with purple ink, the water with Cloud Cover ink and the sun with Timid Tiger ink.

    Tip: Can you see the ‘water lines’ I created with a Wink of Stella pen? So cool!

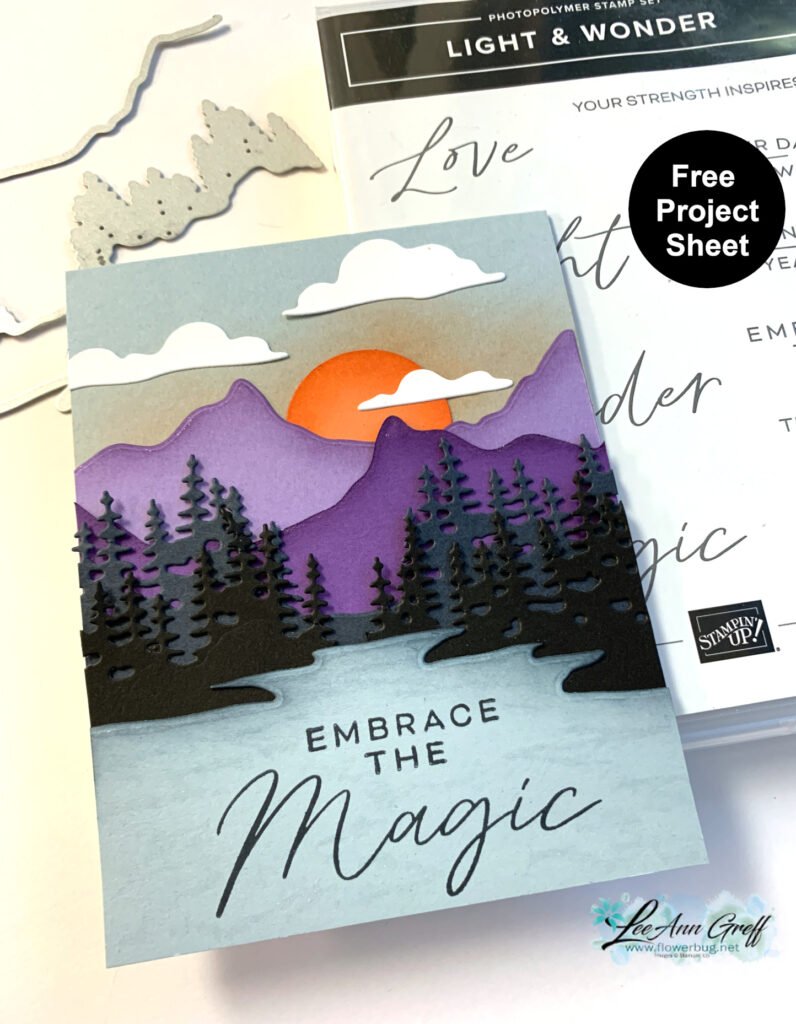
    This is one of my favorite cards I’ve made in awhile. I hope you like it too!

    I got the layout idea for this card from Amanda Mertz on Pinterest but changed it up a bit. I love creating scenes and when I saw this suite it was an absolute must have for me. See it here.

    I created a free project sheet for this card. Click on this link to access it.

    Below is the video tutorial for this card and another easy card layout using this suite.

    Reasons to ShopwithLeeAnn.com

    • Get a free PDF project tutorial with any online order! (changes monthly)
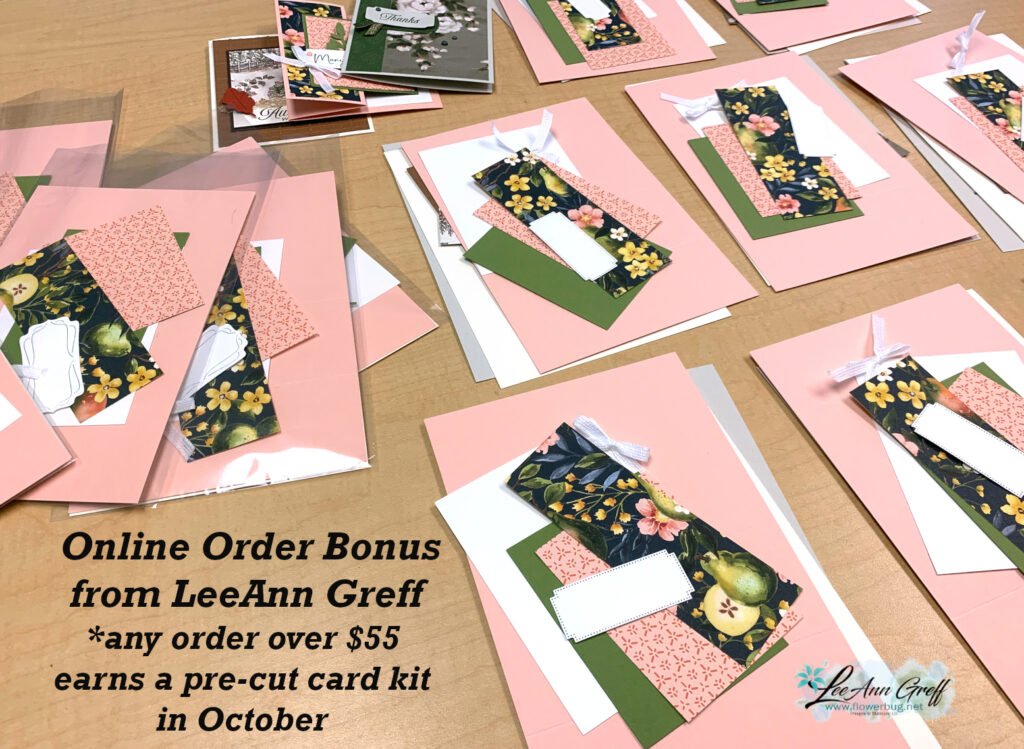
    • An order of $55 or more earns you a free 3 card stamping kit with pre-cut layers; ready to stamp & assemble
    • Earn 10% host rewards on each order you place (over $20). Redeem on a future order.
    • Join my Flowerbug’s Team and get $90 in free product of your choice in October! Details here.
    • Be a Paper Pumpkin subscriber and enjoy the free bonus project PDF tutorial every month. Subscribe here. Refills here.

    ~~~

    October Specials

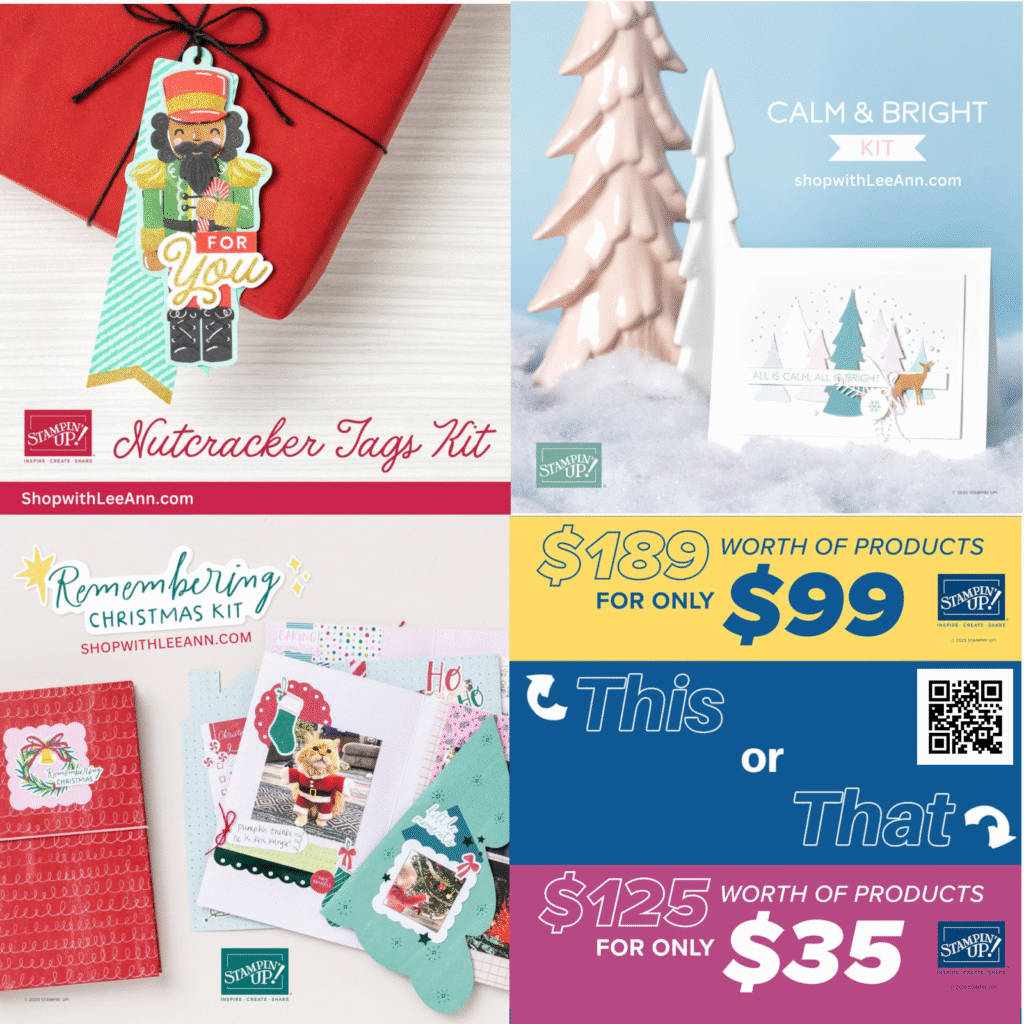
    3 new kits and a Starter Kit special! See the kits here.

    And get the Starter kit here. *Choose your deal – $35 or $99 plus $90 in free products including free shipping, free Paper Pumpkin kit & free catalogs/business supplies!

    ~~~

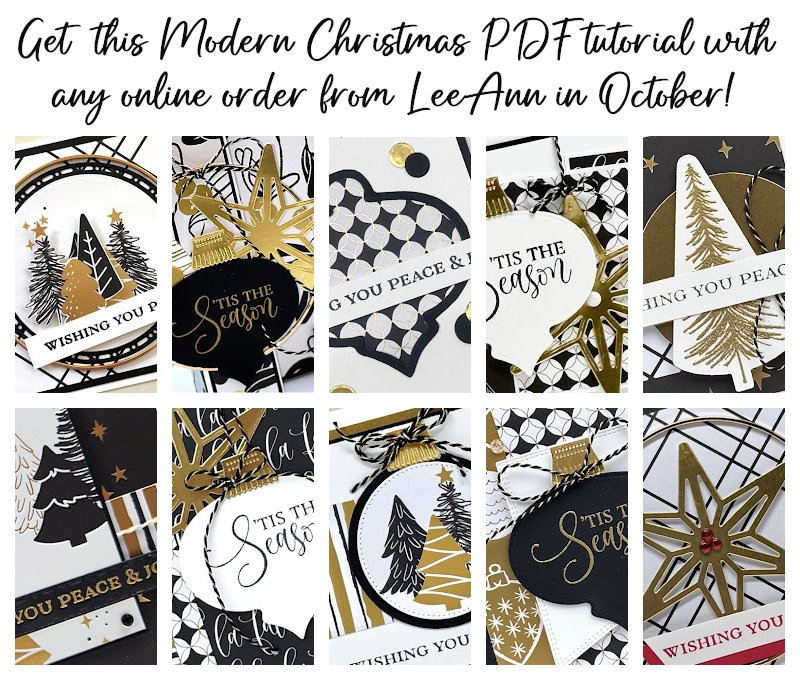
    All online orders from me will receive a beautiful PDF of projects featuring the Modern Christmas suite.

    Leave a Reply

    Your email address will not be published. Required fields are marked *

  • Lights of Aurora scenic card with project sheet & video tutorial


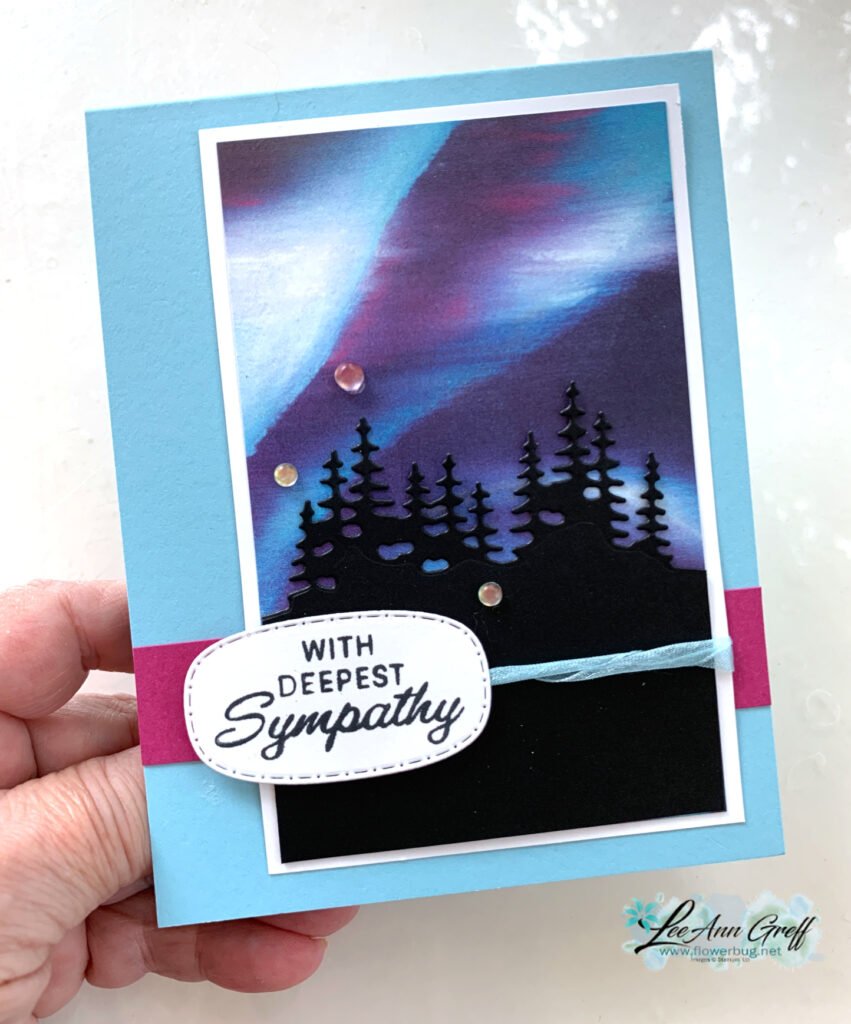
    I shared this pretty card on last week’s Live video:

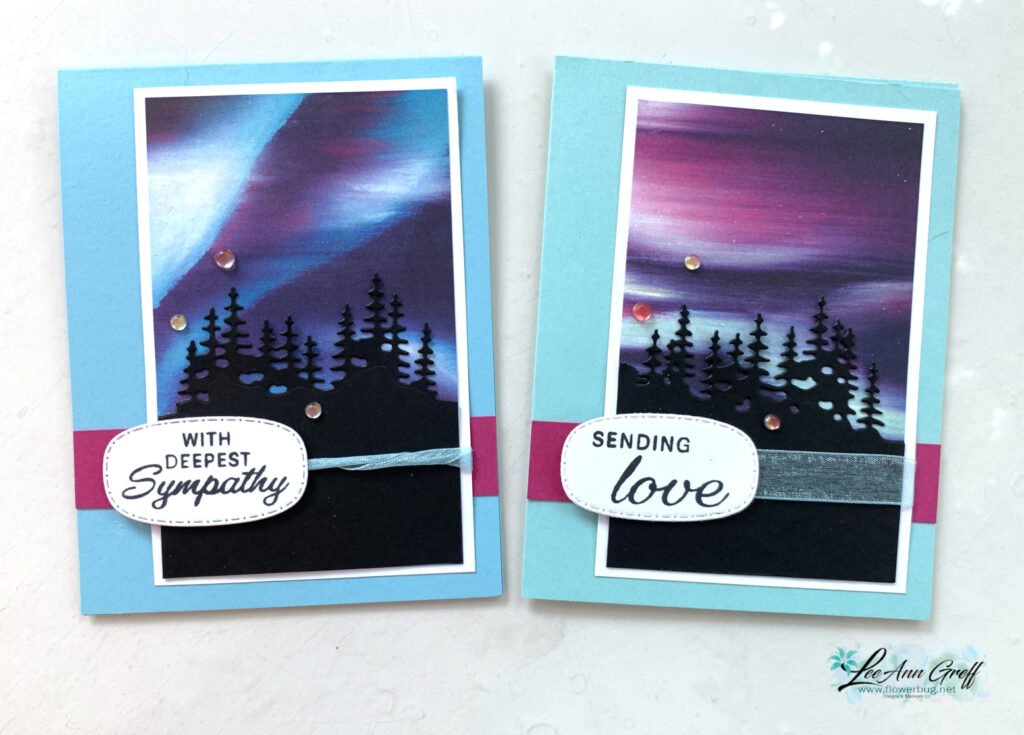
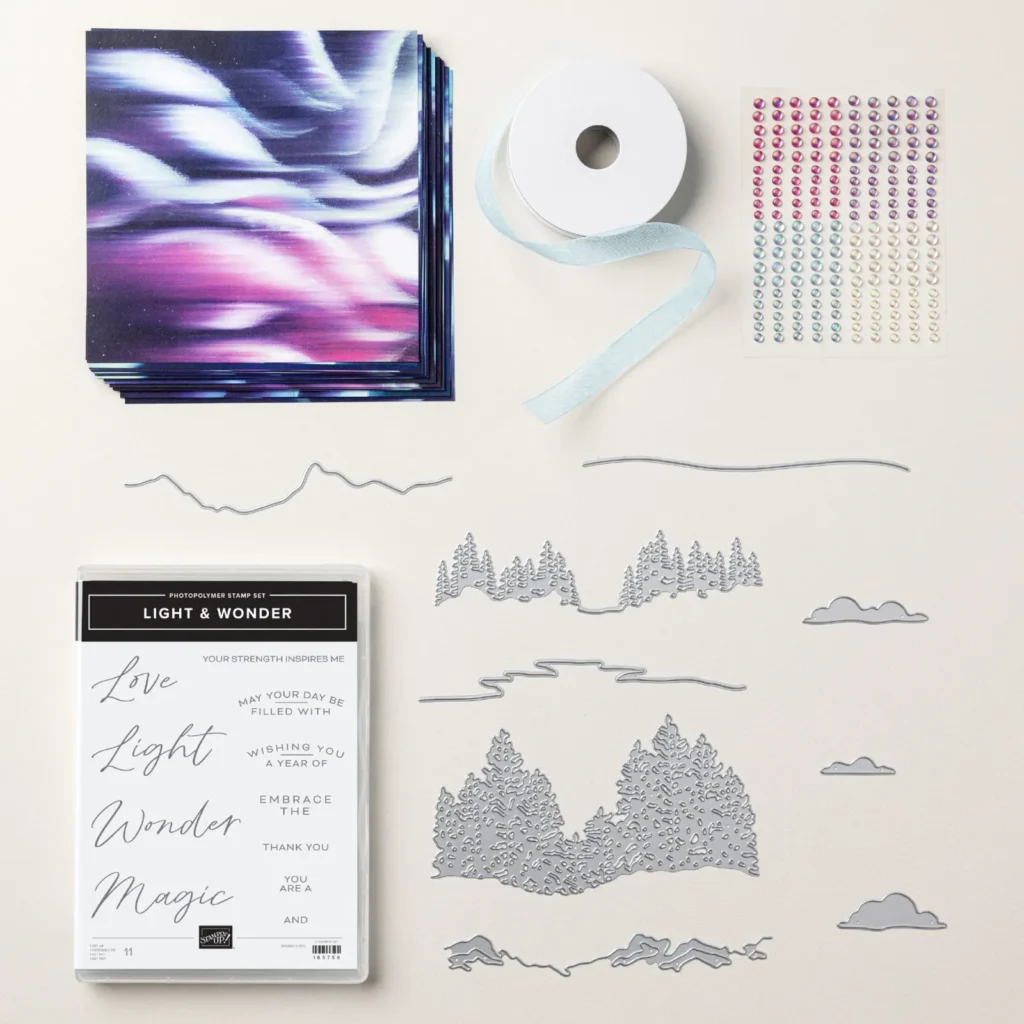
    It features the Lights of Aurora suite seen here. I made sure to cute my designer paper at 3″ wide so I could get 2 pieces from each 6″ piece. We made this pretty card at my September card clubs.

    Besides the DSP & colors (Balmy Blue & Pool Party) do you notice another difference? Look at the ribbon; I tried a new technique of rolling the Balmy Blue sheer ribbon on the left card. Something different!

    Another time saving tip for this card is that I could die-cut two sets of trees at the same time with the extra long die in the bundle seen here:

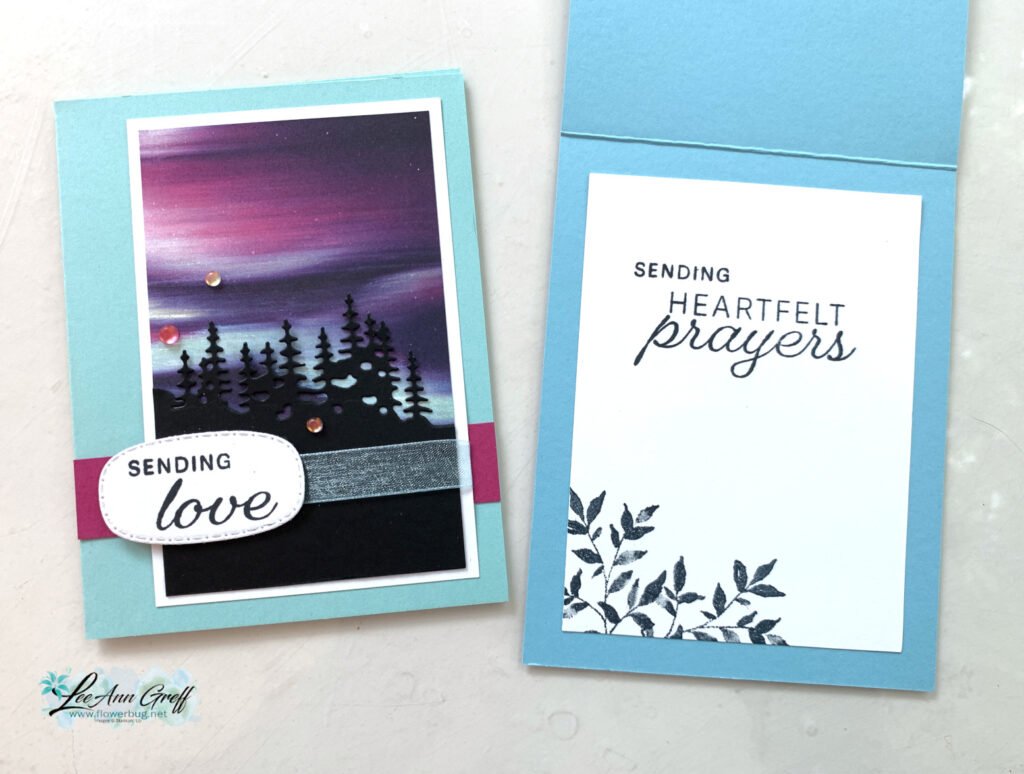
    These sentiments & die-cut are from the Peace on Earth bundle; the leaves are from the Textured Notes set.

    Tip; add balance to your card by placing the main layers off to one side and the greeting on the other.
    This suite has been really popular with my customers. It’s something special & unique we’ve never had before. See it here.

    Click on this link to get the free project sheet for this card.

    Below is the video tutorial where I shared this card and another gorgeous sample. Be sure to follow me on my YouTube channel here.

    Reasons to ShopwithLeeAnn.com

    • Get a free PDF project tutorial with any online order! (changes monthly)
    • An order of $55 or more earns you a free 3 card stamping kit with pre-cut layers; ready to stamp & assemble
    • Earn 10% host rewards on each order you place (over $20). Redeem on a future order.
    • Join my Flowerbug’s Team and get $90 in free product of your choice in October! Details here.
    • Be a Paper Pumpkin subscriber and enjoy the free bonus project PDF tutorial every month. Subscribe here. Refills here.

    ~~~

    October Specials

    3 new kits and a Starter Kit special! See the kits here.

    And get the Starter kit here. *Choose your deal – $35 or $99 plus $90 in free products including free shipping, free Paper Pumpkin kit & free catalogs/business supplies!

    ~~~

    All online orders from me will receive a beautiful PDF of projects featuring the Modern Christmas suite.

    Leave a Reply

    Your email address will not be published. Required fields are marked *

  • Autumn Abundance card kit; so gorgeous and in limited quantity!


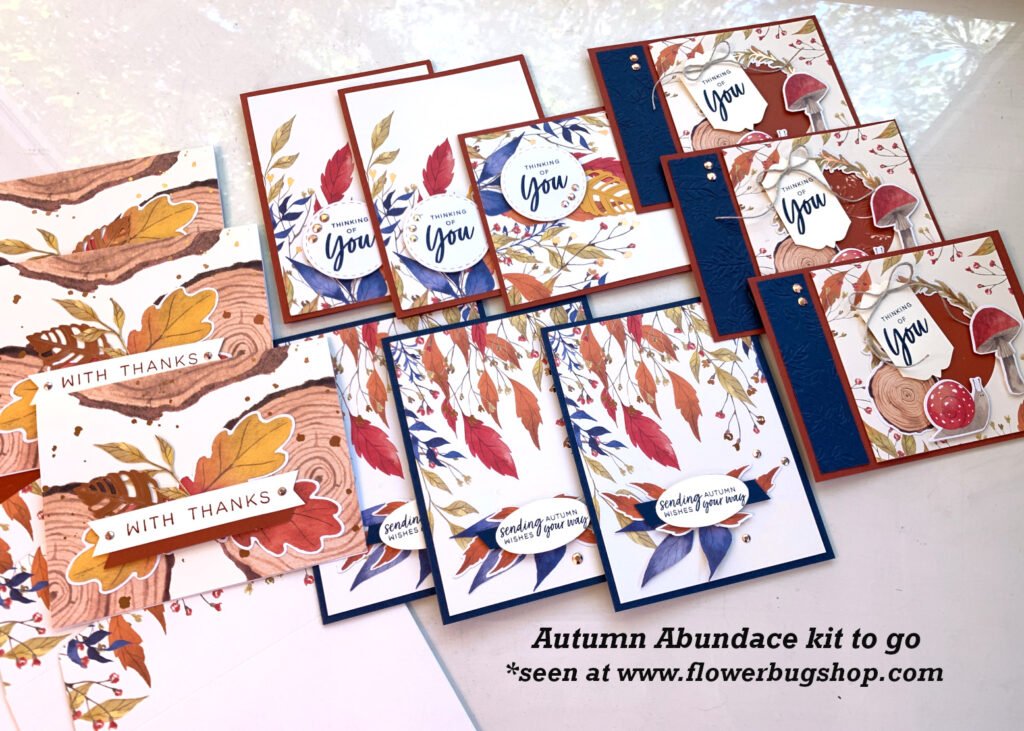
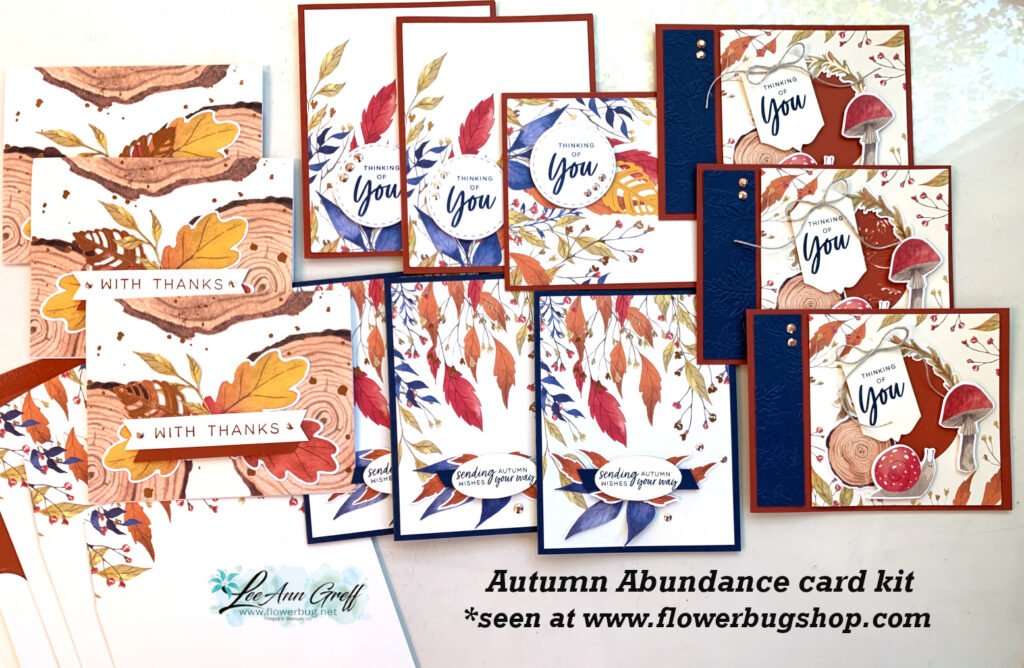
    Here’s a beautiful set of cards perfect for the next few month’s of Autumn.

    Aren’t they pretty?! They started out as a previous Paper Pumpkin kit but I changed them up a bit and added extra cards and layers. Now it’s 12 cards with envelopes, Linen Thread & gems too.
    Most of the layers are pre-cut for you however you will need to trim a few card bases down to add to the card bases I include in the kit.

    The PDF tutorial includes all instructions, photos, measurements and supplies needed. You will need assorted greeting images and a few inks too.

    Click here to grab the kit to go with extra product for just $30.

    Don’t forget to shop around a bit; there are lots more kits to choose from and you’ll save shipping by adding at least one more to your cart.

    Reasons to ShopwithLeeAnn.com

    • Get a free PDF project tutorial with any online order! (changes monthly)
    • An order of $55 or more earns you a free 3 card stamping kit with pre-cut layers; ready to stamp & assemble
    • Earn 10% host rewards on each order you place (over $20). Redeem on a future order.
    • Join my Flowerbug’s Team and get $90 in free product of your choice in October! Details here.
    • Be a Paper Pumpkin subscriber and enjoy the free bonus project PDF tutorial every month. Subscribe here. Refills here.

    ~~~

    October Specials

    3 new kits and a Starter Kit special! See the kits here.

    And get the Starter kit here. *Choose your deal – $35 or $99 plus $90 in free products including free shipping, free Paper Pumpkin kit & free catalogs/business supplies!

    ~~~

    All online orders from me will receive a beautiful PDF of projects featuring the Modern Christmas suite.

    Leave a Reply

    Your email address will not be published. Required fields are marked *


Notice: LeeAnn Greff, Independent Stampin’ Up! Demonstrator, Manager. The content of this website is my sole responsibility as an independent Stampin’ Up! demonstrator and the use of, and content of, the classes, services, or products offered on this website is not endorsed by Stampin’ Up! Copyright 2025