/


Latest Post

A few favorite craft storage tips


I thought I'd share some of my favorite ways to store my stamping products.  Some people enjoy organizing more than creating! 

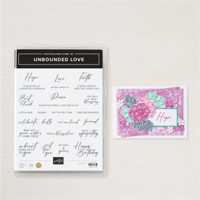
First is how I store my stamp sets.  In a dresser drawer.  I purchased a few dressers from IKEA many years ago and they've held up very well despite multiple moves.  

Here's a photo of my craft studio.  I am very, very lucky to have such a beautiful room in our home for my business and classes. 


Here's how I store my 8 1/2" X 11" card stock and paper scraps.  In front of each color of card stock I keep a cello bag for the scraps in that color. I've used this method for years and it really helps me use my scraps.

Next is how I store my 12 X 12" designer paper and scrapbook pages. 

It's a shoe storage cabinet! My 12 X 12" paper fits like it was made just for it!  You can get two stacks side by side in it since it's about 30" wide.    Plus it has a divider to fit even more paper above it.  I love the way the doors hinge open.  There are three doors and it's only about a foot deep.

Lastly here's how I store my inks, markers and ribbon. These are Stampin' Up! storage and they're fully customizable to fit what you need.  Click here to see the options. 

I love that it fits right on my work area for easy reach. As you can see I organize my inks in rainbow order. I'm not sure why my Blends aren't but I know my granddaughter will love to do that for me this week while she's here.  

~~~

December Specials:

*current host code link:  

P243X6VH

3 new designer papers!

~~~

Available December 3rd; while supplies last!

~~~

~~~

All Posts

  • Neat Z-fold card with free project sheet & video tutorial


    Today I'm sharing a neat Z-fold card that's a little different than usual.  I chose to feature the new Mixed Media Floral designer paper from our Online Exclusives line.  You can see it here.  

    My colors include Mossy Meadow, White & Calypso Coral. The left card above has a 4" square of DSP as the main panel. On the right card I fussy cut the flowers from the DSP and added them over a printed blue panel that resembles sky. 

    The greeting is from the SAB Heart Shaped bundle; the die-cut is from the Mixed Label dies and the Coral piece is punched using the Labeled with Love punch.

    You can see how it opens in the photo below: The card base is 5 1/2" X 4 1/4" and there's a full 11" X 4 1/4" scored layer above it.  


    Click on the following link to get the free project sheet with measurements, supplies and directions. Download Mixed Media Floral Z-fold card

    Below is the video tutorial for this card and two other simple designs using this pretty designer paper.  

    ~~~

    February Specials:

    *current host code link:  

    RDHGQU7E

    Get this free tutorial with any online order in February!

     When you choose the Starter kit in February you get a choice of 2 packs of markers & a free stamp set or an extra $30 in product.  That's $155 in value for just $99! 

    Contact me here

    New Sale-a-Bration choices – free with any $60 purchase through Feb 28th 


    Leave a Reply

    Your email address will not be published. Required fields are marked *

  • Mixed Media Floral fun fold card kit to go (or choose the PDF tutorial option)


    Here is the other card kit to go & tutorial for February.  It features the Mixed Media Floral designer paper seen here from our Online Exclusives.  

    These eye catching cards are all fancy folds. You'll make 2 each of the 5 card designs. Who doesn't love adding a few new fold ideas?  The great thing is you'll have samples in hand to case later. 

    The kit includes these Stampin' Up! products – a share of each – Mixed Media Floral DSP, the Low-Profile gems, scalloped Petal Pink ribbon and the Greetings for All Ephemera pack.

    No stamping is needed with this awesome Ephemera pack. They're all printed in Black & White and ready to add to your projects. You can sponge the edge, use markers to color or leave them as is.  They're a wonderful deal – 2 of each sheet for $7. 

    The pre-cut kit includes all card bases, layers and punched or die-cut pieces.  You will need a paper trimmer for your new DSP. 

    To reserve a pre-cut kit to go for $31 click here.  To purchase the PDF tutorial for $16 click here. 

    The PDF tutorial will be emailed to your immediately after payment.  Please check your junk mail!  The kit with product will be shipped to you at the end of February, barring any product shortages. 

    *Supplies needed: a paper trimmer (for your new DSP), greeting images, ink & adhesives.  

    Remember I have other kits as well; check them all out here and save on shipping. 

    ~~~

    February Specials:

    *current host code link:  

    RDHGQU7E

    Get this free tutorial with any online order in February!

     Sale-a-Bration is Live! For every $60 (or $120) you spend you can choose a free item from the SAB catalog!  

    And when you choose the Starter kit in February you get a choice of 2 sets of markers & a free stamp set or an extra $30 in product.  That's $155 in value for just $99! 

    Opt in for my Spring catalog Designer Paper share and/or the Spring catalog embellishment share seen below. 

    See the details here. 

    Contact me here

    Leave a Reply

    Your email address will not be published. Required fields are marked *

  • Everyday Happiness fun fold card kit to go; or choose the PDF tutorial option


    I chose to feature the new Everyday Happiness designer paper for one of my card kits to go in February. Each month I offer two new kits in my shop here.  

    These soft & pretty cards are all fancy folds. You'll make 2 each of the 5 card designs. It's always great to learn a few new fold ideas and have samples in hand to case later. 

    The kit includes these Stampin' Up! products – a share of each – Everyday Happiness DSP, the Iridescent gems & Lost Lagoon cording. You'll want to have the Pretty Peacock ink and greeting images.  I used the With You in Mind and Layering Leaves sets but you can substitute others easily. *Add on $40 in product to your kit order and choose a free SAB item! 

    The pre-cut kit includes all card bases, layers and punched or die-cut pieces.  You will need a paper trimmer for your new DSP. 

    To reserve a pre-cut kit to go for $31 click here.  To purchase the PDF tutorial for $16 click here. 

    The PDF tutorial will be emailed to your immediately after payment.  Please check your junk mail!  The kit with product will be shipped to you at the end of February, barring any product shortages. 

    *Supplies needed: a paper trimmer (for your new DSP), greeting images, ink & adhesives.  

    Remember I have other kits as well; check them all out here and save on shipping. 

    ~~~

    February Specials:

    *current host code link:  

    DNXE92GP

    Get this free tutorial with any online order in February!

     Sale-a-Bration is Live! For every $60 (or $120) you spend you can choose a free item from the SAB catalog!  

    And when you choose the Starter kit in February you get a choice of 2 sets of markers & a free stamp set or an extra $30 in product.  That's $155 in value for just $99! 

    Opt in for my Spring catalog Designer Paper share and/or the Spring catalog embellishment share seen below. 

    See the details here. 

    Contact me here

    Leave a Reply

    Your email address will not be published. Required fields are marked *


Notice: LeeAnn Greff, Independent Stampin’ Up! Demonstrator, Manager. The content of this website is my sole responsibility as an independent Stampin’ Up! demonstrator and the use of, and content of, the classes, services, or products offered on this website is not endorsed by Stampin’ Up! Copyright 2025