/


Latest Post

5 beautiful cards the easy way; with my ‘5 at a time’ templates!


Check out these gorgeous cards made with my 5 at a time templates!

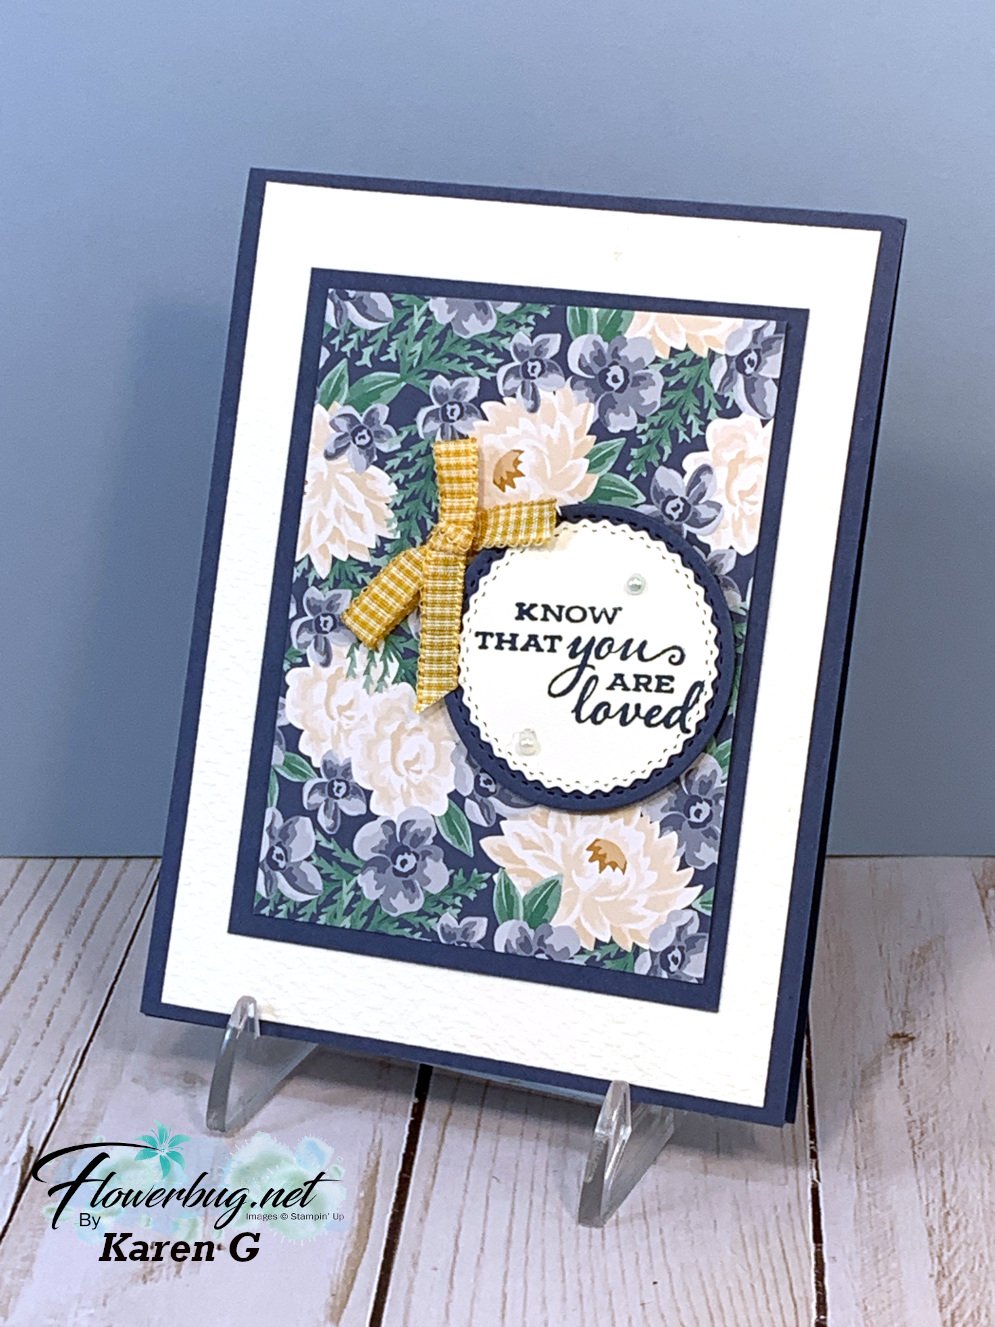
Aren’t they pretty? I chose this stamp set because of the pretty floral images. And I knew they’d make an easy, beautiful background. My colors include Hydrangea Hue, Peaceful Pine and Golden Glow.

My 5 at a time templates make creating 5 cards so effortlessly! This first template is what I used for my White stamped layer.

Vertically, make the first cut from an 8 1/2″ X 11″ White CS at 4 3/4″. Then cut 3 pieces from the left section at 3 1/2″. Now cut the other piece at 3 1/2″ wide and cut that into two pieces at 4 3/4″. Save the bottom piece for a greeting layer.

This next template is for the colored layer under the White stamped pieces. It’s just an 1/8″ larger than the White layers.

Cut in the same manner as the one above; starting vertically at 4 7/8″. Please watch the video here, or below to see how it’s done.


I cut 5 card bases for these stamped layers and you can see how I stamped the insides of some above. I love stamping backgrounds; our stamp images are fantastic! And this set has that distinktive feel to the images which gives multiple hues of colors when stamping.

It’s actually in a bundle with the amazing Tile Garden dies. See the stamp set here and the bundle here.

I created a free project sheet for these cards and it includes the two templates! Click here to print or download it.

And below is the video tutorial I shared last week with an entire different set of cards! I’ll share another version tomorrow.

The Starter kit deal ends on Saturday! I hope you’ll consider joining my team and taking advantage of the continual discount on all future Stampin’ Up! products!

Click here to get the deal!!

All Posts

  • Pampered Pets Easy Fun Fold card


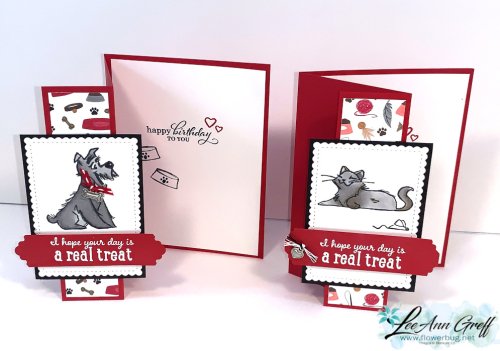
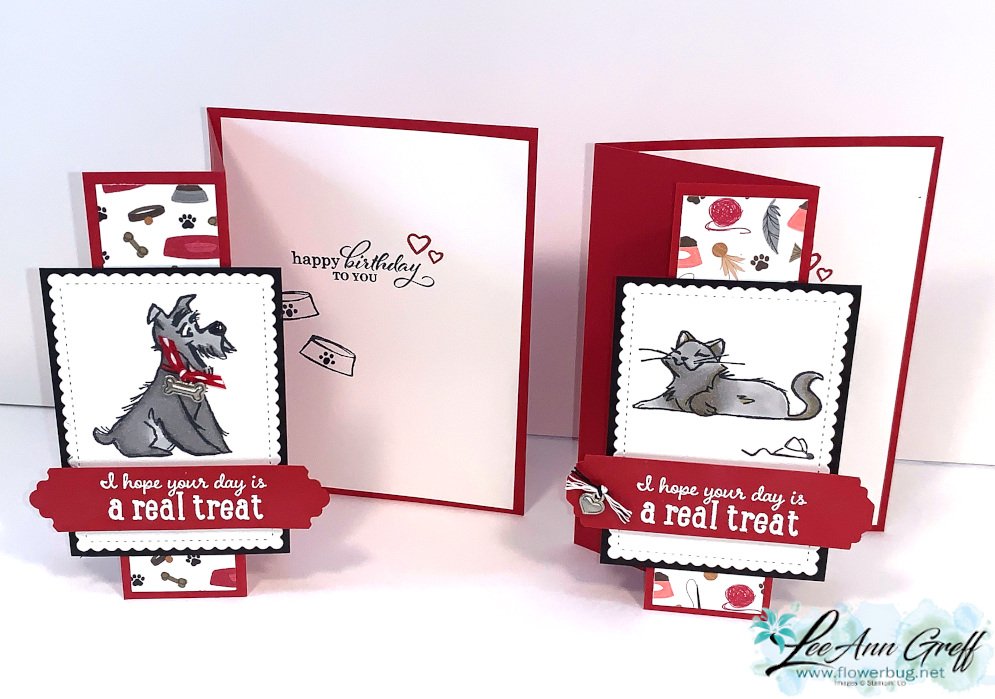
    This cute card starts out as a standard A2 card – 5 1/2" X 8 1/2".  Adding just one extra score line creates this interactive, unique card! 


    I used the Pampered Pets stamp set and the Playful Pets designer paper.  I colored the critters in with Blends markers and added a Playful Pets trinket with the Playful Pets trim and a glue dot. Sooo cute!

    The scalloped White layer is from the Stitched So Sweetly dies and the Real Red greeting is 1" X 4" and punched with the Lovely Labels PIck a Punch on both ends.  Note the two different ends shown above. 

    The Happy Birthday greeting inside the left card is from the Best Year stamp set. 

    Watch the video below to get my tips on assembly and coloring.  Measurements are listed below. 

    Measurements:

    • Real Red 5 1/2" X 8 1/2" scored at 1 1/2" and 4 1/4", greeting strip 1" X 3 3/4"
      White inside 5 1/4" X 4", front die-cut 3 5/8" X 2 1/2"
      Black 3 3/4" X 2 5/8"
      Designer paper 1 1/4" X 5 1/4"

    ~~~

    Bonus Days are here!

     
    For every $50 you spend in July you'll receive a $5 coupon to redeem in August!  

    ~~~

    Current Host code is QW7SUYVX

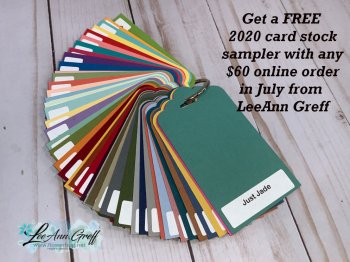
    Get a free 2020 card stock sampler with online orders over $60. 

    If you have trouble telling which color is which, this is what you need! 

    Order online here

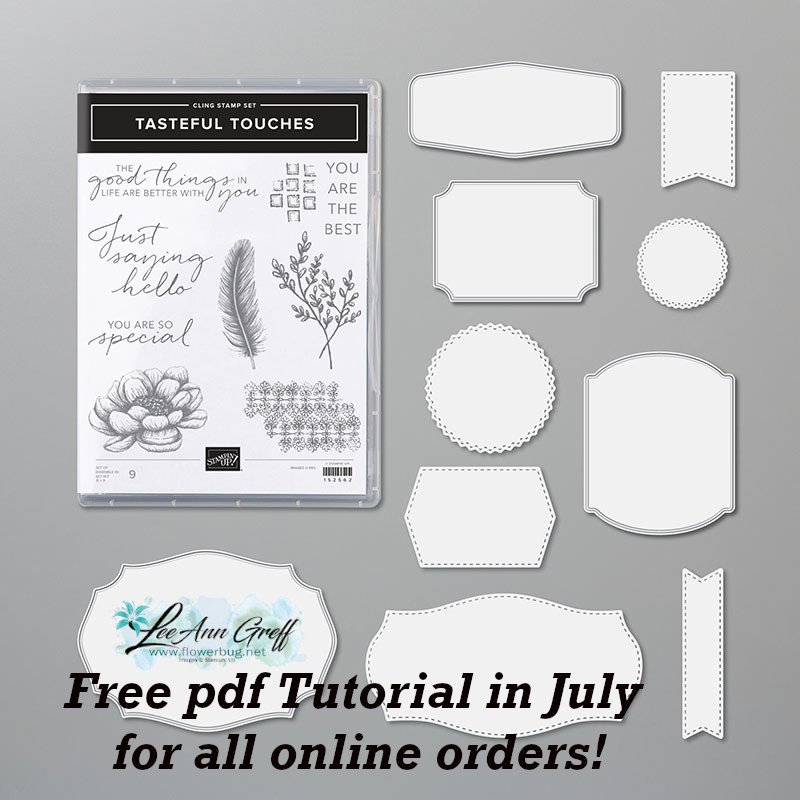
     Get my Tasteful Touches pdf tutorial free with any online order in July


    It includes directions, photos and measurements for 10 cards!

    Leave a Reply

    Your email address will not be published. Required fields are marked *

  • Bonus Days end soon plus beautiful cards!


    There are just a few days left of Bonus Days.  Get a $5 coupon to use in August for every $50 you spend in July.  FREE is fabulous!


    Order online here.

    ~~~

    Today I have a few more beautiful card swaps from my Flowerbug's Team.  

    First is Jacki's card featuring the Forever Fern bundle.  

    She used two new In Colors; Misty Moonlight with Just Jade.  The stamps are distinktive and the die-cuts in the Forever Flourishing dies are incredible!  I love the touch of vellum she added. 

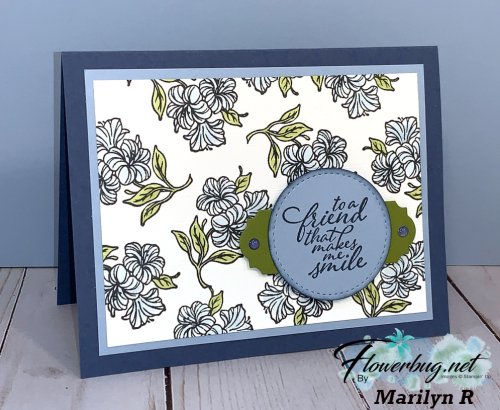
    Marilyn made this pretty card using the Posted For You stamp set.  This one coordinates with the new Rectangular Postage punch. 

    Her colors are Misty Moonlight with Seaside Spray and a touch of Old Olive.  She colored the images in with Blends markers. The greeting is from the Forever Fern stamp set. 

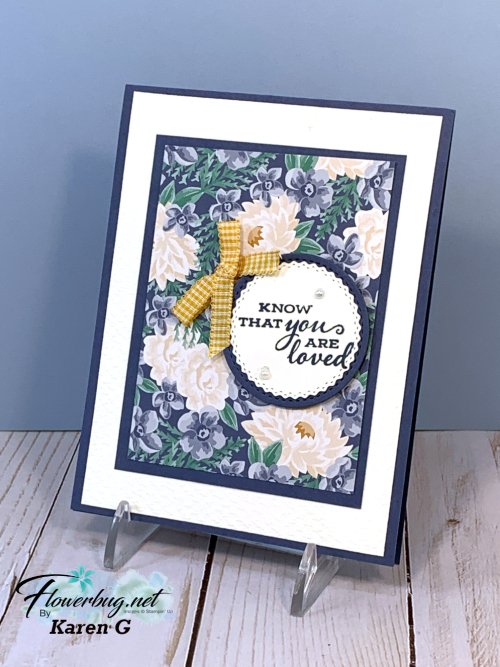
    Next is Karen's card. She used the Flowers for Every Season designer paper and it is the star of the card. 

    The greeting is from the Celebrate Sunflowers set and that neat scalloped die-cut is from the Tasteful Labels dies.  

    ~~~

    Bonus Days are here!

     
    For every $50 you spend in July you'll receive a $5 coupon to redeem in August!  

    ~~~

    Current Host code is QW7SUYVX

    Get a free 2020 card stock sampler with online orders over $60. 

    If you have trouble telling which color is which, this is what you need! 

    Order online here

     Get my Tasteful Touches pdf tutorial free with any online order in July


    It includes directions, photos and measurements for 10 cards!

    Leave a Reply

    Your email address will not be published. Required fields are marked *

  • Flowers for Every Season & more!


    Here are more of our Flowerbug Team swap cards featuring the new In Colors. 

    First is a card made by Mary with the Flowers for Every Season designer paper in Just Jade.

    Sweet & Simple letting the designer paper be the star of the card. The greeting is from So Sentimental and the die-cut is from Stitched So Sweetly. 

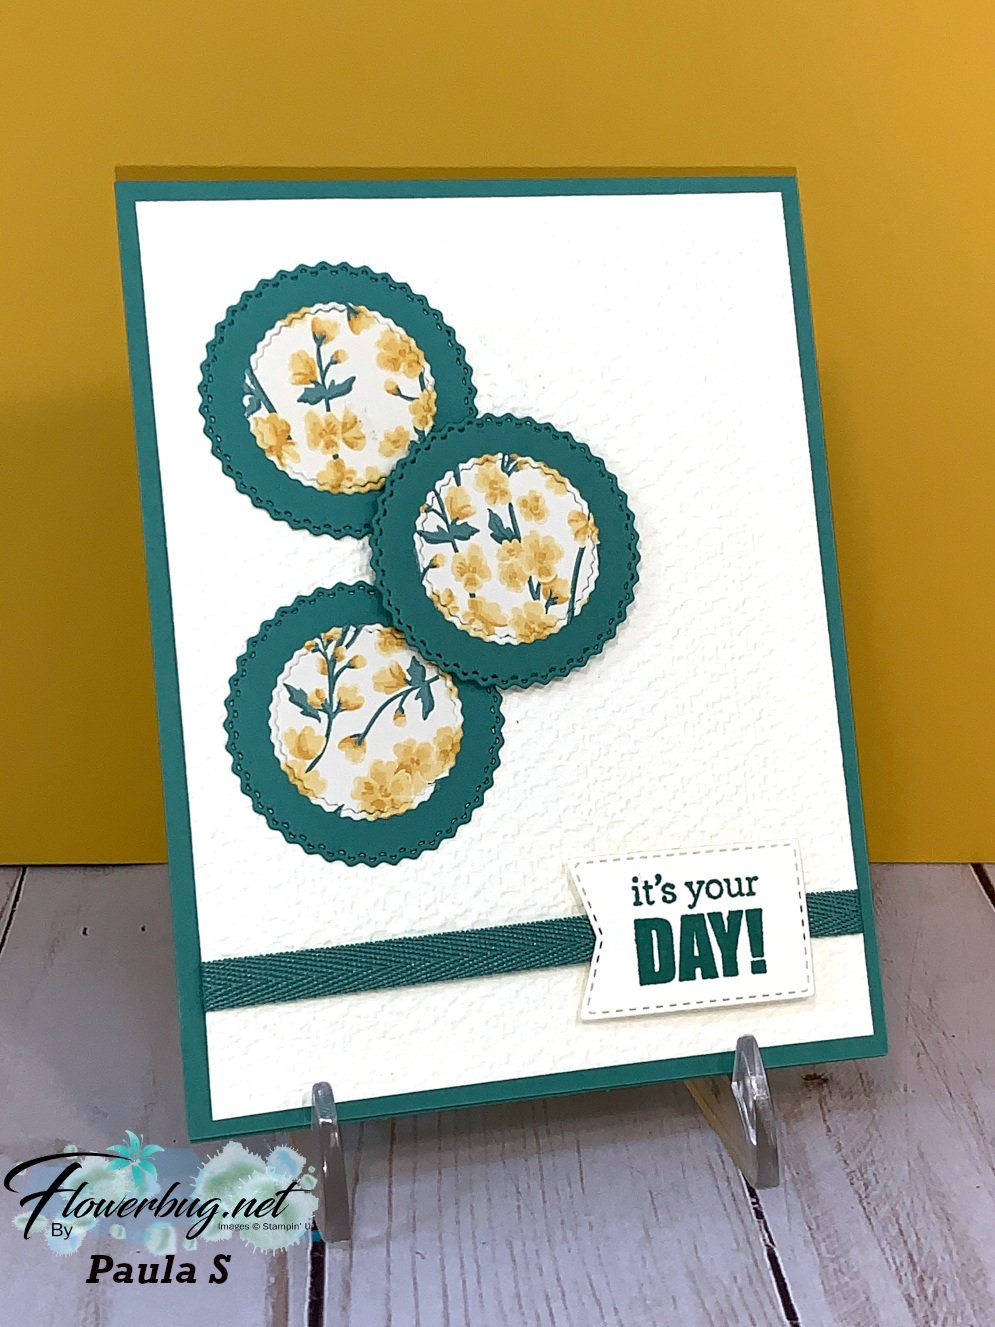
    Next is a card by Paula using the Tasteful Labels dies and the Flowers for Every Season paper also. 

    What a fun layout!  Can you see that wonderful texture on the Vanilla layer?  That's the Tasteful Texture 3D embossing folder.  The circles and greeting are all from the die-cuts from the Tasteful Labels set of dies.  

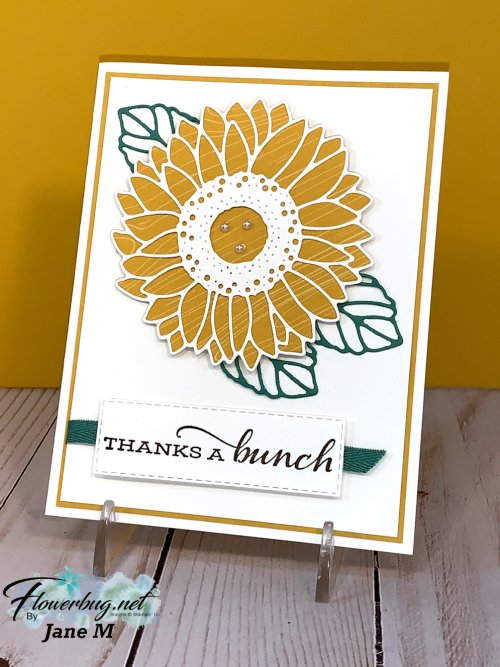
    Next is a pretty sunflower card made by Jane.  She used the In Color 6 X 6" paper for the solid part of the sunflower.  

    The greeting is from the Celebrate Sunflowers. Order the stamp set with these dies in a bundle at 10% savings.  Love these delicate dies!  

    Tip: Did you know that almost all of our dies are now thinner and cut better?  They reformulated them with the last few catalogs so they cut beautifully.  It's not a struggle to get them out of the dies like it used to be. However I've found that if I do a bunch of the same at a time, I do use a piece of waxed paper every 5 die-cuts and that sure makes a difference! 

    ~~~

    Bonus Days are here!

     
    For every $50 you spend in July you'll receive a $5 coupon to redeem in August!  

    ~~~

    Current Host code is JFPDBTBY

    Get a free 2020 card stock sampler with online orders over $60. 

    If you have trouble telling which color is which, this is what you need! 

    Order online here

     Get my Tasteful Touches pdf tutorial free with any online order in July


    It includes directions, photos and measurements for 10 cards!

    Leave a Reply

    Your email address will not be published. Required fields are marked *


Notice: LeeAnn Greff, Independent Stampin’ Up! Demonstrator, Manager. The content of this website is my sole responsibility as an independent Stampin’ Up! demonstrator and the use of, and content of, the classes, services, or products offered on this website is not endorsed by Stampin’ Up! Copyright 2025