/


Latest Post

2nd set of my Team’s awesome masculine swap cards


Yesterday I shared 4 of my Flowerbug's Team manly card ideas for our July card swap.  Today I have three more.  I'm so proud of them; it's obvious they really did their best to make incredible swaps.  

Today's first card was made by Candy. She used the Wildlife Wonder stamp set & Grassy Grove bundle seen here.   

Her colors include Soft Suede & Mossy Meadow.  Here are some tips on how she achieved this amazing card:

  1. Die-cut the tree & grass silhouette from White CS using the Grove dies. Trim to 5" X 3 3/4". 
  2. Stamp the bear on the background White layer (51/4" X 4")
  3. Stamp the grass image on the bottom of the die-cut.  
  4. Use the trio of trees image to stamp all over the 'foiliage' area of the die-cut using Mossy Meadow ink, stamping 1st, 2nd and 3rd generation of ink.  
  5. Use a blending brush to add more green as needed. 
  6. Sponge color to the edges of all layers. 
  7. Distress the edges with the side of your scissors. 
  8. Use a Soft Suede Blends marker to color the trunks.  
  9. Adhere the die-cut over the bear image. Add to the card base. 
  10. Stamp & add the greeting layer. 

Amazing, right?!!  So proud of you Candy!  


Next is another incredibly detailed card made by Roxann.  She used the Beauty of Friendship stamp set seen here. 

I love her corner details but the layer of vellum that softens her stamped trees background is amazing!  It gives an ethereal or foggy feel to the scene.  She used Mossy Meadow with Early Espresso ink & card stock.  

I love the triple tag detail on her greeting.  I believe that is from the Mini Pocket Envelope dies.  Such a unique & special card. 


Lastly for today is a pretty scenic card made by Deloris.  She used the Grassy Grove  bundle seen here.

Her colors include Old Olive, Soft Suede, White and a bit of blue for her sky.  I believe she used Blending Brushes for that soft background.  

Here's what's included in the Grassy Grove bundle.  

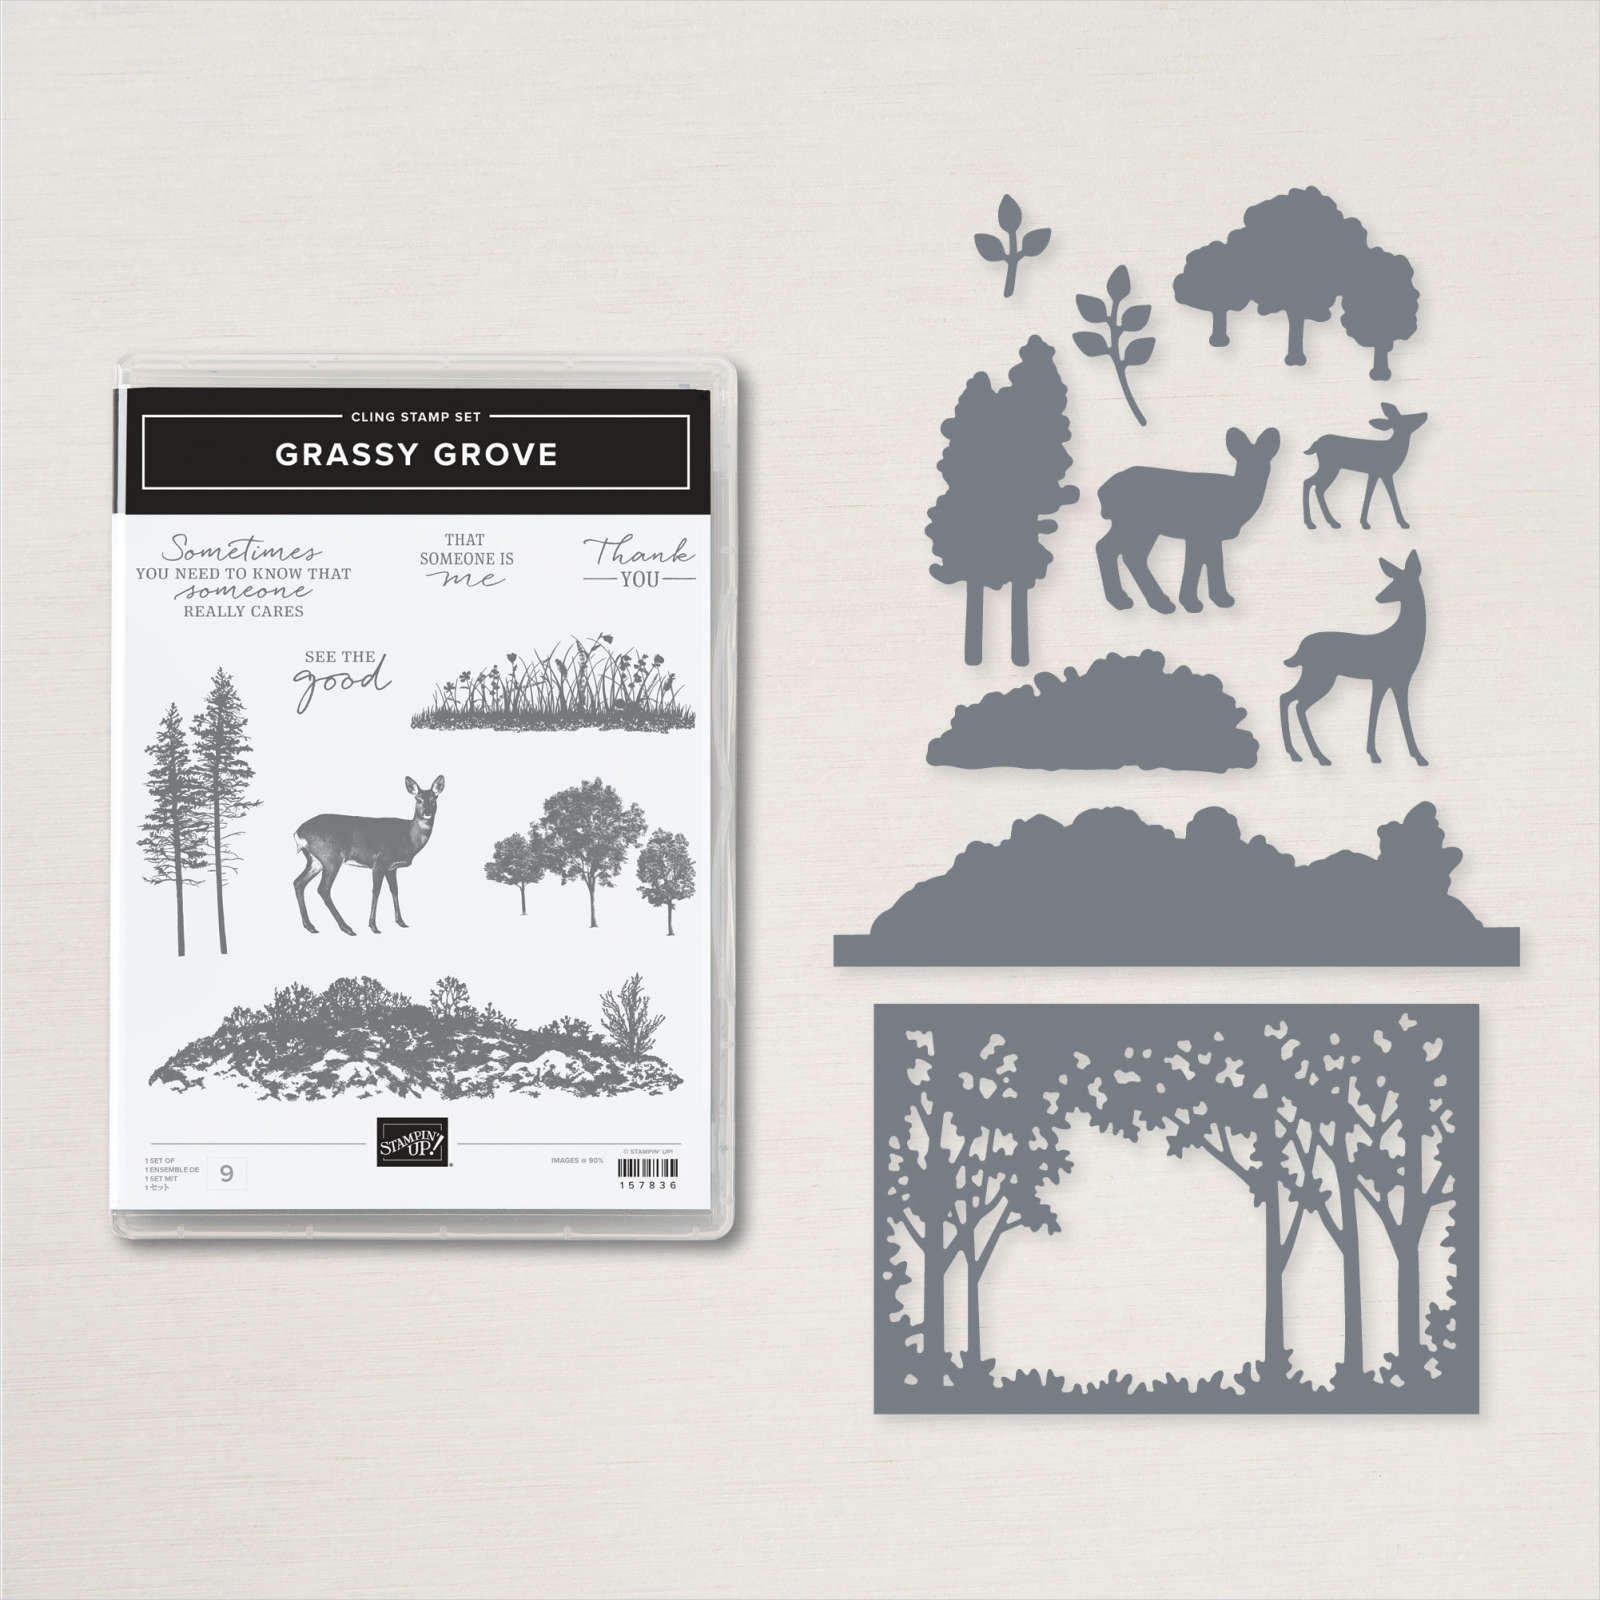
There are a lot of die-cuts here; in fact everything on the front is a die-cut!  The ground, trees & deer are all from the Grove dies.  The greeting is from Peaceful Moments and that die is from the All That dies.  

All are incredible cards for the men in our lives and I couldn't be prouder of them!  

Stay tuned for more masculine card ideas tomorrow and all this week!  

~~~

July Specials

Get free items here in July & August during Sale-a-Bration! 


Host code: RMFKDE3G


Get a free card class in the mail with a $55 order from July 1-30th.

 *click here to order 

Earn free products with my loyalty rewards! 

Click here to download yours and earn a $50 shopping spree!

~~~

Get my Holiday Designer Paper share; contact me here  


All Posts

  • Floral Charm fun-fold card kit to go or choose the PDF tutorial option


    This is my second card kit to go I've created for July.  It features the new Floral Charm designer paper released in our newest Online Exclusives.  It's absolutely gorgeous designer paper!  

    My favorite thing about this pack of paper is that the reverse side of the pretty floral patterns have a coordinating solid print. So I created a batch of fancy fold cards to show them off!  

    The directions for these fun fold cards are included in the PDF tutorial plus there's a private video you'll get access to when you purchase either the kit or the PDF tutorial.  

    This kit to go includes the following products:

    • 1/2 pkg Floral Charm DSP (6" X 12")
    • a share of Peacock/Gold ribbon
    • a share of Shimmer dots
    • pre-cut or die-cut pieces for each of 10 cards
    • the PDF tutorial & video link 

    The kit to go is $31 and can be reserved here.  It is shipped out at the end of July. The PDF tutorial is $16 and can be seen here.  The tutorial is emailed to you immediately after purchase. 

    *You will need stamp greetings, inks, a paper trimmer (to cut your new designer paper) and adhesives to finish the cards. 

    See all of my available kits to go and tutorials here.  Opt in for more than one to save on shipping costs! 

    *If you'd like to subscribe to receive a kit automatically each month please use the button below.  My subscribers get a free surprise every few months along with the guarantee of a beautiful kit full of products too! 

    ~~~

    July Specials:

    New Online Exclusives are here!  

    ~~~

    Last Chance List has been updated!  see it all here. Don't miss out on the deals!

    ~~~

    Get my Turtle-y Cute PDF tutorial free with any online order in July!

    Leave a Reply

    Your email address will not be published. Required fields are marked *

  • Kintsugi Inspirations fun fold card kit to go or tutorial. Reserve yours now!


    I'm thrilled with the cards in the Kintsugi Inspiration kit this month!  I am featuring this unique, gold foil accented designer paper for one of my kits to go in July. (I add 2 new kits to my shop each month!)

     The gorgeous designer paper is definitely the star of these stunning cards. Each of the 10 cards are unique fun fold designs and the video will help you assemble each one.

    The directions for the cards are included in the PDF tutorial plus there's a private video you'll get access to when you purchase either the kit or the PDF tutorial.  

    This kit to go includes the following products:

    • 1/2 pkg Kintsugi Inspirations specialty DSP (6" X 12")
    • a share of Misty Moonlight 1/4" ribbon
    • a share of gold Flower Accent gems
    • pre-cut or die-cut pieces for each of 10 cards
    • the PDF tutorial & video link 

    The kit to go is $31 and can be reserved here.  It is shipped out at the end of July. The PDF tutorial is $16 and can be seen here.  The tutorial is emailed to you immediately after purchase. 

    *You will need stamp greetings, a paper trimmer (to cut your new designer paper), adhesives and inks to finish the cards. 

    See all of my available kits to go and tutorials here.  Opt in for more than one to save on shipping costs! 

    *If you'd like to subscribe to receive a kit automatically each month please use the button below.  My subscribers get a free surprise every few months along with the guarantee of a beautiful kit full of products too! 

    ~~~

    July Specials:

    New Online Exclusives are here!  

    ~~~

    Last Chance List has been updated!  see it all here. Don't miss out on the deals!

    ~~~

    Get my Turtle-y Cute PDF tutorial free with any online order in July!

    Leave a Reply

    Your email address will not be published. Required fields are marked *

  • How to add color to the Peaceful View stamp – video tutorial too!


    Today I'm sharing the second card I made during last week's live video.  Both featured the amazing and beautiful Peaceful View stamp set seen here.  

    I used Balmy Blue, Pecan Pie and White card stock.  Inks include Balmy blue, Old Olive, Granny Apple Green and Pecan Pie. I used a Blending Brush with Balmy Blue ink to lightly color the sky before stamping. 

    Notice the fence. If you look closely you'll see the woodgrain in the fence. This was done by using an Early Espresso Stampin' Write marker to add to the stamped fence directly on the cardstock. It was mostly Pecan Pie colored before.  

    How did I color the image?  I inked the trees with Old Olive ink first using the direct to stamp method. The I used Pecan Pie on the grass and fence.  I used a sponge dauber to remove ink from the plants on the bottom so I could add Green ink to them with a sponge dauber.  I used Pecan Pie ink and a sponge dauber to add color to the trunk as well.  I hope you'll watch the video below to watch this in action. 

    For the greetings I stamped the More Messages stamp a few times and used the coordinating die to cut them all out.  I had lots to choose from this way and can save them to use whenever I need it. Here I added Balmy Blue ink lightly to color the greeting.

    What I love about this new messages bundle is that the greetings and die-cuts are such a nice size; larger than ever before. See the bundle here. 

    Here's the free project sheet with measurements and supplies for you: Download Multi-colored Peaceful View

    Below is the video for this card and another where I show you how to use this stamp on pretty designer paper for a stunning background. I shared that yesterday here. 

    ~~~

    July Specials:

    New Online Exclusives are here!  

    ~~~

    Last Chance List has been updated!  see it all here. Don't miss out on the deals!

    ~~~

    Get my Turtle-y Cute PDF tutorial free with any online order in July!

    Leave a Reply

    Your email address will not be published. Required fields are marked *


Notice: LeeAnn Greff, Independent Stampin’ Up! Demonstrator, Manager. The content of this website is my sole responsibility as an independent Stampin’ Up! demonstrator and the use of, and content of, the classes, services, or products offered on this website is not endorsed by Stampin’ Up! Copyright 2025