/


Latest Post

2 Pretty Team card swaps with neat technique ideas!


Today I'm sharing two Team Swaps from last month.  Both have neat product ideas.

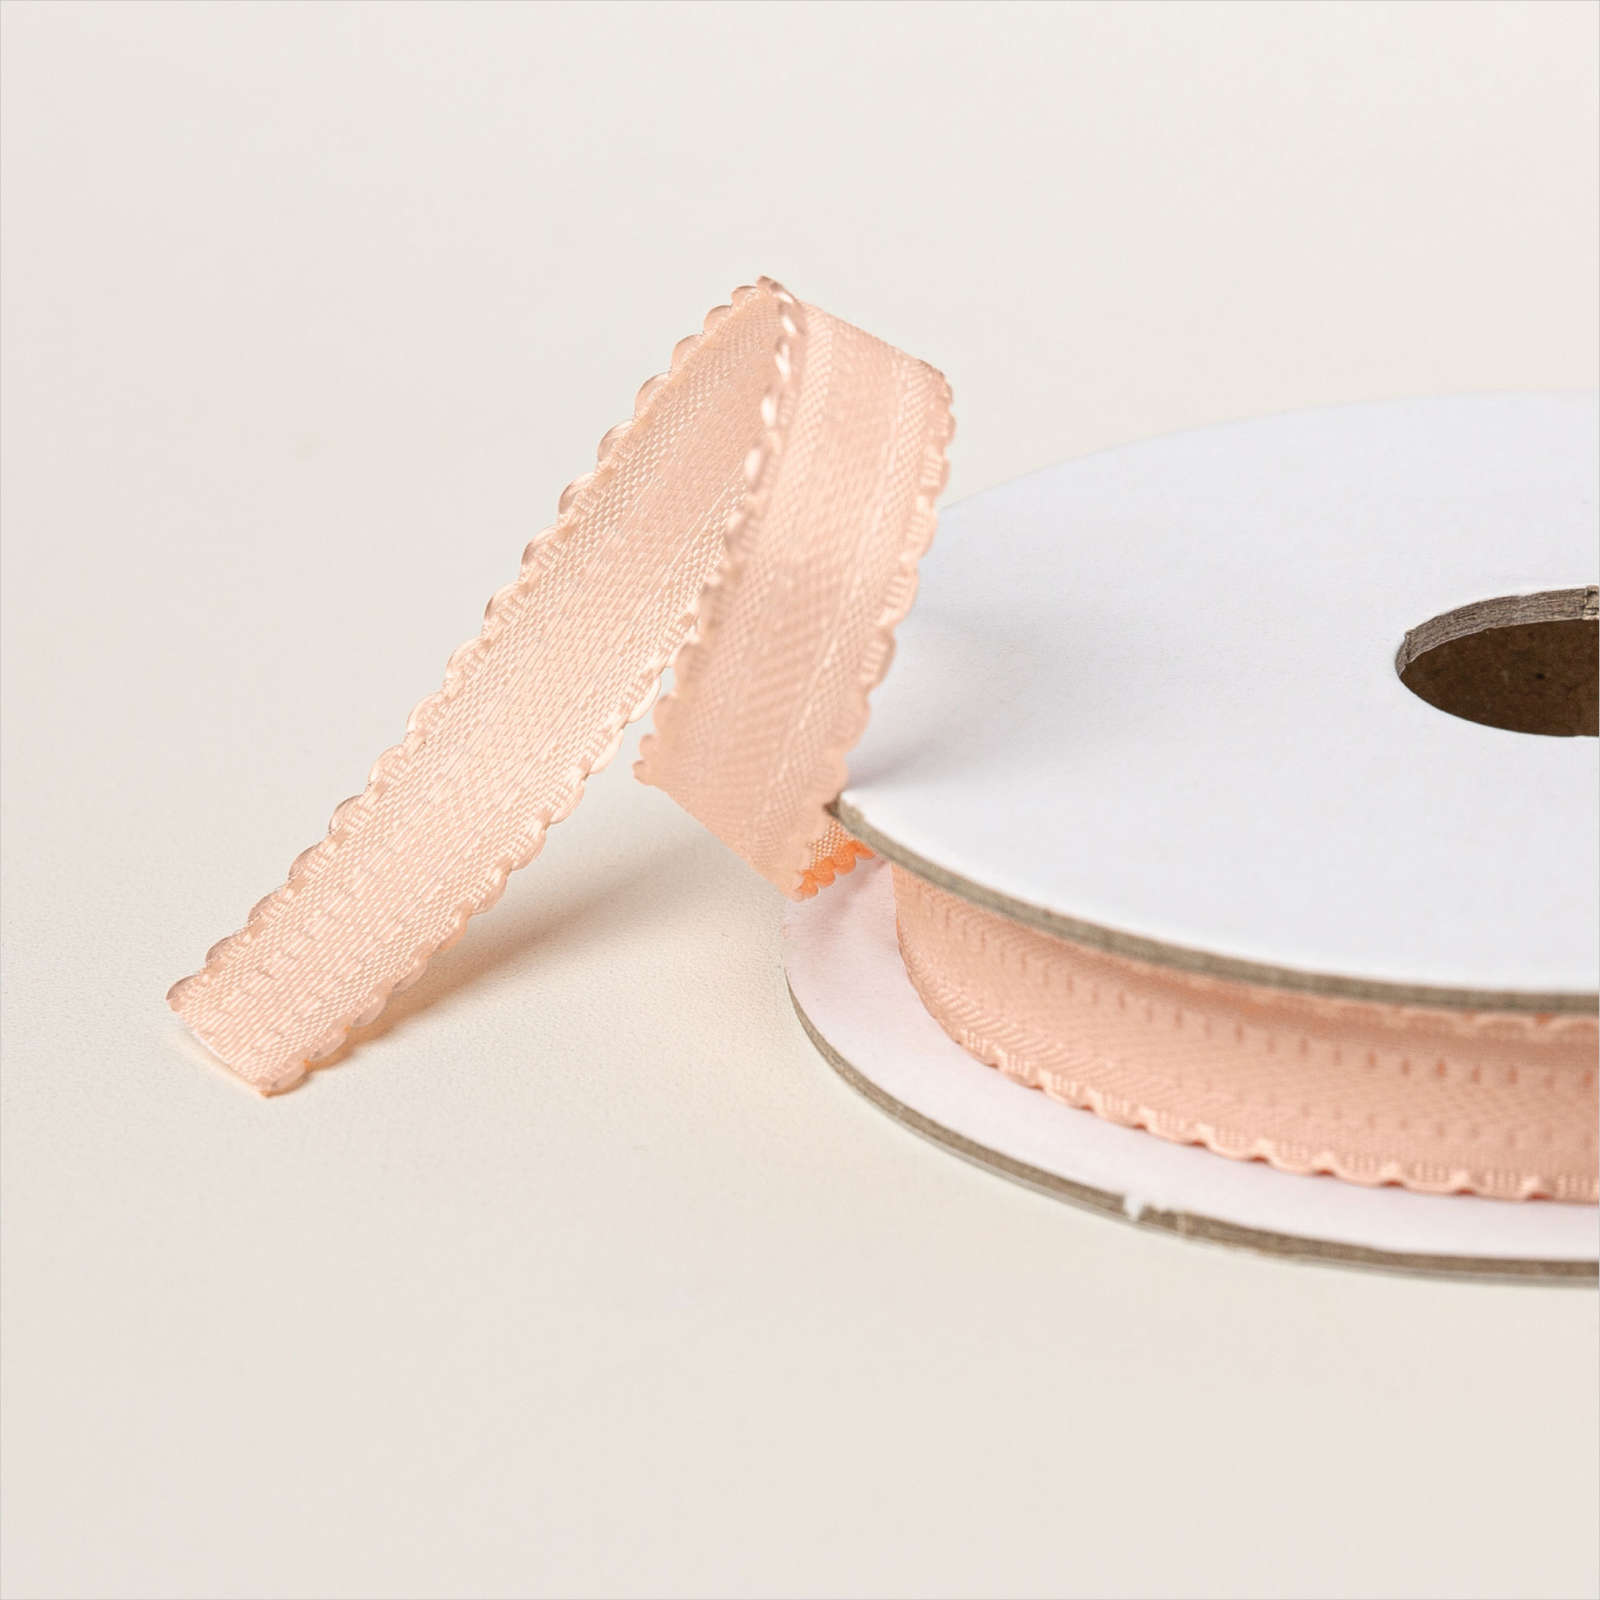
First is Tracey's cute card. Can you guess what the tiny scallops on the DSP is?  

She used the Petal Pink scalloped ribbon under the DSP! Tracey has a special gift on fun ways to use ribbon & twine. This effect is so pretty & delicate looking.  It's currently in low inventory. 

Measurements:

The DSP is 5 1/4" X 1 3/4", the White 5 1/4" X 4", the card base is 5 1/2" X 8 1/2" scored at 4 1/4". The layer under the ribbon & DSP is 5 1/4 X 2"

Here is a list of the many products she used:

  • Hugs for Love bundle seen here (punch will be available in April)
  • Moody Mauve, Basic White & Pretty in Pink CS
  • Timeless Plaid 6 X 6" DSP seen here
  • Spotlight on Nature dies seen here
  • 2 3/8" circle punch
  • Forever Plaid 3D embossing folder (circle) 
  • Heat embossing technique

~~~

Next is a pretty card made by Lori. Her special technique surprised me!  Do you spot it?

She stitched her die-cut circle (Spotlight on Nature) with the 3 color pack of Baker's Twine!  

Her card base is Flirty Flamingo and the 4" X 5 1/4" CS layer is textured with the Exposed Brick embossing folder seen here.  The pretty DSP is the Sale-a-Bration Bloom Impressions (now retired). The greeting & die-cuts are from the Memorable Blooms bundle seen here. 

I'll share more Team swaps tomorrow! 

~~~

March Specials:

*current host code link:  

UBYVA7HN

Get a free Floral Delight tutorial with any online order in March!

 Free Iridescent Foil gems!

All Posts

  • Balloon Festoon surprise slider card with video tutorial


    I shared this CUTE card on last week’s Live video. We made it at my May card clubs:

    It features the Balloon Festoon bundle seen here and the Beautiful Ordinary Life designer series paper. Both are in the 2026 May – August catalog by Stampin’ Up! They pair up wonderfully together!

    It might look like a simple fun fold card but look how it opens:

    The inside greeting layer slides out when you open the front of the card. It’s super easy! Watch the video below to see my tips & tricks on this card fold.

    My colors include Pool Party, Crisp Cantaloupe, White & Daffodil Delight. I used the colors in the Beautiful Ordinary Life DSP as a guide.

    Here’s the free project sheet for this card; click here. Feel free to download it to print or save in your files for later.

    Below is the video tutorial; I hope you watch it! There’s a second card I share as well; I’ll feature that project in tomorrow’s post.

    June Specials:

    Leave a Reply

    Your email address will not be published. Required fields are marked *

  • Beautiful Berry Botanical Vellum; it’s our Product of the Month and just $5!


    May is ending in a few days. Have you seen the beautiful Berry Botanical Vellum yet? It’s the May POM – Product of the Month.

    You can redeem this pretty vellum paper once your order hits the $75 mark. And when you order it from me you’ll receive a nice big PDF tutorial filled with a bunch of special cards featuring this vellum paper. *see the sneak peek below

    See this specialty paper here.

    Here’s a pretty card I made with it:

    I chose to feature the Fresh Freesia vellum from the pack with the Phrases & Frames bundle seen here. It’s one of our newest set of Impression dies. They give a super deep impression when used with our new Impression plate seen here.

    ~~~

    Don’t forget to consider the Starter Kit Deal in May; time is almost up!

    You’ll get either all 5 new Magnetic ink pads or an extra $35 in product of your choice; all for $99!

    Leave a Reply

    Your email address will not be published. Required fields are marked *

  • Cool technique for a background made with our new shimmer brushes


    Take your new Shimmer Brushes for a test drive with this darling DIY background idea. Stampin’ Up! posted this card idea; what a super neat plaid background!

    Here’s how you do it:

    Step 1: Draw diagonal lines on Basic White Cardstock using the Barely Blush Shimmer Brush. (Use the Clear Block F as a guide.) Apply light pressure to create fine lines; increase pressure for thicker lines.

     Step 2: Rotate your cardstock and (using the Clear Block F) draw additional lines to create a plaid pattern.

     Step 3: Decorate your sparkling background with images, sentiments, and embellishments, then adhere the finished piece to the card base.

    We now have 5 colors of these Shimmer Brushes in each of our new In Colors. See them all here.

    I hope this technique inspires you to try it. I think you could also do it with our Wink of Stella on any color CS.

    I have one Mystery Box left!
    Place an order over $100 to grab it before it’s gone.
    Message me before you order to be sure it’s still available.

    Don’t forget to consider the Starter Kit Deal in May; time is almost up!

    You’ll get either all 5 new Magnetic ink pads or an extra $35 in product of your choice; all for $99!

    Leave a Reply

    Your email address will not be published. Required fields are marked *


Notice: LeeAnn Greff, Independent Stampin’ Up! Demonstrator, Manager. The content of this website is my sole responsibility as an independent Stampin’ Up! demonstrator and the use of, and content of, the classes, services, or products offered on this website is not endorsed by Stampin’ Up! Copyright 2025