/


Latest Post

2 more great card ideas with the Basic Border dies!


Before you get to the projects today I want to let everyone know about the current shipping delays. Stampin' Up! had their highest sales day ever on April 4th – by almost 20 times the average!  Wow!  They are quite behind and have added extra staff and longer hours to get caught up.  So if you're wondering where your order is, it's coming….it will just be about 8-10 days longer than normal.  

~~~

This week I'm sharing our April card swaps from my Flowerbug's team. It's so fun to see what they make; everyone has their own unique style.  I LOVE swapping with them!  

Annette chose the Beside Me stamp set for her card. She is a master at coloring and sponging.  

Her colors include Blueberry Bushel, Basic White & Black. The Blueberry Bushel layer is textured with the Timeworn Type folder; the greeting die-cut is from the Stylish Shapes dies. 

She cut two curves for her card; one with the Basic White layer and another with a Black layer.  She colored the image in with Blends markers. 

~~~

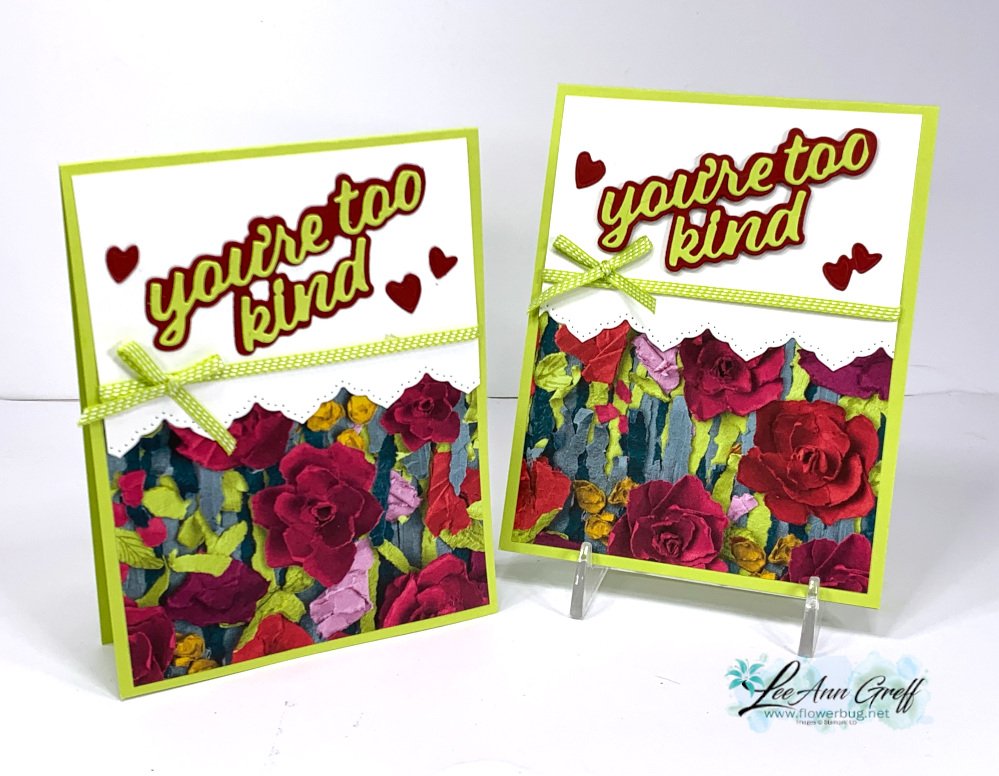
Next is a neat card made by Karen who also used the Basic Border dies seen here.  

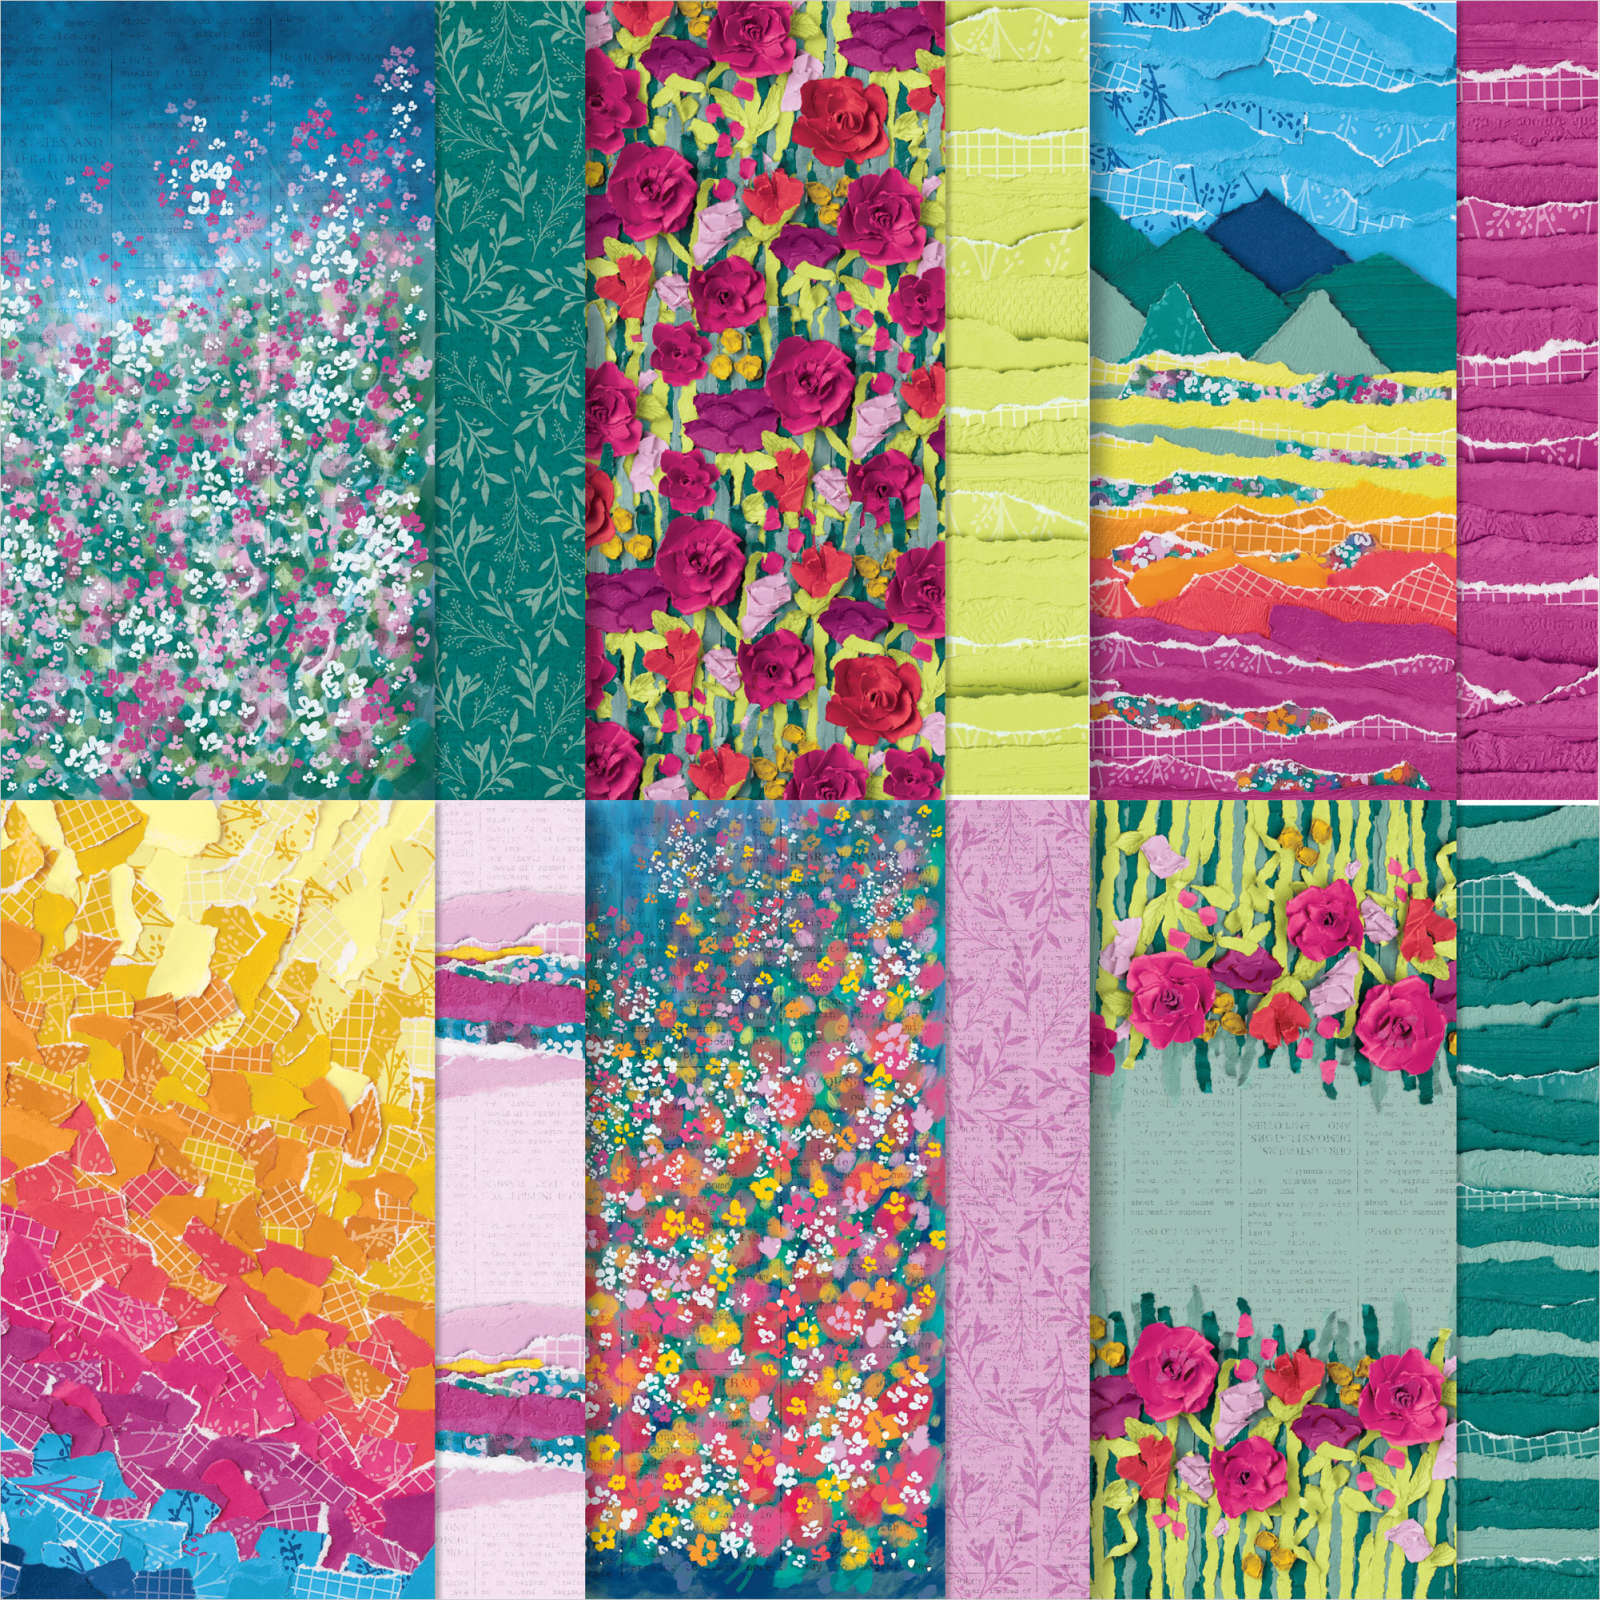
She used the die to cut off the edge of her card and then used that second piece to create a 'vertical window' for her By the Bay specialty designer paper. This pretty paper is discounted on the Last Chance List.  See it here. 

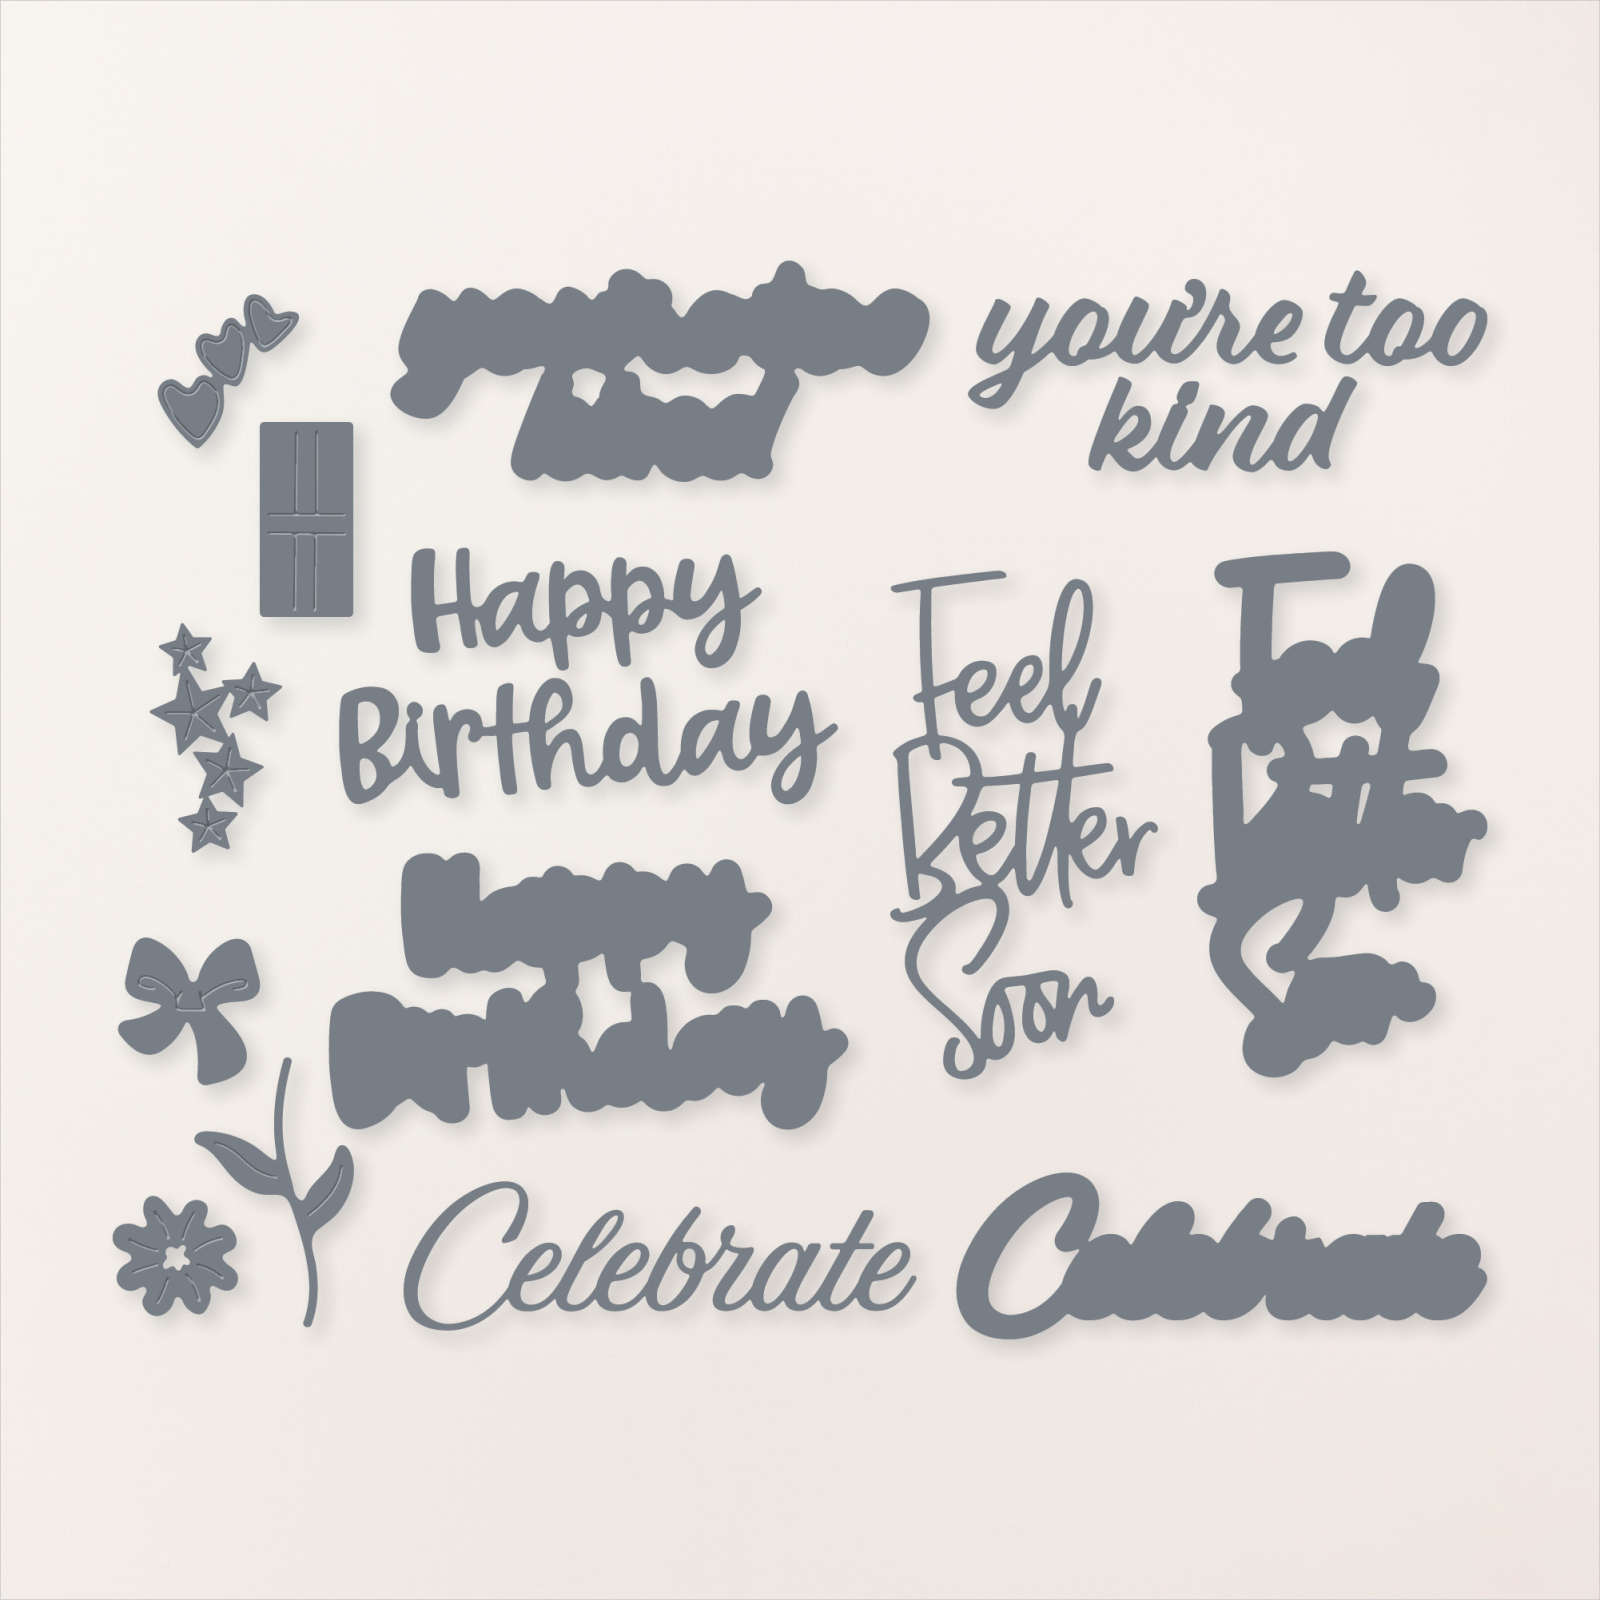
Her greeting and die-cut layers are from the Something Fancy bundle in the Spring catalog.  It will be in the new Annual catalog but no longer as a bundle at 10% off. 

See the Basic Border dies here:  I love these dies; they're so versatile.  Luckily they are carrying over into the new Annual catalog.


~~~

April Specials:

See the 2023 Last Chance list here 

*current host code: SYZD4PH2 or SFHU3WMT

Get a free specialty paper sampler with online orders over $55 using a host code above plus an embellishment if your order is over $100

Earn free products with my loyalty rewards! 

Click here to download yours and earn a $50 shopping spree!

All Posts

  • Another way to use the Border Basics dies – cut once for two card front!


    Here's the third card I made for last week's live video; it also features the Masterfully Made designer paper, Wanted to Say dies and the Border Basics dies.  

    My colors are Lemon Lime Twist, Cherry Cobbler and White.   The flowers in this pretty designer paper are so real; you almost want to touch them.  

    You can see this beautiful designer paper here.  It's discounted in June; down to $10.62.

    The photo below shows both cards made with the same designer paper.  I loved this pattern so well I didn't change it up for the second card. 

    The greeting and hearts are all from the Wanted to Say dies seen here.  

    The pretty scalloped stitched border is made with the Border Basics dies seen here. Start with a piece of White card stock measuring 4" X 5 1/4" and cut it in half with the scalloped die-cut.  Now you have the start for two cards! 

    Below are all three cards made with this three products, all seen on the video below. 


    You can see how I made this card on the video here.  Or click on the photo below to watch. Remember to follow me on Facebook here or on my YouTube channel here. 

    ~~~

    June Specials:

    Designer Paper is 15% off in June!

    WOW – get $155 in product for $99 with free shipping! click here!

    Get a package of In Color pearls with online orders over $55 using a host code.

    *current host code: M7SCQSVS 

     Earn free products with my loyalty rewards! 

    Click here to download yours and earn a $50 shopping spree!

    Leave a Reply

    Your email address will not be published. Required fields are marked *

  • Cut once for two card fronts with the Border Basics dies; video tips & tutorial too


    I shared one of the cards I made in last week's video and here's another one. Both feature the same three products: Masterfully Made designer paper, Wanted to Say dies and the Border Basics dies.  

    I used the White die-cut leftover from the card I shared yesterday on this card; basically getting two cards from one die-cut!

    The Border Basics dies are wonderful and so versatile since they die-cut the stitched edge on both sides.  Below is a photo of the inside of the card: 

    The Celebrate, Happy Birthday, stars and present die-cuts are all from the Wanted to Say dies seen here: 

    Here are both cards I shared; each with a different piece of the Masterfully Made CS.  As you can see I added a thin line of card stock to rest the 'Celebrate' die-cut on. I love the effect!

    You can see this beautiful designer paper here.  It's discounted in June; down to $10.62.

    The photo below shows both cards; one cut for two card front! 

    I cut the right side of the card front off (on the left card) and used that piece on the card on the right. Essentially I cut the card front in half and added it to the card on the right, adding DSP underneath to show off the angles.  One cut; two cards!  

    You can see how I made this card on the video here.  Or click on the photo below to watch. Remember to follow me on Facebook here or on my YouTube channel here. 

    ~~~

    June Specials:

    Designer Paper is 15% off in June!

    WOW – get $155 in product for $99 with free shipping! click here!

    Get a package of In Color pearls with online orders over $55 using a host code.

    *current host code: M7SCQSVS 

     Earn free products with my loyalty rewards! 

    Click here to download yours and earn a $50 shopping spree!

    Leave a Reply

    Your email address will not be published. Required fields are marked *

  • Masterfully Made & Wanted to Say quick card ideas with video tips


    And our annual Stampin' Sale is done!  Each June my customers and I host a paper crafting sale – this year we had 30 sellers and we had a fabulous turnout!  

    That photo was just the stamps for sale; we had so much more!  I wish you could be here for it, but I know it is a long way for some to Minot, ND.  But if you're near me, plan for the weekend after Father's Day. Make a road trip if you can.  
    We had one person come from St. Louis and another who was in town visiting from Peru!  They were so glad to be here for this annual event.  

    ~~~

    Last week I shared three card ideas featuring three products: Masterfully Made designer series paper, Wanted to Say dies and Border Basics dies. Here's one of them:

    The Masterfully Made designer paper features a torn edge look to a few of the sheets.  I chose this one because of it's beautiful colors.  I added Berry Burst, Fresh Freesia and Azure Afternoon in the die-cuts from the Wanted to Say dies.  This set of dies has a detailed and a layered die for each set of words in the set, plus a bunch of other dies like the flowers I used here. You can see them here.

    The angled border on the White card base is die-cut with the Basic Borders dies seen here.  I love these and use them often.  You can see them here.  I saved the piece I die-cut and used it on another card.  Here are both of the cards I made, using two different sheets of the Masterfully Made DSP. 

    You can see this beautiful designer paper here.  It's discounted in June; down to $10.62.

    As you can see, there is no stamping on the front.  But I did add a greeting to the inside:

    You can see how I made this card on the video here.  Or click on the photo below to watch. Remember to follow me on Facebook here or on my YouTube channel here. 

    ~~~

    June Specials:

    Designer Paper is 15% off in June!

    WOW – get $155 in product for $99 with free shipping! click here!

    Get a package of In Color pearls with online orders over $55 using a host code.

    *current host code: M7SCQSVS 

     Earn free products with my loyalty rewards! 

    Click here to download yours and earn a $50 shopping spree!

    Leave a Reply

    Your email address will not be published. Required fields are marked *


Notice: LeeAnn Greff, Independent Stampin’ Up! Demonstrator, Manager. The content of this website is my sole responsibility as an independent Stampin’ Up! demonstrator and the use of, and content of, the classes, services, or products offered on this website is not endorsed by Stampin’ Up! Copyright 2025