/


Latest Post

Amazing WOW projects with Hey Chuck; Part 2


Each month one of my Flowerbug's Team is featured as an Artist of the Month.  For July Annette chose the adorable Hey Chuck bundle seen here.  I know you'll be amazed at her fabulous projects I'll be sharing. 

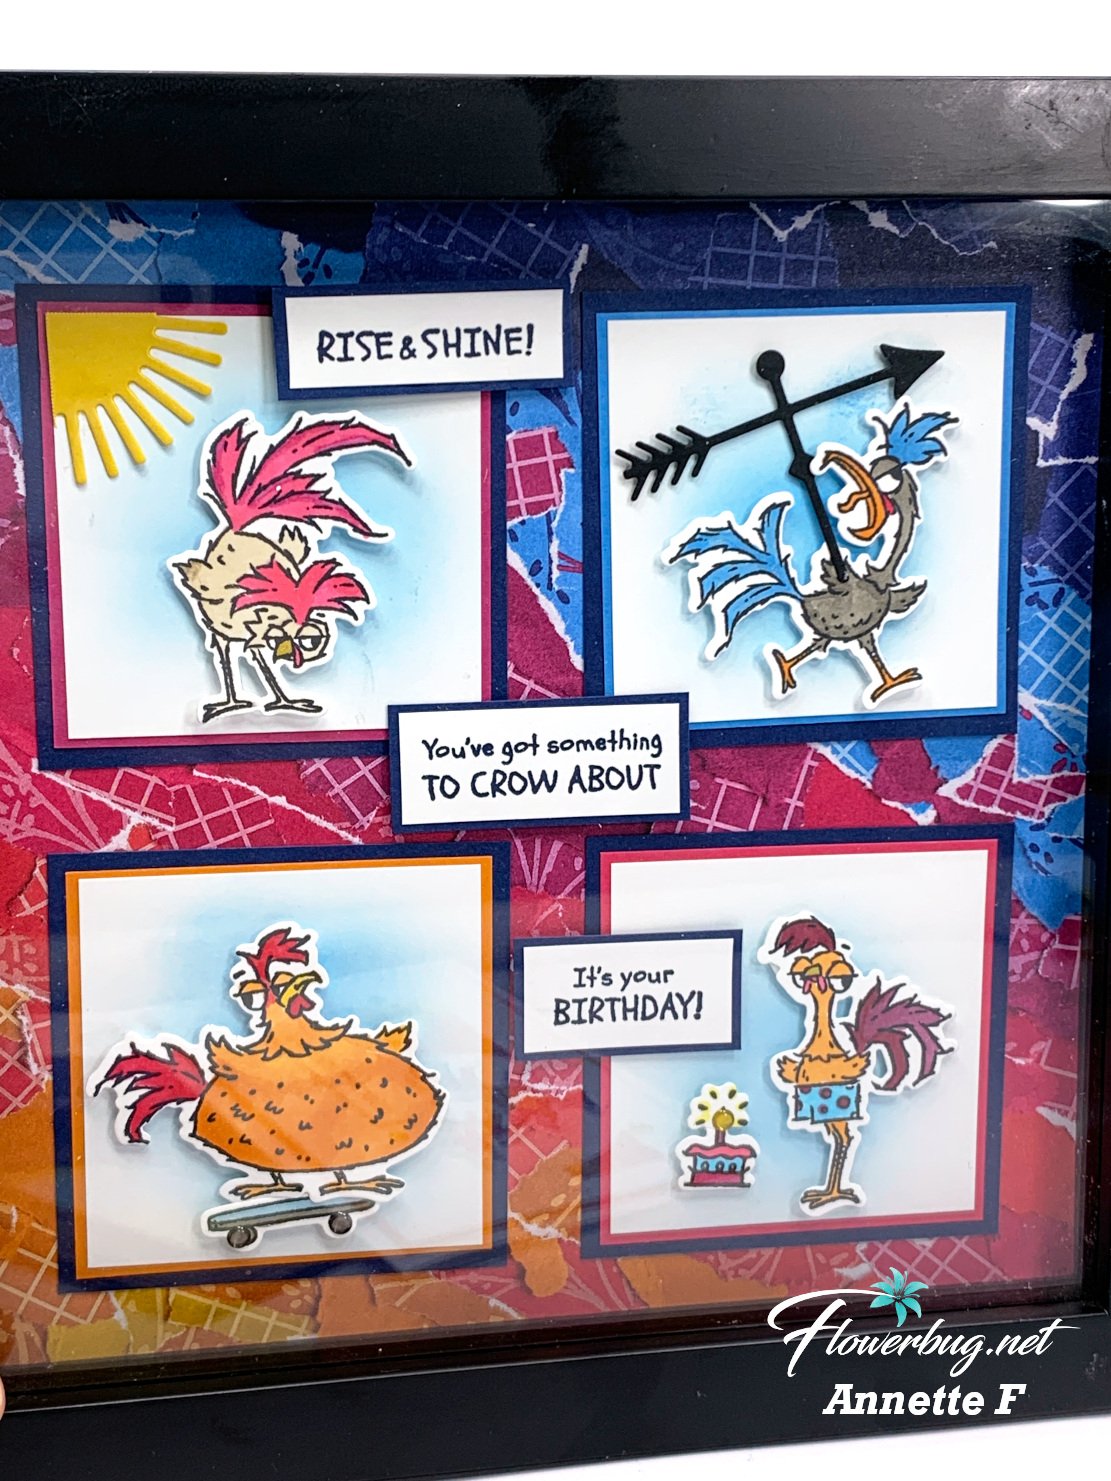
First up today is a stunning framed sampler.  

Just look at her incredible scenes!  I think the bit of blue behind each image sets them off incredibly. 

Sampler details:

  • She used Azure Afternoon ink and blending brushes to add a bit of blue behind her die-cut rooster scenes. 
  • The designer paper behind it all is the Masterfully Made designer series paper seen here. 
  • She colored the images with Blends markers and popped them up on the squares. 
  • Her 4 white squares measure 2 5/8", colored squares are 2 3/4" and the black are 2 7/8" squares 
  • The black frame is 9" in size; the glass opening is 7 1/2" 
Here's the Hey Chuck bundle she used.  The dies are back now and available!

~~~

Look at this hilarious rooster!  And the perfect greeting for him….. 


She used the Dots & Spots die for her background and that strip of the Masterfully Made DSP is a perfect addition to this card and her color choices. The white on white theme makes the image pop! 

The dimension she achieved by popping up the rooster and the greeting with Dimensionals makes such a difference to this card.  

Details:

  • Dots & Spots white layers are 5" X 3 3/4", Pumpkin Pie layer is 5 1/8" X 3 7/8"
  • Stitched circle is from the Stylish Shapes dies
  • DSP strip is 4" X 1"

~~~

Next is a fun fold card featuring the Glorious Gingham designer paper.  
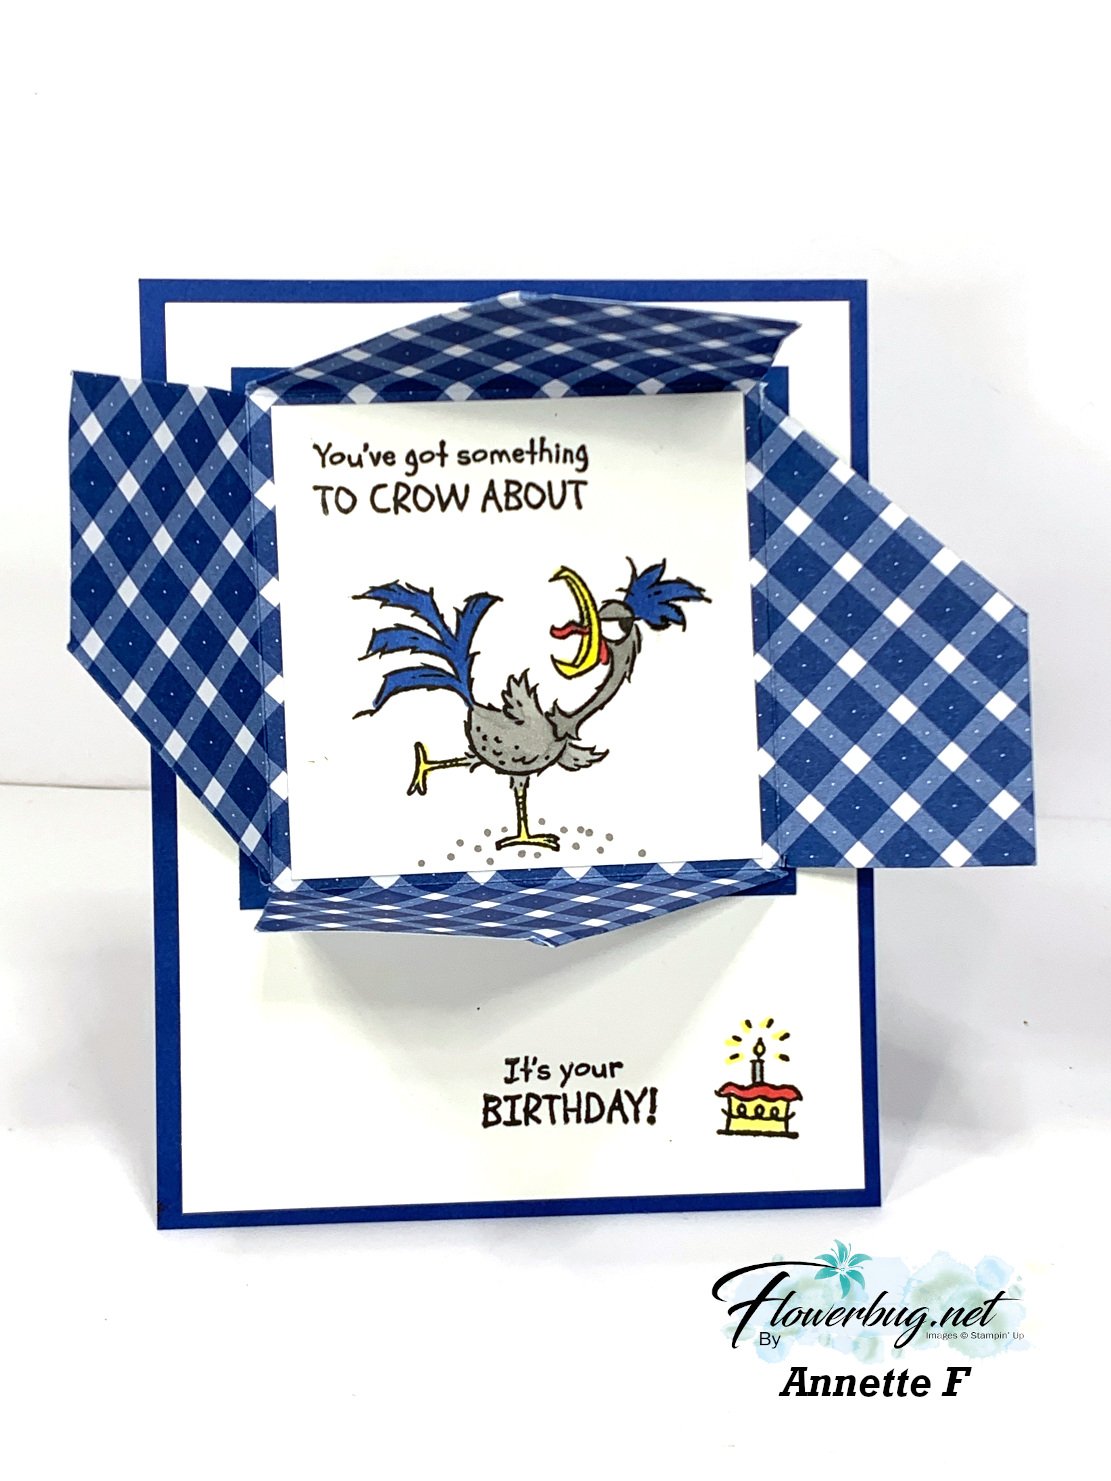

She got the idea from Karen Titus.  The DSP is 6" square and you score and cut it to fold in on itself.  Here's what it looks like when it's closed up: 


I'll be sharing how to make one of these cards very soon!  


More to come tomorrow! 

~~~

August Specials: 

 *current host codes: KY99RPXP 

ShopwithLeeAnn.com

Redeem your Bonus Days coupons in August!  

Free Gift with orders in August: 

Get a pack of at least 5 beautiful cards with orders over $50 this month. 

The more you order the more cards you get!

*cards are previous card kits to go; over the top and many fun folds.  
 

All Posts

  • ‘Ornament’ Christmas cards for quick & easy card making!


    We're making ornament cards on tonight's Stamp with Me Live.  It's a quick & easy idea for your Christmas cards!


    The designer paper is the Santa Express seen here.  It's filled with lots of great patterns; not just Santas & trains.  

    Join me here Live at 7:30 pm CT.  The video will be on my YouTube channel by Tuesday, November 29th too. 

    I chose an 'easy' card so those who feel rushed in getting their Christmas cards made. Plus these cards use your DSP and an embossing folder too; both make a card special. 
     
    I added a Wonderful Snowflake to the designer paper circle for a quick, beautiful iridescent element.  These snowflakes will be well discounted on Thursday with the Last Chance List seen here: Download 2022 Holiday Catalog Last Chance
     
    The greeting is from the Joyful Flurry stamp set. 
     
    Join me here when I share some tips on making these fun and easy cards tonight. 
     
    Gather these supplies:
    • Card bases 5 1/2" X 8 1/2"
    • White or neutral background layer 3 3/4" X 5", will be textured
    • Another layer 4" X 5 1/4"
    • 'ornament' circles cut from DSP – mine are almost 3" around
    • Silver or gold paper (or other) for the top of the ornament
    • Twine or thin ribbon
    Other items: Greeting stamps, ink, embossing folder, snowflakes
     
    I made one card into an easy fun fold by folding the front of the card base back on itself. For this one I chose to add greetings from the Holly Jolly Wishes stamp set. 

    The card base is Mint Macaron with White & Poppy Parade accents. 

    To catch all of my videos, follow me on my FB page here.  Or on YouTube here.   


    Which do you like better?  

    ~~~

    Order online here

    Host code link: KA9ZYZB6

    November Specials: 

    Check out the Last Chance items from the Holiday Catalog; it starts December 1st

    1. Get a pack of mini Stampin' Dimensionals from me with online orders over $55!


    2. All orders in November will receive a big project tutorial – a collection of 12 cards featuring this new collection of products.

    Earn free products with my loyalty rewards! 

    Click here to download yours and earn a $50 shopping spree!

    Leave a Reply

    Your email address will not be published. Required fields are marked *

  • 2022 Holiday Carryover List & Last Chance Sale list is here!


    They've announced which Holiday catalog products will carry over and which ones will retire. 

    The sales period starts December 1st and they are while supplies last. 

    Click here to see the carryover list.

    Click here to see the Last Chance list.  Select items are reduced from 20-60%!! 


    I shared this fun card on Tuesday's FB Live this week.  Here's a link to the video.  

    It's a wiper card featuring the Christmas Lights bundle and the Santa Express designer paper.  

    The colors include Shaded Spruce, Mint Macaron and Blushing Bride.  Of course they came from the colors in the Santa Express DSP.  This paper will be 40% off starting December 1st with the Last Chance sale.  But remember it's while supplies last!  

    Inks include Shaded Spruce, Mint Macaron, White Craft & Blushing Bride.  The 'Joy' greeting is from the Brightest Glow stamp set.

    Here are the measurements of each piece.  But honestly to figure out how to put it together you may want to watch the video.  

    • Shaded Spruce 8 1/2" X 4 1/4" scored at 5 1/2" & 7", 8 1/2" X 2" scored at 5 1/2" & 7", inside
      piece is 2" X 1" scored at 1" to the corner diagonally
      • Mint Macaron 5 1/4" X 4"
      • Blushing Bride 5 1/4" X 1" & scraps for snowflakes
      • DSP 1 1/8" X 4" for right side, 2 pieces at 1 3/8" X 1 3/4" for left
      • White 5 1/4" X 4" for back and scraps for snowflakes & oval greeting

    Here's a photo of the wiper mechanism.  This is the scored end of the 8 1/2" X 2" layer. 


    It's a super fun card to open and then open again and again!  There are endless possibilities to add to your wiper pop-up; think greetings, animals, balloons, stars….  

    Here’s the project sheet for you with measurements and product list Download Christmas Lights Wiper card Nov 2022

    The Christmas Lights bundle includes the stamped snowflakes and these pretty snowflake die-cuts too. 

    The oval die-cut is from the All That dies in the Annual catalog.  The embossing folder is Wintry; in the Annual catalog. 

    Here's the video; click on the photo to watch it.  

    ~~~

    Order online here

    Host code link: KA9ZYZB6

    November Specials: 

    1. Get a pack of mini Stampin' Dimensionals from me with online orders over $55!


    2. All orders in November will receive a big project tutorial – a collection of 12 cards featuring this new collection of products.

    Earn free products with my loyalty rewards! 

    Click here to download yours and earn a $50 shopping spree!

    Leave a Reply

    Your email address will not be published. Required fields are marked *

  • 2 more fun fold card ideas for you; from the Flowerbugs!


    Happy Thanksgiving!!  I hope you enjoy a wonderful holiday weekend and spend it with friends or maybe stamping!

    We'll be with our kids in Fargo and besides enjoying our turkey dinner we'll be playing games, going to an escape room and I'll be addressing some Christmas cards too.  

    ~~~

    Here are more of our Flowerbug's Team swaps featuring fancy folds.  

    Candy made this 'book binding' card with the Kindest Gnomes; see it here.  


    Measurements are: 

    • Cherry Cobbler card base 4 1/4" X 11" scored at 4 1/4" & 5 1/2"
    • DSP 1" X 4" on the 'binding', 1/2" X 4" strip across
    • Evergreen layer 4" square


    Roxann made this amazing Diamond Fold card.  She used the Splendid Day specialty designer paper from the 2022 Holiday Catalog; seen here. 

    Her colors include Petal Pink &Soft Sea Foam. It's finished size is 5" square so it does not fit into a standard A2 size envelope.  

    Measurements:

    • Card base 5" X 10".  Score at 2 1/2" & 5".  You'll find the upper center at 2 1/2" and make a mark.  From the top, cut down on both sides to the first score line, removing those upper corners. 
    • Then make a mark from the bottom up on each side at the 7 1/2" mark.  Cut from the bottom center; also at 2 1/2", and cut to the 7 1/2" mark, removing the bottom outer corners. 
    • Soft Sea Foam squares are 3 1/4"
    • Designer paper squares are 3"

    Maybe someday I'll create one of these and share how it's done. It's a neat card!  

    I sure have some talented Team Members, don't I?  They always impress me with their creativity, colors and ingenuity.  

    ~~~

    Order online here

    Host code link: KA9ZYZB6

    November Specials: 

    1. Get a pack of mini Stampin' Dimensionals from me with online orders over $55!


    2. All orders in November will receive a big project tutorial – a collection of 12 cards featuring this new collection of products.

    Earn free products with my loyalty rewards! 

    Click here to download yours and earn a $50 shopping spree!

    Leave a Reply

    Your email address will not be published. Required fields are marked *


Notice: LeeAnn Greff, Independent Stampin’ Up! Demonstrator, Manager. The content of this website is my sole responsibility as an independent Stampin’ Up! demonstrator and the use of, and content of, the classes, services, or products offered on this website is not endorsed by Stampin’ Up! Copyright 2025