/


Latest Post

Use the Double Wonder Template to make 11 quick cards! Join me Thursday night!


Do you ever planned a stamping session focusing on just a few products? It's easy to get overwhelmed with everything you own.  Using this method is actually quite liberating and fuels the creative process.  I've started doing that more and more often especially when planning my card kits to go.  I pick Stampin' Up! products from the same suite and choose some sketches or layouts for card ideas.  the process is so enjoyable this way!  

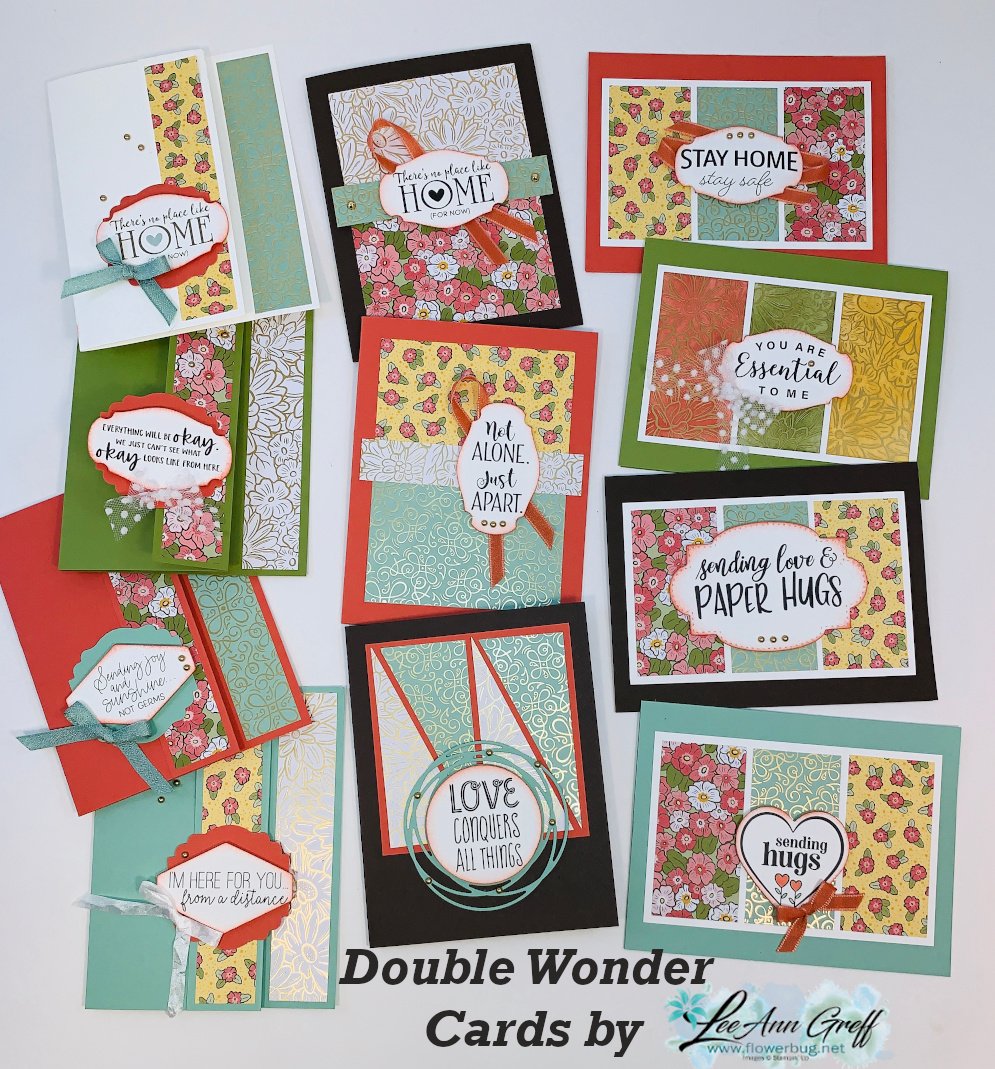
Lately I've been seeing groups of cards using the Double Wonder template and had to try it.  It was originally designed by Shannon West from Stampin' Up!  It's so clever!! You start out with 2 pieces of 6" X 12" designer paper and using the pieces you can quickly have 11 finished cards!

Look at these! I'll be making these cards Live tomorrow night at 7 pm CT. Join me either here on FB or on Zoom.  
Here are the steps: 

  1. Pick out 2 different sheets of 6 X 12" designer paper and 11 card bases.  Make sure you have some ribbons or embellishments to match.  
  2. Use the template below to cut your designer paper; cutting both at once. 
  3. Grab some scraps of White and coordinating colors for punches/greetings. 
  4. Cut 4 pieces of layering card stock at 3 1/4" X 5" and one 3 3/4" square for the bonus card. (I used White)
  5. Choose a stamp set & ink to coordinate. 
  6. Or use the new Share Sunshine Covid-19 digital download like I did for my greetings. No stamping needed!  You can purchase that here. https://covid19.stampinup.com/products/giving-back-us-ca Price: $12.00 USD
  7. Come back here tomorrow night so we can stamp together.
  8. Or use this link to join via Zoom. *see tips on zoom meetings below  https://us02web.zoom.us/j/88215870191

I chose to use the new Ornate Garden designer paper for my cards.  Anything goes but a non directional design is best; try not to choose a paper that needs to be north and south.  
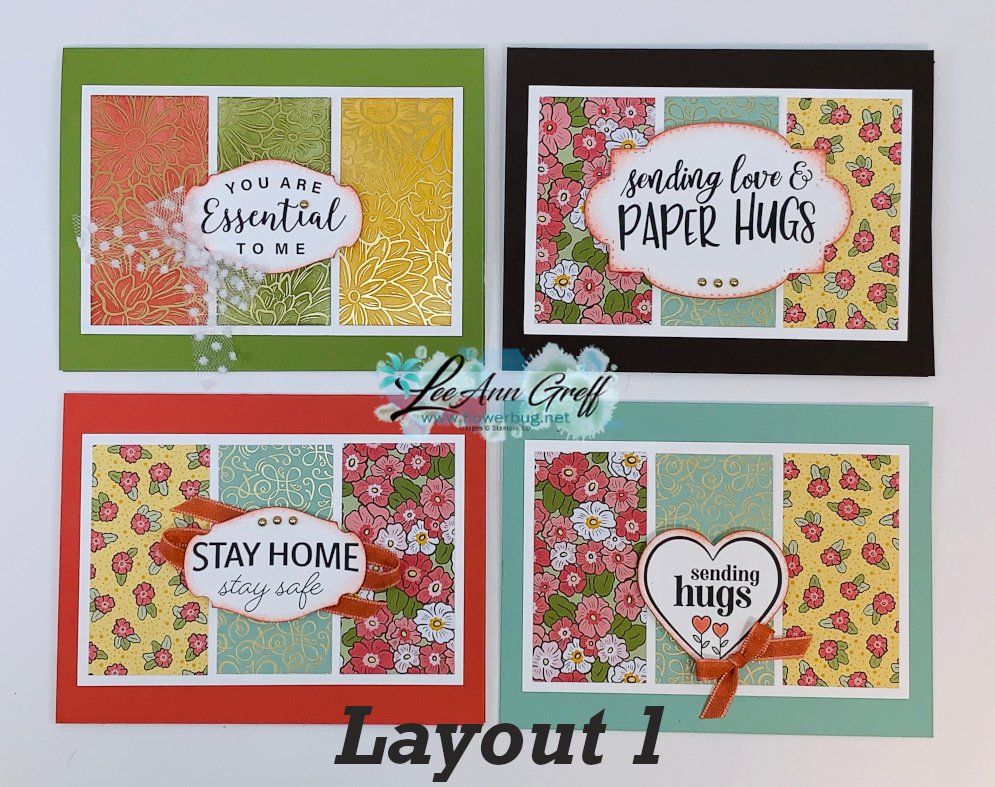

Below is the template but click here to download the Double Wonder Designer Paper cards & template 

Zoom meeting tips:

  1. You will need access to a camera and/or microphone to participate.
  2. You may need to download Zoom to join; depending on the device you are using. It's free!  
  3. You will be muted when you join to prevent a lot of background noises. 
  4. If you'd like to speak you can un-mute yourself you can do so; or press the spacebar. 

~~~~

Online orders please use this host code for April:

RBXHNWMV

If the order is over $55 you'll get a free Simple Shammy cleaner from me! 

Check out the retiring products below; while supplies last!

All Posts

  • Exciting new Online Exclusive products are here! Irresistible Blooms shaker card with video tutorial


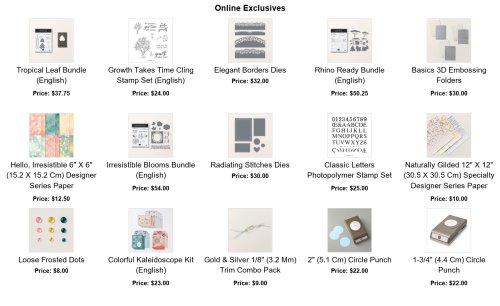
    Yesterday they released 12 new items in the Online Exclusives store.  These items are not in any printed catalog.

    Have you looked at them yet? Click here or on the photo below to see them online. 


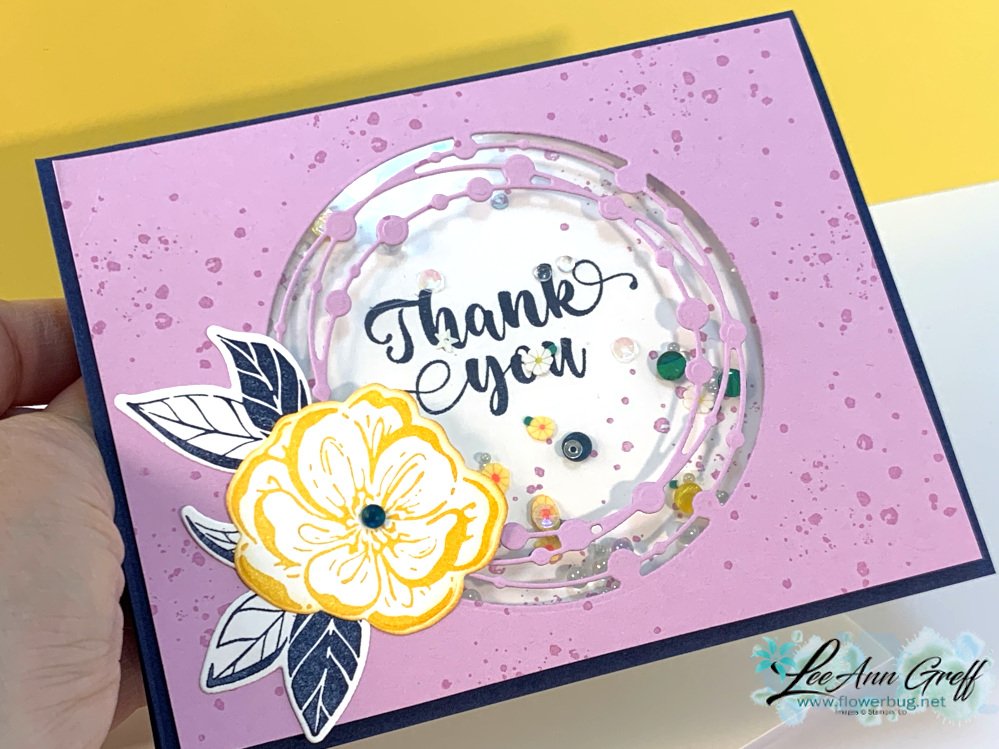
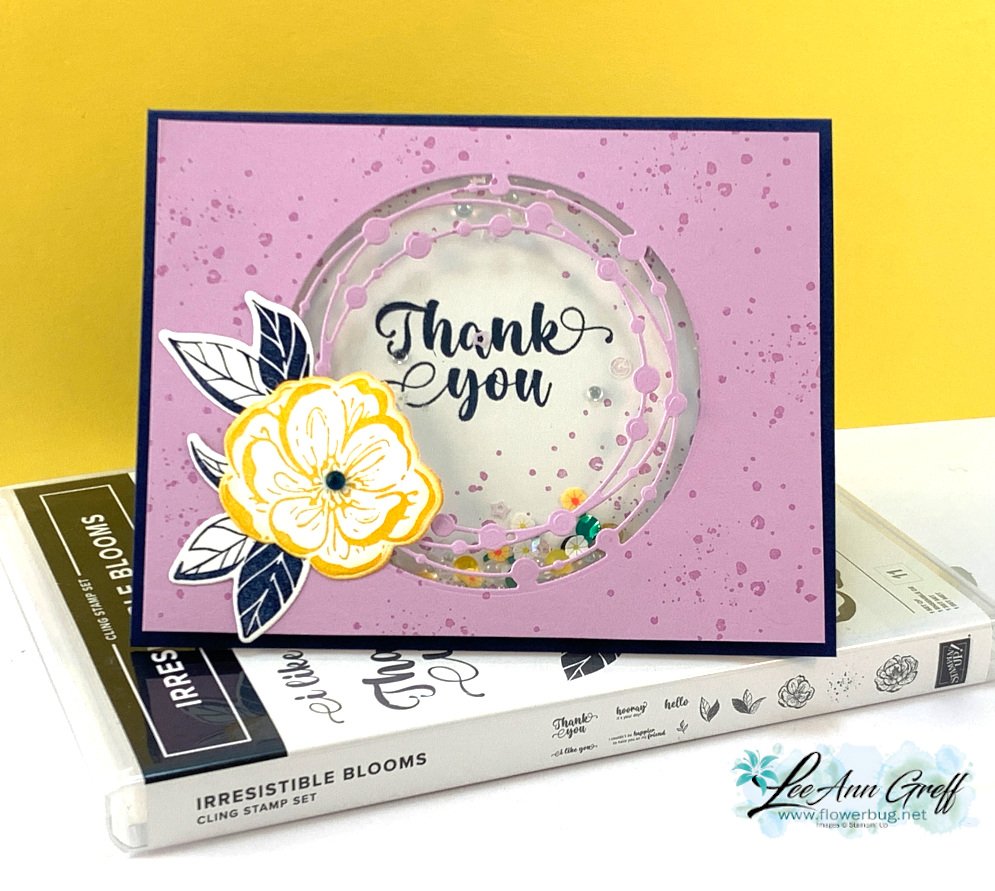
    I shared this fun shaker card on last week's FB Live video. It features one of the new Online Exclusive bundles called Irresistible Blooms.  

    I chose Fresh Freesia with Navy & Daffodil Delight as my colors.  I'm so ready for spring and yellow & purple are fresh, happy colors. 

    I used the circle die in this new bundle to cut a window in my Fresh Freesia front layer and stamped the spatter image all over the front.  Then I adhered my window sheet behind the opening. 

    Next I added Foam Adhesive strips around the opening, in the back. This keeps the shaker elements in the viewing window and contained. Peel off the backing on the foam strips and add your stamped layer over it.  

    *Tips: I like to peel off the backing before I add the shaker pieces.  This prevents movement that can cause the shaker pieces to jump.  I also like to cut my inside layer just a bit smaller so I can center it on this piece, upside down.  

    I stamped the flower & leave and die-cut them with the coordinating dies from the Irresistible Blooms bundle.  See it here.  

    Click here or on the photo below to watch the video tutorial.  It's the second of three products using this new bundle.  

    ~~~

    March Specials:

    See the new Online Exclusives here! 

    *current host code:  TMJXFR2T

    Get a free class kit to go with online orders over $55 when using the host code above!

    Earn free products with my loyalty rewards! 

    Click here to download yours and earn a $50 shopping spree!

    Leave a Reply

    Your email address will not be published. Required fields are marked *

  • Floating Panel card with video – so cool but incredibly easy!


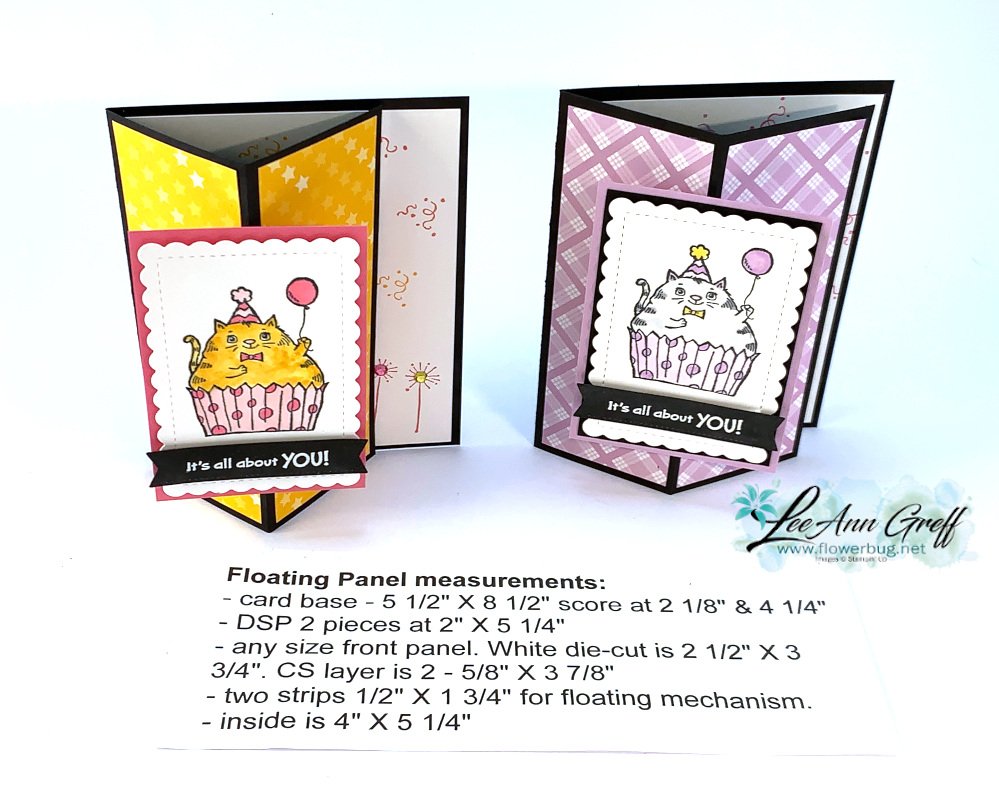
    On a recent FB Live class we made Floating Panel cards like this one made with the Best Day stamp set from the January-April catalog. Click here to see the cute Best Day stamp set.

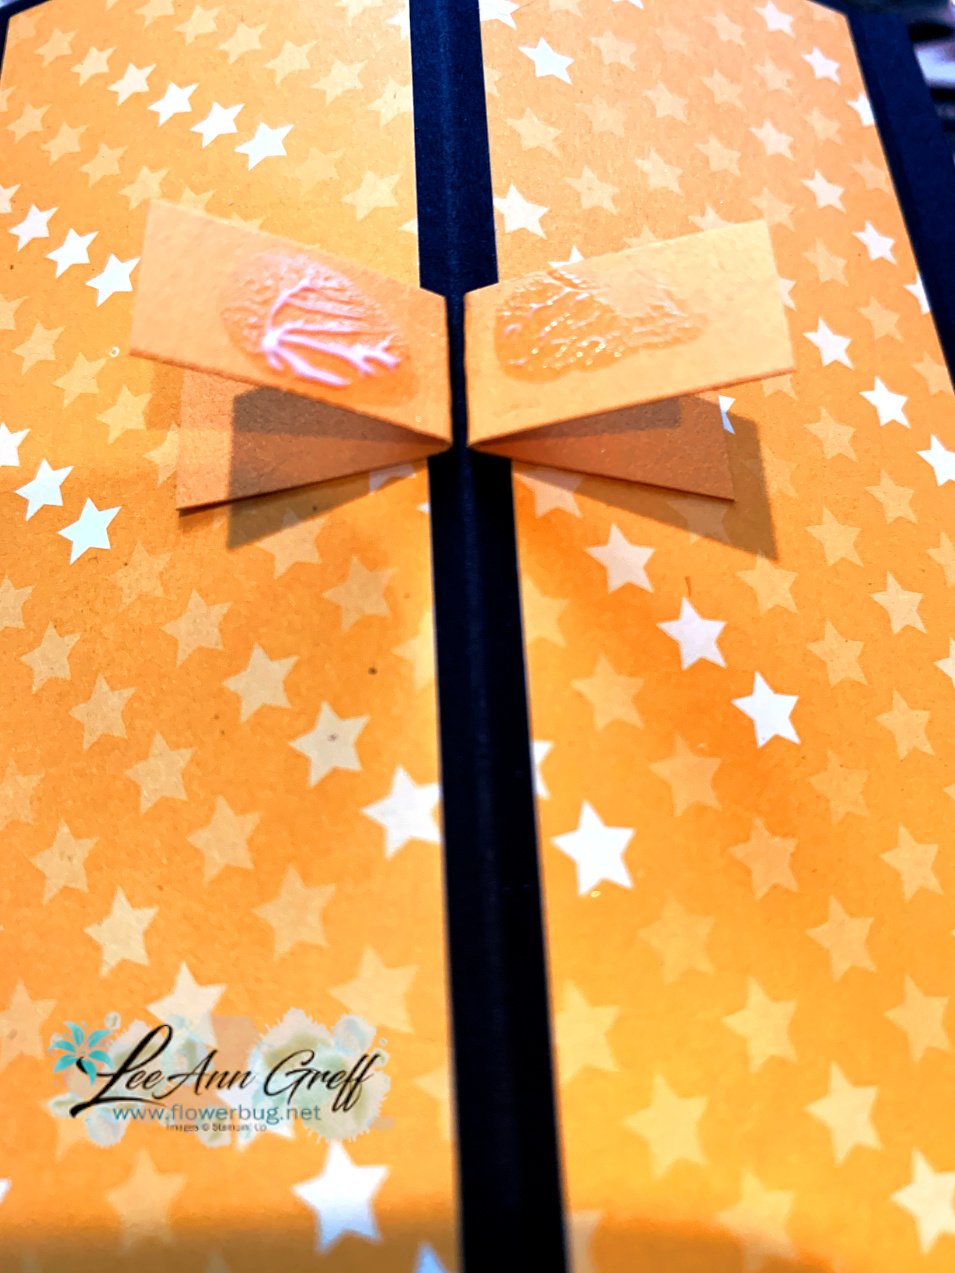
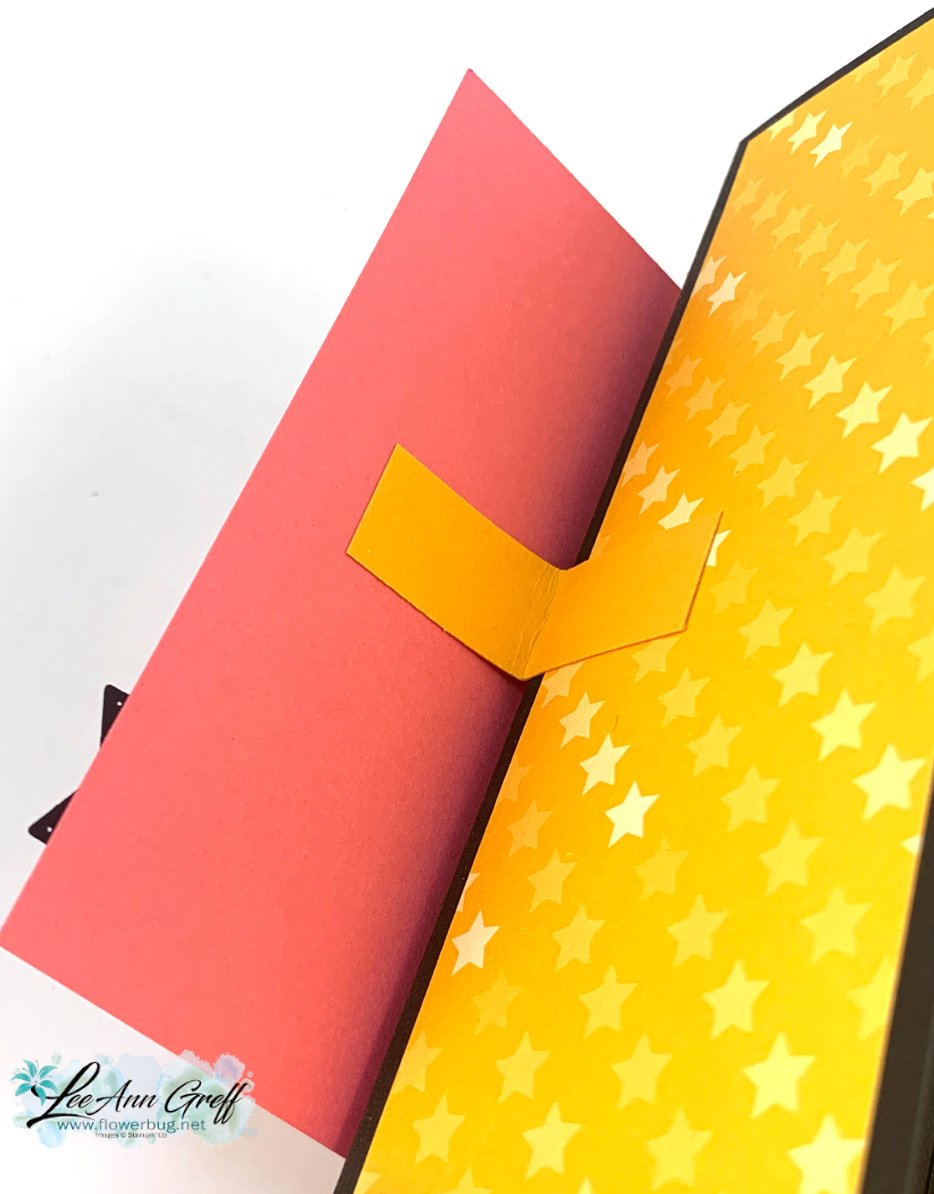
    See how the card front is folded in half but the panel is straight?  There's a neat, easy way to do that by adding two little pieces of card stock.  Each strip is folded in half and positioned on both the top panel and the card base.  See the other photo below to understand it.  Or watch the video here. 


    I also used the Dandy Designs designer paper from our Sale-a-Bration promotion.  Sadly that is now over; it ended February 28th.  

    My colors on the card above are Black, Mango Melody & Polished Pink.  I used Blends markers to color the cat image.  I added Wink of Stella for some shimmer as well.  

    Floating Panel measurements:

    • card base – 5 1/2" X 8 1/2" score at 2 1/8" & 4 1/4"
    • DSP 2 pieces at 2" X 5 1/4"
    • White scalloped (Scalloped Contours die) die-cut is 2 1/2" X 3 3/4"
    • CS layer is 2 5/8" X 3 7/8"
    • two strips 1/2" X 1 3/4" for floating mechanism 

    I used the Best Day stamp set here; it's adorable with lots of birthday images and greetings.  It's in the Jan-June catalog and you can see it here. 

    You can see how the two folded strips are added to the front center fold below: 

    I stamped the inside with images from the Best Day stamp set, adding some colored rhinestones to help the card stay open and in place.  Honestly a die-cut or punch would work better than a rhinestone.  

    Click here or on the photo below to watch the video.  

    ~~~

    March Specials:

    See the new Online Exclusives here! 

    *current host code:  TMJXFR2T

    Get a free card class with online orders over $55 when using the host code above!

    Earn free products with my loyalty rewards! 

    Click here to download yours and earn a $50 shopping spree!

    Leave a Reply

    Your email address will not be published. Required fields are marked *

  • Online Exclusives start today! Check out this stunning card & video; a special technique with fabulous results.


    The online exclusives are available today for everyone!  There are LOTS of brand new products! NEW bundles, gorgeous NEW dies and more!!  Check them all out here.  

    Here's a little preview of most of the new items! *Use the arrows to see them all. 

    Demonstrators were able to pre-order the Hello, Irresistible suite in February and I had a blast playing with these gorgeous products.  In fact I focused on them on last week's FB Live video.  You can see it here. 

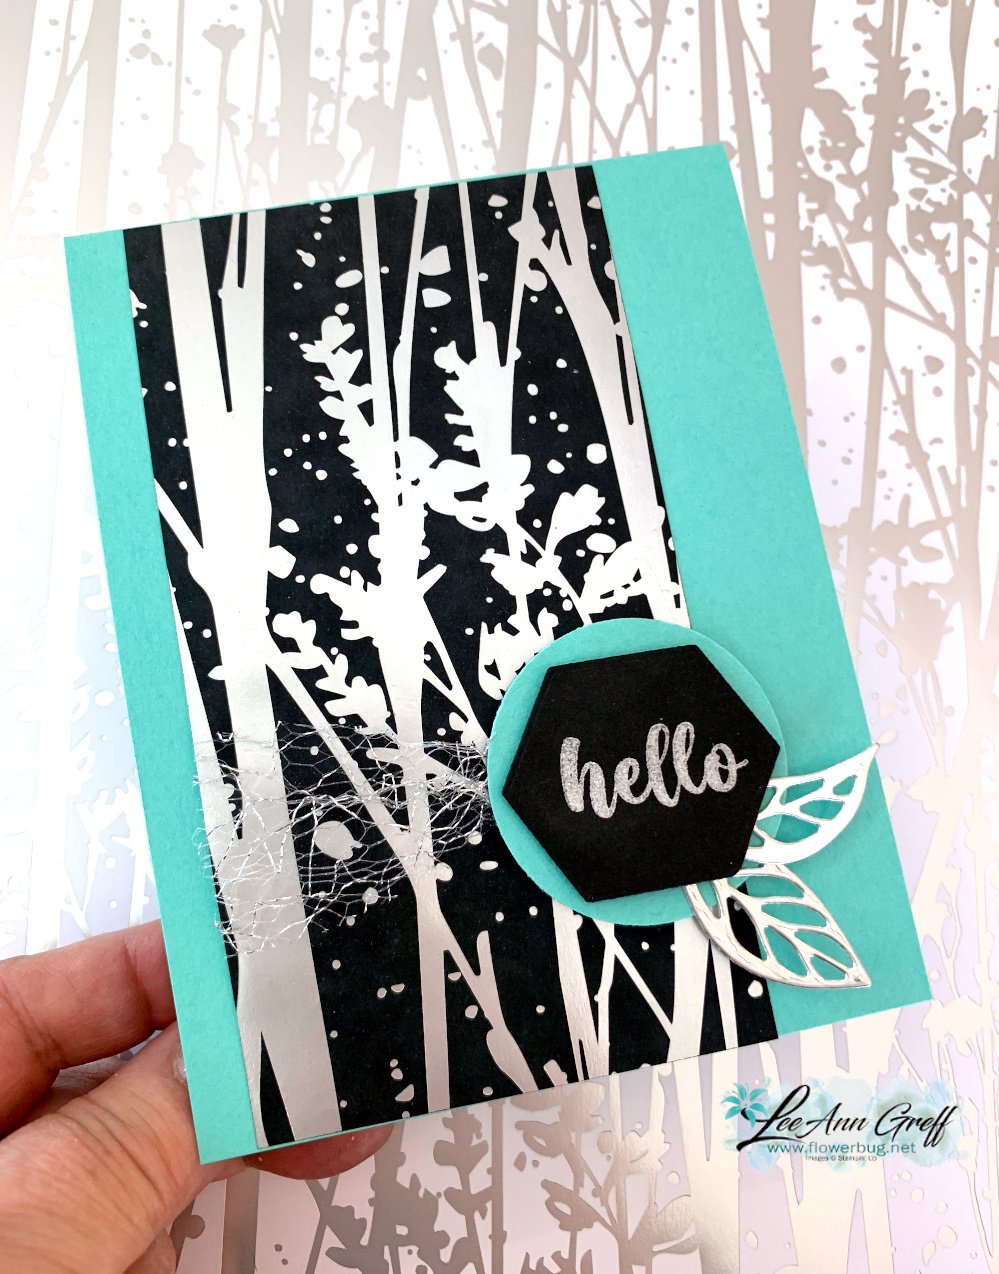
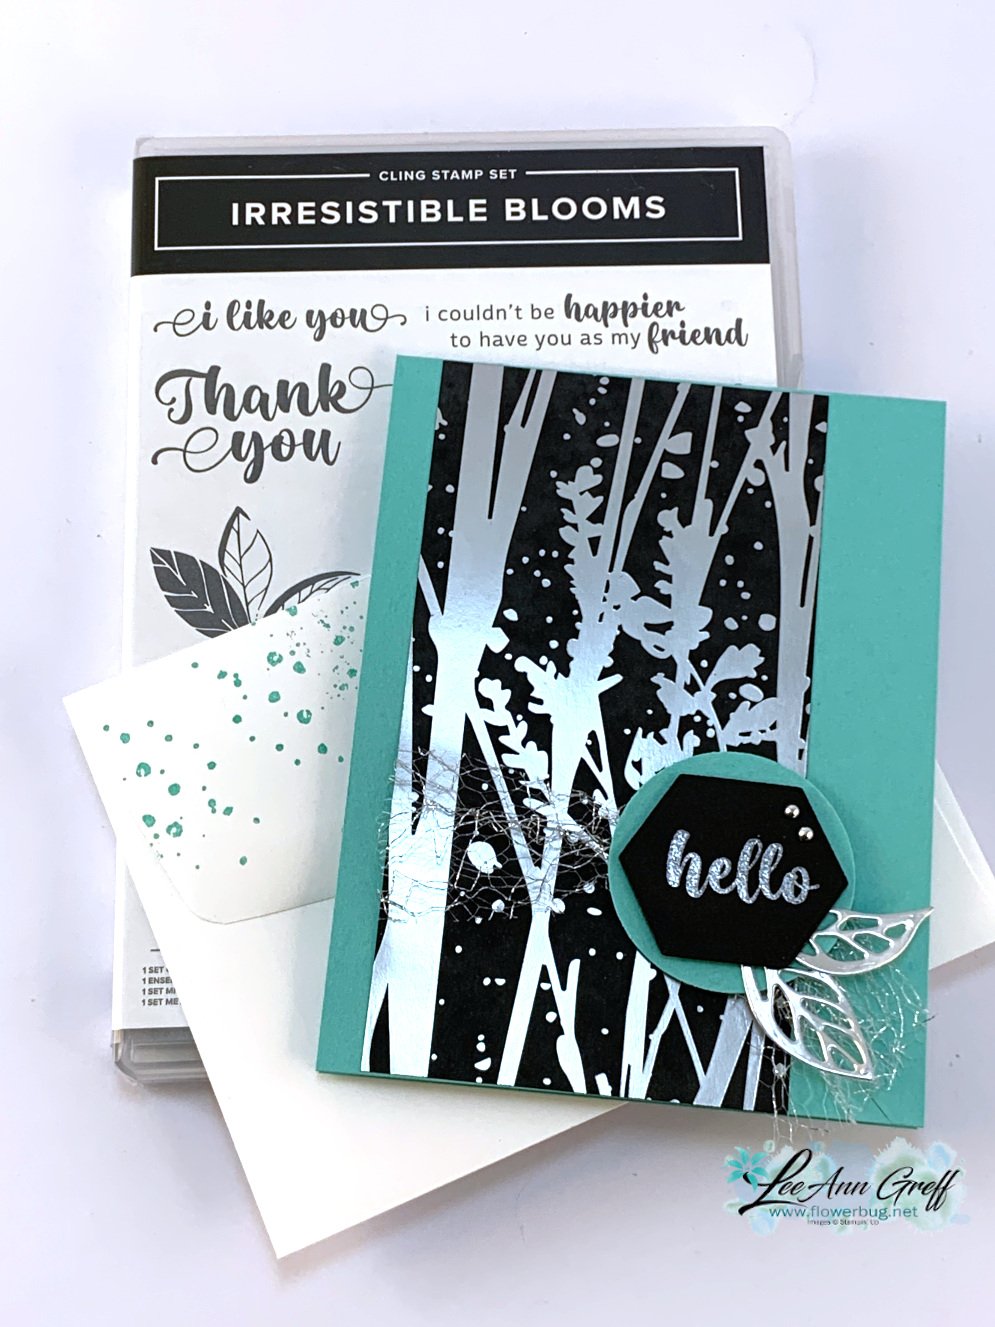
    Here's one of my favorite cards I shared in the video.  It shows off the stunning Naturally Gilded specialty paper. 

    If you look at the background in the photo above you'll see the paper as is.  I added black on the background.  The printed designs are in silver which leaves a white background.  I knew the Silver would resist my Black Memento ink so I rubbed the ink pad directly onto the paper.  After it was nice and black I wiped off the black ink that was floating on the Silver designs.  So cool and super easy!  

    I used the leaves dies in the Irresistible Blooms and the greeting from the coordinating stamp set here.  I hope you watch the video; I believe it's the last project. 

    Below are some of the cards I shared in the video plus a cool bag to gift the cards in.  This is one of our Embossed Treat Bags on page 140 of the Annual Catalog. There are 10 in a pack for $7.50.  They fit standard cards and they're also food safe! 


    As you can see I had a great time playing with this cool bundle.  It's fabulous and I love the Hello, Irresistible designer paper so much I'm featuring it for one of my card kits to go in March.  Stay tuned for details soon! 

    Below is the video where I share this technique plus a shaker card and a fun fold too.  Don't forget to follow me on YouTube here.  

    ~~~

    March Specials:

    See the new Online Exclusives here! 

    *current host code:  TMJXFR2T

    Get a free card class with online orders over $55 when using the host code above!

    Earn free products with my loyalty rewards! 

    Click here to download yours and earn a $50 shopping spree!

    Leave a Reply

    Your email address will not be published. Required fields are marked *


Notice: LeeAnn Greff, Independent Stampin’ Up! Demonstrator, Manager. The content of this website is my sole responsibility as an independent Stampin’ Up! demonstrator and the use of, and content of, the classes, services, or products offered on this website is not endorsed by Stampin’ Up! Copyright 2025