/


Latest Post

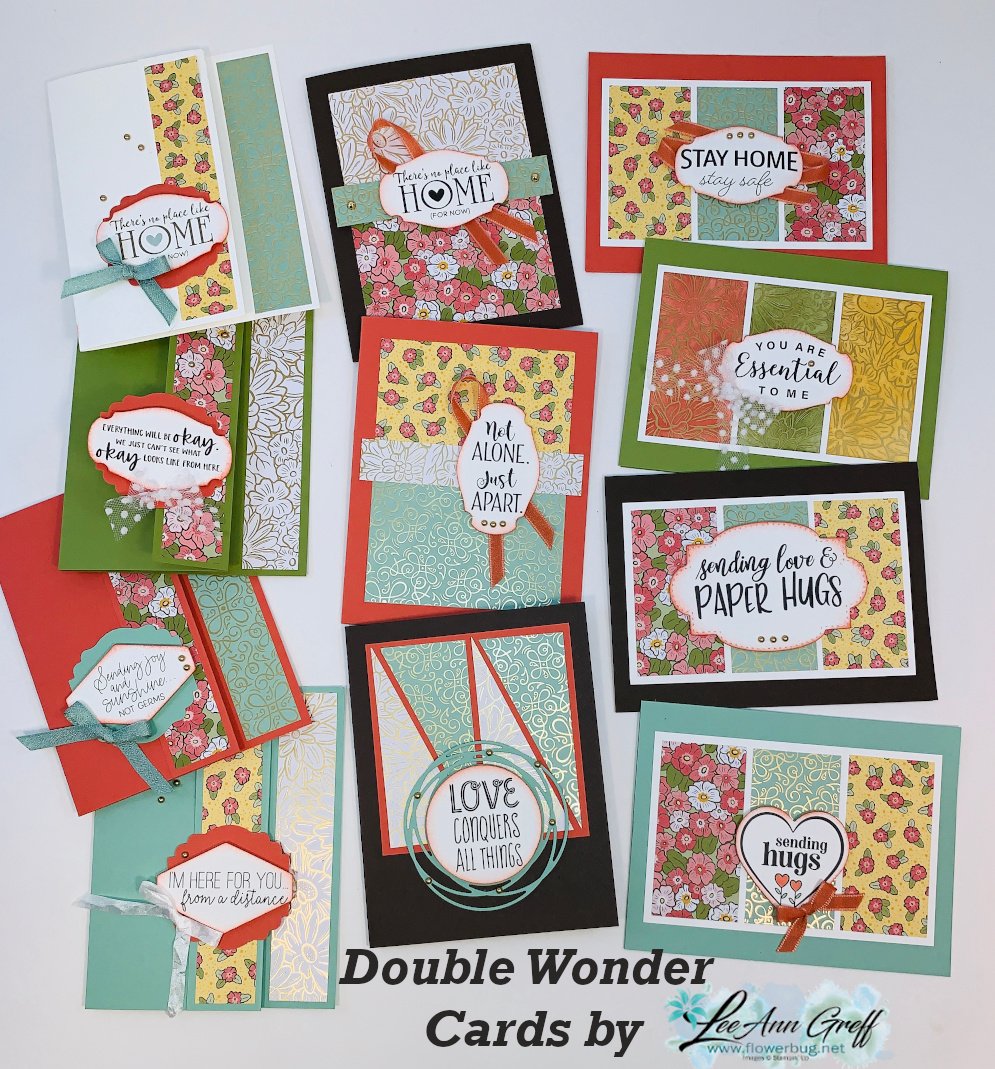
Use the Double Wonder Template to make 11 quick cards! Join me Thursday night!


Do you ever planned a stamping session focusing on just a few products? It's easy to get overwhelmed with everything you own.  Using this method is actually quite liberating and fuels the creative process.  I've started doing that more and more often especially when planning my card kits to go.  I pick Stampin' Up! products from the same suite and choose some sketches or layouts for card ideas.  the process is so enjoyable this way!  

Lately I've been seeing groups of cards using the Double Wonder template and had to try it.  It was originally designed by Shannon West from Stampin' Up!  It's so clever!! You start out with 2 pieces of 6" X 12" designer paper and using the pieces you can quickly have 11 finished cards!

Look at these! I'll be making these cards Live tomorrow night at 7 pm CT. Join me either here on FB or on Zoom.  
Here are the steps: 

  1. Pick out 2 different sheets of 6 X 12" designer paper and 11 card bases.  Make sure you have some ribbons or embellishments to match.  
  2. Use the template below to cut your designer paper; cutting both at once. 
  3. Grab some scraps of White and coordinating colors for punches/greetings. 
  4. Cut 4 pieces of layering card stock at 3 1/4" X 5" and one 3 3/4" square for the bonus card. (I used White)
  5. Choose a stamp set & ink to coordinate. 
  6. Or use the new Share Sunshine Covid-19 digital download like I did for my greetings. No stamping needed!  You can purchase that here. https://covid19.stampinup.com/products/giving-back-us-ca Price: $12.00 USD
  7. Come back here tomorrow night so we can stamp together.
  8. Or use this link to join via Zoom. *see tips on zoom meetings below  https://us02web.zoom.us/j/88215870191

I chose to use the new Ornate Garden designer paper for my cards.  Anything goes but a non directional design is best; try not to choose a paper that needs to be north and south.  
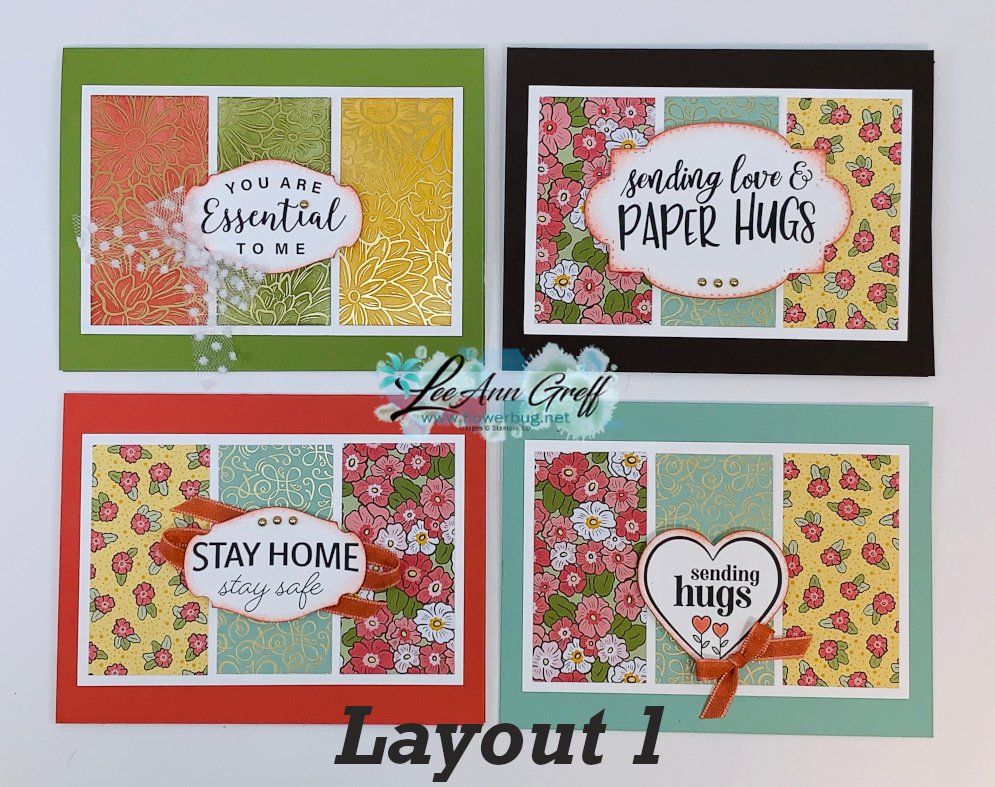

Below is the template but click here to download the Double Wonder Designer Paper cards & template 

Zoom meeting tips:

  1. You will need access to a camera and/or microphone to participate.
  2. You may need to download Zoom to join; depending on the device you are using. It's free!  
  3. You will be muted when you join to prevent a lot of background noises. 
  4. If you'd like to speak you can un-mute yourself you can do so; or press the spacebar. 

~~~~

Online orders please use this host code for April:

RBXHNWMV

If the order is over $55 you'll get a free Simple Shammy cleaner from me! 

Check out the retiring products below; while supplies last!

All Posts

  • Check out these projects featuring Clearance Rack deals


    There are quite a few amazing deals on the Clearance Rack now and I thought I'd highlight a few of my favorites:  

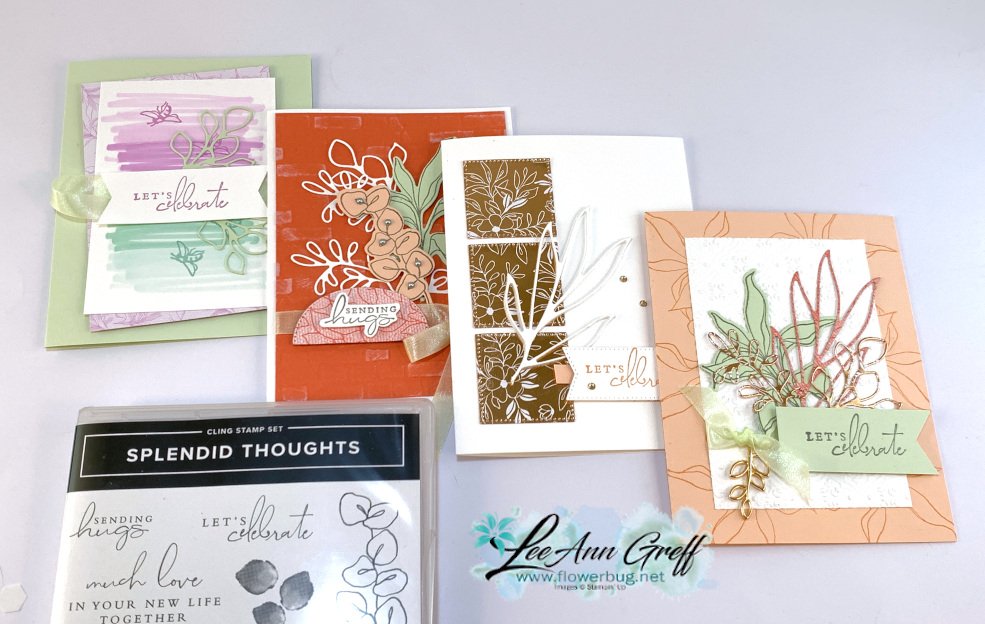
    First is the beautiful Splendid Thoughts stamp set for just $16 and the coordinating Splendid Stem dies for just $8.25. I shared these projects last year: 


    I am surprised that the stamp set and dies are both there along with the pretty Soft Seafoam ribbon and the Open Leaf Trinkets. *Both are now just $1.25! Click on the blue highlighted words to see these items in the Clearance Rack. 


    Remember the Clearance Rack changes every day; do not delay if you want anything! *Remember to use this host code when ordering.  XNYX2DWG

    ~~~

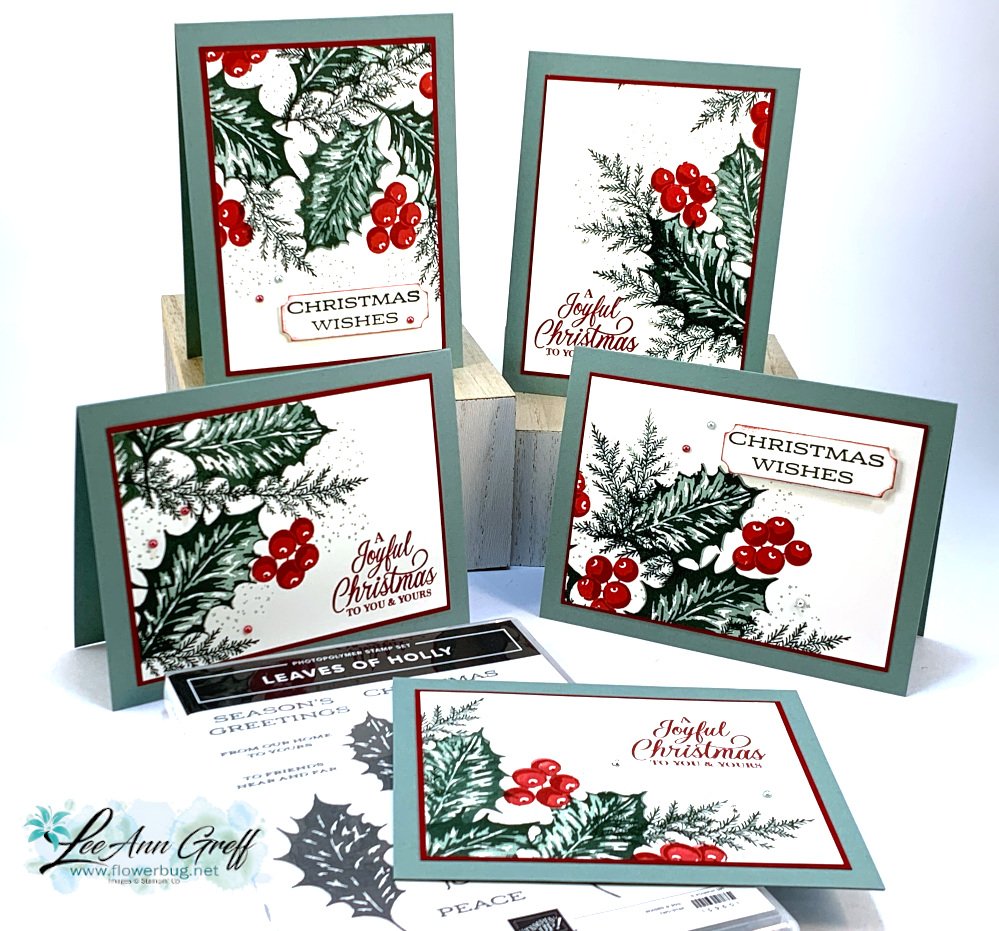
    Next is the Leaves of Holly stamp set.  It was $22 and is now just $15.25 on clearance. 

    I created these beautiful Christmas cards on a video last year.  

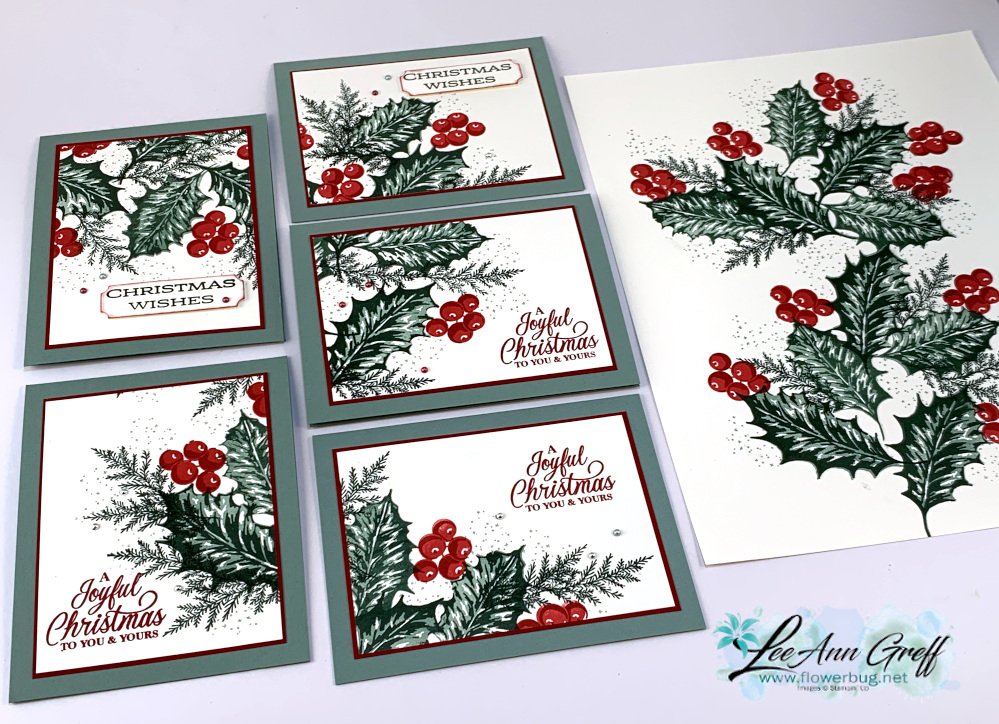
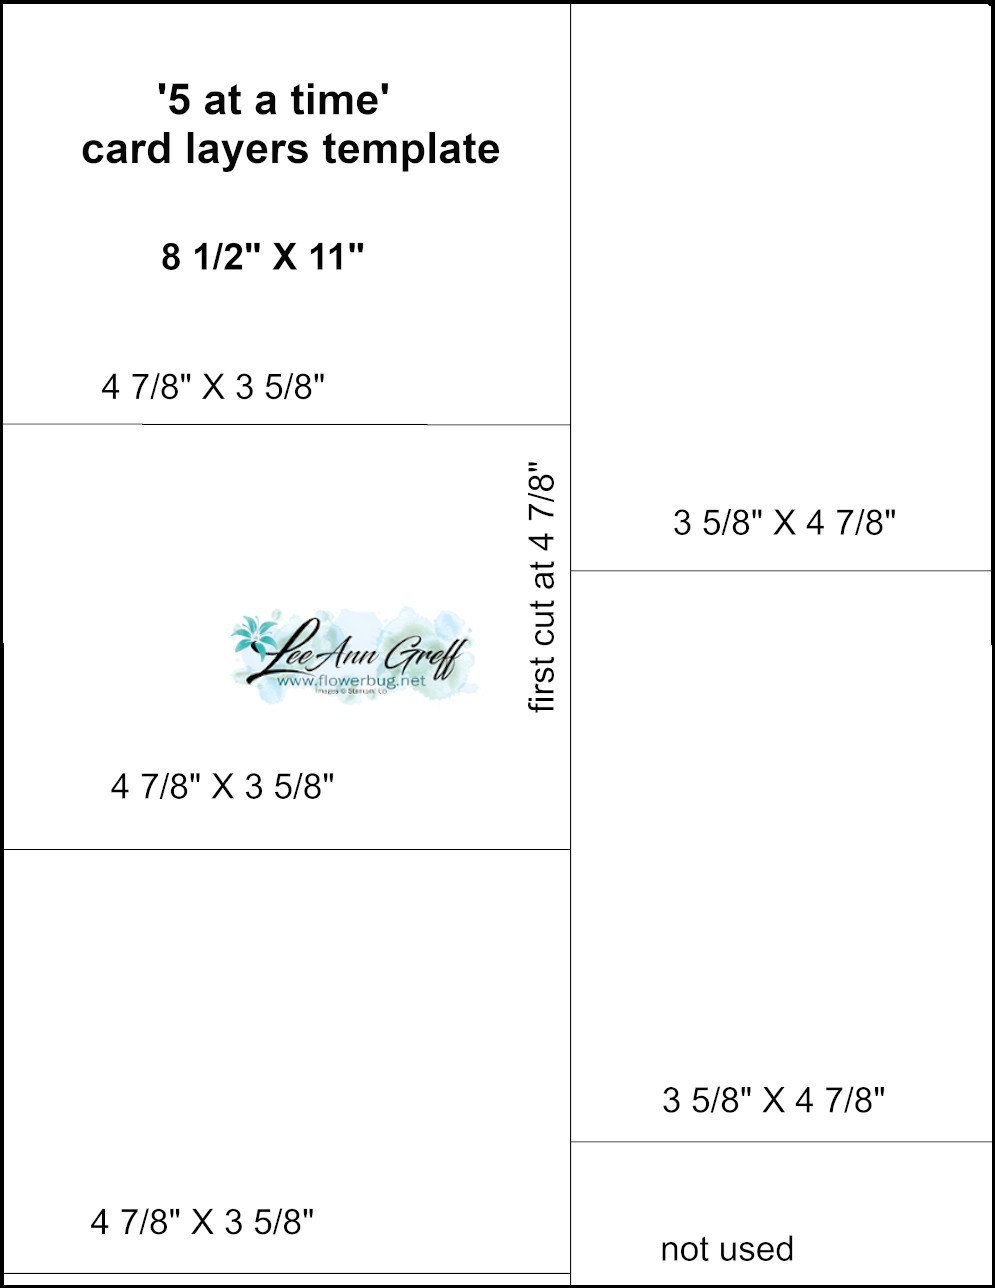
    I call it the 5 at a time technique.  You stamp one sheet of neutral paper and then cut it into 5 pieces using my template below.  And the neat thing is the layers under the stamped White card stock are also cut using a template. Just 2 sheets of card stock to make 5 card fronts!  *Watch the video below or click here. 


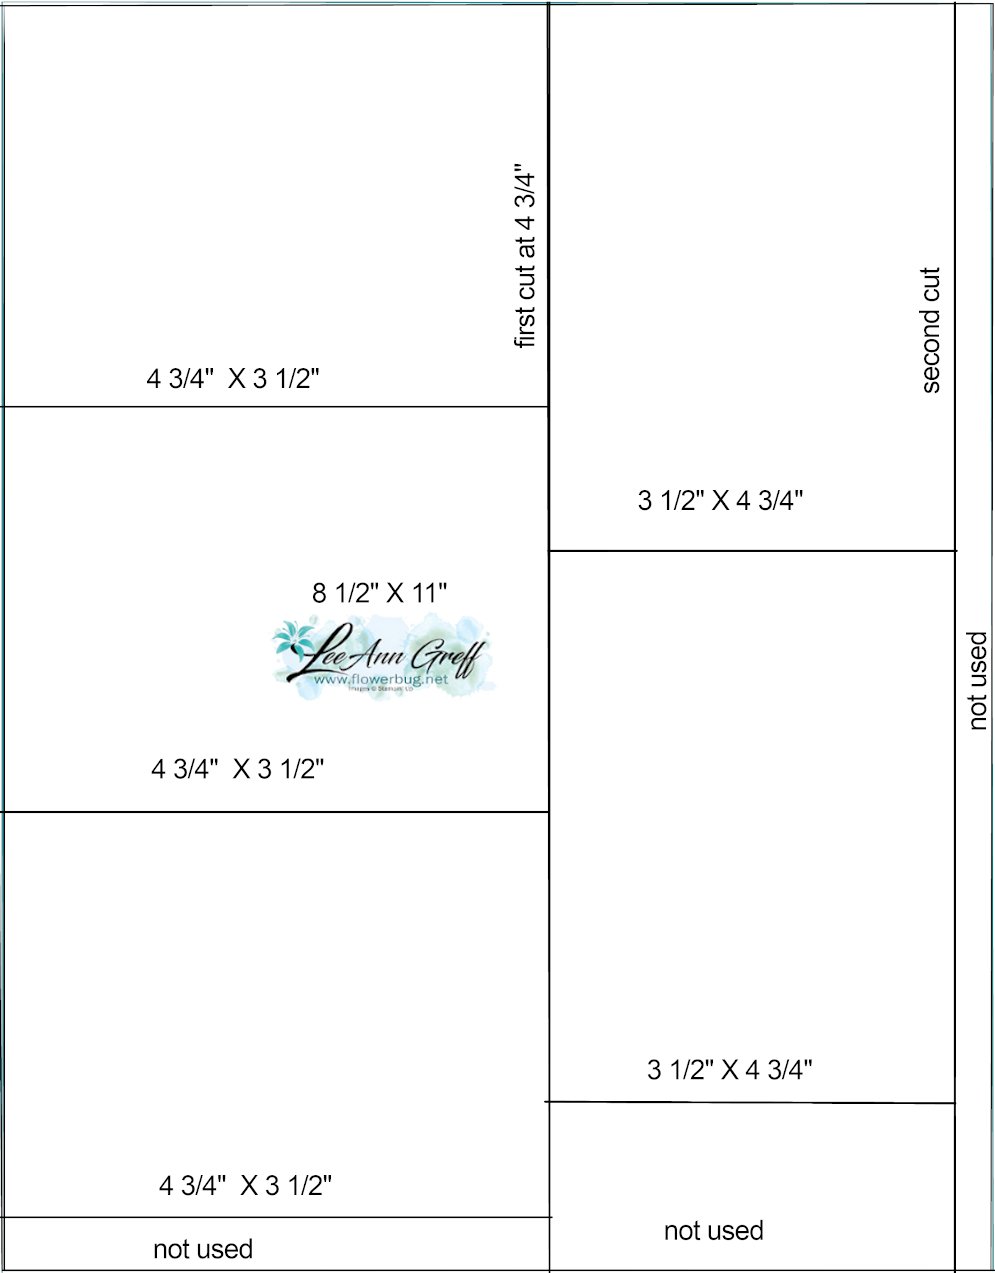
    See how I stamped down the center of the White card stock on the photo above?  Next I cut it using the template below: 

    The first template is what you stamp on.  The one below is for the layers under the stamped pieces. It's just 1/8" larger for a nice thin layered accent.  

    Next is the template for the colored layers on each stamped layer.  


    Watch the video below to see how it's done.  Think about your favorite stamp sets and how fast you can create beautiful cards using these templates!  

     ~~~

    July Specials: 

    Bonus Days!

    Get a $5 coupon for each $50 order you place in July.  Redeem in August!


    Clearance Rack update!

    See all items available here

     NEW Online Exclusives will be available

    See them all here

    ~~~

    I have 3 free card kits left!  It includes a Beautifully Happy stamp set 

    with online orders over $65; must use a host code.

     *current host code: XNYX2DWG

    Leave a Reply

    Your email address will not be published. Required fields are marked *

  • Pinwheel Tower Fancy Fold card with video & free projects sheet!


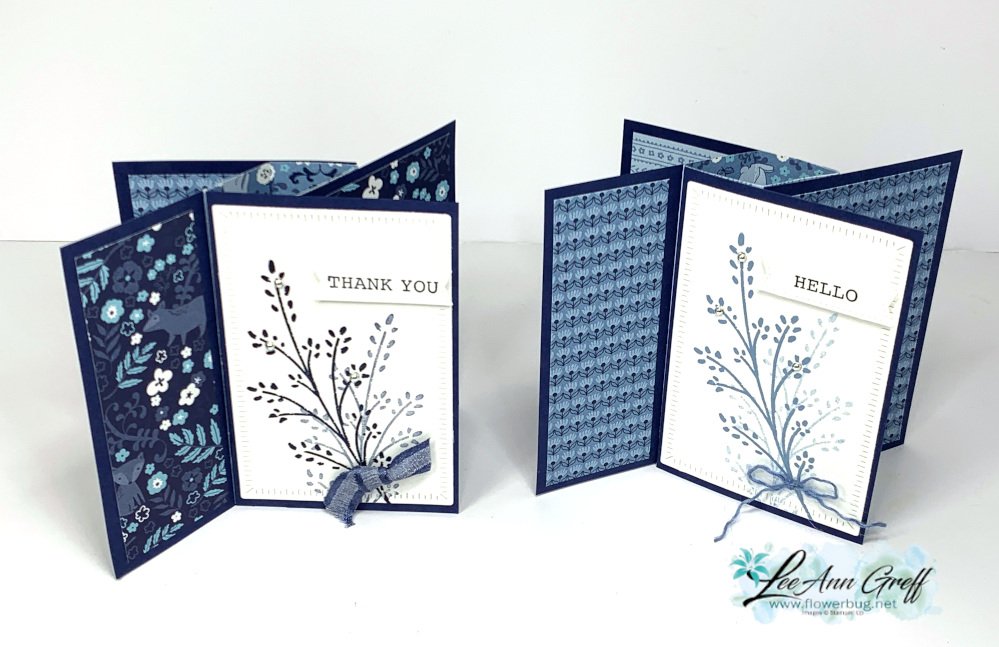
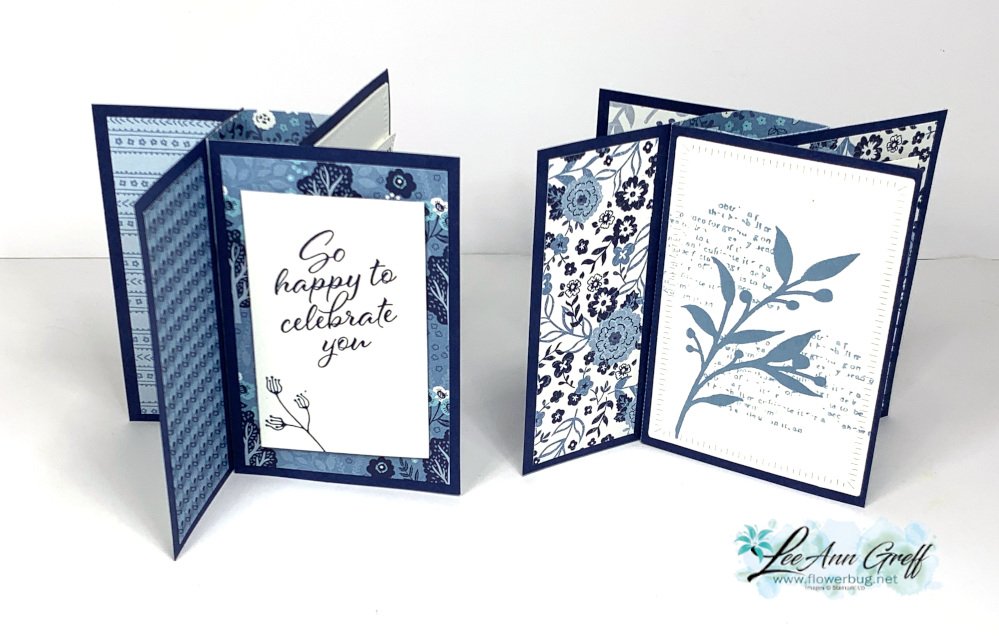
    Here's another card we made at my July Card Clubs.  I always try to feature one fun fold card and this was a doozy!  

    When they saw the many pieces they were a bit worried it would be hard.  But as we made it together they loved it!  Be sure to watch the video here or below; it's so much easier than it looks!  

    This card is super fun to play with; it reminds me of a 'never ending' card.  You can turn and turn it and see something new each time. But the finished card lays flat and is 5 1/2" X 4 1/4" so it fits nicely in an envelope.  

    Besides the Gorgeously Made stamp set (seen here) I chose the Layering Leaves (seen here) for the pretty greetings and leaf images. 

    I chose to feature the Countryside Inn designer series paper seen here with it's many shades of Blue.  I chose to use Night of Navy and White card stock, Navy and Boho Blue inks. 

    You can find the measurement, photos, directions and supplies list here on this free project sheet. Download July 23 Pinwheel Tower card

    Each of the 4 panels of Navy card stock is adhered to the center 'tower' made from a 4 1/4" square of designer paper. Once you have your card base created it's simple to add the 6 pieces of DSP and your stamped panels. 

    I also used the Radiating Stitches dies seen here (online exclusive) and the Stylish Shapes dies for the greeting.  The ribbon is the Night of Navy 3/8" bordered ribbon.  

    Click here or on the photo below to watch the video.  It's the second project featured.  

     ~~~

    July Specials: 

    Bonus Days!

    Get a $5 coupon for each $50 order you place in July.  Redeem in August!


    Clearance Rack update!

    See all items available here

     NEW Online Exclusives will be available

    See them all here

    ~~~

    I have 3 free card kits left!  It includes a Beautifully Happy stamp set 

    with online orders over $65; must use a host code.

     *current host code: XNYX2DWG

    Leave a Reply

    Your email address will not be published. Required fields are marked *

  • Gorgeously Made with a neat background technique & video tutorial


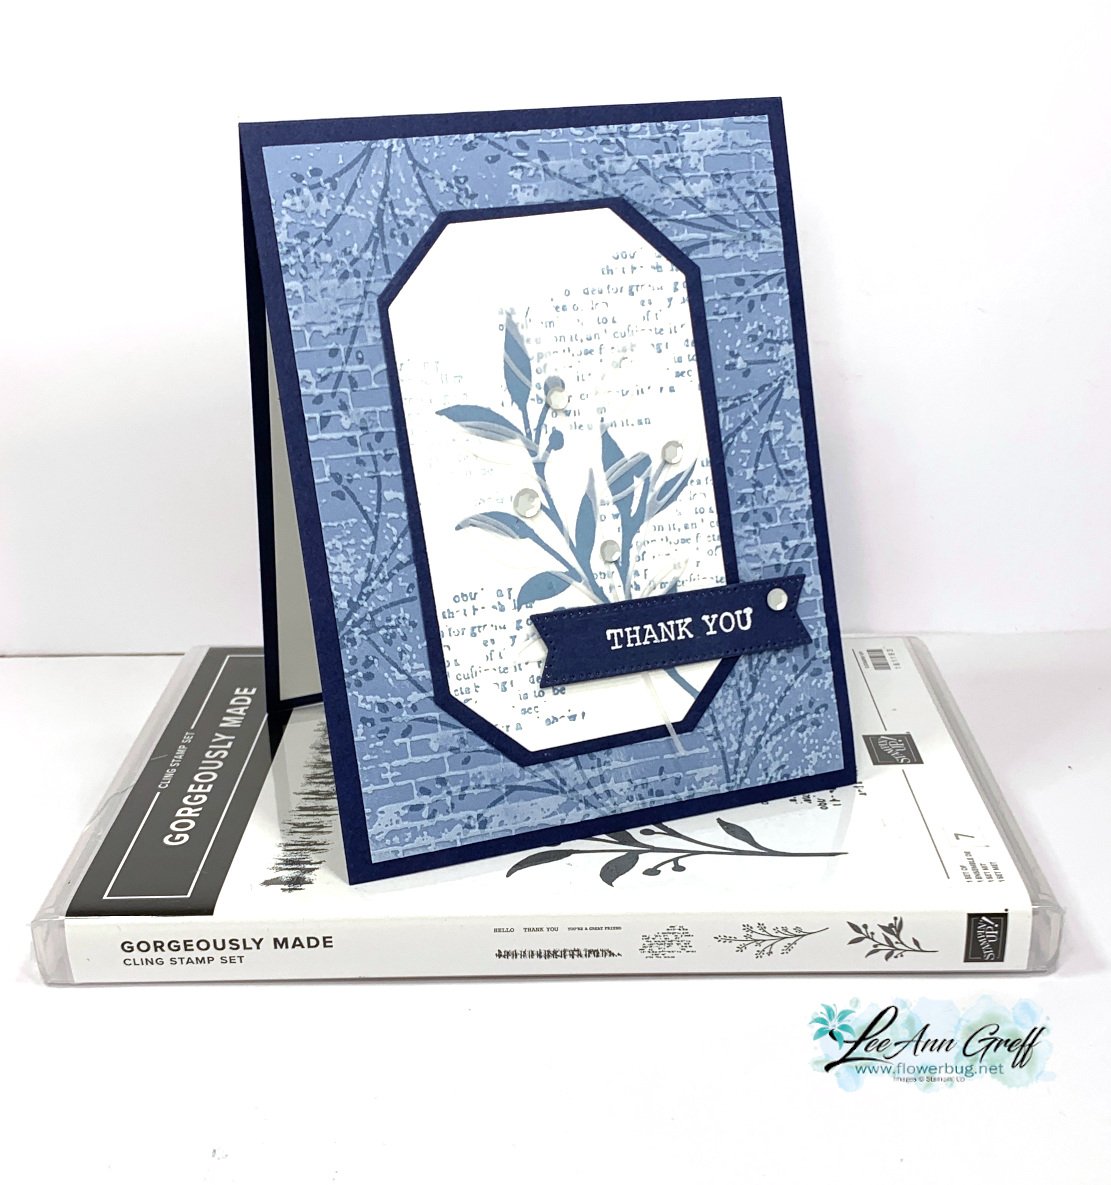
    I shared this card as part of my Tuesday Live video last week.  I was featuring the Gorgeously Made bundle.  Check out the background! 

    I focused on creating a pretty, textured background under the main image. Here are the steps:

    1. I first stamped the foliage image with Boho Blue ink onto Boho Blue card stock.
    2. Next I textured it with the Exposed Brick embossing folder seen here. (It's one of my favorite folders.)
    3. Lastly I dragged my White Craft ink pad over the texture. Tip: use a very light touch or ensure your ink pad is a little bit dry. I LOVE the look of this so much!  

    I used the same foliage image for the inside of the card as I did the pretty background, stamping once in full strength Boho Blue ink and stamping again without reinking.  

    I stamped the other large leafy image from the Gorgeously Made set on the Countryside Corners white die-cut. I added the print image a few times in second generation Boho Blue ink (this means stamped off once). It's layered on a Navy die-cut before adding to the card base.  

    The greeting is heat embossed on Navy using White embossing powder. The die-cut is from the Stylish Shapes dies – my go-to dies for greetings. 

    There's just something special about a monochromatic card; this time in blues.  If you're going for an elegant or cohesive look try using just one color in varying hues.  Greens, blues and browns are some of my favorite choices.  

    Click here or on the photo below to watch the video.  It's the first project featured; the other is a super fun 'fancy fold' card.  

     ~~~

    July Specials: 

    Bonus Days!

    Get a $5 coupon for each $50 order you place in July.  Redeem in August!


    Clearance Rack update!

    See all items available here

     NEW Online Exclusives will be available

    See them all here

    ~~~

    I have 3 free card kits left!  It includes a new Beautifully Happy stamp set 

    with online orders over $65; must use a host code.

     *current host code: XNYX2DWG

    Leave a Reply

    Your email address will not be published. Required fields are marked *


Notice: LeeAnn Greff, Independent Stampin’ Up! Demonstrator, Manager. The content of this website is my sole responsibility as an independent Stampin’ Up! demonstrator and the use of, and content of, the classes, services, or products offered on this website is not endorsed by Stampin’ Up! Copyright 2025