/


Latest Post

Use the Double Wonder Template to make 11 quick cards! Join me Thursday night!


Do you ever planned a stamping session focusing on just a few products? It's easy to get overwhelmed with everything you own.  Using this method is actually quite liberating and fuels the creative process.  I've started doing that more and more often especially when planning my card kits to go.  I pick Stampin' Up! products from the same suite and choose some sketches or layouts for card ideas.  the process is so enjoyable this way!  

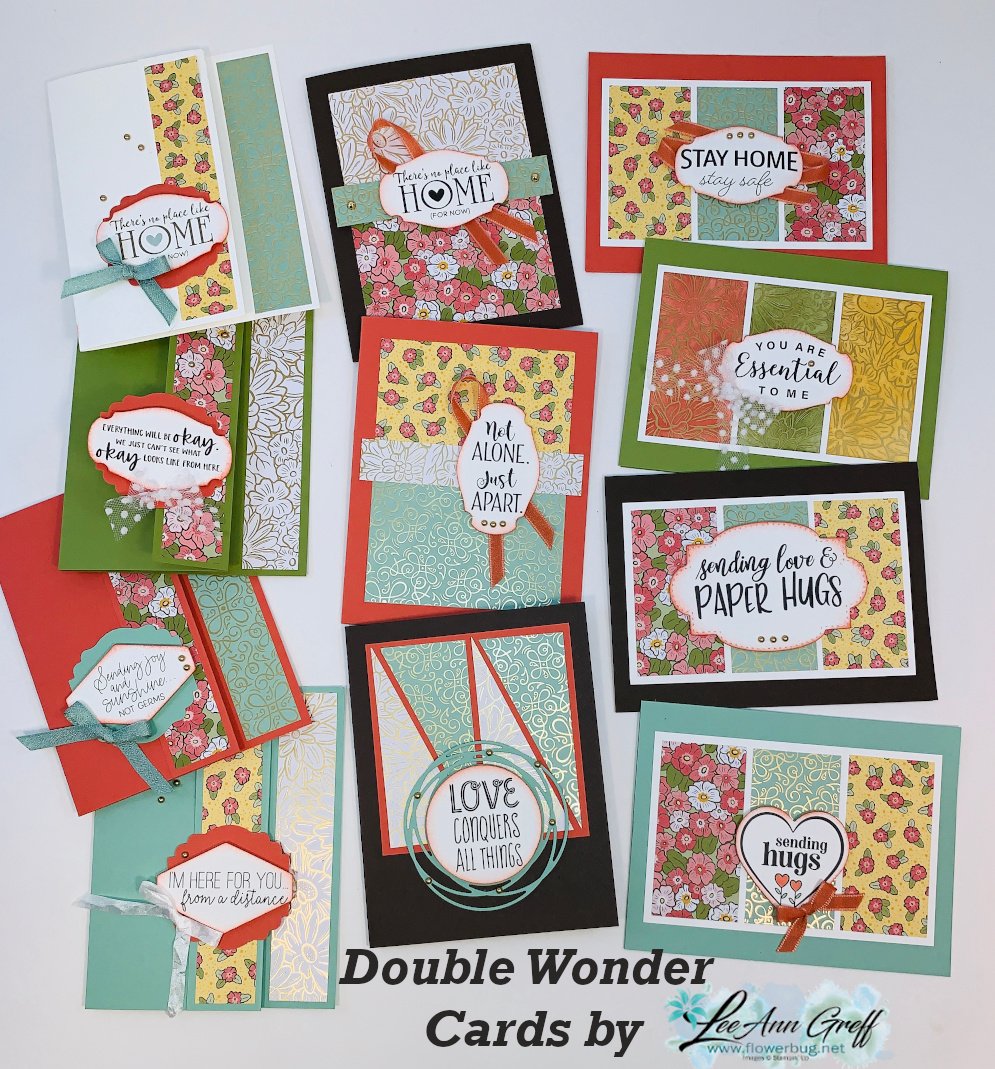
Lately I've been seeing groups of cards using the Double Wonder template and had to try it.  It was originally designed by Shannon West from Stampin' Up!  It's so clever!! You start out with 2 pieces of 6" X 12" designer paper and using the pieces you can quickly have 11 finished cards!

Look at these! I'll be making these cards Live tomorrow night at 7 pm CT. Join me either here on FB or on Zoom.  
Here are the steps: 

  1. Pick out 2 different sheets of 6 X 12" designer paper and 11 card bases.  Make sure you have some ribbons or embellishments to match.  
  2. Use the template below to cut your designer paper; cutting both at once. 
  3. Grab some scraps of White and coordinating colors for punches/greetings. 
  4. Cut 4 pieces of layering card stock at 3 1/4" X 5" and one 3 3/4" square for the bonus card. (I used White)
  5. Choose a stamp set & ink to coordinate. 
  6. Or use the new Share Sunshine Covid-19 digital download like I did for my greetings. No stamping needed!  You can purchase that here. https://covid19.stampinup.com/products/giving-back-us-ca Price: $12.00 USD
  7. Come back here tomorrow night so we can stamp together.
  8. Or use this link to join via Zoom. *see tips on zoom meetings below  https://us02web.zoom.us/j/88215870191

I chose to use the new Ornate Garden designer paper for my cards.  Anything goes but a non directional design is best; try not to choose a paper that needs to be north and south.  
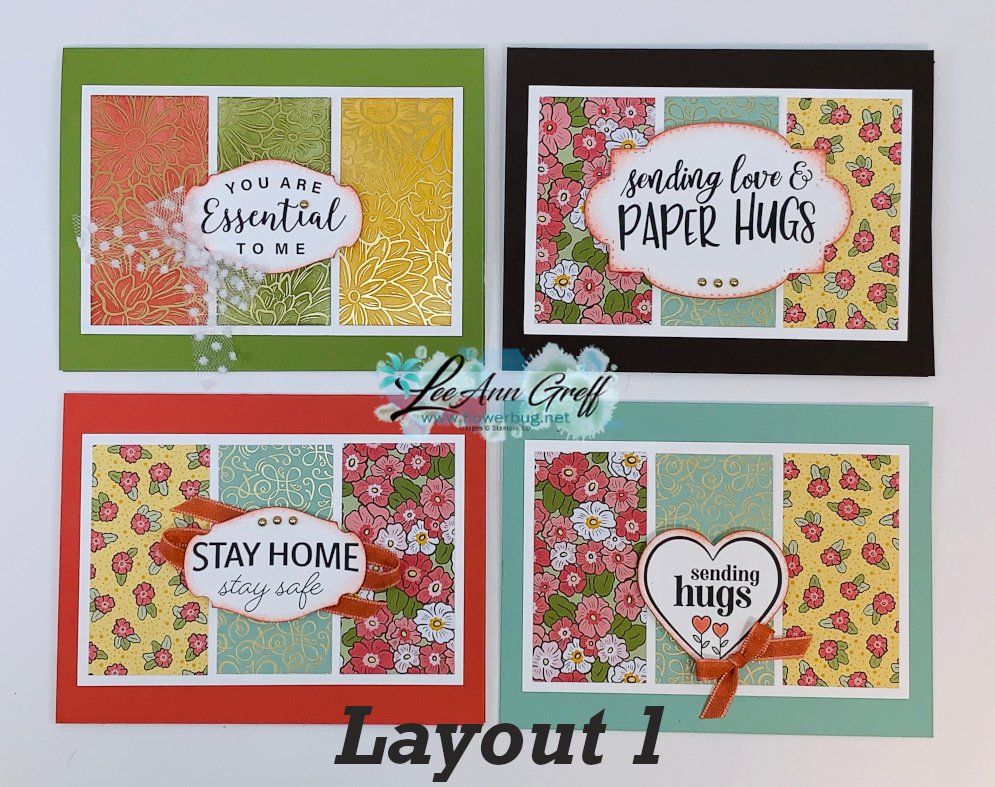

Below is the template but click here to download the Double Wonder Designer Paper cards & template 

Zoom meeting tips:

  1. You will need access to a camera and/or microphone to participate.
  2. You may need to download Zoom to join; depending on the device you are using. It's free!  
  3. You will be muted when you join to prevent a lot of background noises. 
  4. If you'd like to speak you can un-mute yourself you can do so; or press the spacebar. 

~~~~

Online orders please use this host code for April:

RBXHNWMV

If the order is over $55 you'll get a free Simple Shammy cleaner from me! 

Check out the retiring products below; while supplies last!

All Posts

  • Still more incredible Fun Fold Team swap cards!


    We had sooo many fabulous fancy fold cards at our February Team swap!  I've been sharing a few each day this past week. Please look back to see them all; I'm sharing measurements for each one!

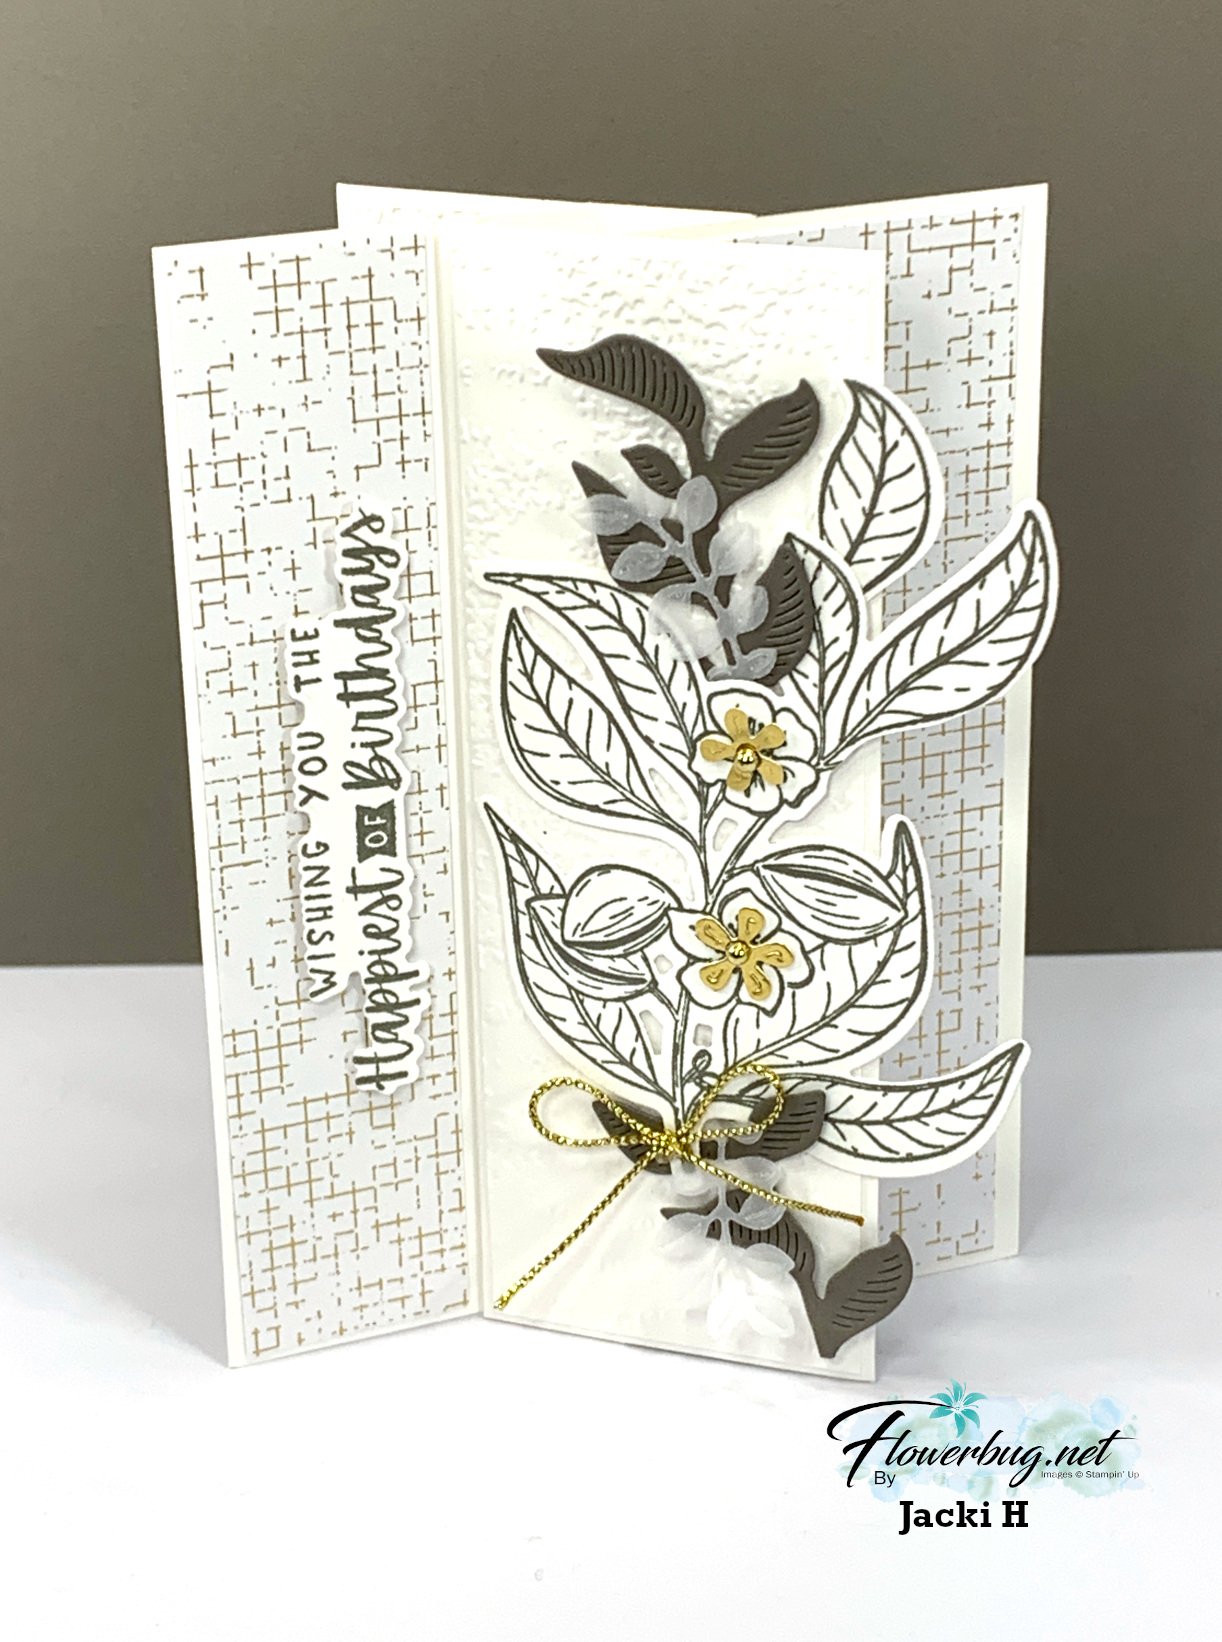
    Jacki made this stunning Pinwheel Tower card featuring the Nature's Sweetness Suite: 

    Her colors include White, Pebbled Path and bit of Gold foil & Vellum. She also added gold pearls and Gold Elegant Trim. The texture is made with the Exposed Brick embossing folder.  The greeting is from the Charming Sentiments bundle.

    See the Nature's Sweetness suite here; it's huge & filled with beautiful stamps, textures & die-cuts. 

    The picture doesn't do it justice; it's simply stunning! If you haven't made one and want to know how check out this video I shared a while back. 

    Measurements:

    • Center box is 3 1/4" X 4 1/4"; scored at 1/4", 1", 1 3/4", 2 1/2" 
    • 4 pieces at 2" tall X 4 1/4" 
    • Designer paper layers are 1 1/8" & 1 7/8" – 2 each of 2 patterns

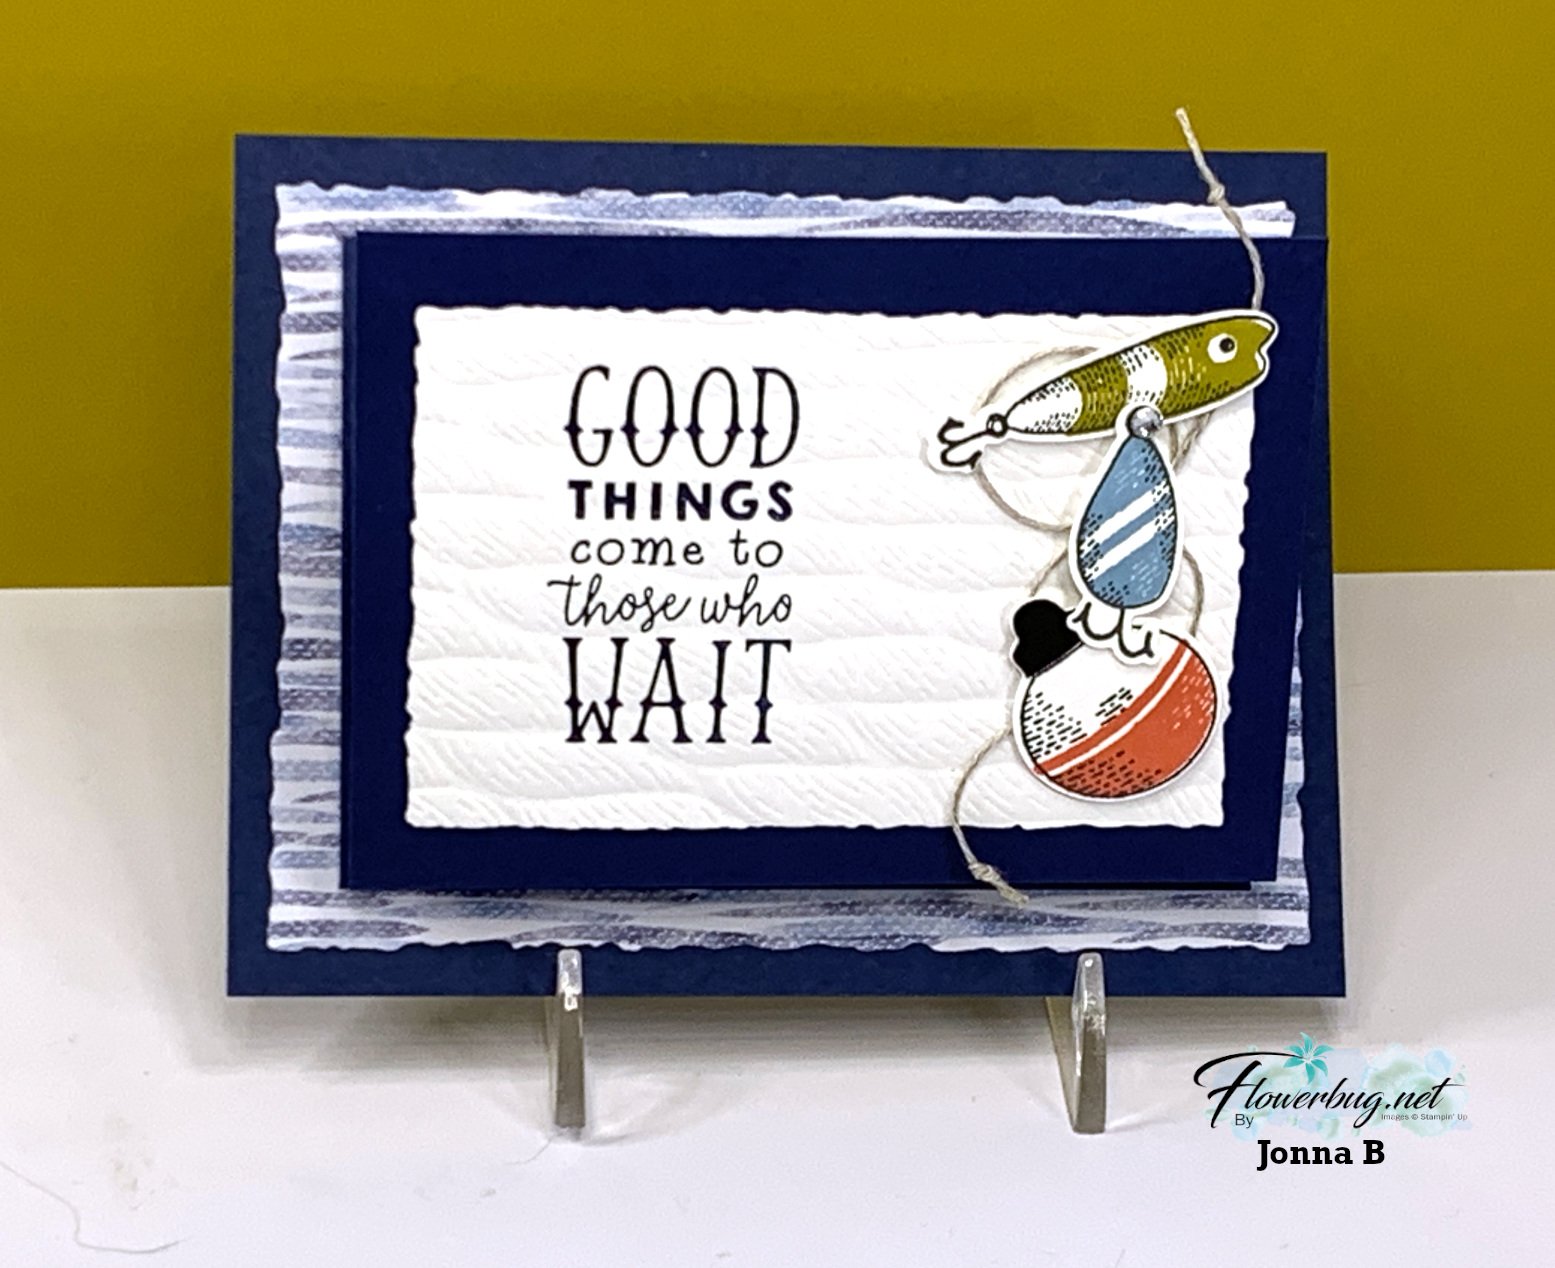
    Next is another incredible card made by Jonna who chose the Gone Fishing bundle seen here.  

    She paired it with the Let's Go Fishing designer paper & Twisted Rope 3D embossing folder. This is an entire suite in the Annual catalog and could retired in April. See it all here. 

    When you open up her card it's a gift card.  What a great men's card idea!  

    Measurements:

    • Navy card base 5 1/2" X 4 1/4", folded layer is 4 1/2" X 9 3/4" scored at 3 1/4" & 6 1/2"
    • Designer paper – striped on front is cut with the Deckled Rectangles – finished size is 5 1/8" X 3 3/4", inside gift card is 4 1/4" X 2 1/4"
    • White front – Deckled Rectangle die-cut is 3 7/8" X 2 5/8" finished, center white is 4 1/4" X 3" 

    ~~~

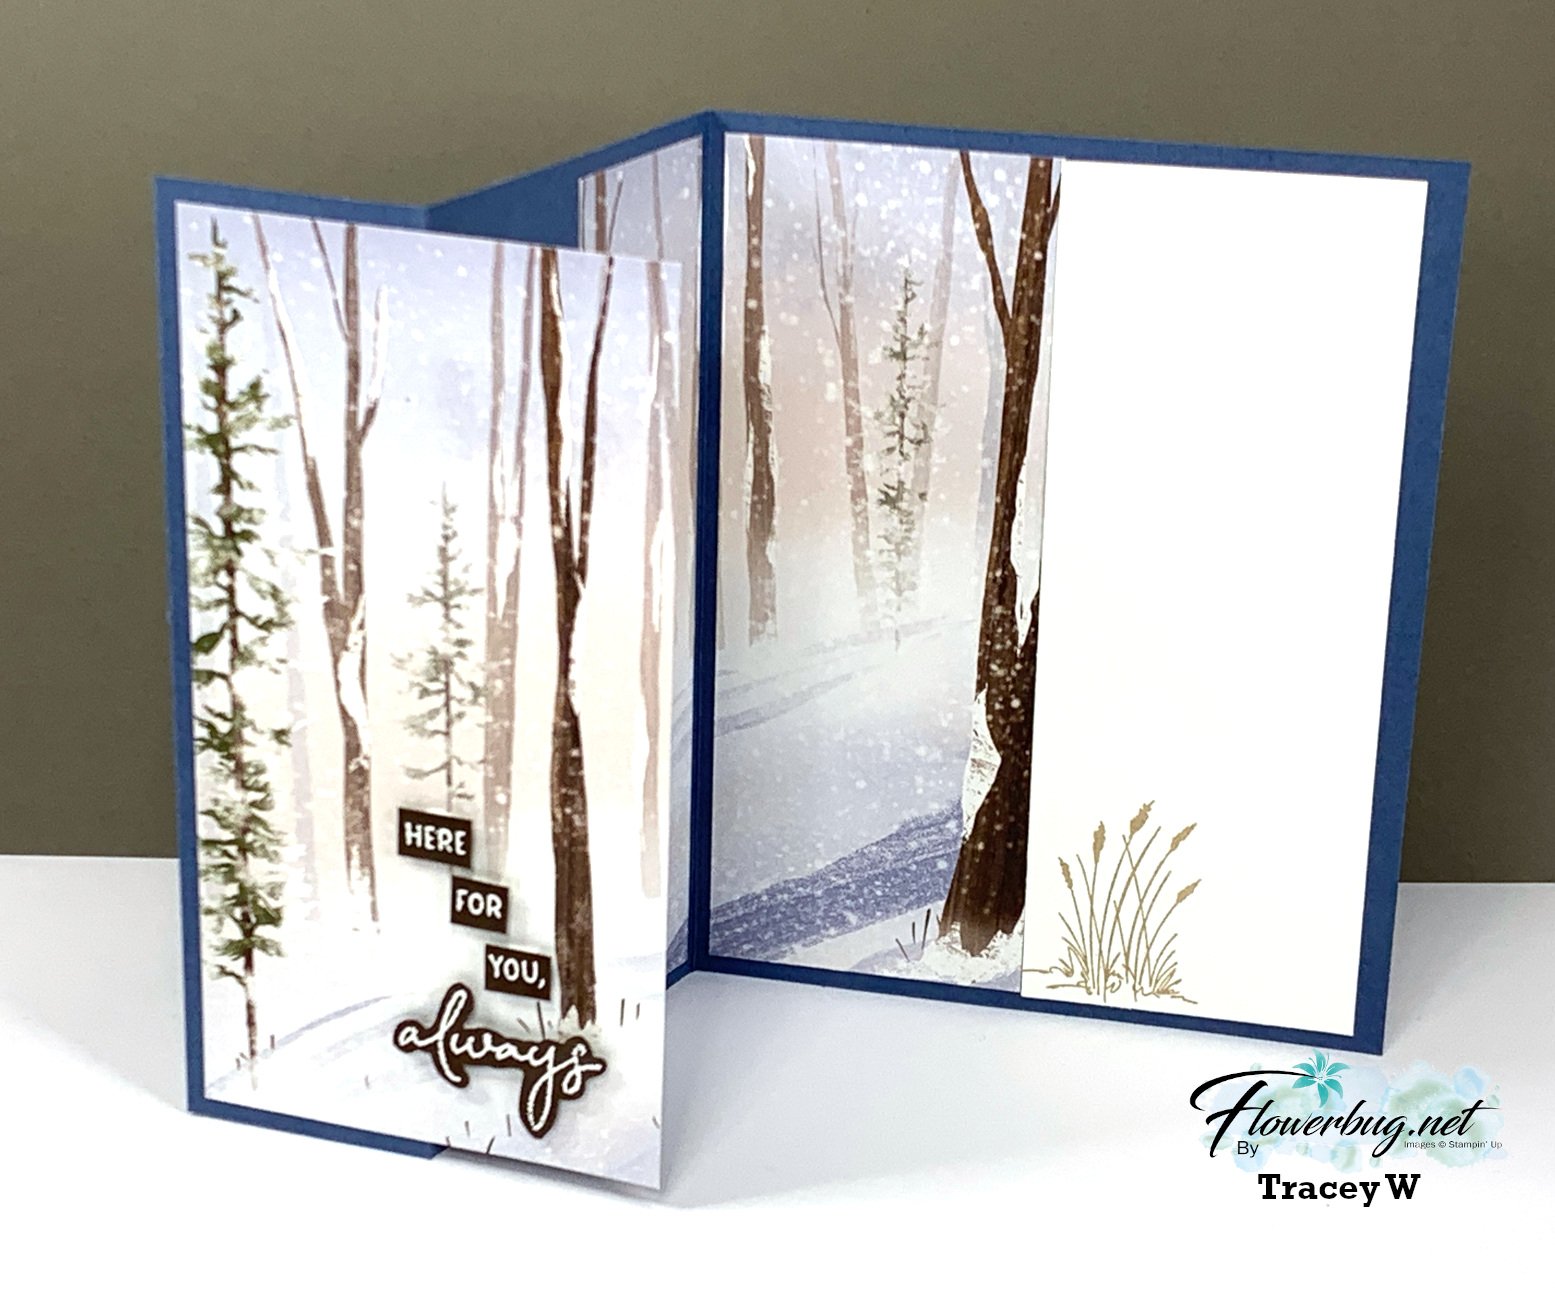
    Oh; this one is so beautiful!  Tracey made this one with the One Horse Open Sleigh designer paper. 

    This fold is my absolute favorite way to show off our scenic papers!  the card base has one extra score line and you cut your paper into pieces from left to right so when the card opens it's a full scene! 

    I LOVE her heat embossed greeting; it's fussy cut into multiple pieces and added with mini dimensionals; what a fabulous effect!  The texture on the front left panel is the Exposed Brick 3D emboss folder seen here. 

    Measurements: 

    • Misty Moonlight card base 8 1/2" X 5 1/2" score at 1 1/2" & 4 1/4", second textured layer is 1" X 5 1/4"
    • Designer paper is 6" X 5 1/4" tall. Cut from left to right at 2 3/4" & 4"

    This pretty paper was available online but is sadly gone now.  *Our Online Exclusives are available while supplies last.

    I shared how to make this card on a video a few months back. See it here. 

    *Stop back in for more fancy fold swaps tomorrow! 

    ~~~

    February Specials: 

    Earn FREE products with your Stampin' Up! purchase during

    Sale-a-Bration! *click here

    *current host code link: 6SUH2MUQ

    It's the best time to get a pre-paid Sale-a-Bration subscription

    & earn free Sale-a-Bration products!  

    ~~~

    Get a free Gold Foiled cards & envelopes kit

    with online orders over $55 in February

    All online orders in February will receive this free Nature's Sweetness tutorial with 8 projects!

    Leave a Reply

    Your email address will not be published. Required fields are marked *

  • Fancy fold swap cards by my Flowerbug’s Team – with measurements!


    We swapped Fun Fold cards with my team in February and they knocked it out of the park! I've already shared quite a few of their cards with you and today I have more yet! 

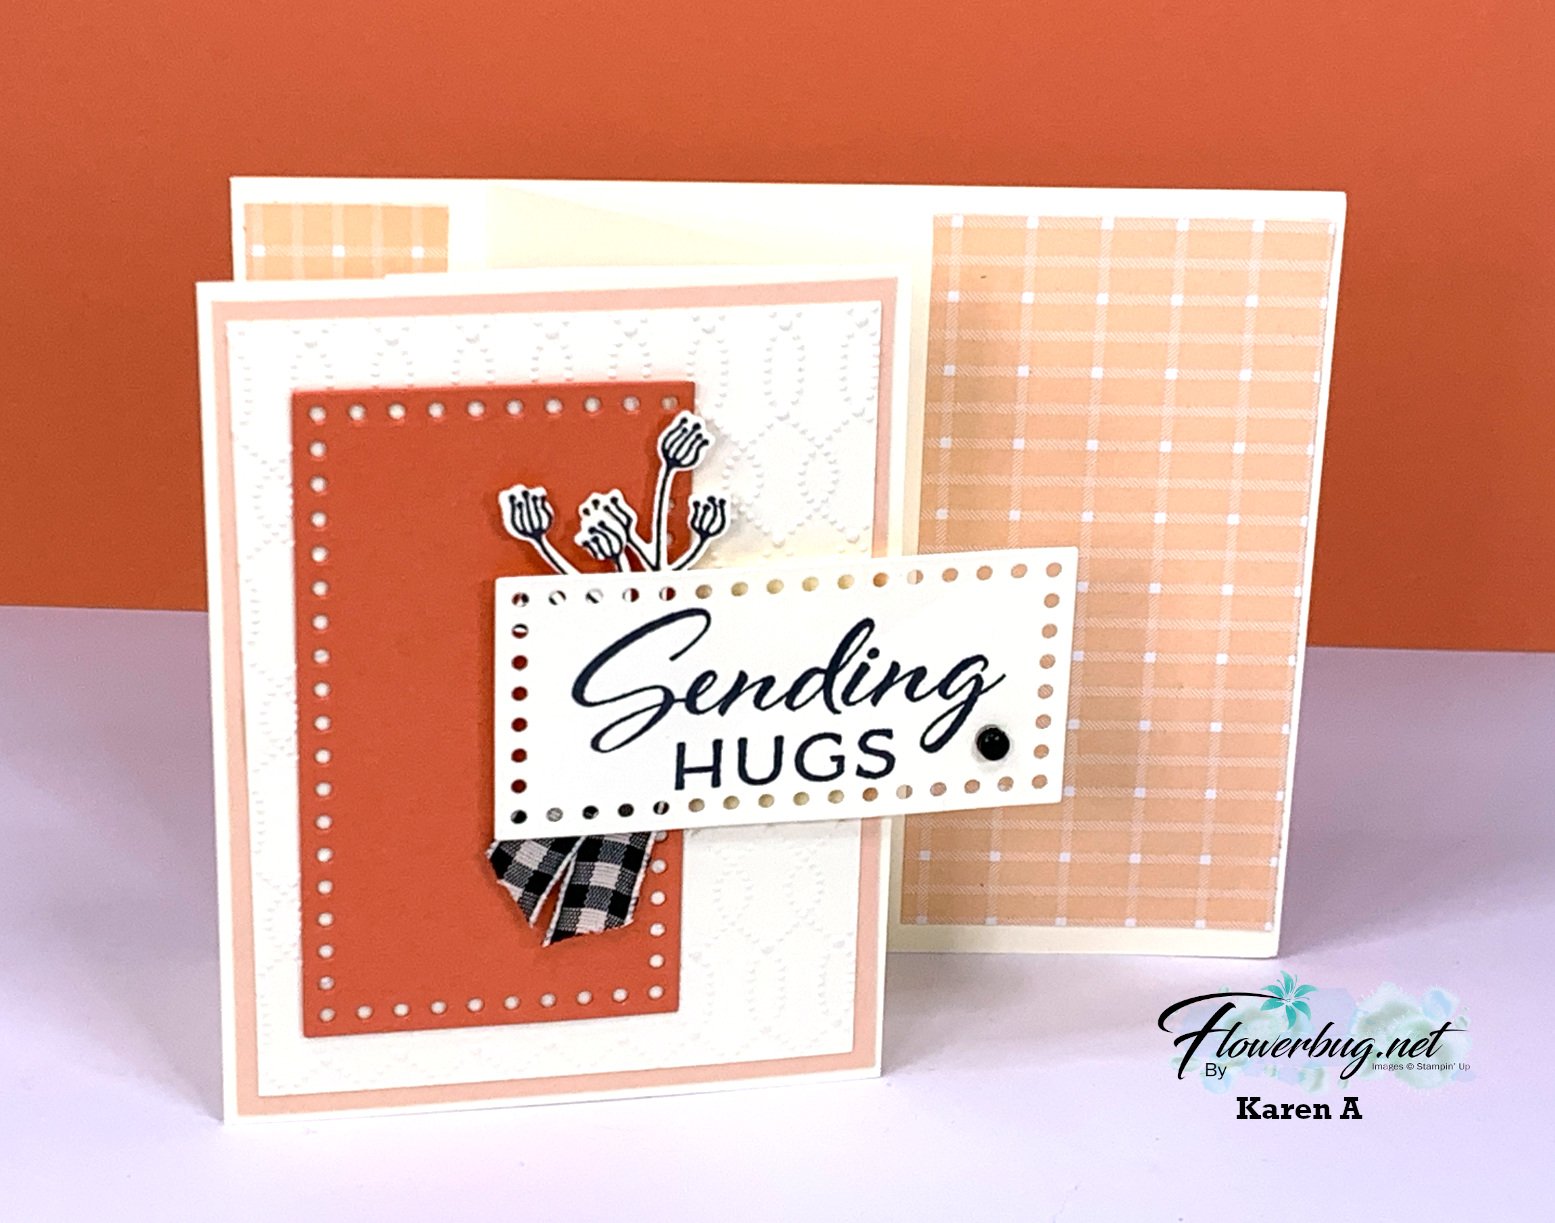
    First up today is a pretty card made by Karen.  She found a new fun fold that's a take on a 'book-binding' fold but now completely new with just one additional piece. 

    She used the Softly Stippled designer paper – a free choice during Sale-a-Bration with any $50 purchase. Her colors include Calypso Coral, Black, Petal Pink and Vanilla. 

    Measurements:

    • Vanilla card base 4 1/4" X 11" scored at 2 1/8", 4 1/4" & 5 1/2", 2nd Vanilla layer is 3 1/4" X 4 1/4", textured layer is 2 7/8" X 3 7/8", die-cut greeting (Everyday Detail dies) is 2 3/4" X 1 3/8"
    • Petal Pink is 3 1/8" X 4 1/8"
    • Calypso Coral die-cut (Everyday Detail dies) is 1 3/4" X 3 1/4"
    • Designer paper – 2 pieces – 1" X 4" for book binding fold, 2" X 4" on right side.  

    ~~~

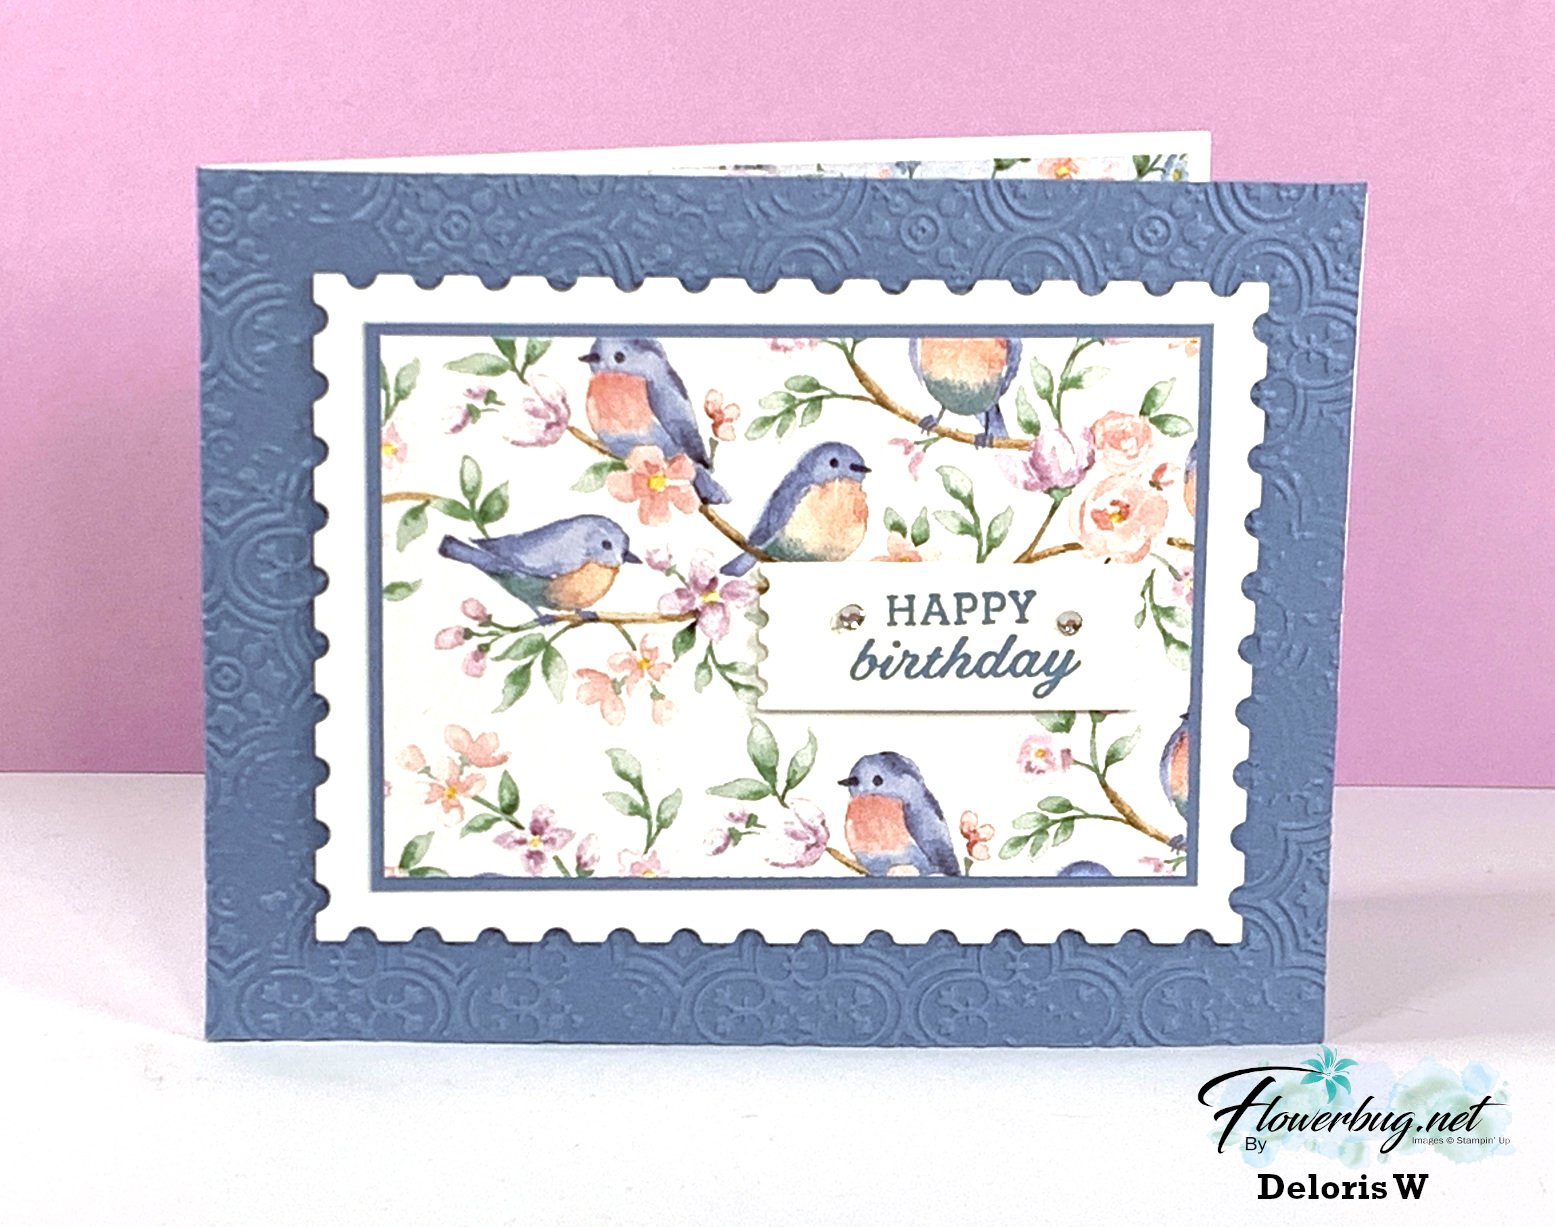
    This next card was made by Deloris who chose the Flight & Airy designer paper, also in our Sale-a-Bration offering in February. It's also free with any $50 purchase from Stampin' Up!. 

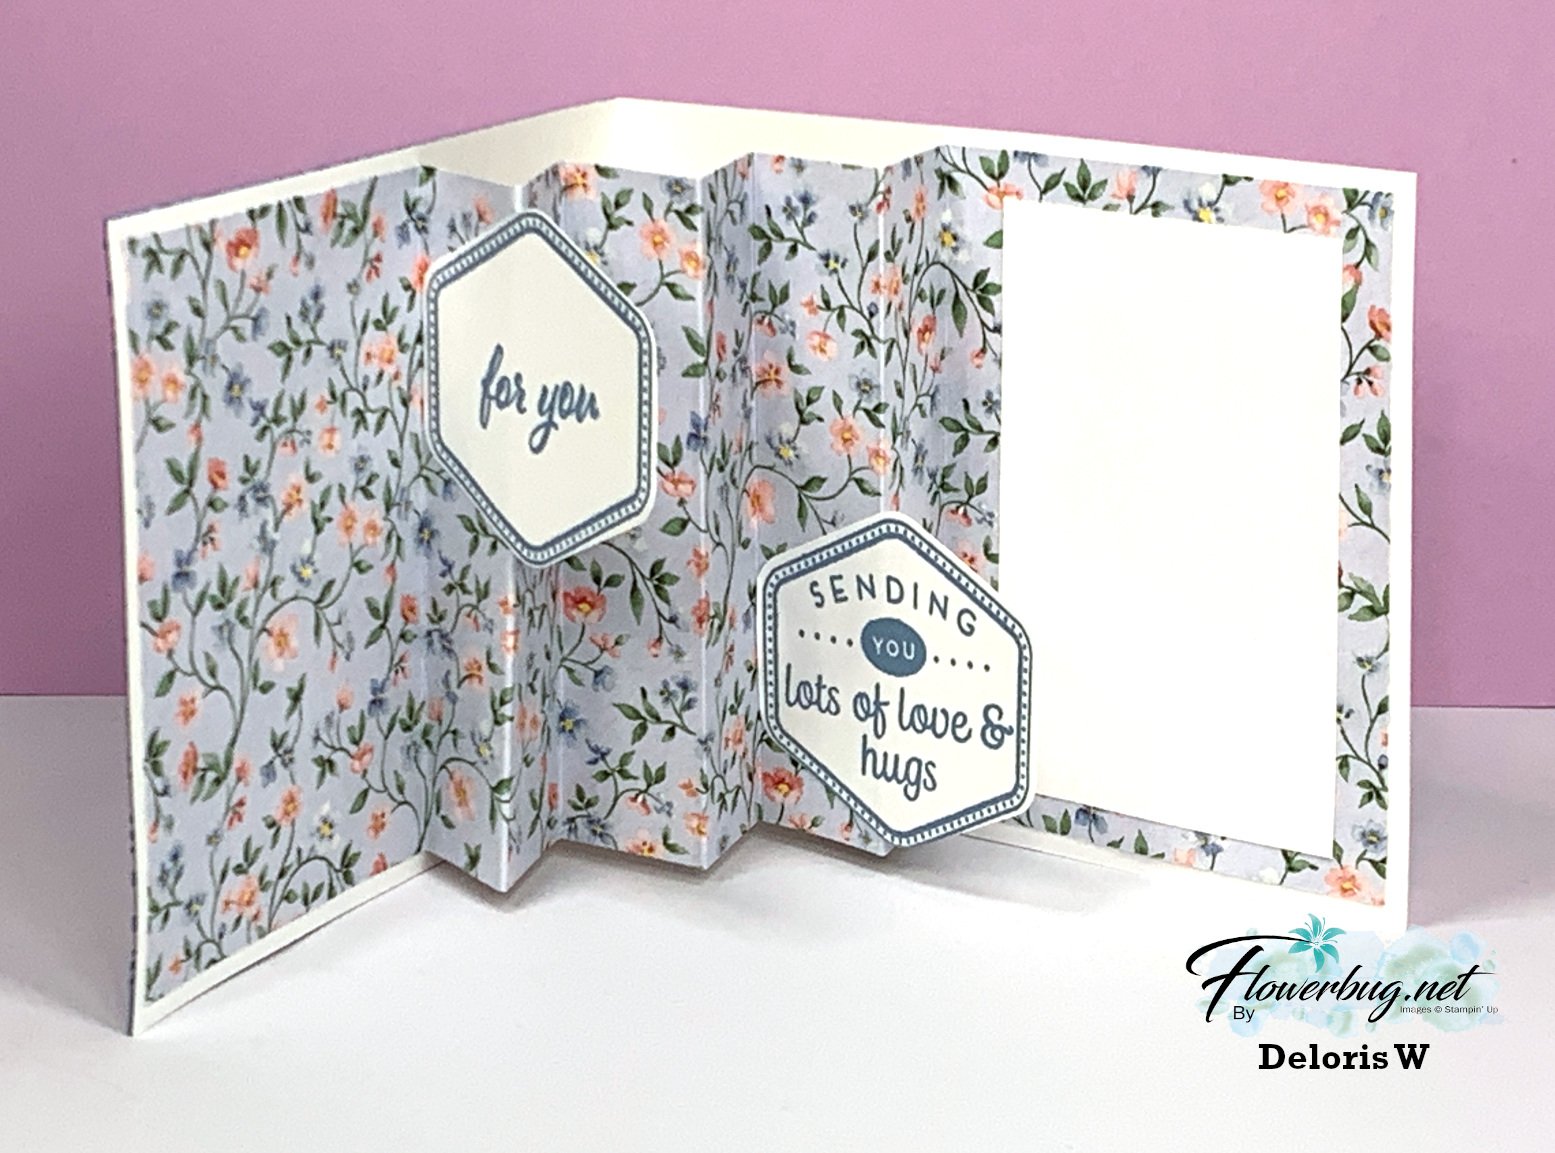
    She used the Perennial Postage dies on the front along with the Distressed Tile embossing folder.  Look at the inside fold!

    The inside greetings are from the Heartfelt Hexagon bundle.

    I shared how to make this neat accordion card on a recent video – see it here. 

    Measurements:

    • Card base 11" X 4 1/4" score at 5 1/2", White layer for Perennial Postage die is 4 1/2" X 3 1/4" finished size, inside white is 2 1/4" X 3 1/2"
    • Boho Blue on front is 5 1/2" X 4 1/4" &  4" X 2 3/4"
    • Flight & Airy designer paper – front is 3 7/8" X 2 5/8", inside accordion is 12" X 4" scored at 3", 4", 5", 6", 7", 8" & 9"

    ~~~

    Lastly today is a beautiful card made by Rita who chose the Softly Stippled designer paper like Karen above. 

    Her colors include Pebbled Path, Calypso Coral and Vanilla.  The inside greeting is from Charming Sentiments; the front is from Wild Ferns.

    Measurements:

    • card base 11" X 5 1/2" score at 1 3/4", 3 1/2", 5 1/4" & 7". second accordion piece is 4" X 3" score in half at 2"
    • Pebbled Path layers – 4 pieces at 1 1/2" X 5 1/4"
    • Designer paper 1 3/4" X 2 3/4" and 1/2" X 5 1/4" on the inside right edge
    • Calypso Coral greeting strip is 2 3/4" X 5/8" 

    I'll share more with you tomorrow!  Stay tuned!  

    ~~~

    February Specials: 

    Earn FREE products with your Stampin' Up! purchase during

    Sale-a-Bration! *click here

    *current host code links: 4BXU7SGH or 6SUH2MUQ

    It's the best time to get a pre-paid Sale-a-Bration subscription

    & earn free Sale-a-Bration products!  


    ~~~

    Get a free Gold Foiled cards & envelopes kit

    with online orders over $55 in February

    All online orders in February will receive a free Nature's Sweetness tutorial with 8 projects!

    Leave a Reply

    Your email address will not be published. Required fields are marked *

  • Simple Direct to Paper Technique for quick gorgeous cards! Plus 6 ways to add ribbon! Video & free project sheet too!


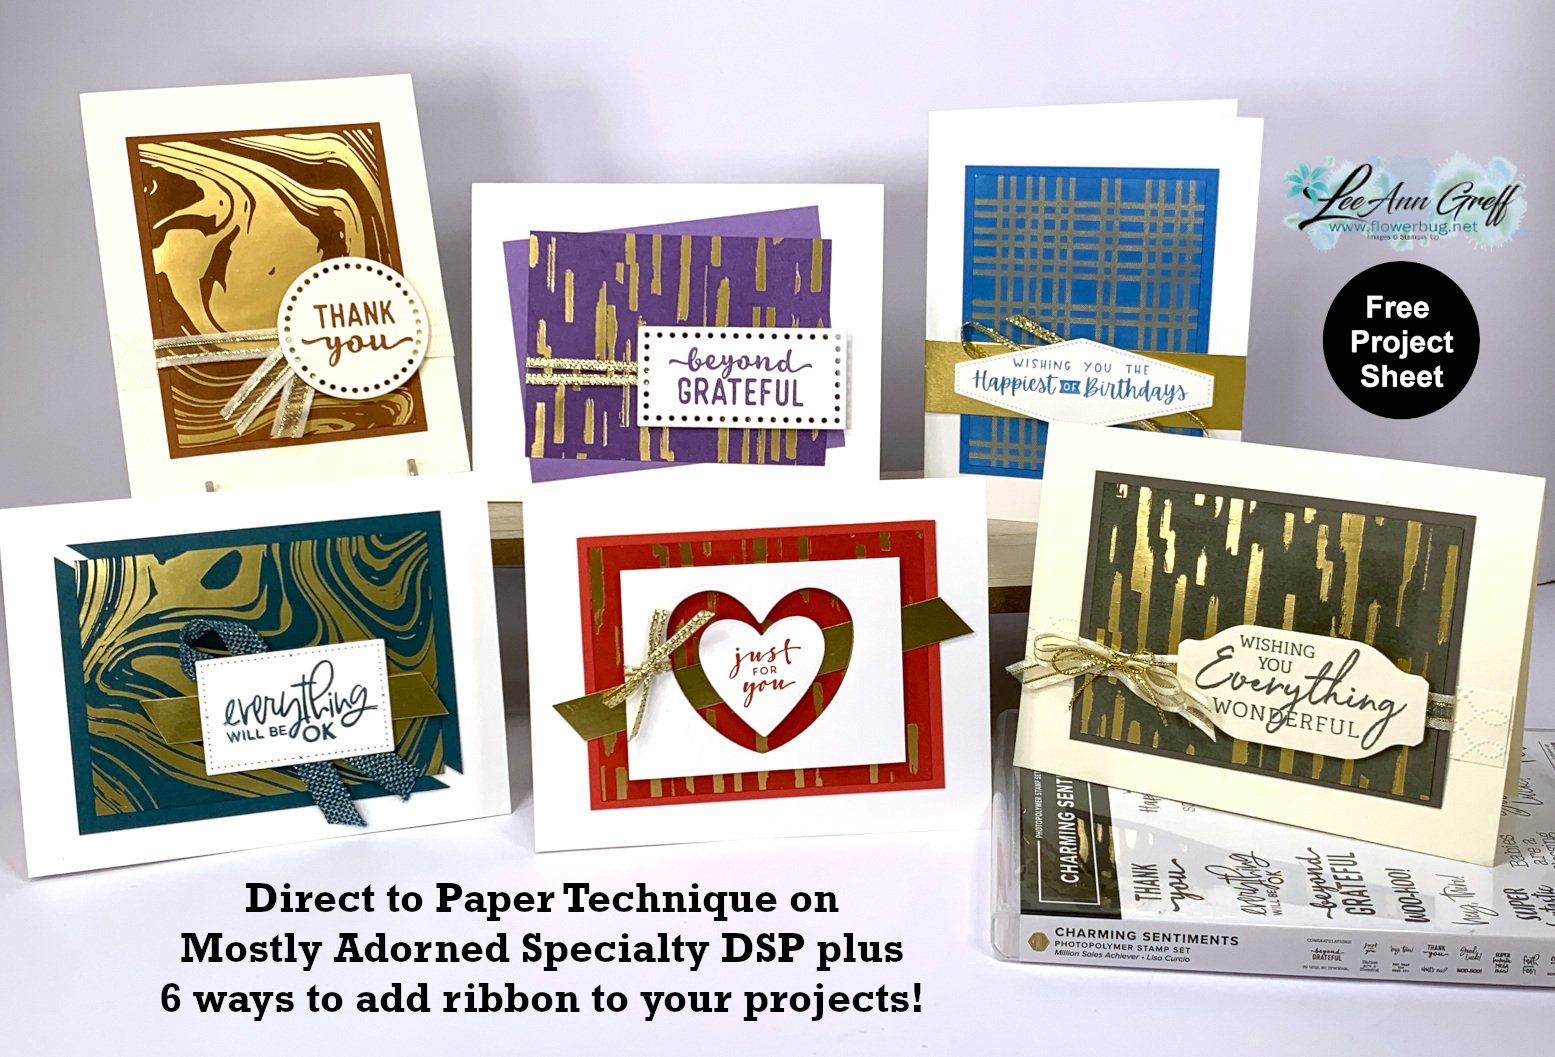
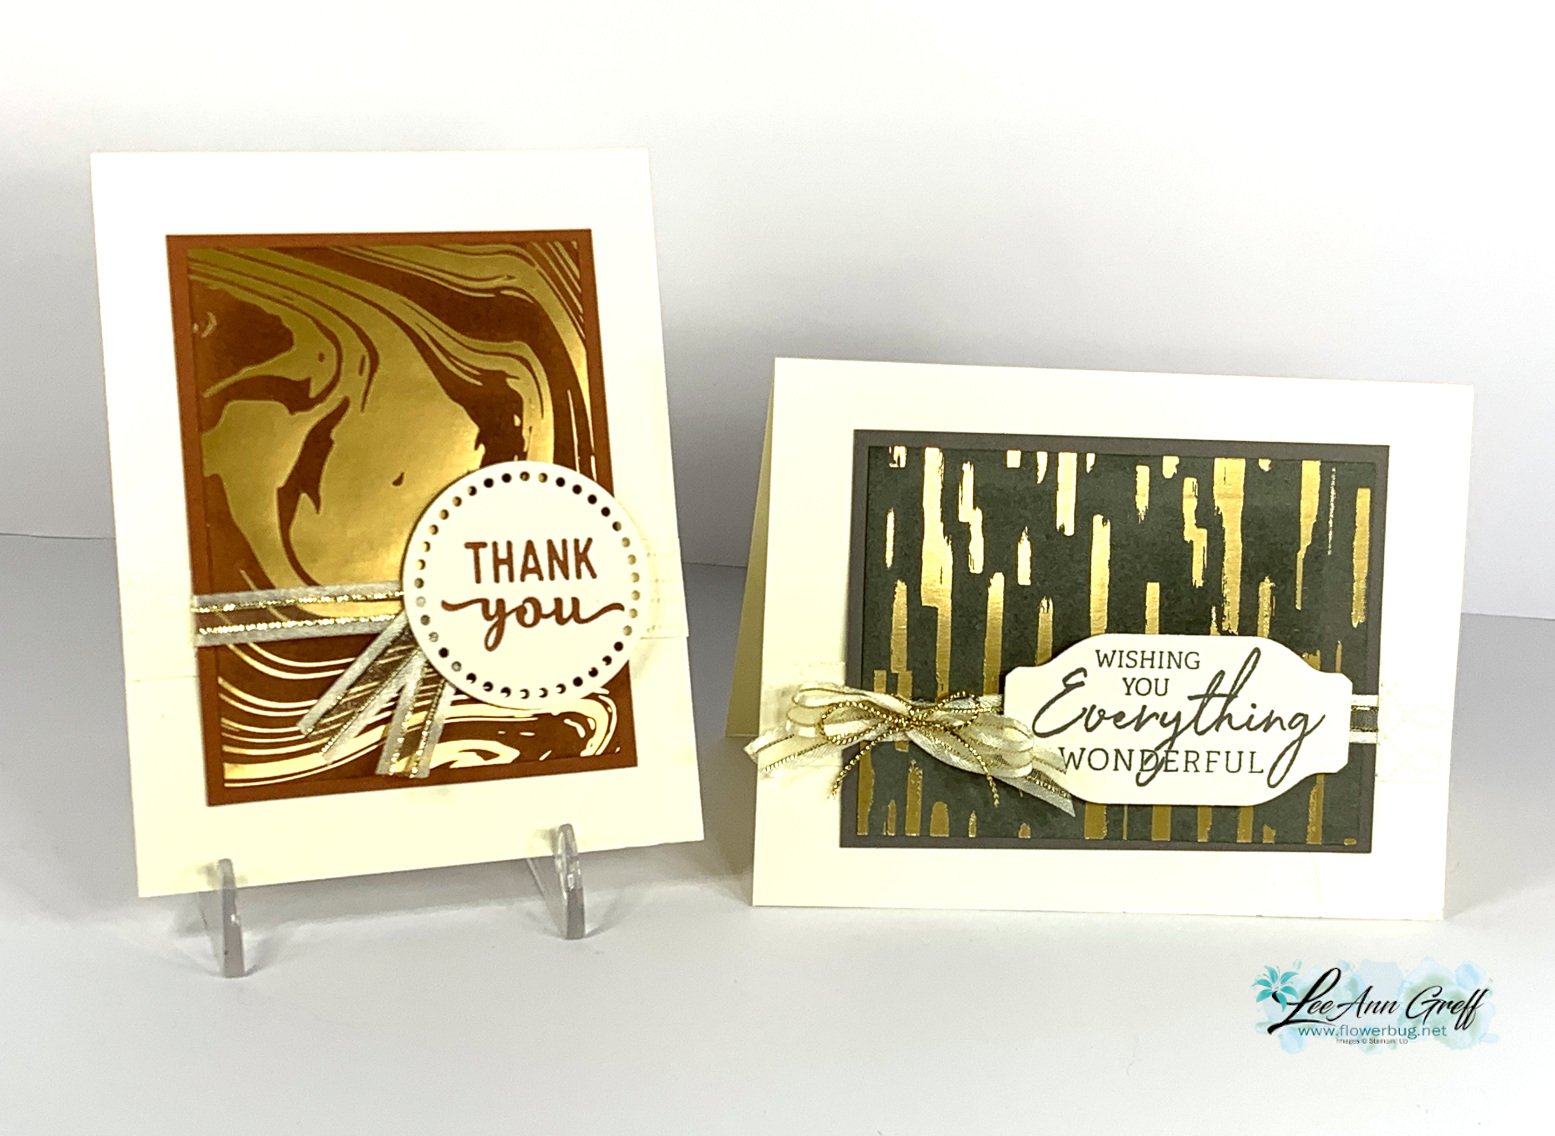
    On last week's Live video I focused on the Most Adored specialty designer paper and shared the Direct to Paper technique and these gorgeous cards: 

    Anytime we have designer papers with foil designs I think of this fun technique! It's basically rubbing or tapping your water based ink pad onto the designer paper. The ink soaks into the background but resists the foil designs. Simply wipe the excess ink off the foil with a tissue – done!

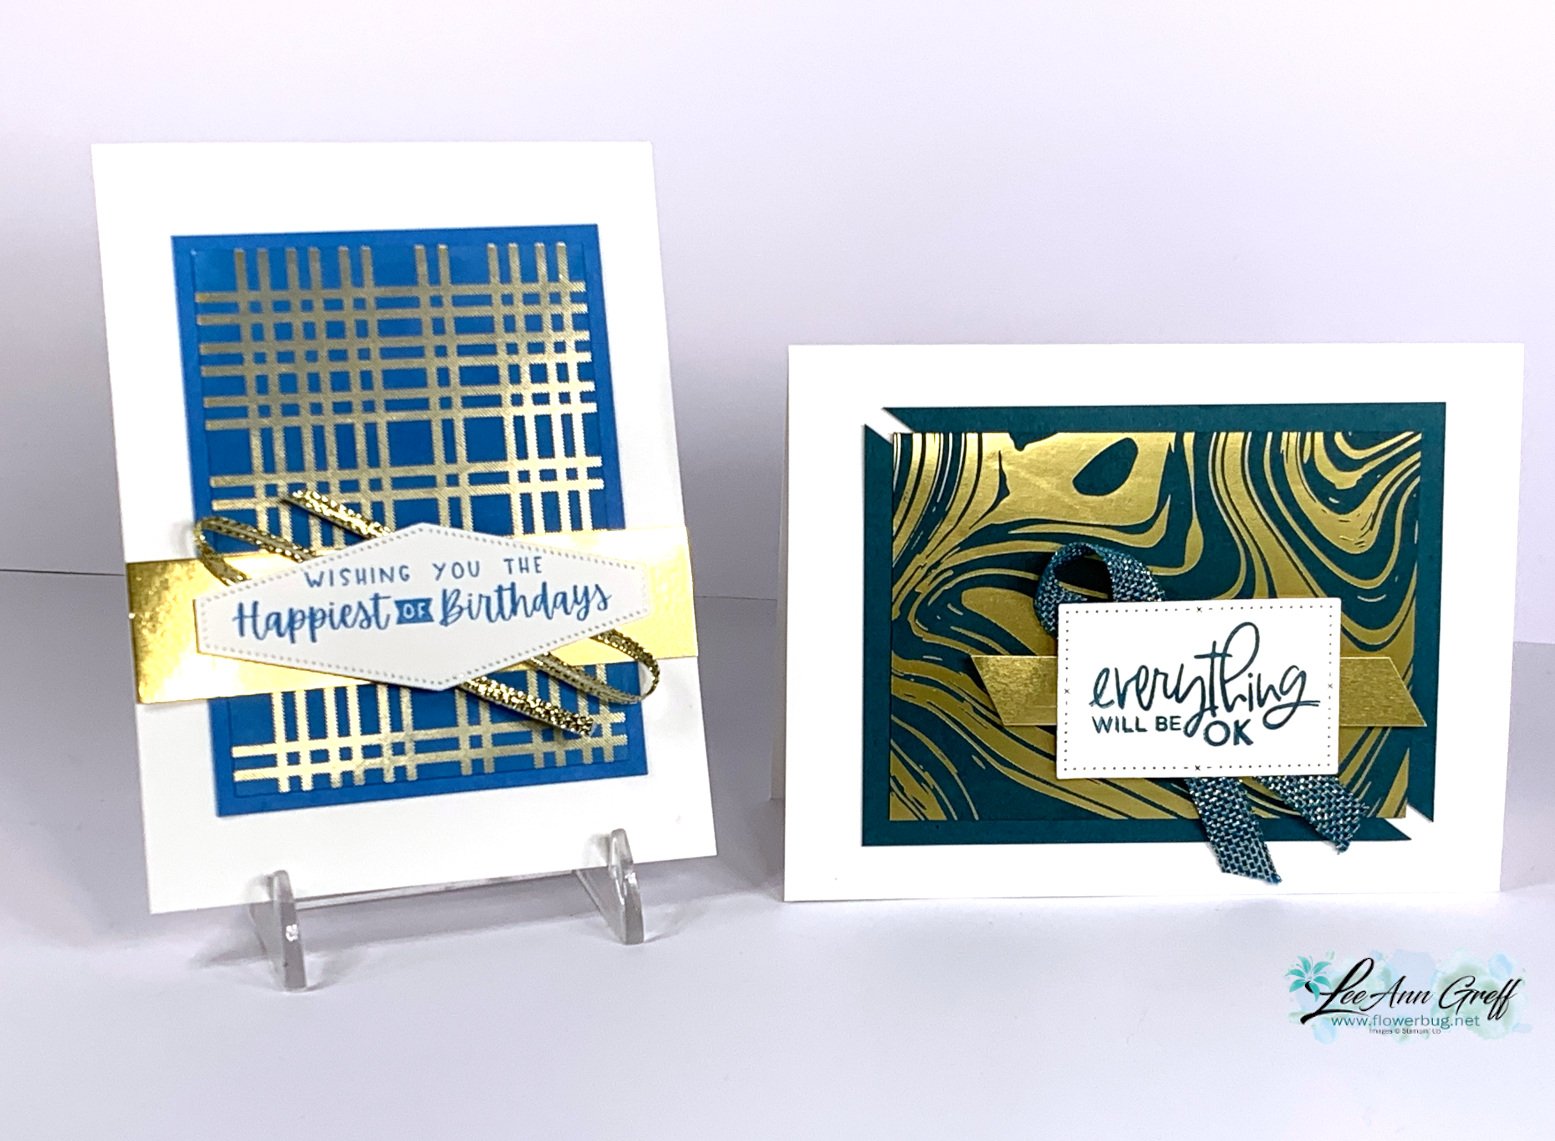
    The colors above are Azure Afternoon and Pretty Peacock. Notice the different ribbon techniques and layouts. The left card has loops of ribbon added to the greeting label; the right has a simple fold of ribbon. 

    Each card has two main pieces – the designer paper is 3" X 4" and the layered, coordinating card stock is 3 1/4" X 4 1/4". Check out the different layouts with these basic pieces.  

    The left card above is Highland Heather and the right is Sweet Sorbet.  A few more examples of ways to add ribbon and change up this simple layout.  I added two thin strips of ribbon across the left card and tied a bow around the window frame on the right. 

    Remember this pretty specialty paper is available through February during Sale-a-Bration. It's free with any $50 Stampin' Up! purchase. See it here. 

    Keeping to a basic layout like this is a wonderful way to get a bunch of cards done quickly and use up your designer paper at the same time! I chose the Charming Sentiments stamp set for all of my greetings.  

    The colors above are Copper Clay and Pebbled Path – 2 of our newest in colors.  Ribbon uses include a flag and a double bow.

    The free project sheet can be downloaded here: It's also a great reference for ways to add ribbon! Download Direct to Paper technique with 6 ways to add ribbon

    I hope you're inspired by the simply card idea, the technique and the 6 ways to add ribbon!  Watch the video below to see this technique in action!

    I'm Live on Facebook here every Tuesday at 11 am. Follow me to catch it live. 

    Or see and follow me on YouTube here! 

    ~~~

    February Specials: 

    Earn FREE products with your Stampin' Up! purchase during

    Sale-a-Bration! *click here

    *current host code link: 4BXU7SGH 

    It's the best time to get a pre-paid Sale-a-Bration subscription

    & earn free Sale-a-Bration products!  

    ~~~

    Get a free Gold Foiled cards & envelopes kit

    with online orders over $55 in February

    All online orders in February will receive this free tutorial with 8 projects!

    Leave a Reply

    Your email address will not be published. Required fields are marked *


Notice: LeeAnn Greff, Independent Stampin’ Up! Demonstrator, Manager. The content of this website is my sole responsibility as an independent Stampin’ Up! demonstrator and the use of, and content of, the classes, services, or products offered on this website is not endorsed by Stampin’ Up! Copyright 2025