/


Latest Post

Thoughtful Journey designer paper paired with In The Grove for stunning results!


I shared this beautiful card on last week's Live video. 

It features a few new products in the 1024-25 Annual Catalog;
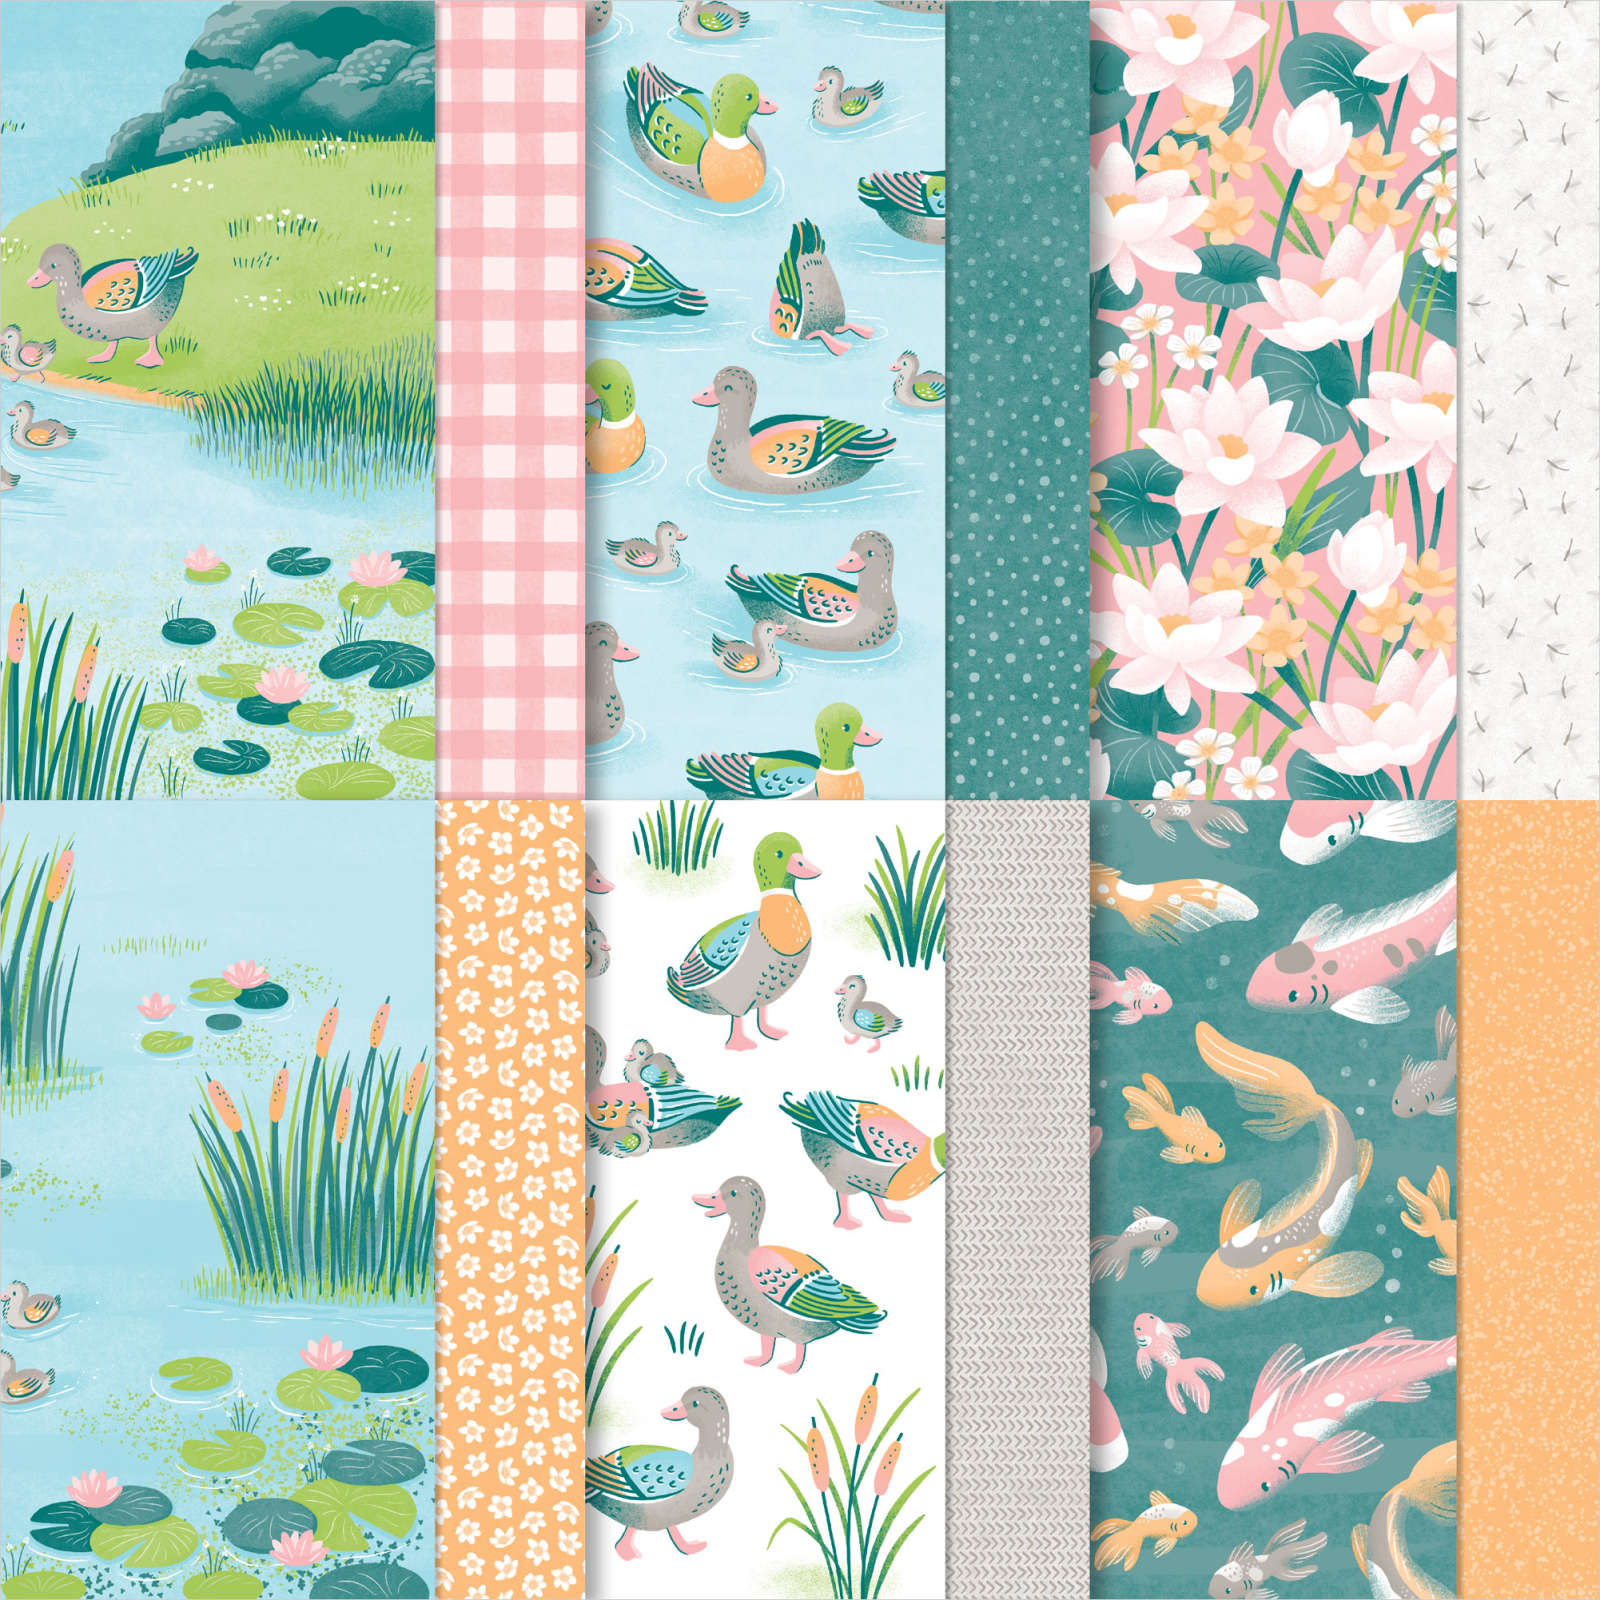
This Thoughtful Journey designer paper is incredible! Many people love the watercolor look of this type of scenic paper.

To me it seems the perfect choice for thinking of you, sympathy or get well cards.  

I made a few of these cards with the Lily Pond Lane designer paper too.  You can see both in the photo below:

Here's a free printable project sheet for you: Download In the Grove scene

My card bases are Misty Moonlight and the White birch tree die-cut is approximately 5" X 3 3/4"; as is the designer paper under it.  See the Lily Pond Lane designer paper here. 

I think these scenic cards are fabulous.  Those birch tree die-cuts sure make quick but beautiful cards! 

You can see this card being made on my video below plus another card made with the In the Grove bundle. 

~~~

May Specials: 

*current host code link:  D6QRFZ7J or FCJ937QT

Click on the pictures above or below to get to my new catalog shares – choose from designer papers or a ribbon share. 

~~~

All online orders in May will receive a free project tutorial and if your order is over $50 I'll also send you a pre-cut card kit!

All Posts

  • Origami Christmas Tree card; soooo easy!


    I make one of these trees almost every year.  Why? Because they are easy & fun and we always have new Designer Paper for me to play with. 

    All you need are four squares of DSP. No scoring or other measurements.  Watch the video here or below to see how it's done. 

    Here are the supplies:

    • Card stock – Old Olive & Mossy Meadow card bases, Real Red & Cherry Cobbler layers, White greeting strip & inside
    • Designer Paper – Heartwarming Hugs (out of stock now) and Sweet Stockings
    • Greeting image from the Christmas Cheer stamp set
    • Star topper from the Starlit punch
    • Embossing folder – Evergreen Forest (out of stock temporarily) 

    Measurements: 

    • Card base 5 ½” X 8 ½”
    • DSP – 4 square pieces at 1 ¼”, 1 ¾”, 2 ¼” & 2 ¾”
    • Textured front & White inside are 4” X 5 ¼”

    Below is the video for you. I share another special card project and some pretty star/snowflake ornaments as well.  

    ~~~

    December Specials:

    Host code:  6YCWV7QN

     *click here to order 

    Use the host code above & get a free card stock sampler ring with a $50 order in December! 

    See the last chance list here

    See the July-December catalog carry over list here

    Leave a Reply

    Your email address will not be published. Required fields are marked *

  • Easy Christmas Ornament card


    I think this is pretty clever & unique; it's a 'faux' Christmas ornament on a card. And it's quick & easy too!  

    It looks so real; like you could lift it off!  And you actually could if you use temporary adhesive; or add it to a pocket.  

    I shared this project on a FB Live last week.  It's the second project I made in this video.  

    Products used:

    • Merry Melody embossing folder on the White CS
    • The ornament is made with the largest smooth circle in our Circles dies. 
    • The DSP is called Painted Christmas and is in low inventory right now.  
    • Elegant Trim for the 'hanger'. 
    • Brushed Metallic specialty CS for the 'hanger'. 
    • Heat embossing for the greeting – from the Words of Cheer stamp set. 
    • CS is Real Red, White & Evening Evergreen 

    Here's a close-up of it. 

    I give a few hints in the video on achieving this.  Basically you want to stamp your greeting first and add it to your DSP.  THEN cut both pieces out at the same time with your circle die. 

    Below is the video for you. I share another special card project and some pretty star/snowflake ornaments as well.  

    ~~~

    December Specials:

    Host code:  6YCWV7QN

     *click here to order 

    Use the host code above & get a free card stock sampler ring with a $50 order in December! 

    See the last chance list here

    See the July-December catalog carry over list here

    Leave a Reply

    Your email address will not be published. Required fields are marked *

  • Fun way to use paper strips! Live video tonight!


    We made these cards on FB Live Monday night.  What a fun and easy way to use up your extra designer paper pieces! Click here to watch the video. 

    I used the Pattern Party designer paper for these cards. It's a host choice in the back of the annual catalog seen here.  One side is Black & White and the other is colorful prints. I love the black & white patterns with a pop of color! 

    Tips: 

    • I start out with a 2 1/4" X 4 3/4" piece of neutral CS.  This is what I adhered the strips of Designer Paper to. 
    • I added Seal adhesive over the entire piece and added the strips one by one. 
    • Apply one strip across the middle at an angle first. Then keep filling in. 
    • I trimmed the excess off the edges once I had it well covered with strips.  
    • My DSP strips measure between 1/4" and 5/8" wide and about 3" long.  It doesn't matter how wide your strips are; it looks great if they're different widths.  
    • Add dimensionals to the back of this piece for added dimension. 
    • Add a greeting and accents if desired. 

    You might wonder where this greeting is from.  It's an upcoming Sale-a-Bration stamp set called 'Hello Friend'.  It's in a bundle with a pack of Designer Paper.  It will be free with a $100 purchase during SAB in January & February.  Of course Demo's can earn it free now during our pre-order period. 

    The other new items here is a punch.  Can you spot it?  It's called the bough punch and has two options in the punch.  The large leaf and the 'buds' too.  

    Below is the video for you: 

    ~~~

    December Specials:

    Host code:  6YCWV7QN

     *click here to order 

    Use the host code above & get a free card stock sampler ring with a $50 order in December! 

    See the last chance list here

    See the July-December catalog carry over list here

    Leave a Reply

    Your email address will not be published. Required fields are marked *


Notice: LeeAnn Greff, Independent Stampin’ Up! Demonstrator, Manager. The content of this website is my sole responsibility as an independent Stampin’ Up! demonstrator and the use of, and content of, the classes, services, or products offered on this website is not endorsed by Stampin’ Up! Copyright 2025