/


Latest Post

Sweetest Time Christmas card


I thought I'd share a few Christmas cards I've received lately. 

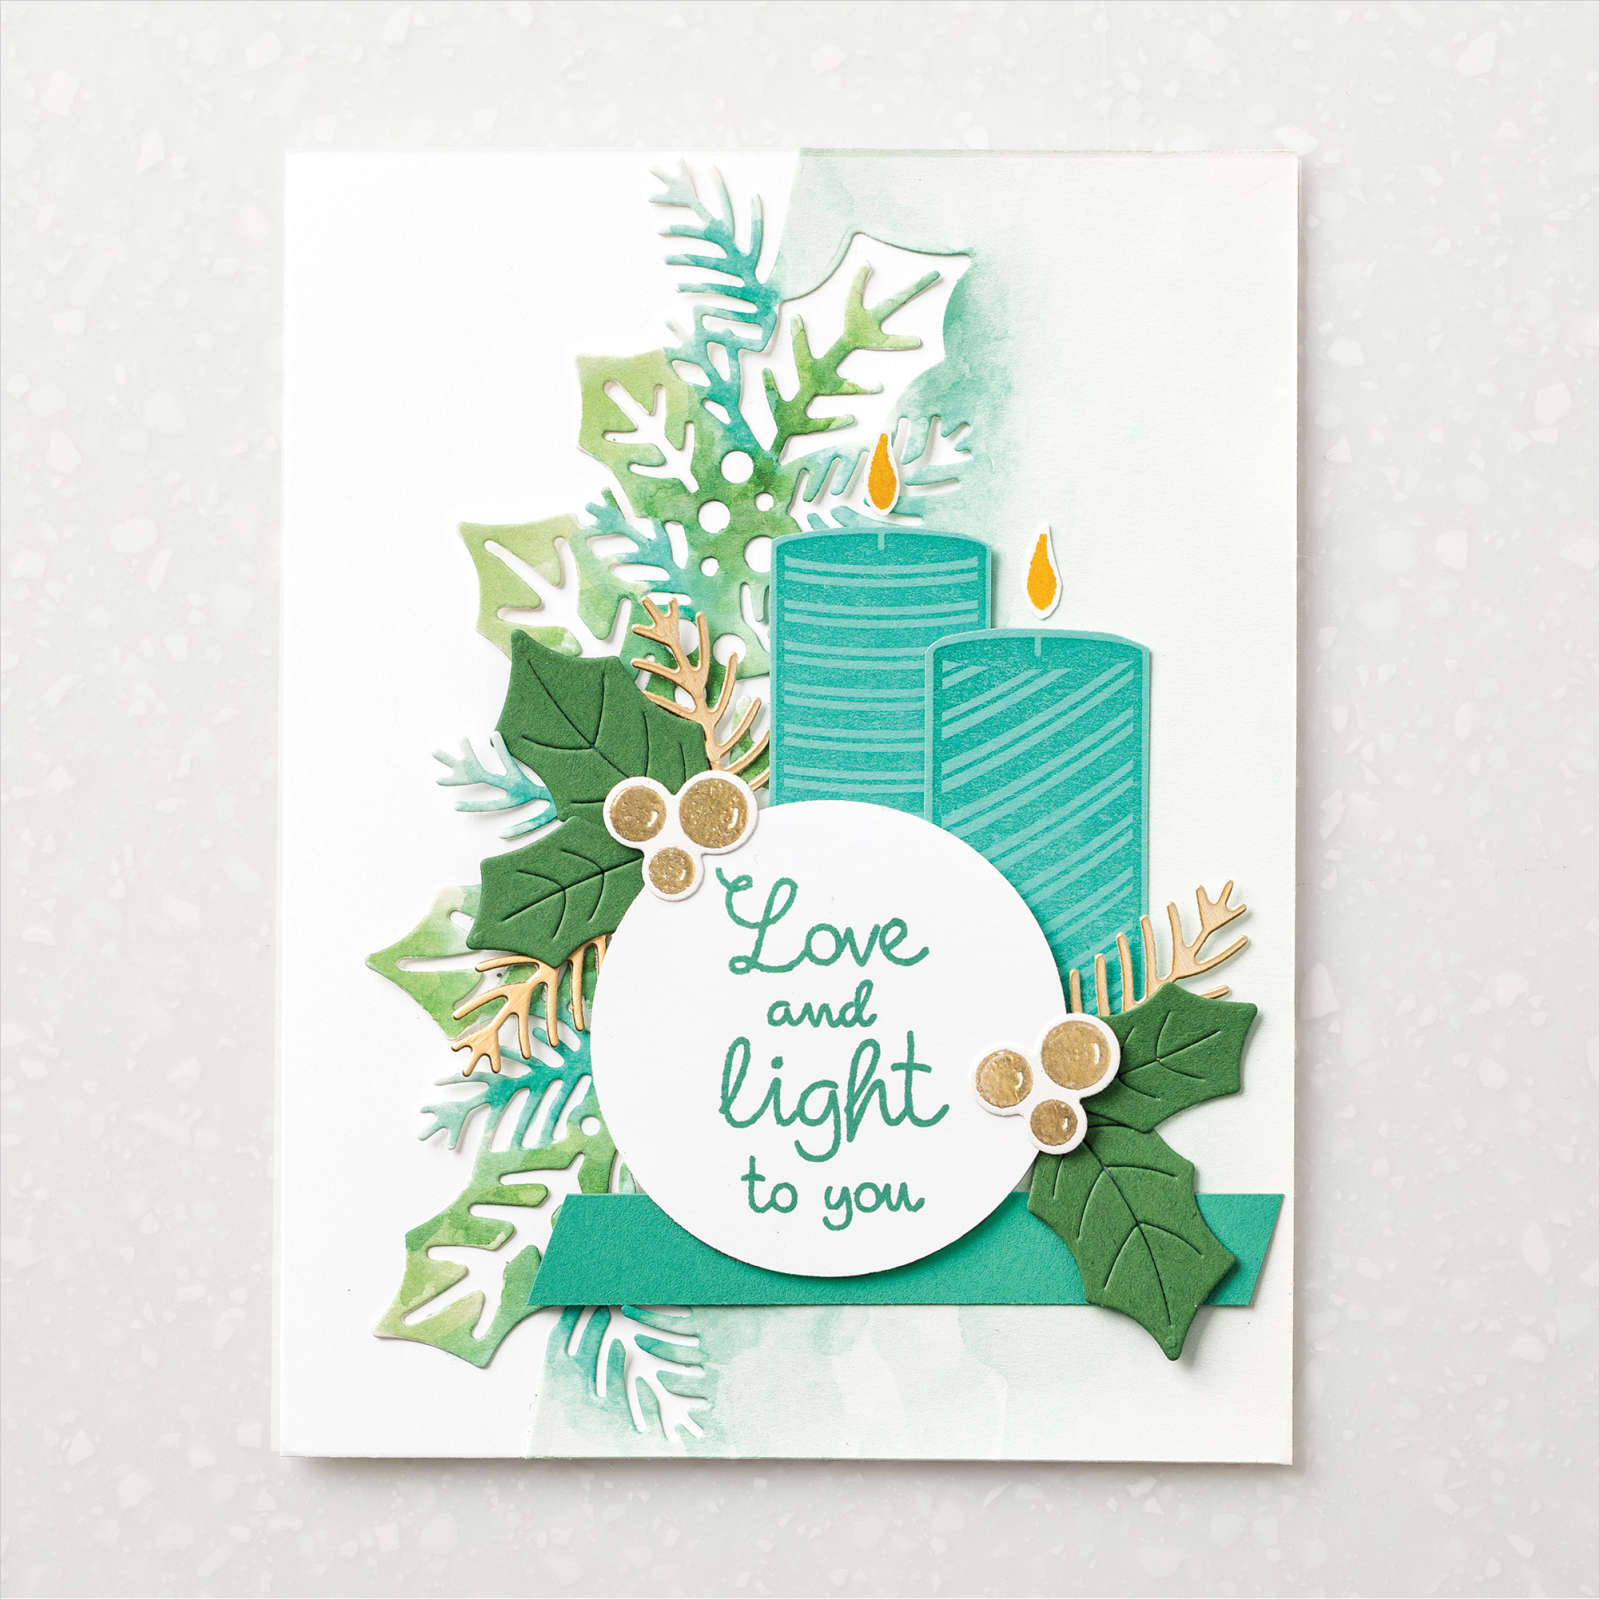
Jean sent me this pretty Christmas card using the Sweetest Time bundle seen here. 

The Sweetest Border dies are so neat!  I love how you get a solid edge but the detailed candy canes all in one.  

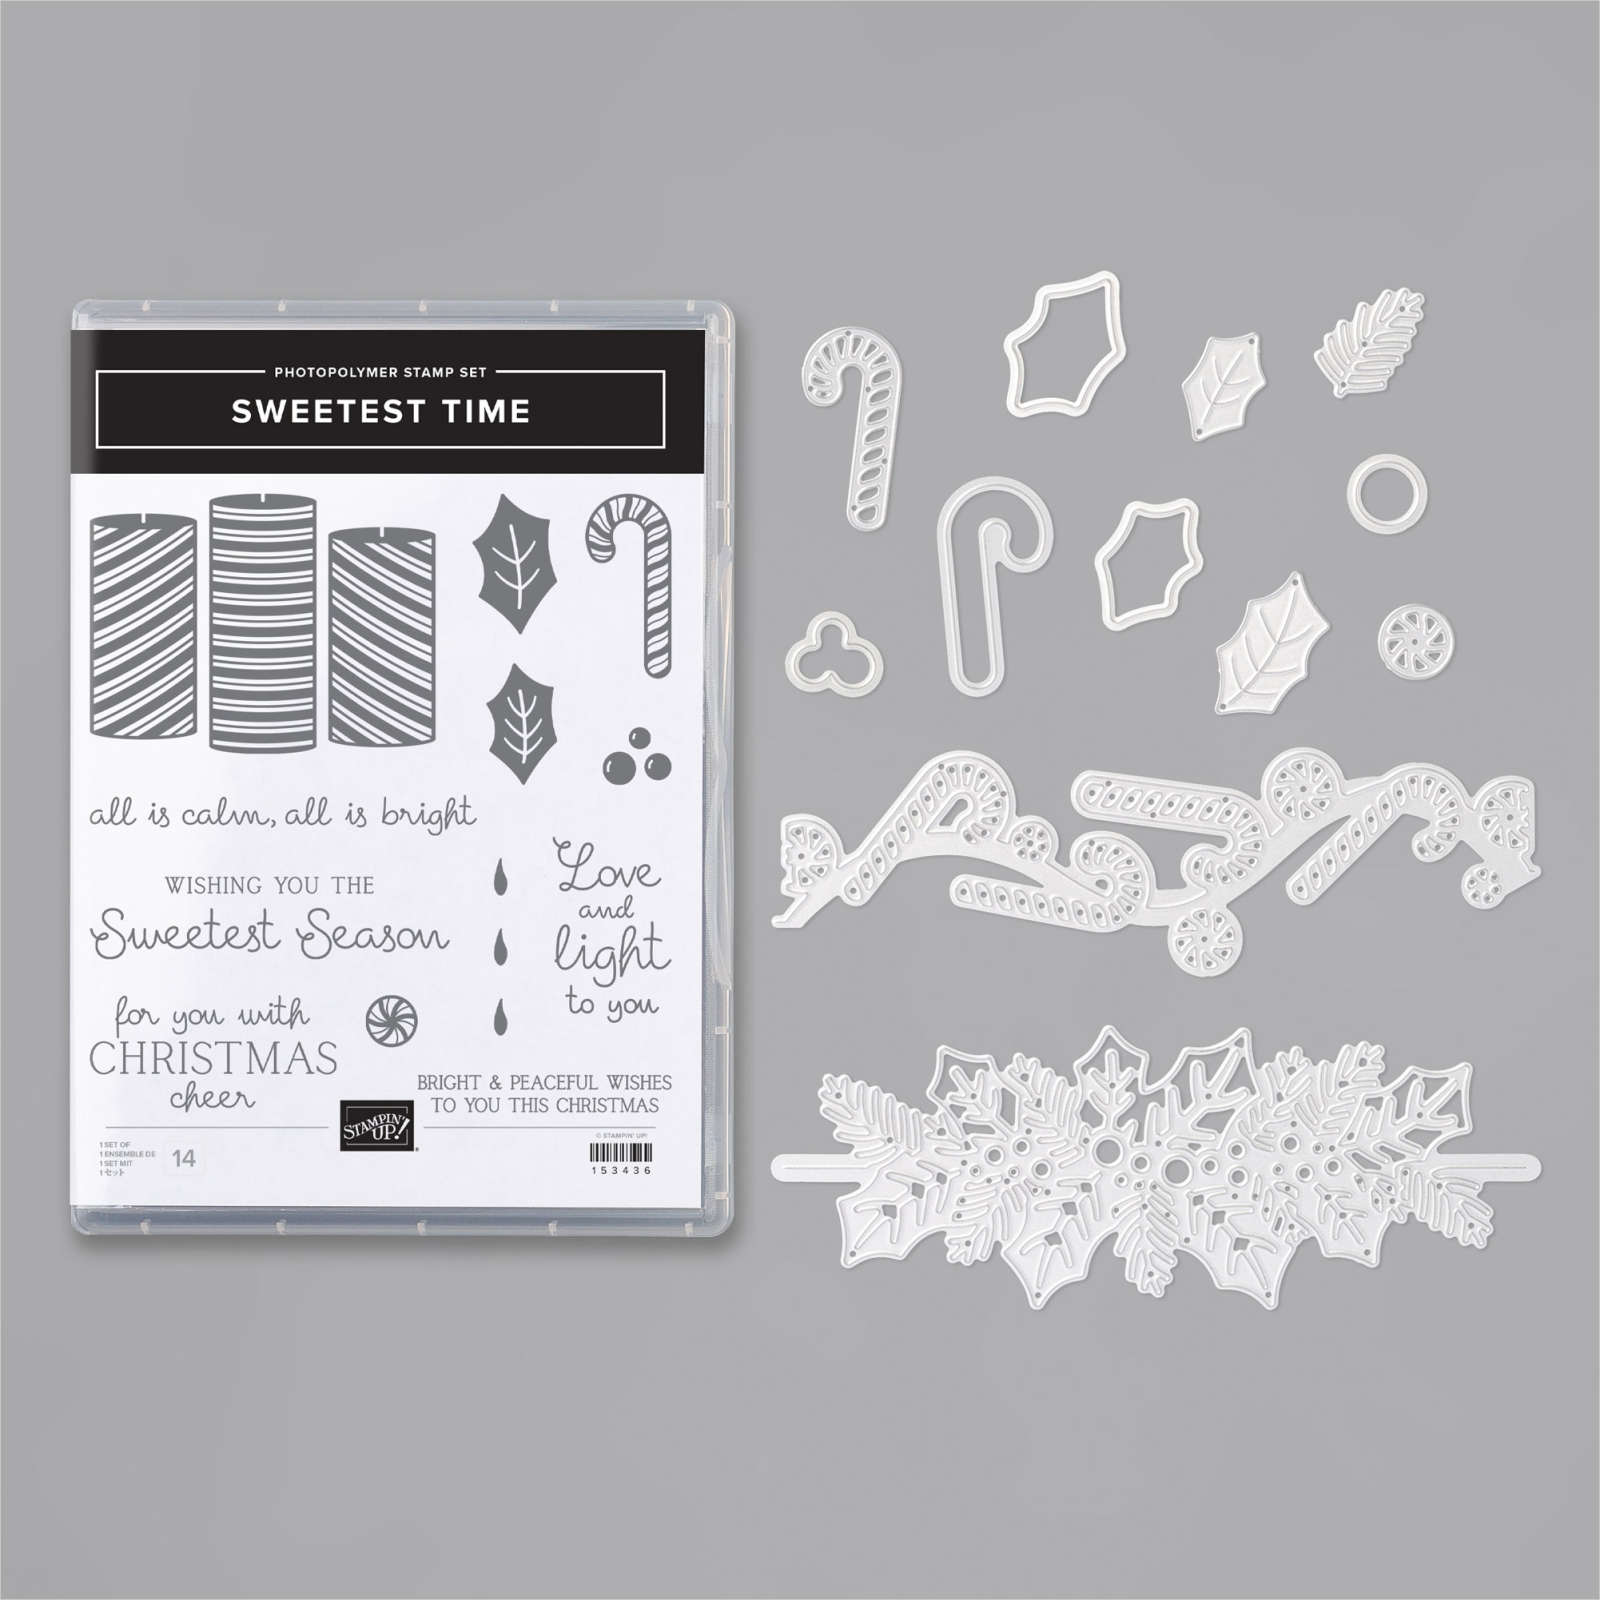
She used Real Red with Pear Pizzazz here along with the Wonderful Gems.  

Here's another card shared by Stampin' Up!

And look at these projects!  They're showcased with the new Mini Stampin' Cut & Emboss Machine!      


I just received mine and I LOVE IT!  It's adorable, small and lightweight.  It's the perfect size for both travel and to fit right on my workspace.  It's available to demonstrators this month but will be released to everyone on January 5th!  It's just $60 and you'll earn a free Sale-a-Bration choice when you purchase it in January. 

If you're in a hurry to get yours, you can add it to your Starter kit in December and join as a Demonstrator.  What a great gift to yourself!  Join the Stampin' Up! family and enjoy the fun and perks of being part of something awesome! Go here to join my Flowerbug's Team. 

~~~


December Ordering Special: 

Current Host code is AHJNPWNB

Order online here

All online orders will receive my 16 Christmas cards class PDF!

Get a free package of 220 Red Rhinestones from me with an online order over $50 using the host code above.

Below are the Multipurpose Glue stands we're making. They're $6 each and available in my Shop here.  

All Posts

  • A few favorite craft storage tips


    I thought I'd share some of my favorite ways to store my stamping products.  Some people enjoy organizing more than creating! 

    First is how I store my stamp sets.  In a dresser drawer.  I purchased a few dressers from IKEA many years ago and they've held up very well despite multiple moves.  

    Here's a photo of my craft studio.  I am very, very lucky to have such a beautiful room in our home for my business and classes. 


    Here's how I store my 8 1/2" X 11" card stock and paper scraps.  In front of each color of card stock I keep a cello bag for the scraps in that color. I've used this method for years and it really helps me use my scraps.

    Next is how I store my 12 X 12" designer paper and scrapbook pages. 

    It's a shoe storage cabinet! My 12 X 12" paper fits like it was made just for it!  You can get two stacks side by side in it since it's about 30" wide.    Plus it has a divider to fit even more paper above it.  I love the way the doors hinge open.  There are three doors and it's only about a foot deep.

    Lastly here's how I store my inks, markers and ribbon. These are Stampin' Up! storage and they're fully customizable to fit what you need.  Click here to see the options. 

    I love that it fits right on my work area for easy reach. As you can see I organize my inks in rainbow order. I'm not sure why my Blends aren't but I know my granddaughter will love to do that for me this week while she's here.  

    ~~~

    December Specials:

    *current host code link:  

    P243X6VH

    3 new designer papers!

    ~~~

    Available December 3rd; while supplies last!

    ~~~

    ~~~

    Leave a Reply

    Your email address will not be published. Required fields are marked *

  • Merry Christmas!


    I hope you enjoy a beautiful Holiday with family & friends.  

    Leave a Reply

    Your email address will not be published. Required fields are marked *

  • Diagonal Fun Fold with new products! Free project sheet & video too.


    Today I'm sharing a neat fun fold I hadn't made for awhile.  It's a diagonal fold that is fun and easy. 


    I used a few new, upcoming products from both the 2025 Spring and the 2025 Sale-a-Bration catalogs.  The greeting & punch are made with the Bright Borders set and coordinating To the Point punch.  The designer paper is the Toadstool Gardens 6" DSP from the SAB catalog.  It's free with any $60 purchase from January 7th – February 28th, 2025.  

    I made over 20 of them for a mail out swap I joined.  The colors include Melon Mambo & Granny Apple Green. 


    I share how to make it in the video here and seen below.  Basically it involves trimming off half of one side of the card base, flipping it and adhering it back to the card front.  The only confusing this can be adding your designer paper.  I suggest using a non-directional paper when trying this out. 

    Here's the free project sheet you can print or download. Click on the following link: Download Bright Borders Diagonal fun fold


    Below is the video if you'd like to see how to assemble this card. I also share a pretty Sophisticated Sled project too.

    ~~~

    December Specials:

    *current host code link:  

    P243X6VH

    3 new designer papers!

    ~~~

    Available December 3rd; while supplies last!

    ~~~

    ~~~

    Leave a Reply

    Your email address will not be published. Required fields are marked *


Notice: LeeAnn Greff, Independent Stampin’ Up! Demonstrator, Manager. The content of this website is my sole responsibility as an independent Stampin’ Up! demonstrator and the use of, and content of, the classes, services, or products offered on this website is not endorsed by Stampin’ Up! Copyright 2025