/


Latest Post

Stunning cards in the Full of Charm card kit to go; reserve yours now!


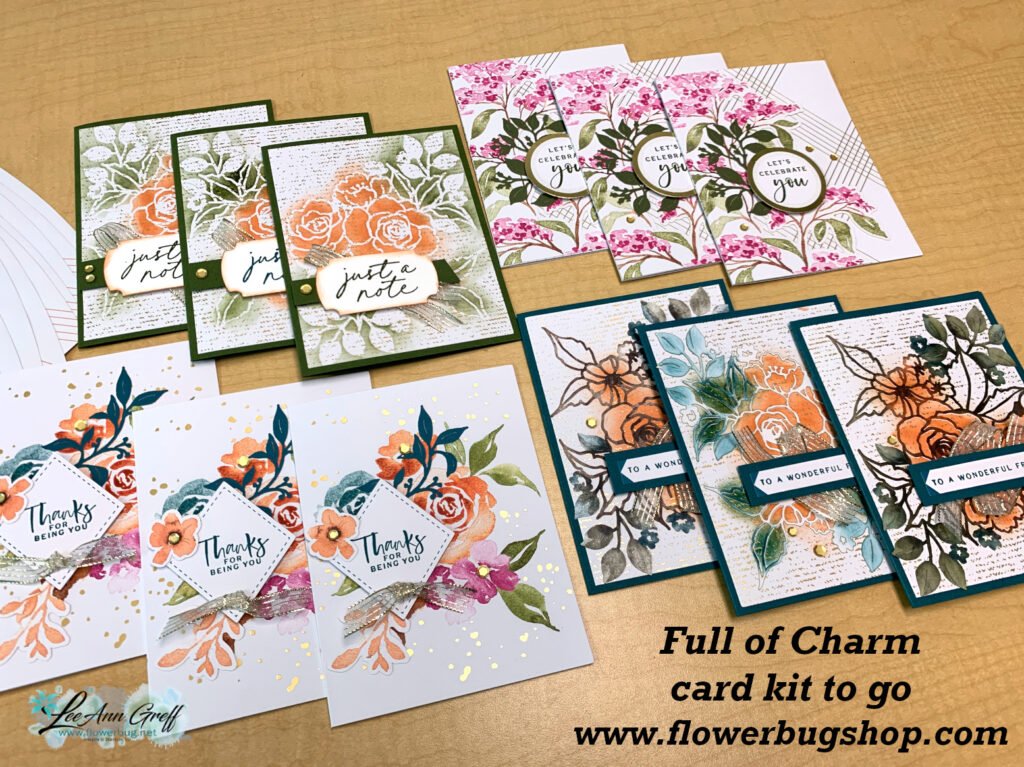
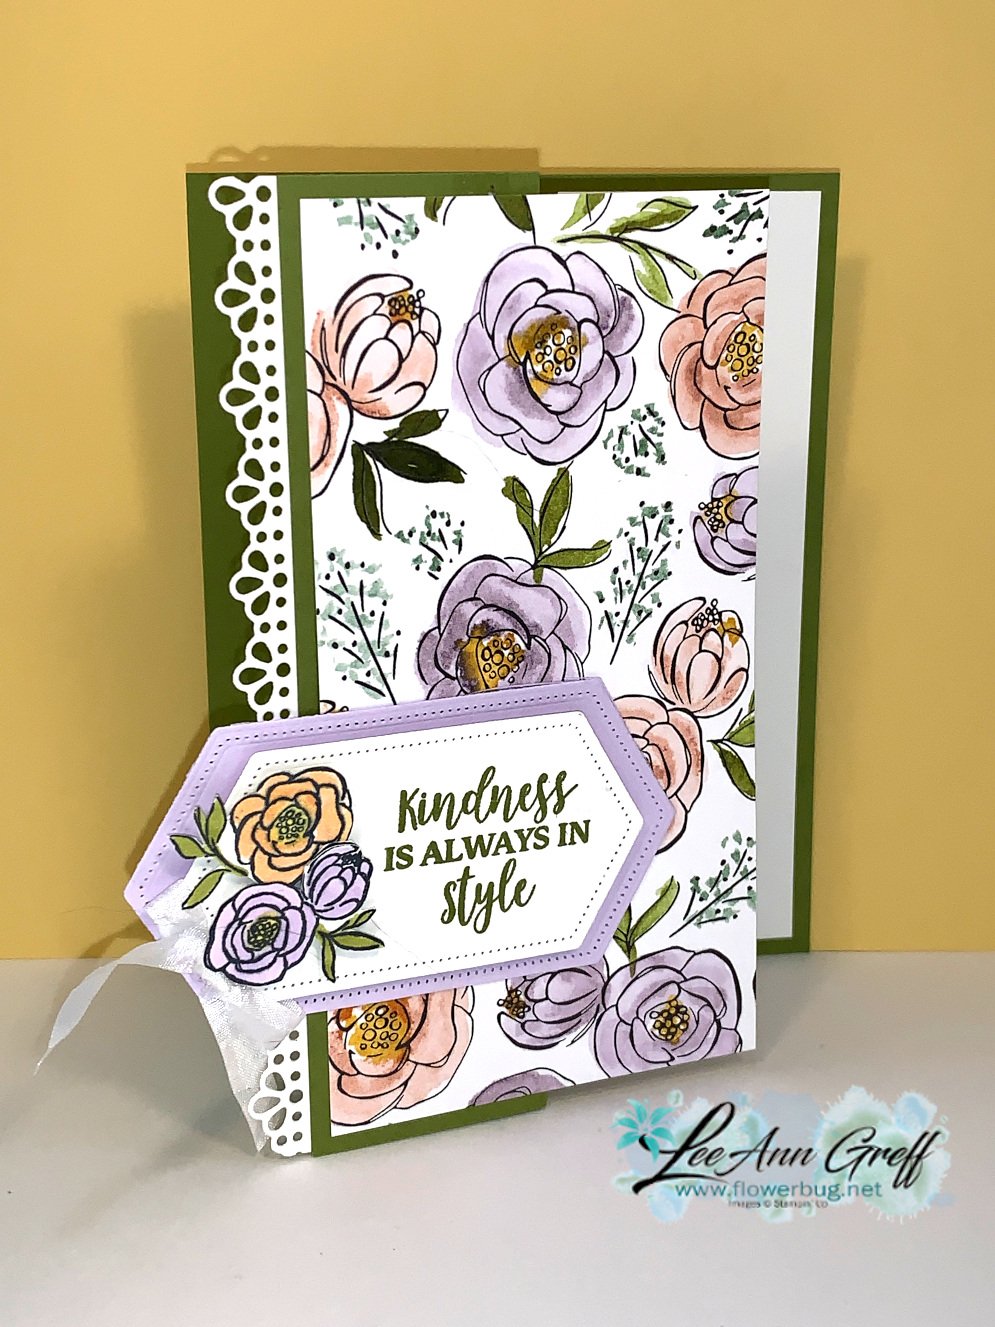
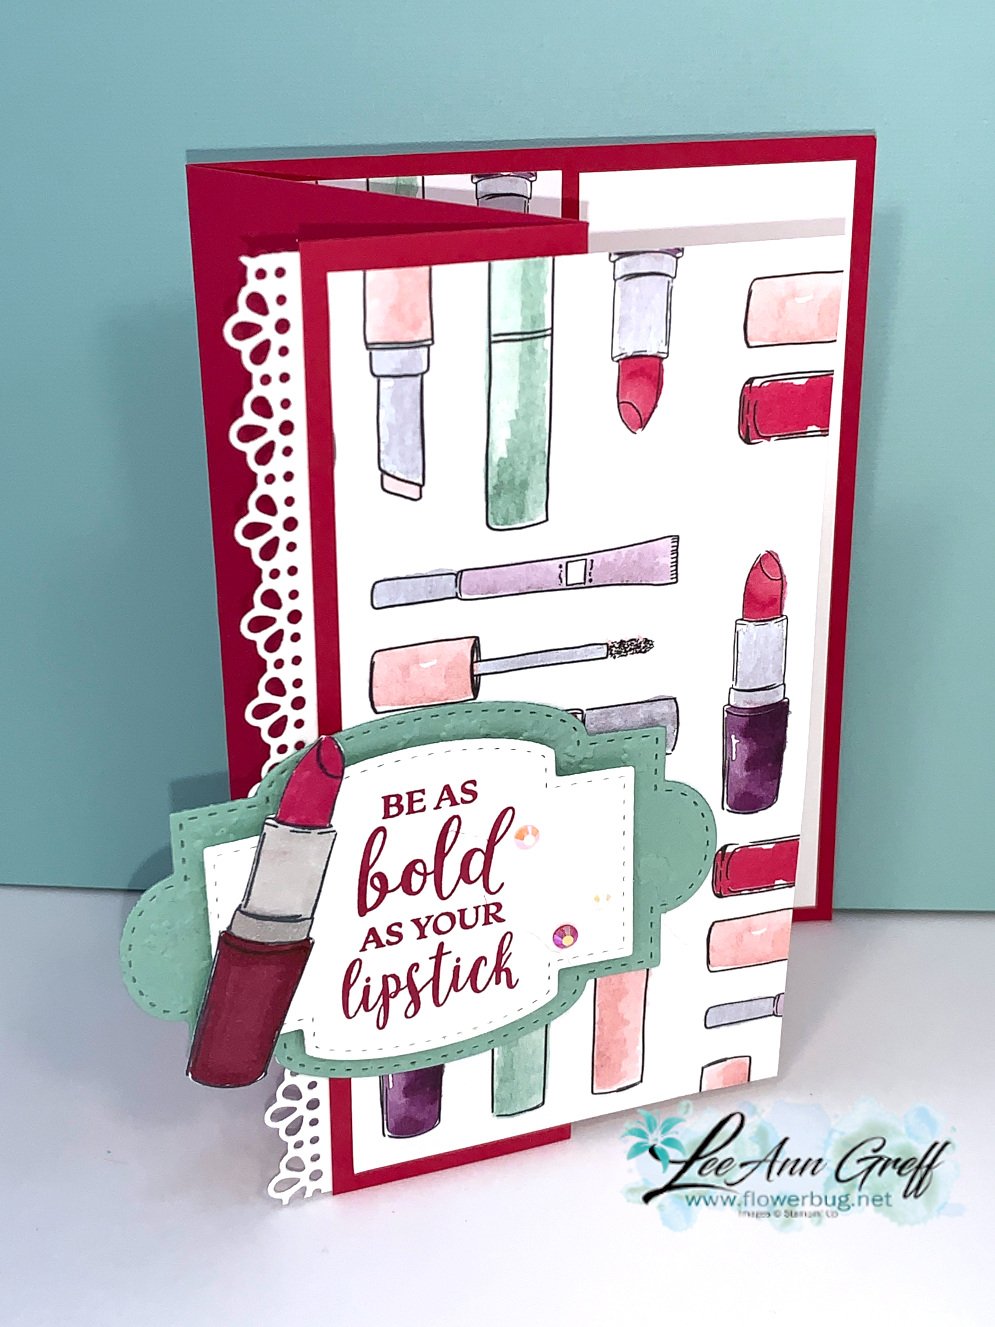
I created these gorgeous, colorful cards from the Full of Charm Paper Pumpkin refill kit.

The card kit includes the refill kit, gems, assorted pre-cut pieces, 12 envelopes and a spool of iridescent ribbon. I used the printed floral stencils in the kit along with blending brushes to create some of the pretty backgrounds.

You will need the following to complete the cards: greeting stamps, Mossy Meadow & Peach Pie ink, blending brushes or sponges, Paper Trimmer, scissors and adhesives.

I have a limited number of kits available; reserve yours here. It’s $30 and includes the PDF tutorial which is sent via email immediately after purchase. The kit is mailed at the end of the month (February).

Check out all of my kits to go here. I have lots of kits available to choose from. Get more than one to save on shipping costs!

~~~

February Specials

Free shipping February 18-20th for orders over $75. Shop here!

Product of the Month is the new Painted Illusions 12 X 12″ designer paper

Get the NEW Stampin’ Positioner FREE when you choose the Starter Kit in February! Click here

Bonus Days – Redeem your coupons in February!

February’s PDF of the Month!

Two NEW kits just released here:

Check out the Last Chance List; new items are added and available

while supplies last

All Posts

  • Mountain Air; a gorgeous scene


    You might know that I love creating scenic cards.  Even though my nickname is 'Flowerbug' that's because I am a gardener; not because I love flowers.  I do!  But when making cards I actually lean towards botanicals or scenes with trees and water.  This card is a perfect example of my 'style' using the Mountain Air bundle seen here.  

    I created it on my Facebook Live two weeks ago.  It's super easy to make!  Here's a link to it on FB.  

    The colors here are Seaside Spray, Night of Navy and Whisper White.  I did use one of the dies from the Mountain Air bundle; that pretty detailed tree.  I also sponged the mountains and trees a bit then stamped the trees again upside down in White Craft ink for 'water'.  The greeting is from the Well Said stamp set.

    I love this set so much I am featuring it in March. Anyone who purchases the Mountain Air stamp set or bundle from me (past or in March) qualifies to receive the 10 cards project tutorial.  And all online orders (of any amount) will also receive it!  

    Here's the video: 

    ~~~

    March Specials just for you besides Sale-a-Braton

    and the Product Coordination Release seen here

        1. Earn a ticket in the drawing for each $25 you order online in March for a free Little Ladybug stamp set!

    Order online here

    2. All online orders will receive a free Mountain View pdf cards tutorial in an email.

    3. And if your order is over $55 you'll get a Sale-a-Bration paper sampler and metallic cards & envelopes!  A great start to beautiful card making. 

    March host code is TRYUEHDZ

    Order online here

    4. THE Best deal! Choose any FREE stamp set when you purchase the Starter kit during Sale-a-Bration; of any value! Plus you'll get a free paper trimmer and a 6 X 6 sampler of new Designer Paper!  It's just $99 plus tax and you can choose $125 in products with free shipping!  Click here to join my awesome Flowerbug's Team! 


    Leave a Reply

    Your email address will not be published. Required fields are marked *

  • Inlaid technique video with Mountain View!


    This gorgeous card was one of our January Card Club projects.  Of course I love the colors of Coastal Cabana, Granny Apple Green and Pretty Peacock. 

    I cased the idea from Cheryl Miller at Sense of Whimsy. 

    Here's how to make this pretty card. 

    1. First die-cut two trees from the main White panel one on the upper left and one on the lower right.
    2. I sponged one of these die-cut white trees with Coastal Cabana and Granny Apple ink for the center tree. 
    3. Then die-cut two more trees from the Lily Impressions designer paper (free with a $50 order during Sale-a-Bration).  
    4. Adhere the White panel to the Coastal Cabana panel and then to the main Green card base. 
    5. Insert the two die-cut trees into the left and right die-cut areas for an inlaid effect.  (I recommend Fine Tip glue or Multipurpose adhesive)
    6. There's a trick to getting this unique greeting shape with the Tailored Tag punch.  I share it on the video below. 
    7. I used the Sending you Thoughts stamp set and heat embossed the greeting. 

    Watch the video below for many more tips on creating this fabulous card. 


    The Mountain Air bundle is my special for March.  Everyone who purchases it from me will receive a free 10 cards tutorial!  Past and present orders count!  You can see it here. 

    Coordination Product Release – While supplies last!

    ~~~

    Four February Specials just for you besides Sale-a-Braton

    and the Product Coordination Release! 

        1. Earn a ticket in the drawing for each $25 you order online in February for a free Little Ladybug stamp set!

    Order online here

    2. All online orders will receive a free pdf cards tutorial in an email.

    3. And if your order is over $55 you'll get a free package of Champagne Rhinestones too!

    February Host Code is 4CQKPWRV

    Order online here

    4. Choose any FREE stamp set when you purchase the Starter kit during Sale-a-Bration; of any value! Plus you'll get a free paper trimmer and a 6 X 6 sampler of new Designer Paper!  It's just $99 plus tax for $125 in product of your choice plus shipping is free!  Click here to join my awesome Flowerbug's Team! 


    Leave a Reply

    Your email address will not be published. Required fields are marked *

  • Over the Moon Fun-Fold card


    My friend Marilyn made this card for a swap with her Card Club this month.  Many of my Club gals swap cards every other month.  They are loving this and actually 'using' their products!  

    It's made with the 'Over the Moon' stamp set seen here.  

    Isn't it cute?  It's a fun fold card where the front panel swings open on the bottom.

    The black spots look like patterned paper but they're stamped using the 'Love What You Do' stamp set seen here.  Aren't they perfect?!!!

    Measurements:

    • Black back – 4 1/4" X 5 1/2", bottom front 2 3/4" X 4 3/4" scored at 4 1/4", front panel 3" X 4 1/4" stitched rectangle
    • Real Red 2 5/8" X 4" stitched rectangle
    • White front 2 1/4" X 3 1/2" stitched rectangle, lower front spotted, stamped panel 2 1/2" X 4" 

    ~~~

    Four February Specials just for you besides Sale-a-Braton

    and the Product Coordination Release! 

        1. Earn a ticket in the drawing for each $25 you order online in February for a free Little Ladybug stamp set!

    Order online here

    2. All online orders will receive a free pdf cards tutorial in an email.

    3. And if your order is over $55 you'll get a free package of Champagne Rhinestones too!

    February Host Code is 4CQKPWRV

    Order online here

    4. Choose any FREE stamp set when you purchase the Starter kit during Sale-a-Bration; of any value! Plus you'll get a free paper trimmer and a 6 X 6 sampler of new Designer Paper!  It's just $99 plus tax; shipping is free!  Click here to join my awesome Flowerbug's Team! 


    Leave a Reply

    Your email address will not be published. Required fields are marked *


Notice: LeeAnn Greff, Independent Stampin’ Up! Demonstrator, Manager. The content of this website is my sole responsibility as an independent Stampin’ Up! demonstrator and the use of, and content of, the classes, services, or products offered on this website is not endorsed by Stampin’ Up! Copyright 2025