/


Latest Post

Still more incredible Fun Fold Team swap cards!


We had sooo many fabulous fancy fold cards at our February Team swap!  I've been sharing a few each day this past week. Please look back to see them all; I'm sharing measurements for each one!

Jacki made this stunning Pinwheel Tower card featuring the Nature's Sweetness Suite: 

Her colors include White, Pebbled Path and bit of Gold foil & Vellum. She also added gold pearls and Gold Elegant Trim. The texture is made with the Exposed Brick embossing folder.  The greeting is from the Charming Sentiments bundle.

See the Nature's Sweetness suite here; it's huge & filled with beautiful stamps, textures & die-cuts. 
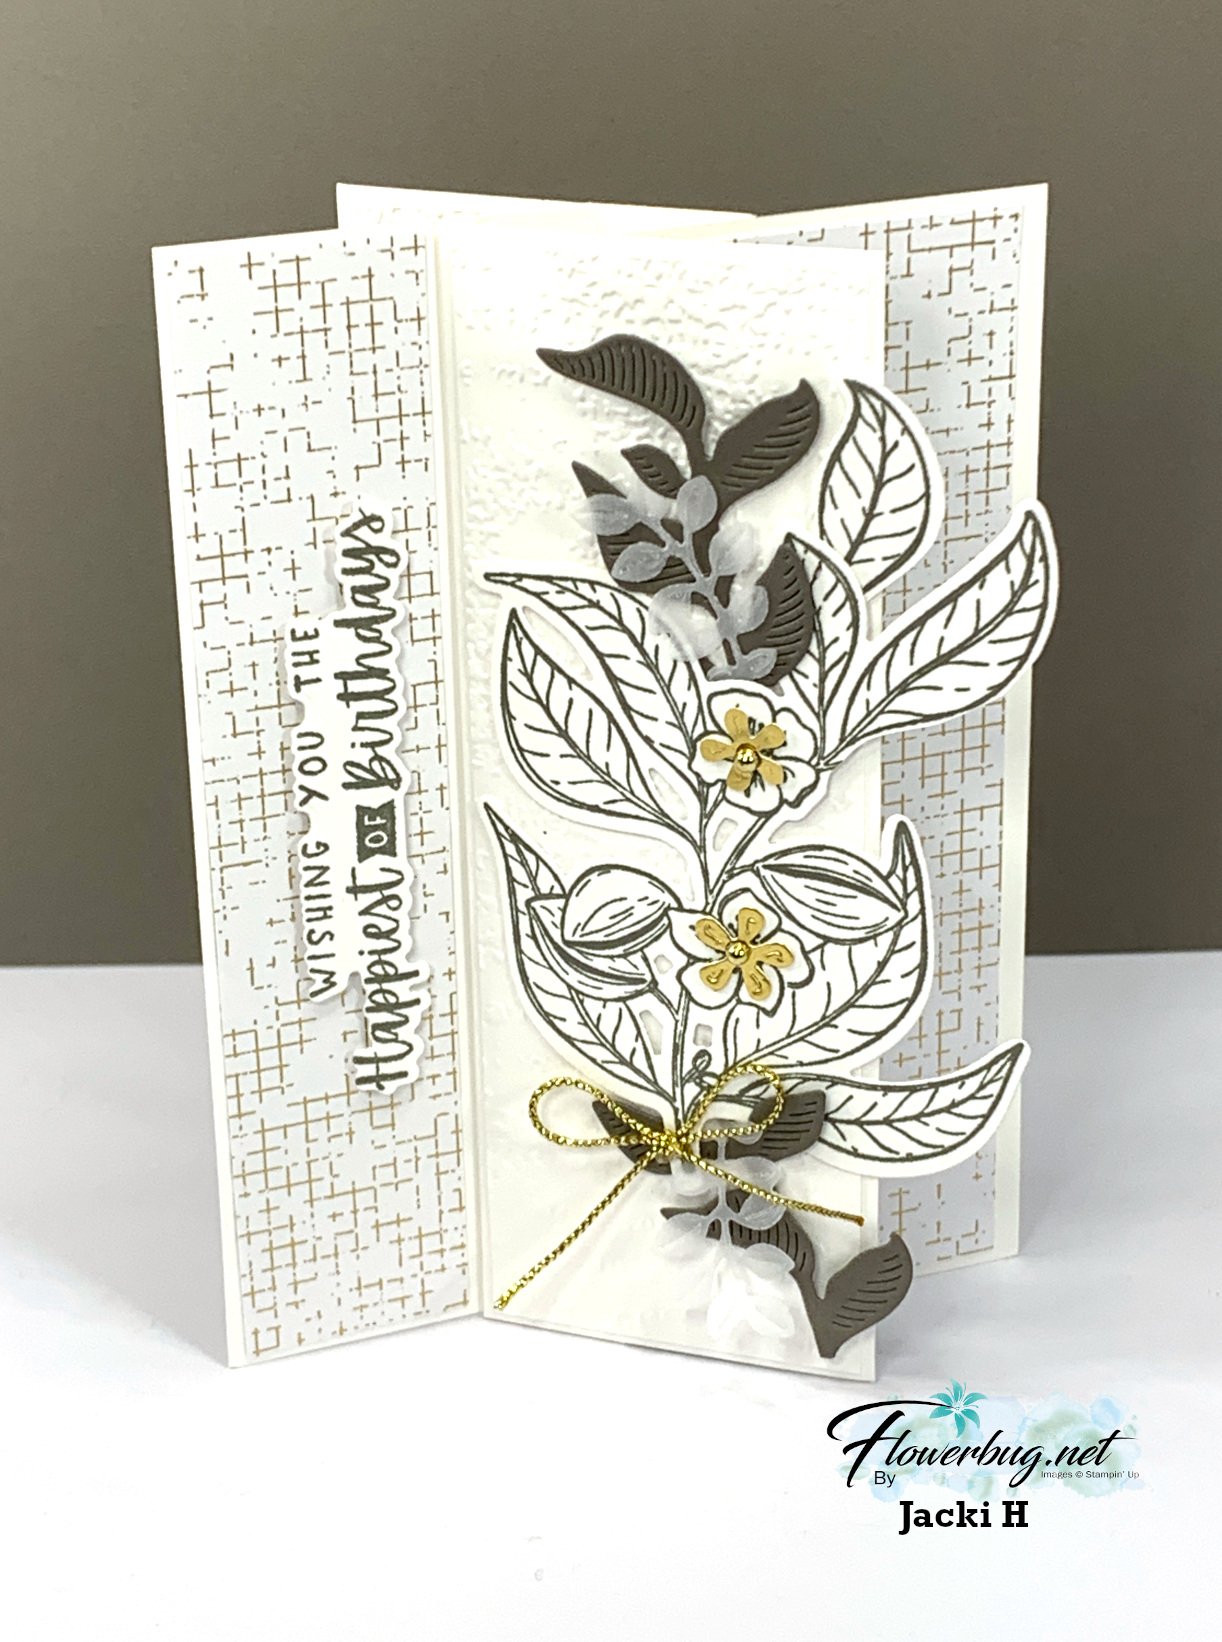
The picture doesn't do it justice; it's simply stunning! If you haven't made one and want to know how check out this video I shared a while back. 

Measurements:

  • Center box is 3 1/4" X 4 1/4"; scored at 1/4", 1", 1 3/4", 2 1/2" 
  • 4 pieces at 2" tall X 4 1/4" 
  • Designer paper layers are 1 1/8" & 1 7/8" – 2 each of 2 patterns

Next is another incredible card made by Jonna who chose the Gone Fishing bundle seen here.  
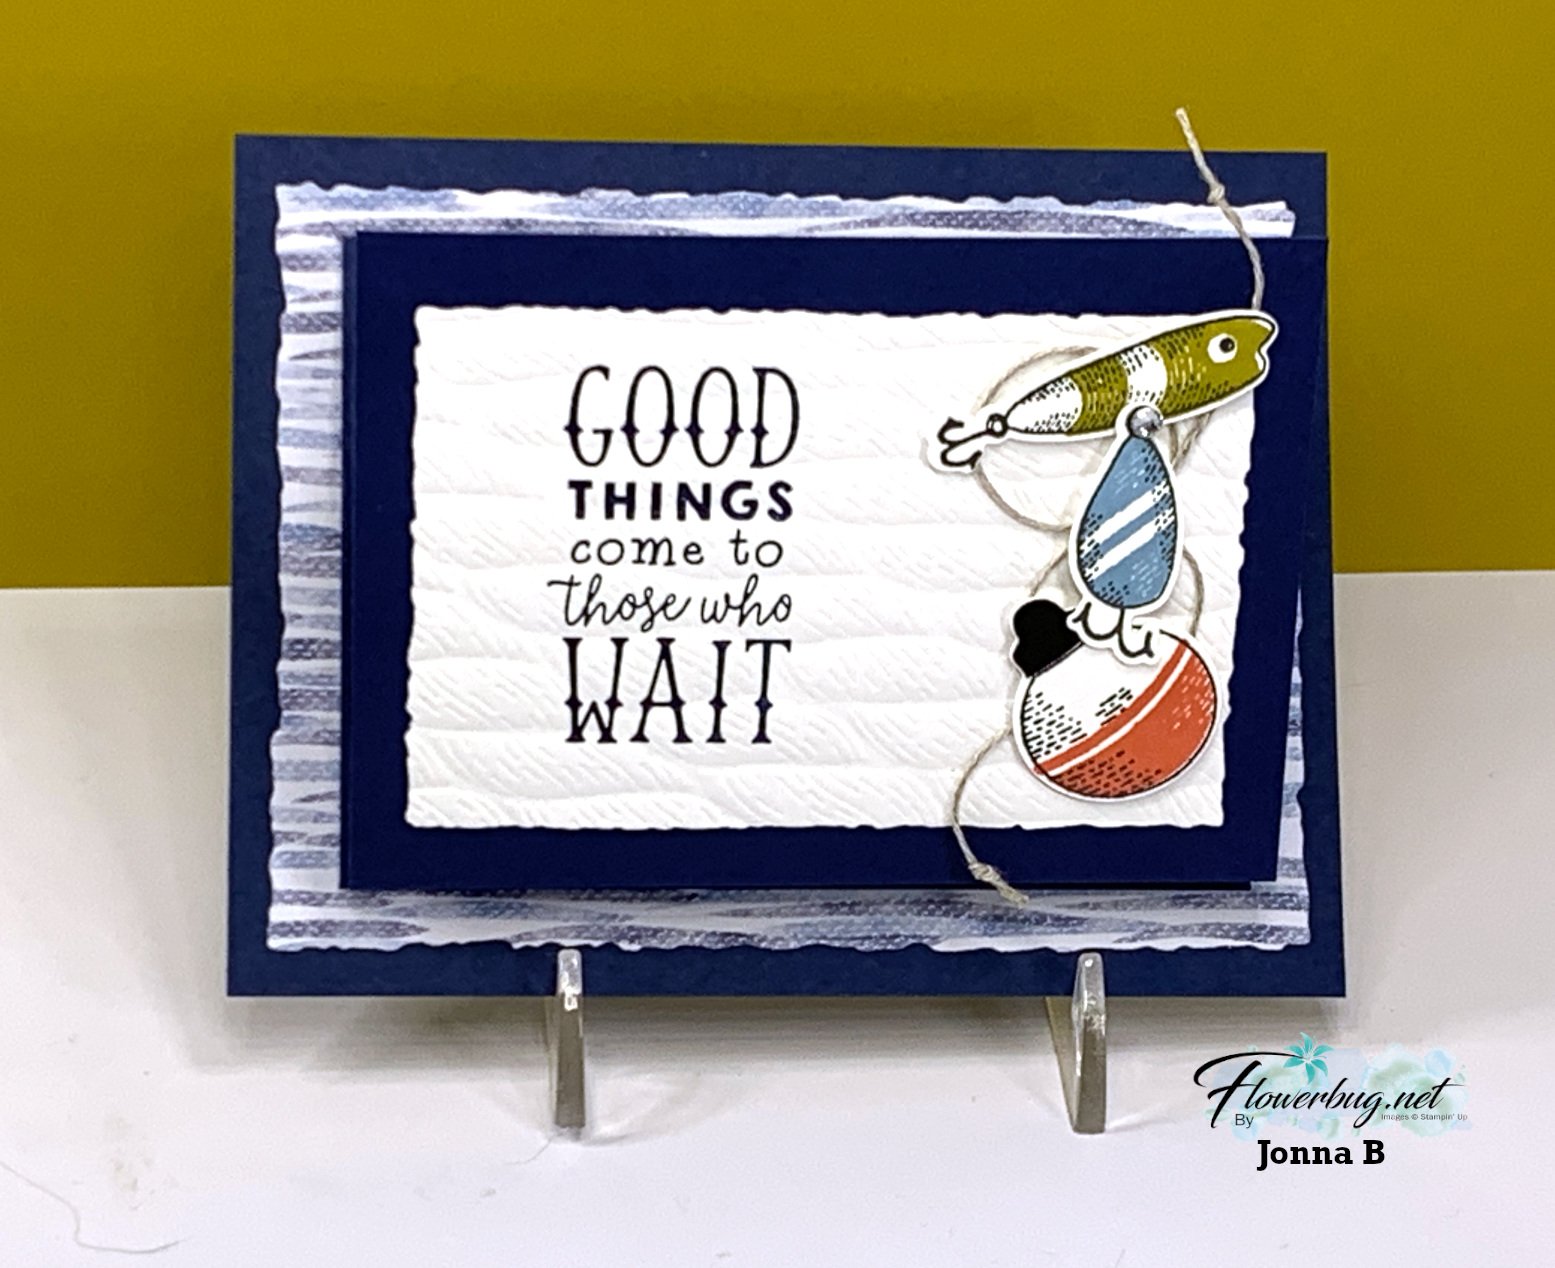
She paired it with the Let's Go Fishing designer paper & Twisted Rope 3D embossing folder. This is an entire suite in the Annual catalog and could retired in April. See it all here. 

When you open up her card it's a gift card.  What a great men's card idea!  

Measurements:

  • Navy card base 5 1/2" X 4 1/4", folded layer is 4 1/2" X 9 3/4" scored at 3 1/4" & 6 1/2"
  • Designer paper – striped on front is cut with the Deckled Rectangles – finished size is 5 1/8" X 3 3/4", inside gift card is 4 1/4" X 2 1/4"
  • White front – Deckled Rectangle die-cut is 3 7/8" X 2 5/8" finished, center white is 4 1/4" X 3" 

~~~

Oh; this one is so beautiful!  Tracey made this one with the One Horse Open Sleigh designer paper. 

This fold is my absolute favorite way to show off our scenic papers!  the card base has one extra score line and you cut your paper into pieces from left to right so when the card opens it's a full scene! 

I LOVE her heat embossed greeting; it's fussy cut into multiple pieces and added with mini dimensionals; what a fabulous effect!  The texture on the front left panel is the Exposed Brick 3D emboss folder seen here. 

Measurements: 

  • Misty Moonlight card base 8 1/2" X 5 1/2" score at 1 1/2" & 4 1/4", second textured layer is 1" X 5 1/4"
  • Designer paper is 6" X 5 1/4" tall. Cut from left to right at 2 3/4" & 4"
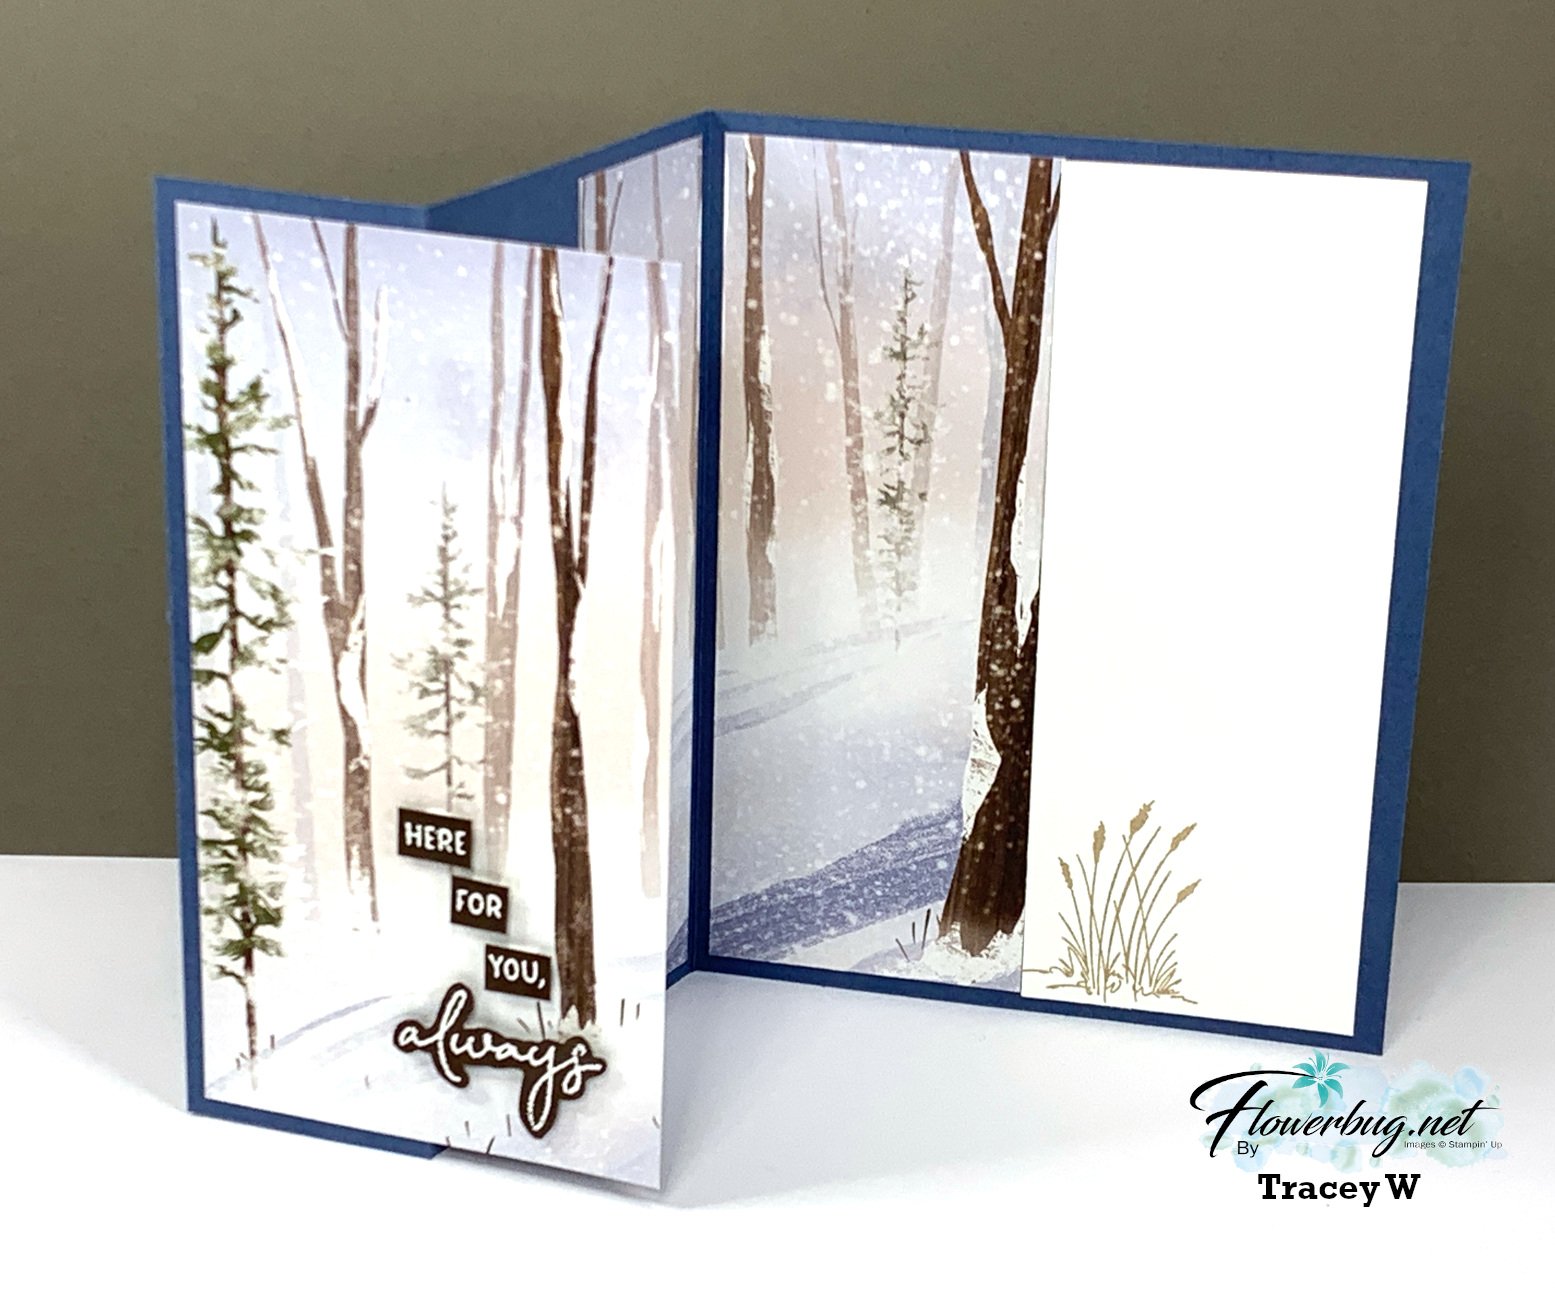
This pretty paper was available online but is sadly gone now.  *Our Online Exclusives are available while supplies last.

I shared how to make this card on a video a few months back. See it here. 

*Stop back in for more fancy fold swaps tomorrow! 

~~~

February Specials: 

Earn FREE products with your Stampin' Up! purchase during

Sale-a-Bration! *click here

*current host code link: 6SUH2MUQ

It's the best time to get a pre-paid Sale-a-Bration subscription

& earn free Sale-a-Bration products!  

~~~

Get a free Gold Foiled cards & envelopes kit

with online orders over $55 in February

All online orders in February will receive this free Nature's Sweetness tutorial with 8 projects!

All Posts

  • 24 hour sale extended through today!!! And a Fun Fold Poinsettia Card


    There were a few technical glitches during the big sale yesterday so Stampin' Up! decided to extend the sale another 24 hours!!  Yay!!  Go here to order and take advantage of this rare sale when things like card stock, Blends markers, ink pads & punches are all on sale!  


    Here is the list of excluded items for the sale.  download the 2020 Holiday Extravaganza sale excluded list

    **All orders using the host code below that are over $55 will receive 3 things FREE from me:

    1. A free Winter Snow embossing folder
    2. 10 free cards from me!
    3. My 22 project Curvy Celebrations PDF tutorial.

    ~~~

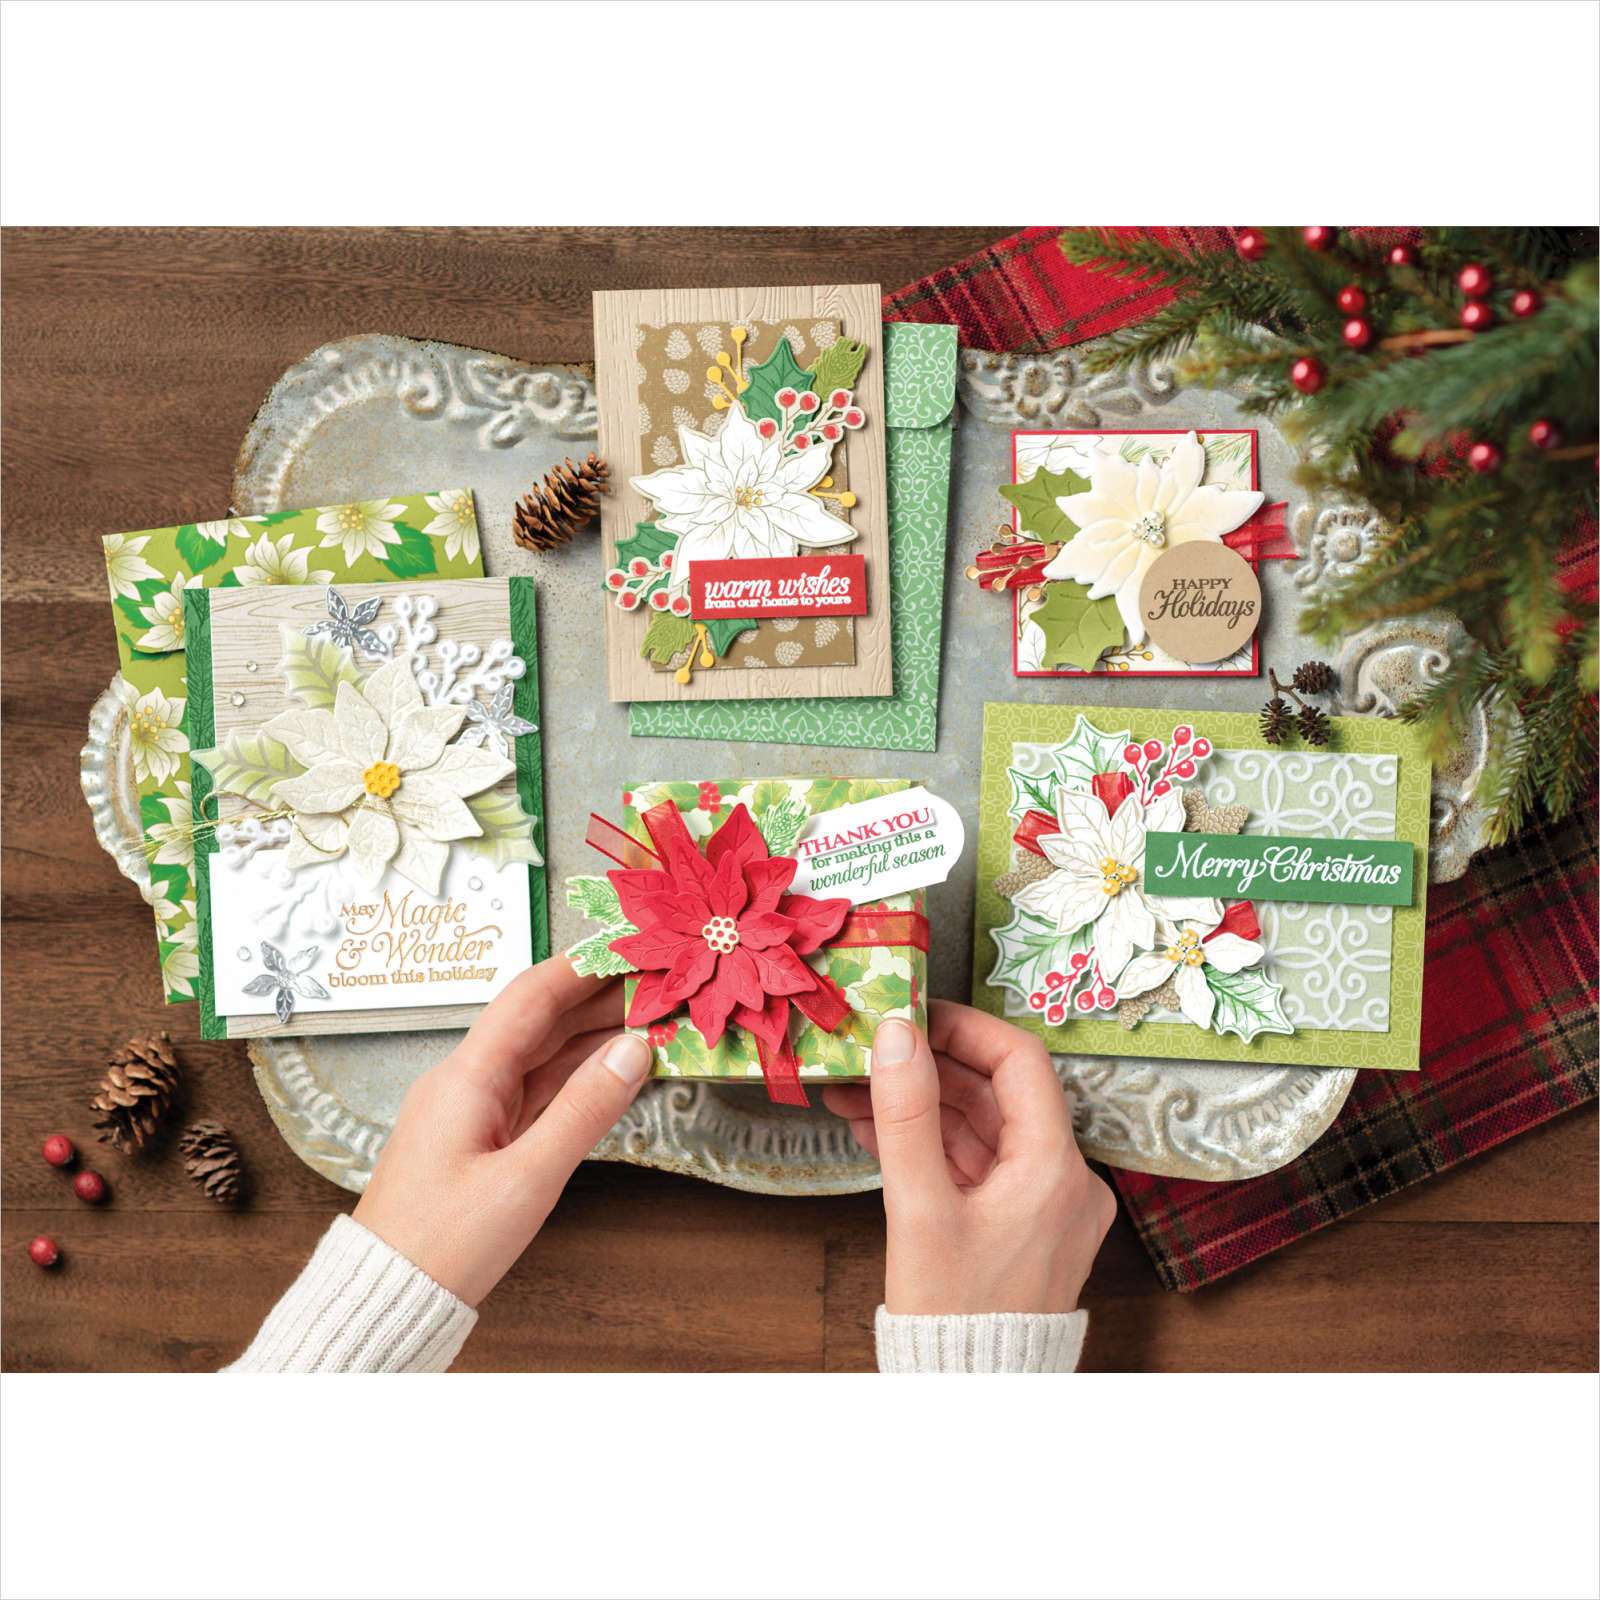
    I realized I hadn't shared these pretty fun fold cards made with the Poinsettia Petals suite.  They were made during my Stamp with Me Live last month.  You can watch in the video below. 

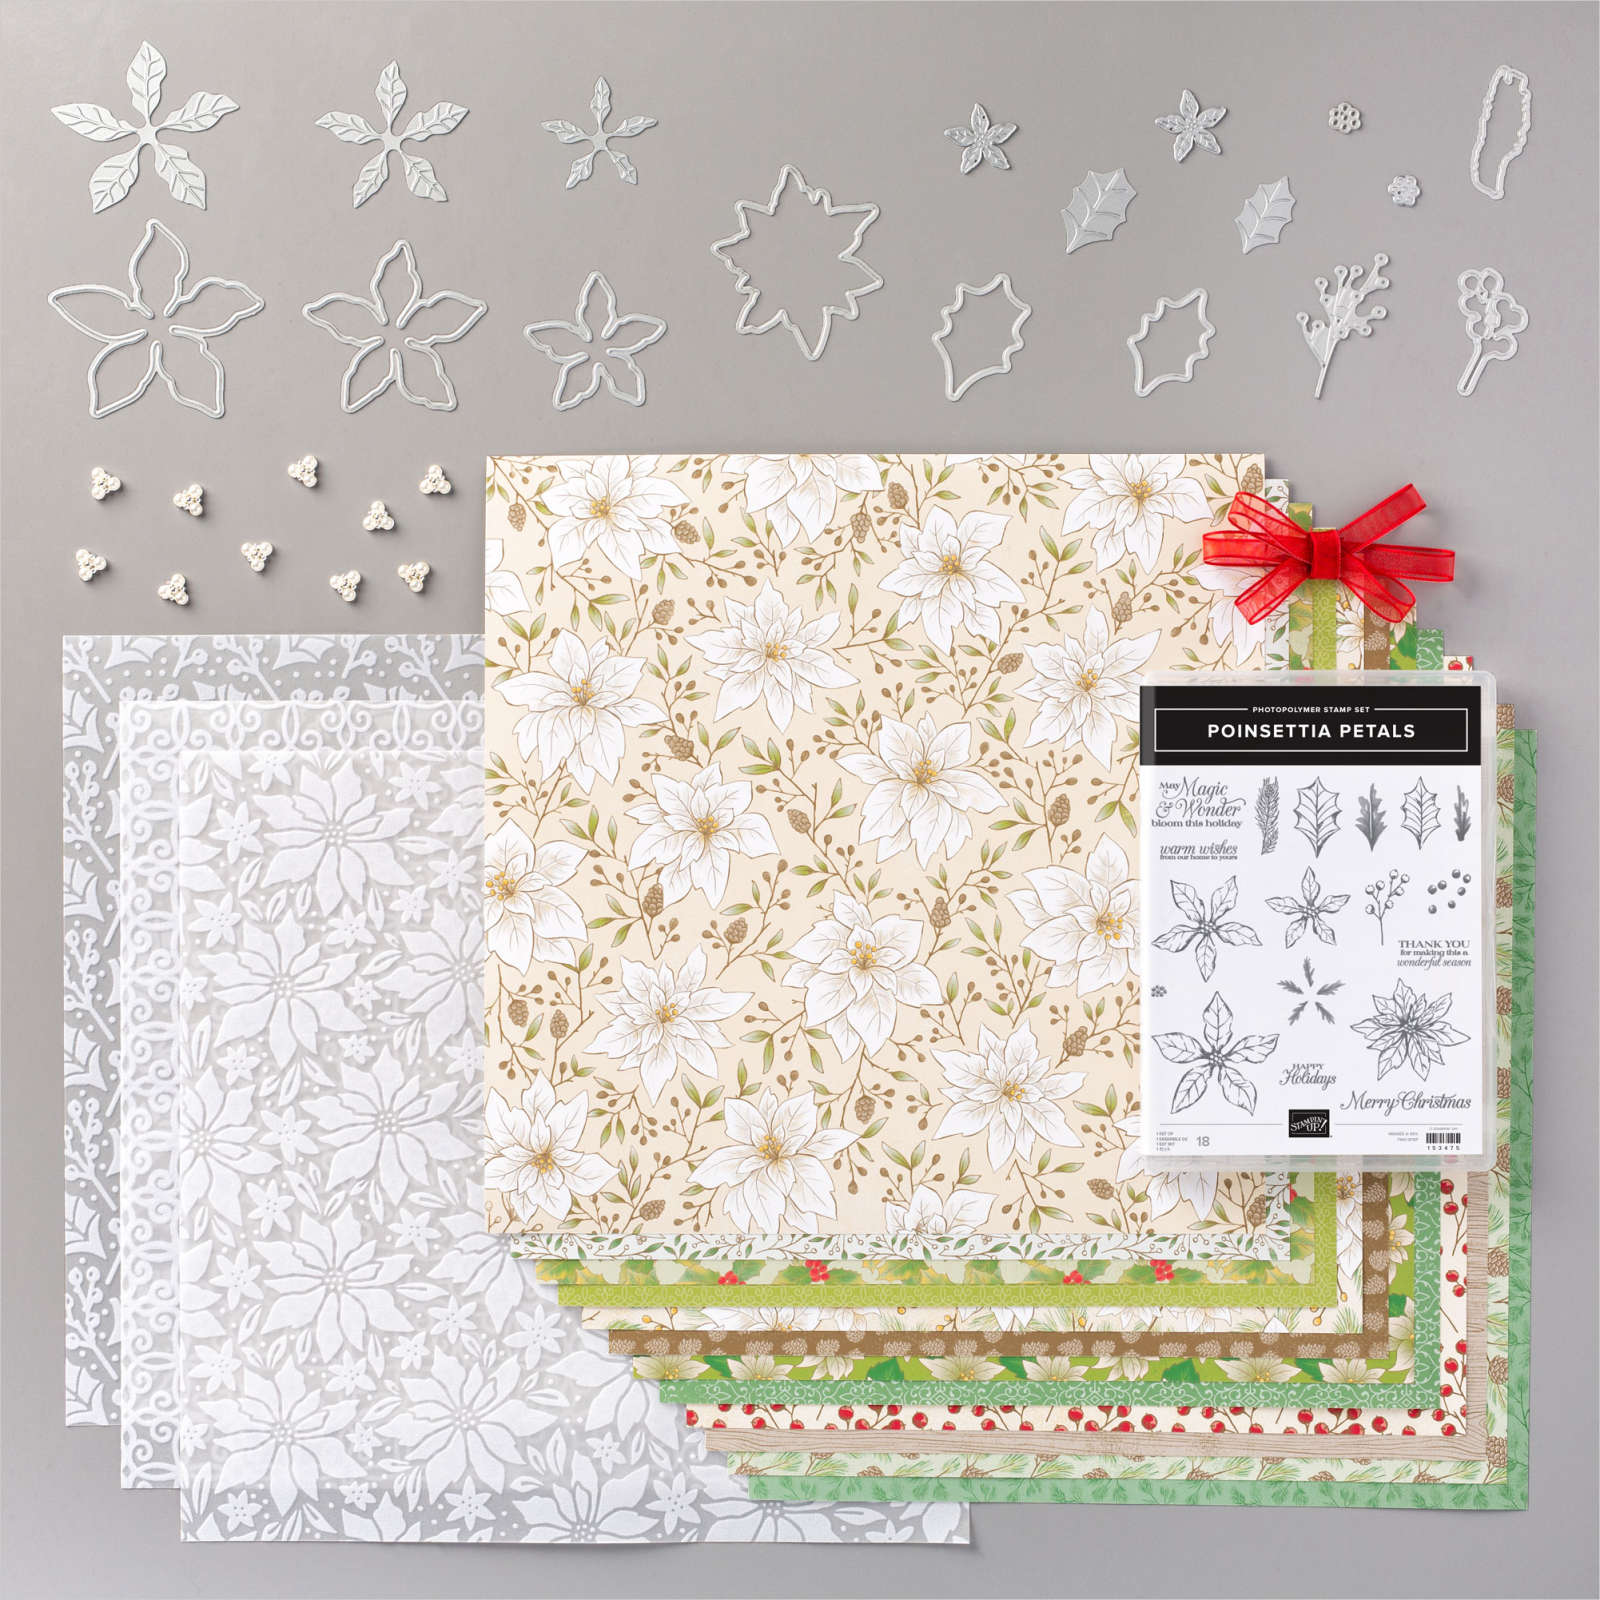
    Isn't it pretty?  I used the Poinsettia Place designer paper and the Poinsettia Petals bundle plus Metallic pearls & the All the Trimmings ribbon combo as well as the Vanilla/Gold ribbon. 

    Here's the inside: 

    Measurements:

    • Card Base 5 1/2" X 5 1/4" scored at 4 1/4"
      CS – same color as base 4 1/8" X 3 5/8"
      2 pieces designer paper 4" X 1 1/4" for sides and one more at 7/8" X 5 1/4" for top (or a textured piece of CS instead).
      2 pieces neutral CS for front and inside
      A die-cut flower, snowflake etc 

    You can see the Poinsettia Place suite of products here.  They're so pretty!

    ~~~

    November Specials!

    Current Host code is NCMAWRKB

    Order online here


    All online orders receive my FREE Curvy Celebrations 22 project PDF Tutorial! 

    Below are the Multipurpose Glue stands we're making. They're available in my Shop here.  


    We can fit three in a box for almost the same shipping cost. They are $6 each and shipping is about $3-4 in US.   They make great gifts for your stamping friends!  

    Leave a Reply

    Your email address will not be published. Required fields are marked *

  • Easy Tag Topper Gift card holder


    Today's the big sale!  Almost everything is 10% off from the Annual Catalog! *see the excluded list below

    This includes the following items plus bundles & even suites!  Go here to order: 

    • Stamparatus
    • Blends markers!
    • Punches & dies!
    • Most card stock packs (excluding White, Vanilla & Pumpkin Pie)
    • Ribbons & embellishments
    • Ink pads & ink refills – fill your collections of colors! 
    • Clear Blocks, Dimensionals, Designer Paper 

    Here is the list of excluded items for the sale.  download the 2020 Holiday Extravaganza sale excluded list

    **All orders using the host code below that are over $55 will receive 3 things FREE from me:

    1. a free Winter Snow embossing folder
    2. 10 free cards!
    3. my 22 project Curvy Celebrations PDF tutorial (see below)

    ~~~

    I bet this year many of us will be giving gift cards more than ever.  This social distancing is hard but during the Holiday's it's going to be so tough!  If you are missing celebrating with your family this year I feel for you.  Holidays are meant to be enjoyed together. But if it keeps us and them safe I'm sure it's the right decision. But we don't have to like it, right?! 

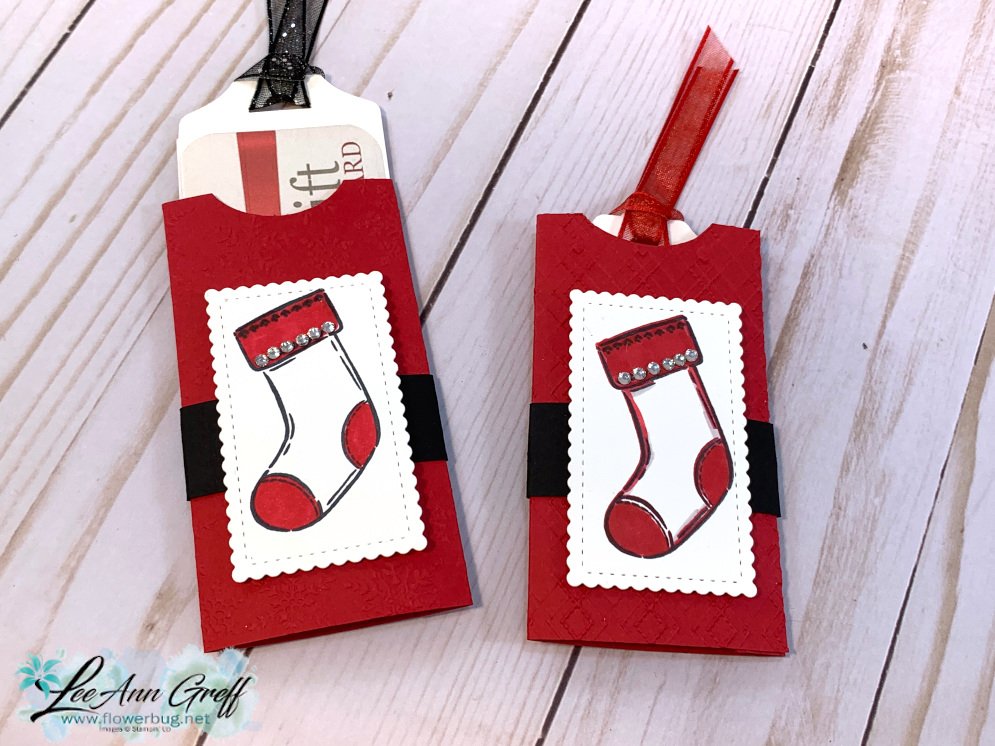
    Here's a fun gift card holder you can make to give those gift cards in. 

    I made one during last week's Facebook Live but you can see the video below, or here on my YouTube Channel. 

    The measurements are as follows: 

    • 5” X 4 ¼” – score at ½” and 2 ¾", *get 4 from one sheet of CS
    • White tag – 2” X 6” scored at 4”, Black band is 1” X 5”
    • White rectangle die-cut (Stitched So Sweetly) is 2 3/4" X 1 5/8" 

    *The gift card is the last project on the video below; you can fast forward through the cards if you'd like. 

    Products Used:

    Tag Buffet stamp set, Stitched So Sweetly Dies, Fancy Tag Topper Punch, Red, White & Black CS, Blends markers, rhinestones

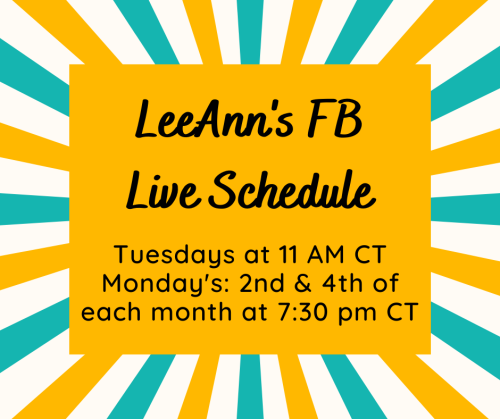
    Remember you can find me here on Facebook 6 times a month! 

    ~~~

    Check out my November specials below:

    Current Host code is NQHKDKZR

    Order online here


    All online orders receive my FREE Curvy Celebrations 22 project PDF Tutorial! 

    Below are the Multipurpose Glue stands we're making. They're available in my Shop here.  


    We can fit three in a box for almost the same shipping cost. They are $6 each and shipping is about $3-4 in US.   They make great gifts for your stamping friends!  

    Leave a Reply

    Your email address will not be published. Required fields are marked *

  • We’re making explosion pop-up cards!!


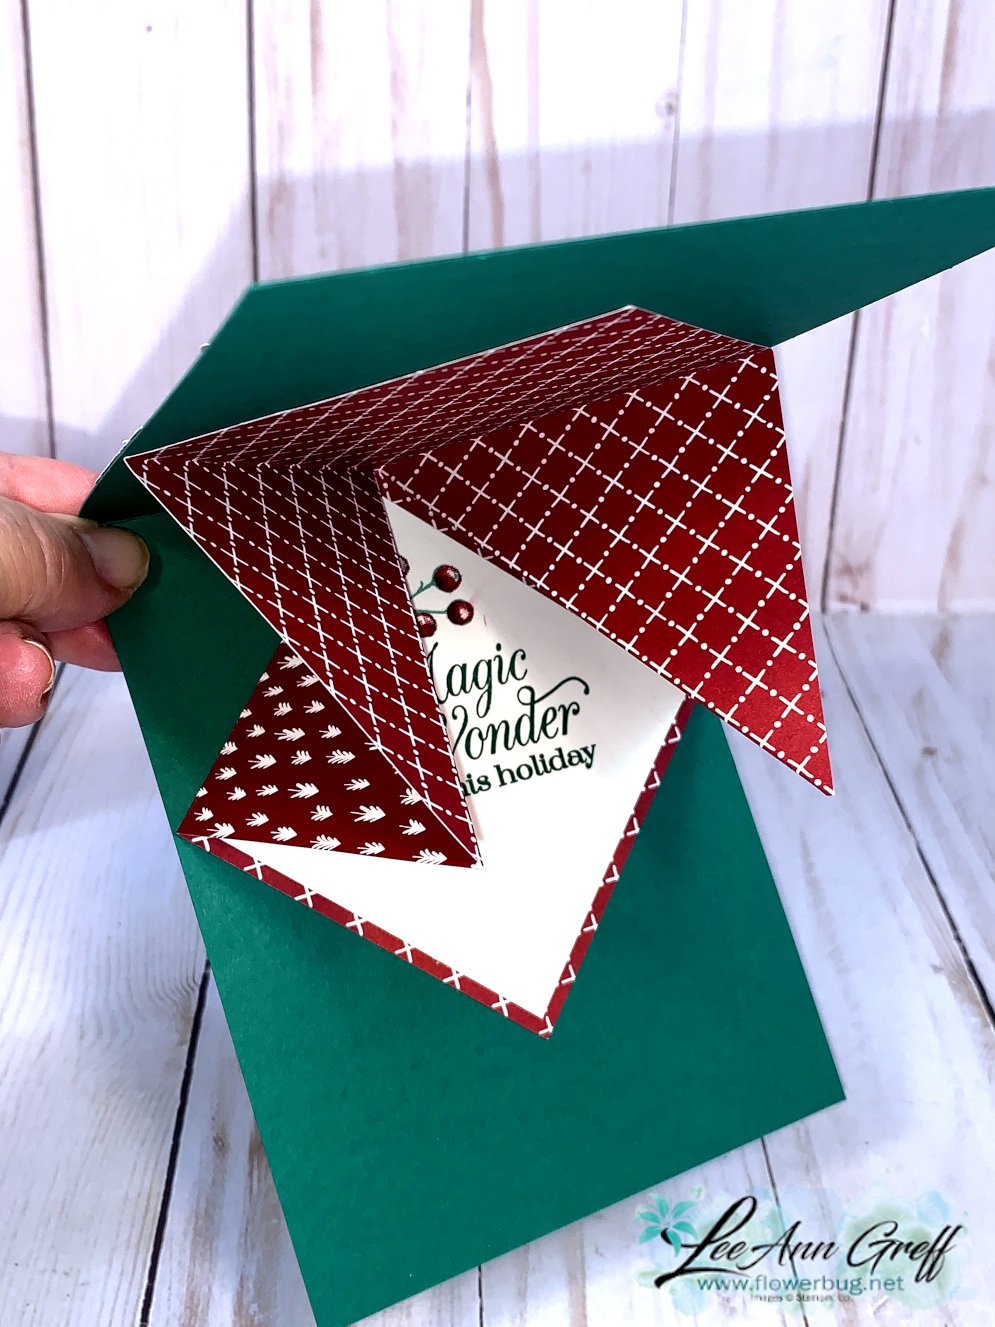
    On my Stamp with Me Live I shared these cards and how easy it is to make an explosion card.  

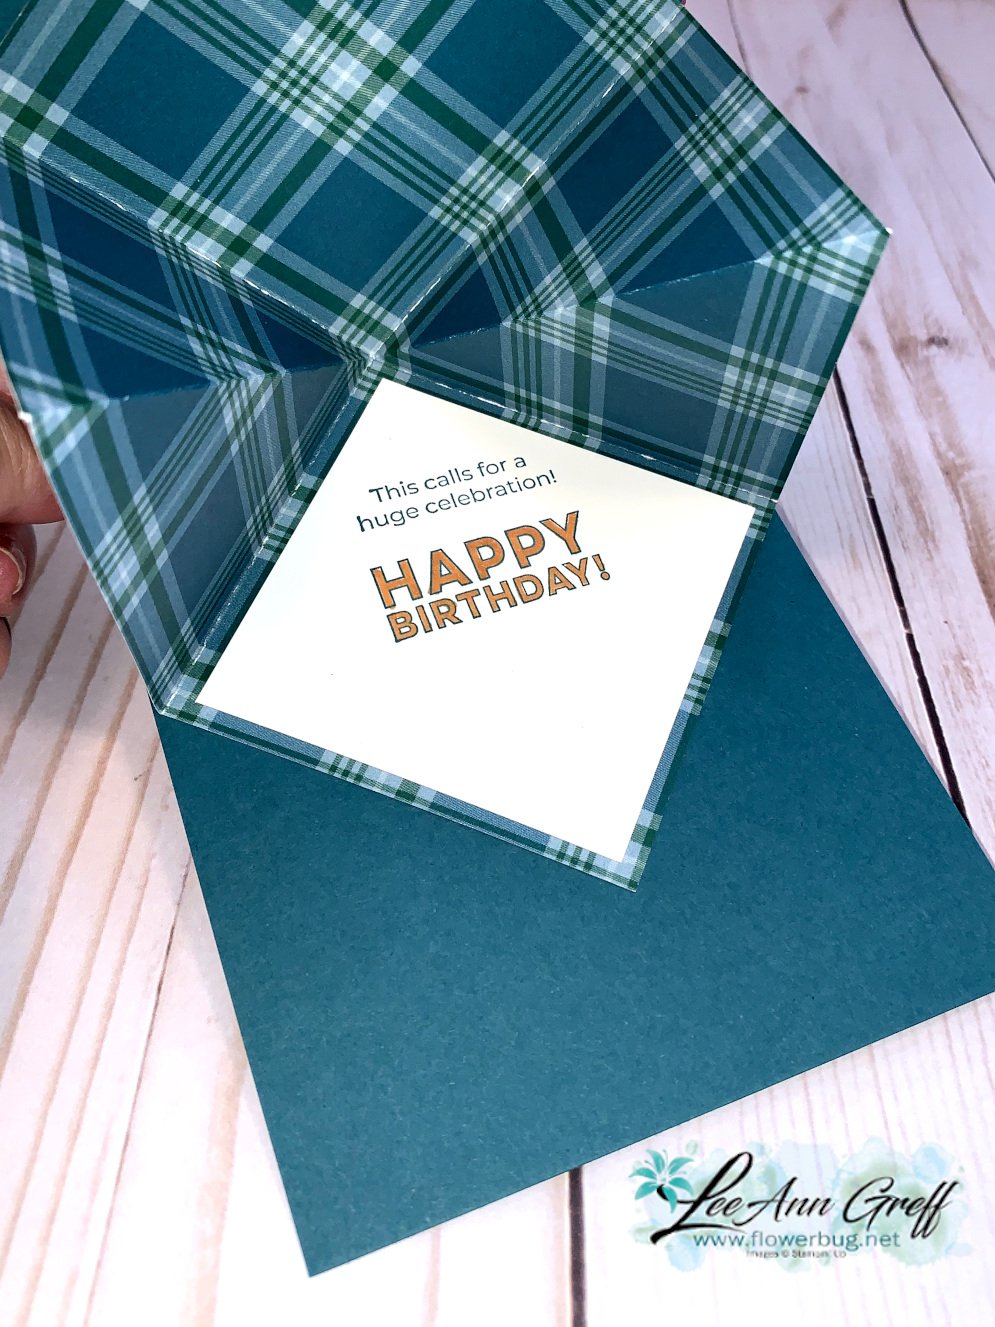
    These cards look pretty ordinary from the front but there's a surprise inside; see below:

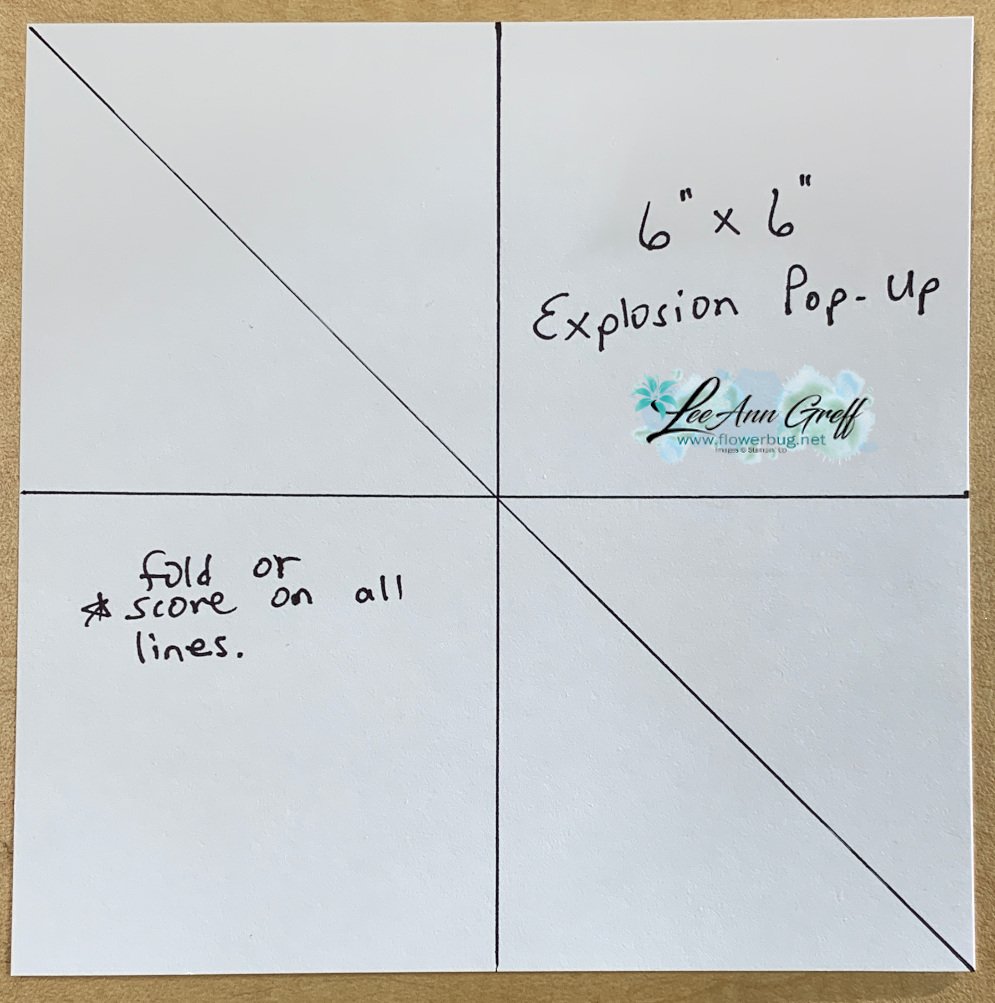
    Isn't it cool?  And it's super easy to do.  It's a 6" square of designer paper that you fold in halves with a bone folder. No measuring at all!  

    Here's the template for the explosion card. 

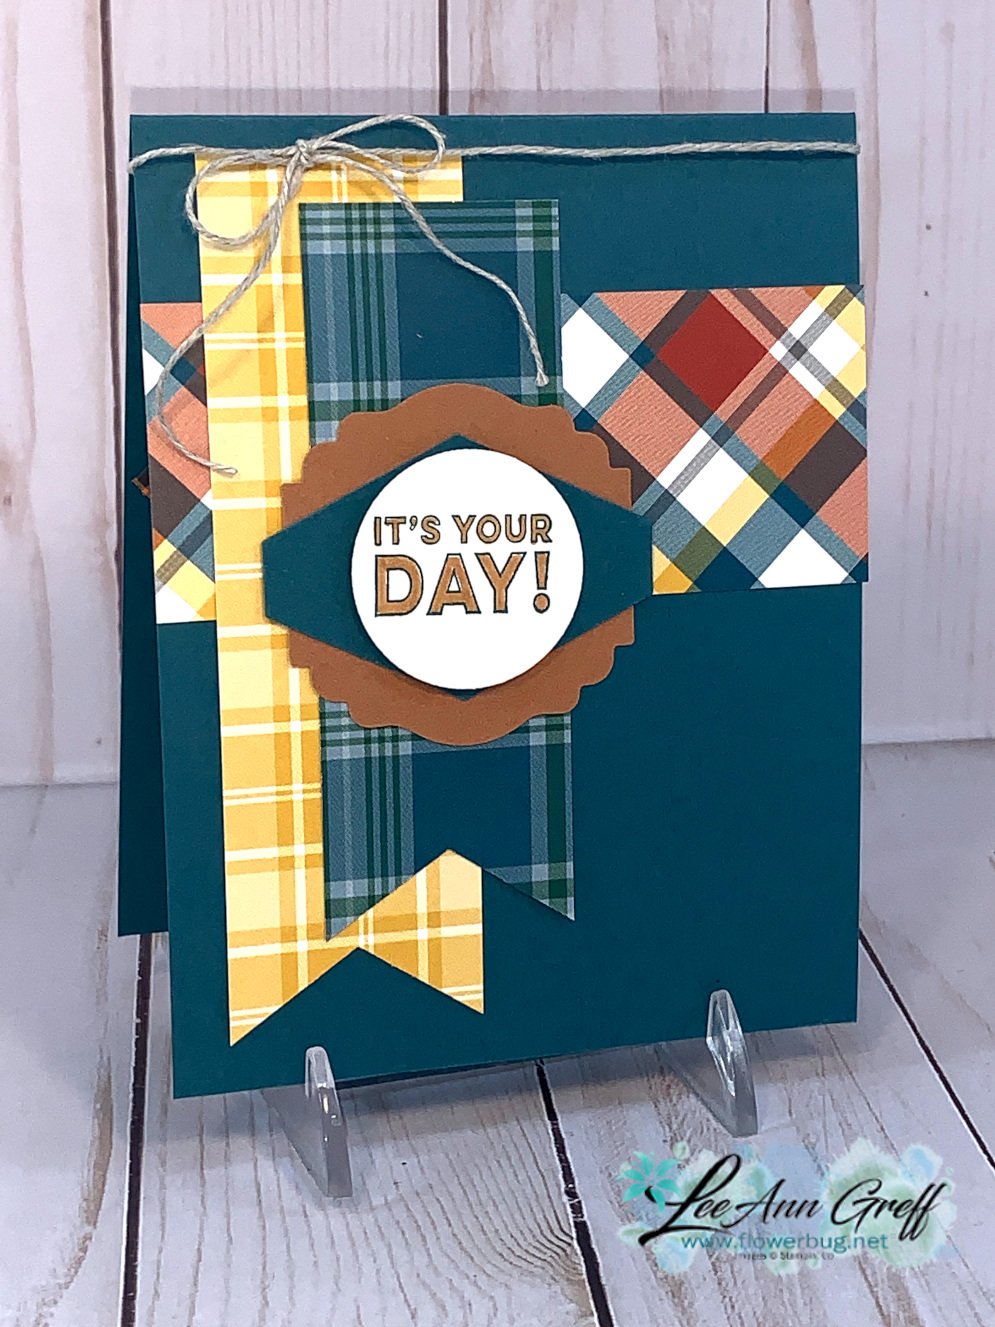
    Here's a masculine birthday made with the Plaid Tidings designer paper and Many Mates stamp set.

    These are so fun to make.  And you can add a bit more fun to the card by adding in some confetti, punched pieces or sequins to the inside.  What a surprise they'll enjoy! 

    Join me here on the 2nd & 4th Mondays at 7:30 pm Central Time.  You can either watch or prep your pieces to create right along with me!  

    Here's the video: 

    Measurements to prep:

    Card base 4 1/4" X 11" scored at 5 1/2"
    Front – DSP: one at 1 3/4" X 4 1/4" across, banners are 1 1/2" X 5 1/2" and 1 1/2" X 4 1/2"
    Greeting on a punched or die-cut circle, layered with other punches or dies.
    Inside DSP is 6" square, White is 2 3/4" square.
    Additional supplies:
    Ink, embellishments, bone folder, dimensionals, glue
     
    Products used:
    Cherry Cobbler, Shaded Spruce & Pretty Peacock CS
    Classic Christmas, 'Tis the Season & Plaid Tidings DSP.
    Other: Poinsettia Petals & Many Mates stamp sets, Snowflakes, Circles Collection & Poinsettia dies plus Tailored Tag & Label Me Lovely punches

    ~~~

    November Specials!

    Current Host code is A2MTFYEB

    Order online here


    All online orders receive my FREE Curvy Celebrations 22 project PDF Tutorial! 

    Below are the Multipurpose Glue stands we're making. They're available in my Shop here.  


    We can fit three in a box for almost the same shipping cost. They are $6 each and shipping is about $3-4 in US.   They make great gifts for your stamping friends!  

    Leave a Reply

    Your email address will not be published. Required fields are marked *


Notice: LeeAnn Greff, Independent Stampin’ Up! Demonstrator, Manager. The content of this website is my sole responsibility as an independent Stampin’ Up! demonstrator and the use of, and content of, the classes, services, or products offered on this website is not endorsed by Stampin’ Up! Copyright 2025