/


Latest Post

Spring Corners fun fold card with free project sheet & video tutorial


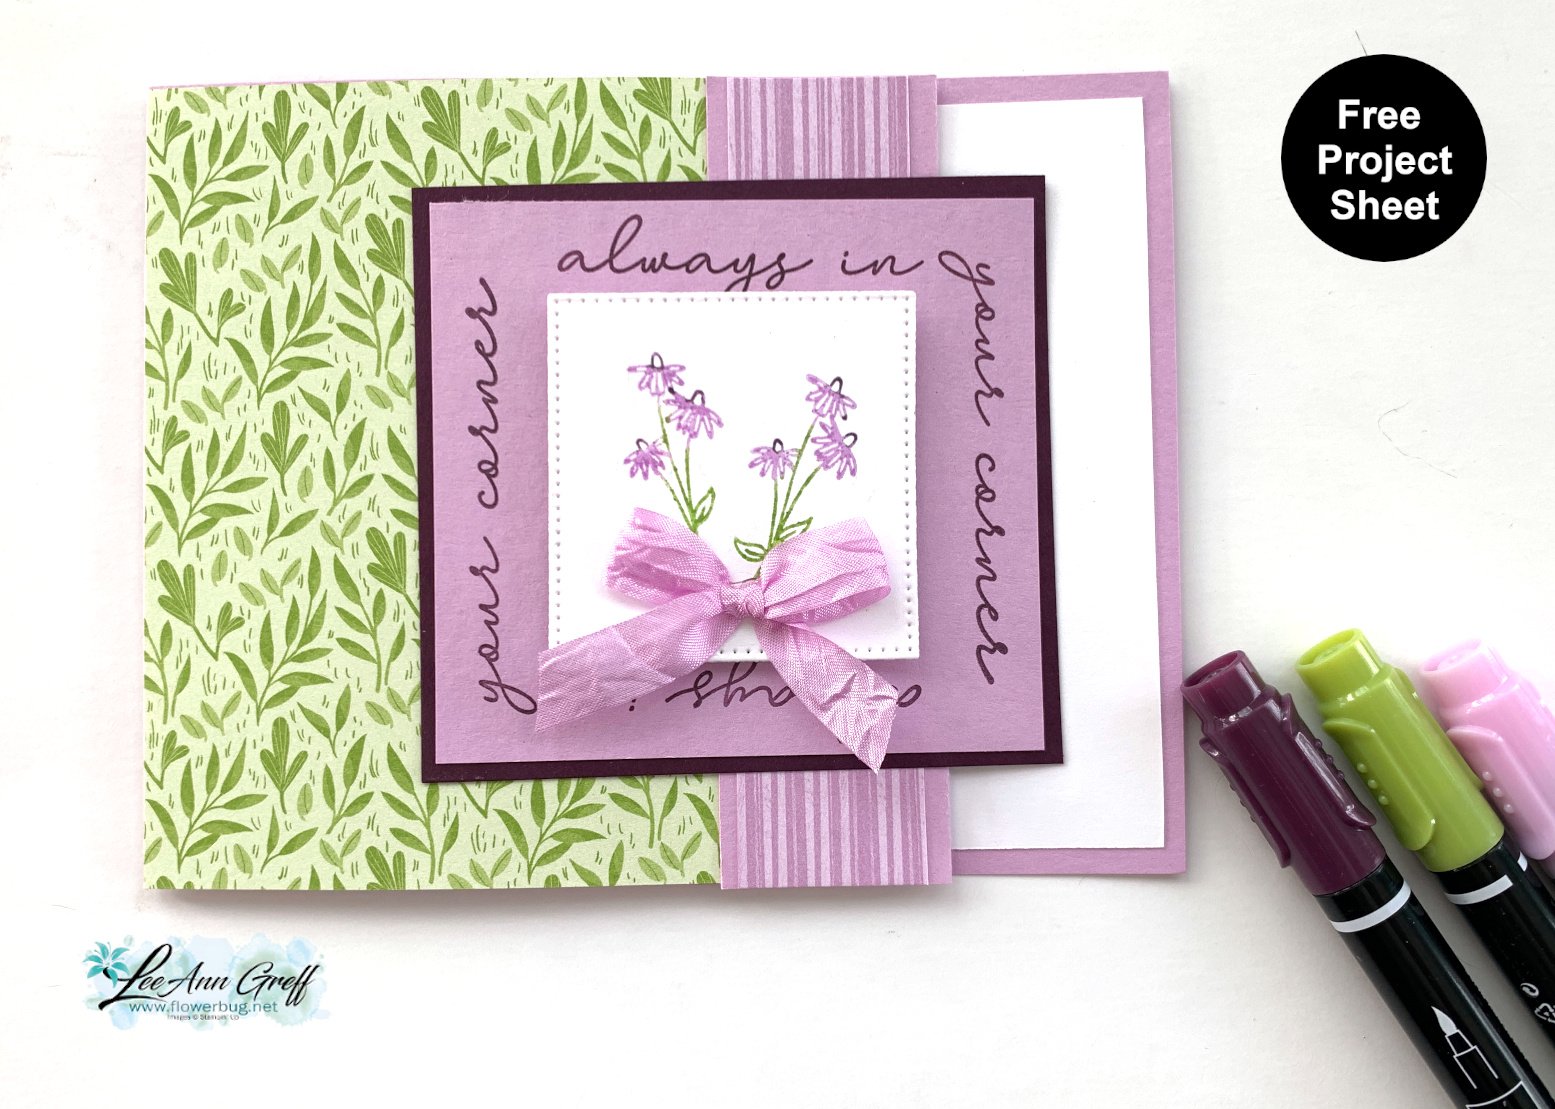
I totally enjoyed making this neat fun fold card.  It shows off this neat stamp set wonderfully! 

I wanted to highlight the flower image as well as the neat greeting. I used Stampin' Write markers to color my image before I stamped. 

Tips on coloring stamps with markers:

  • always us a water-based marker (never a Blends 'permanent' marker)
  • color with the lightest color first so you don't contaminate your tip with a darker color
  • huff on the image before stamping to moisten the inks – this gives a brighter image

This neat fold starts with an 11" X 4 1/4" card base with a small fold back on the front. Then the DSP layer is added behind it.  

My colors include Fresh Freesia, Blackberry Bliss or Granny Apple Green and White. The DSP is the Toadstool Gardens and the ribbon is the Fresh Freesia seam binding ribbon – both are from our free Sale-a-Bration choice.
Here's the free project tutorial with measurements.  Just click on this link to print or download it. Download Spring Corners fun fold with Toadstook DSP

*Below is the video for this card and another cute card using the Spring Corners set.   

~~~

February Specials:

*current host code link:  

DNXE92GP

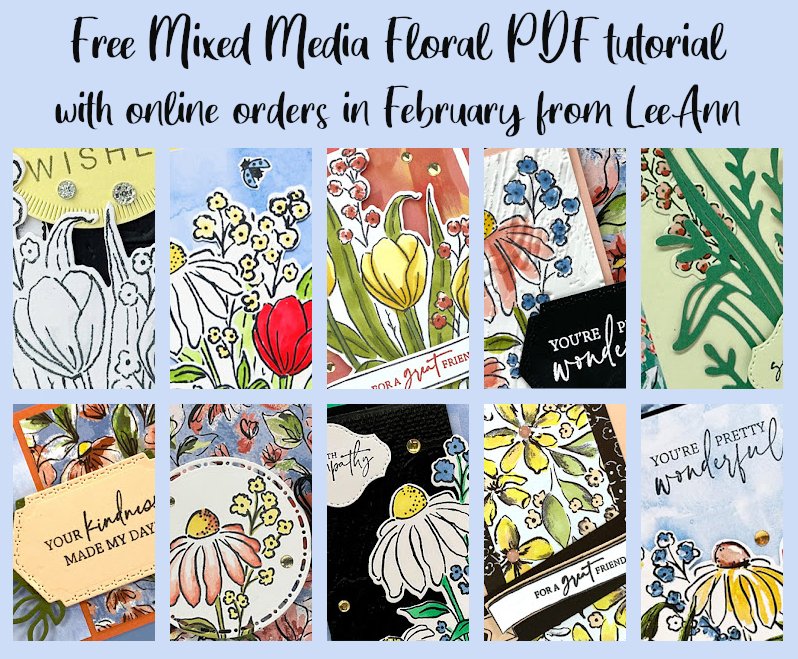
Get this free tutorial with any online order in February!
 New Sale-a-Bration items are here!

For every $60 (or $120) you spend you can choose a free item from the SAB catalog! 


 And when you choose the Starter kit in February you get a choice of 2 sets of markers & a free stamp set or an extra $30 in product.  That's $155 in value for just $99! 

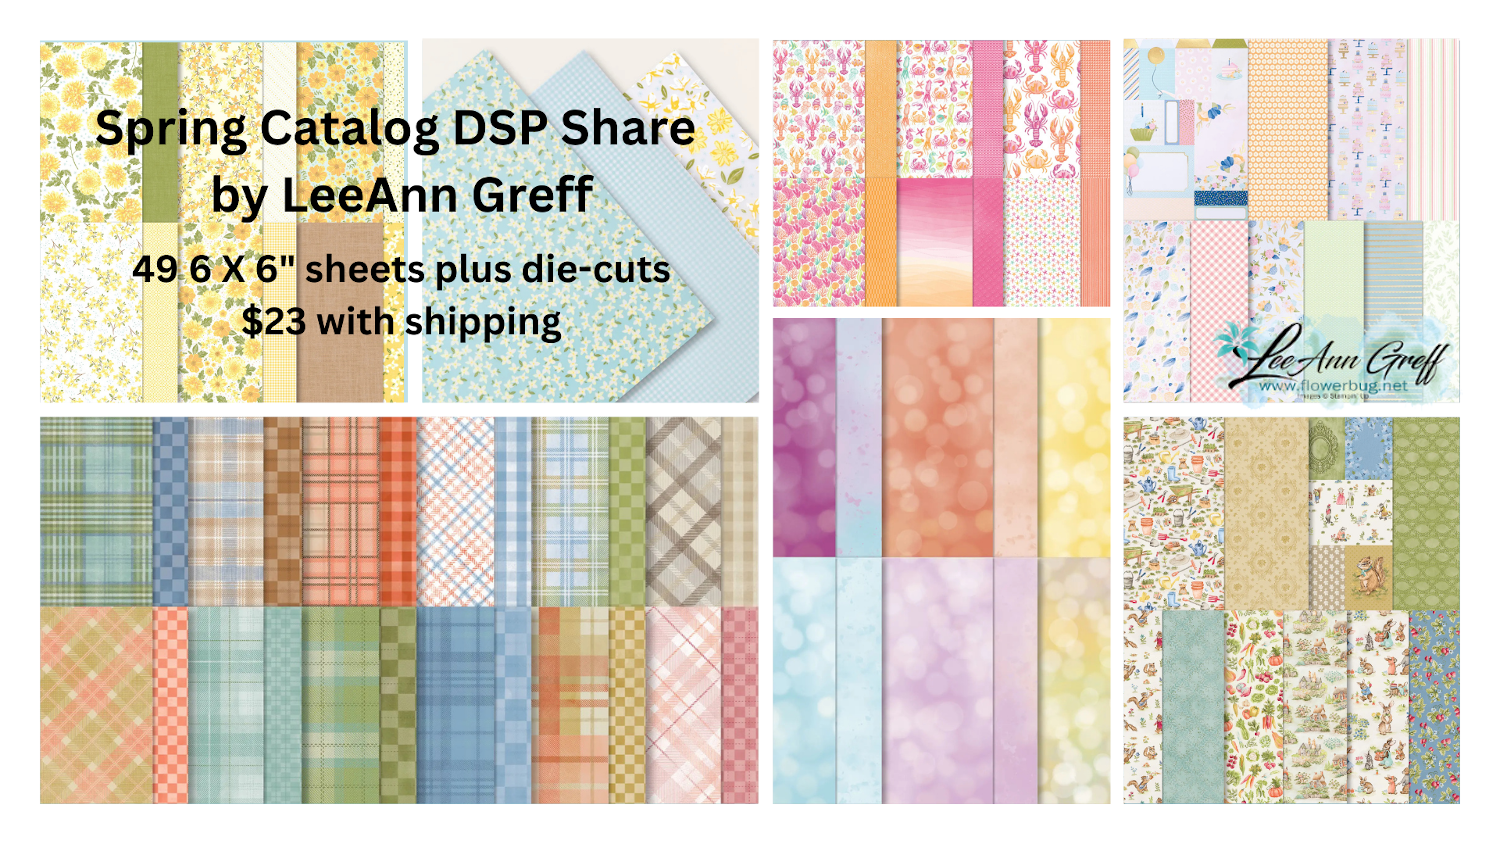
Opt in for my Spring catalog Designer Paper share and/or the Spring catalog embellishment share seen below. 

See the details here. 
Contact me here

All Posts

  • Scary Cute ‘side step’ fun fold card by Sharon!


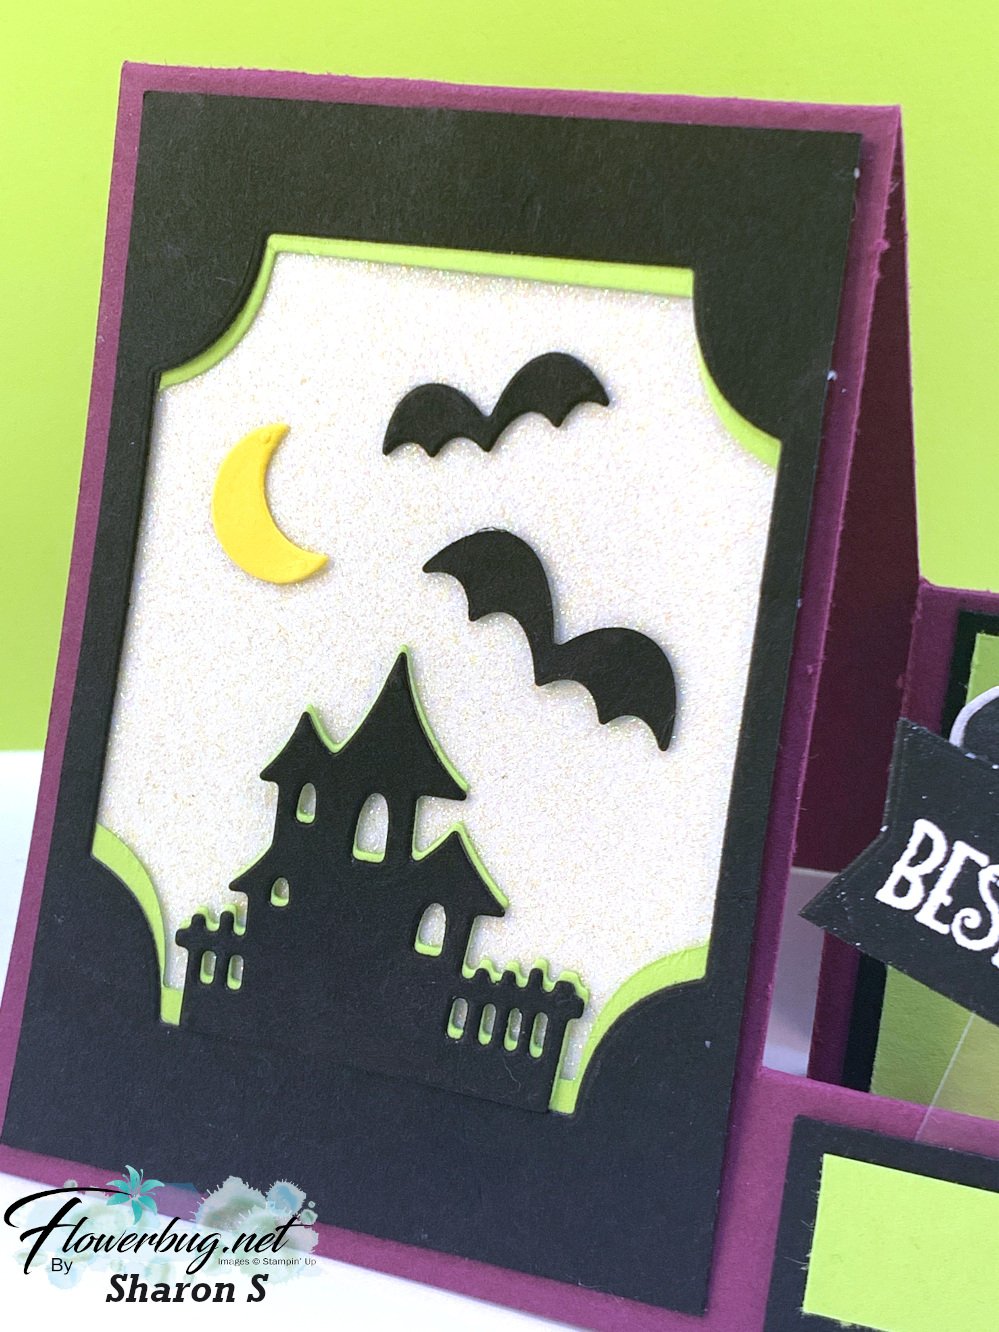
    Sharon shared this card with us at our last Team Meeting.  It's adorable!!

    Her colors are Rich Razzleberry, Black & Granny Apple Green.  

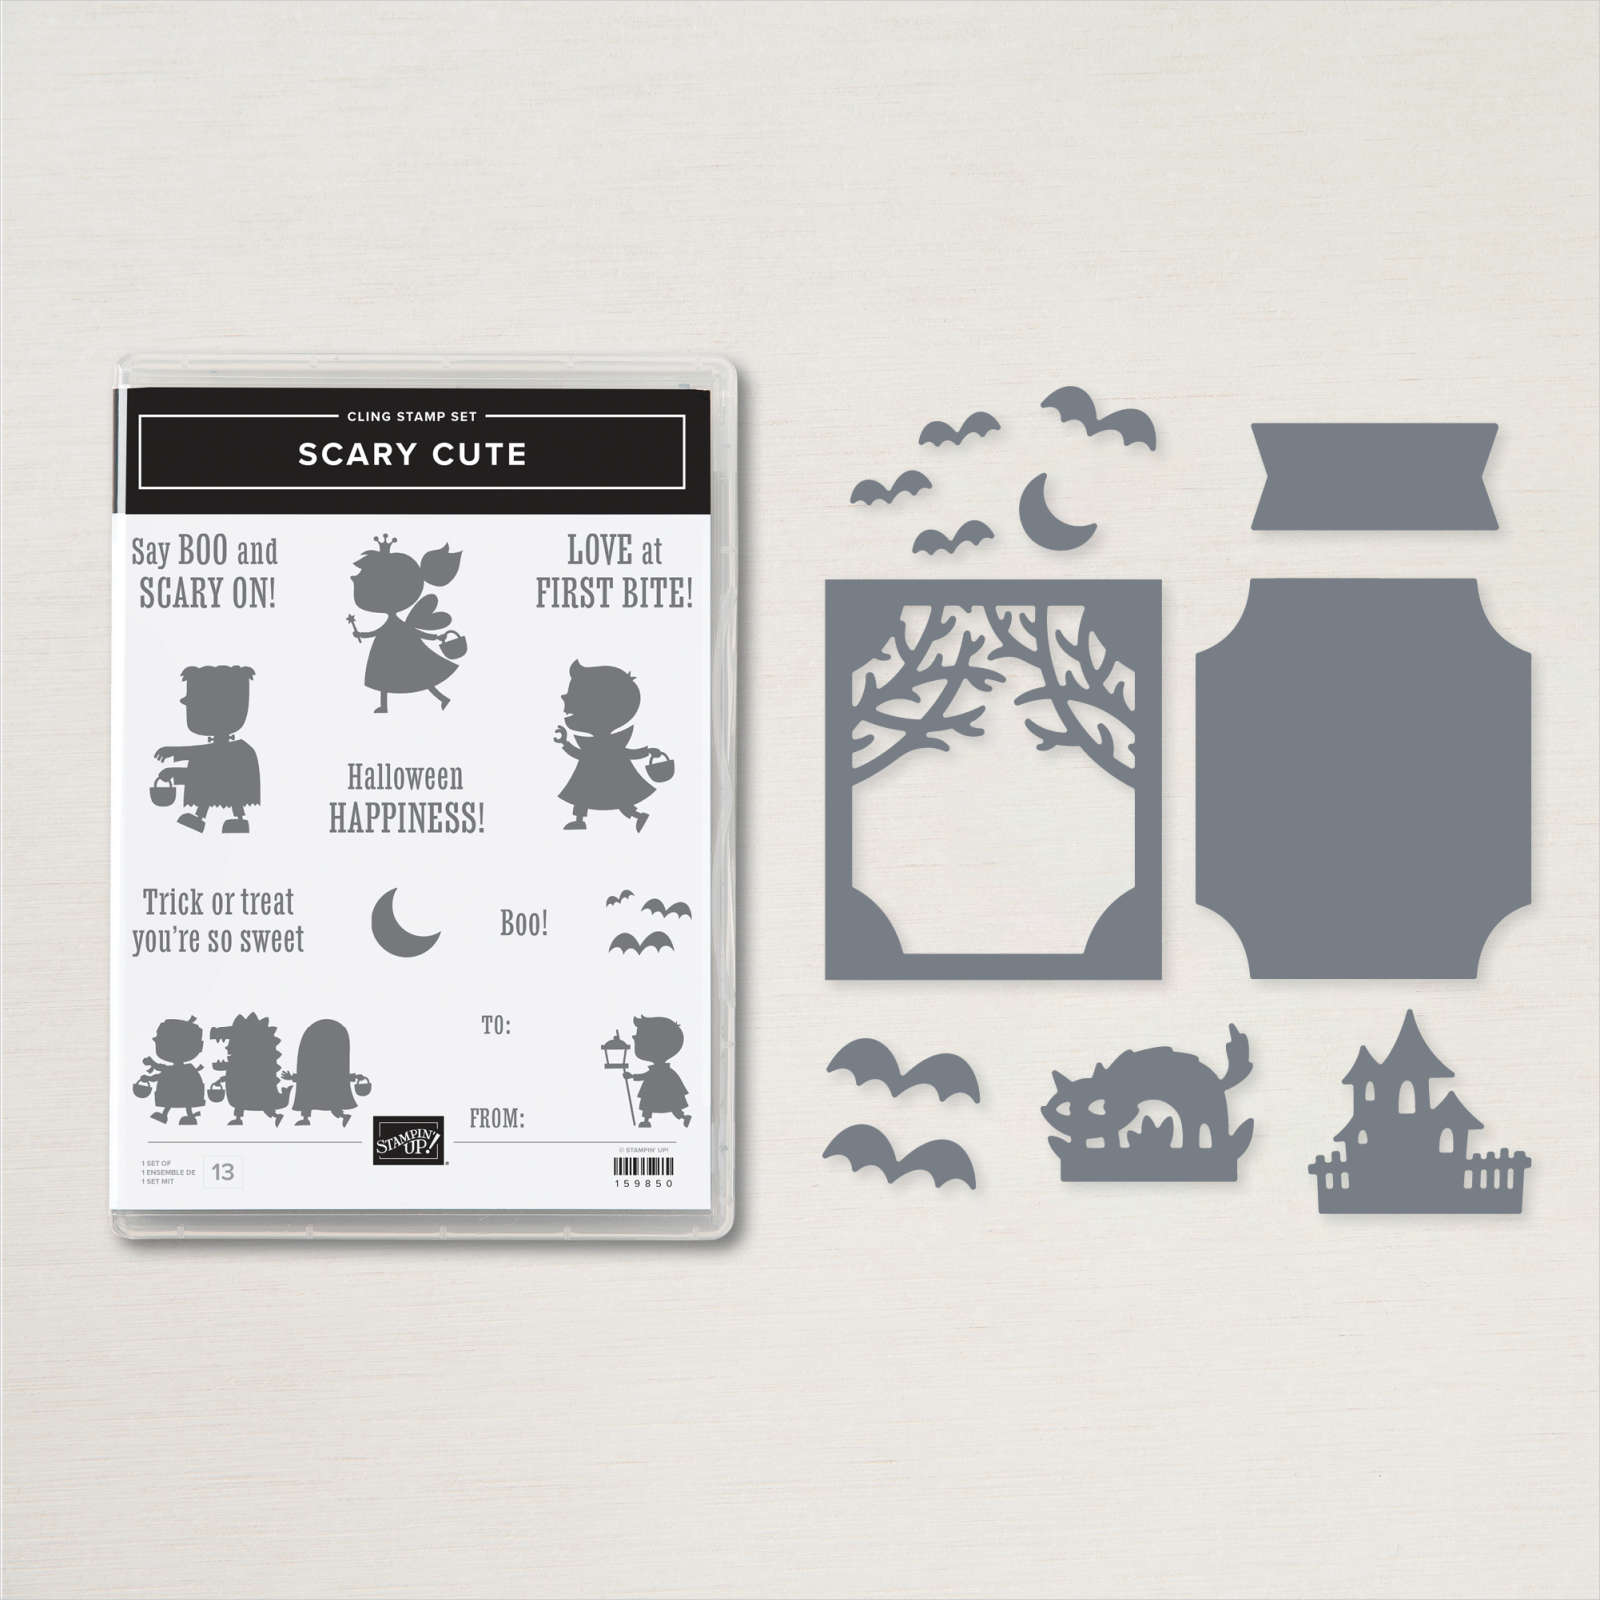
    She said she cased it from Tammy White.  The card base is all one piece.  It's called a side-step card and here is a link to a tutorial I wrote years ago.  She used the Scary Silhouette dies for the left side and the Bewitching stamp set for the hat & boots on the right.  

    The hat & boots are popped up on the steps with thin strips of window sheets.  There is white glimmer paper behind the die-cuts on the front.  I love the say she achieved the silhouette under the Black layer.  She did this by snipping the green die-cut in half on the sides and moving it down from the top and up from the bottom.  

    You can see this Scary Cute bundle here.  And it's in stock! 

    ~~~

    October Specials

    Starter Kit special! Get $155 in product for just $99

    click here

    ~~~

    Order online here

    Host code links: GDCBRHF7 or SVBHWRCY

    Get a free embellishment from me with online orders over $50!


    Earn free products with my loyalty rewards! 

    Click here to download yours and earn a $50 shopping spree!

    Leave a Reply

    Your email address will not be published. Required fields are marked *

  • EASY 5 at a time cards with Leaves of Holly


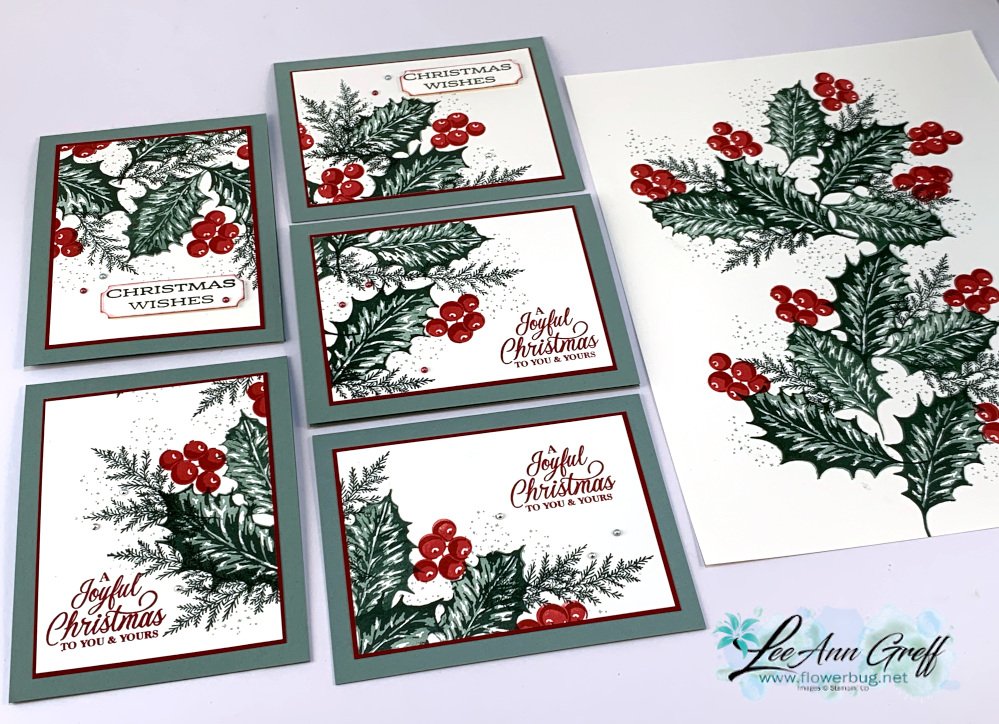
    I created a set of gorgeous Christmas cards on last week's FB Live video using my two templates.  

    I used the Leaves of Holly bundle seen here and these colors – Soft Succulent, Evening Evergreen, Real Red & Cherry Cobbler.  My Soft Succulent card bases are either 5 1/2" X 8 1/2" or 4 1/4" X 11".  

    I did use a few images from Merriest Moments stamp set as well.  

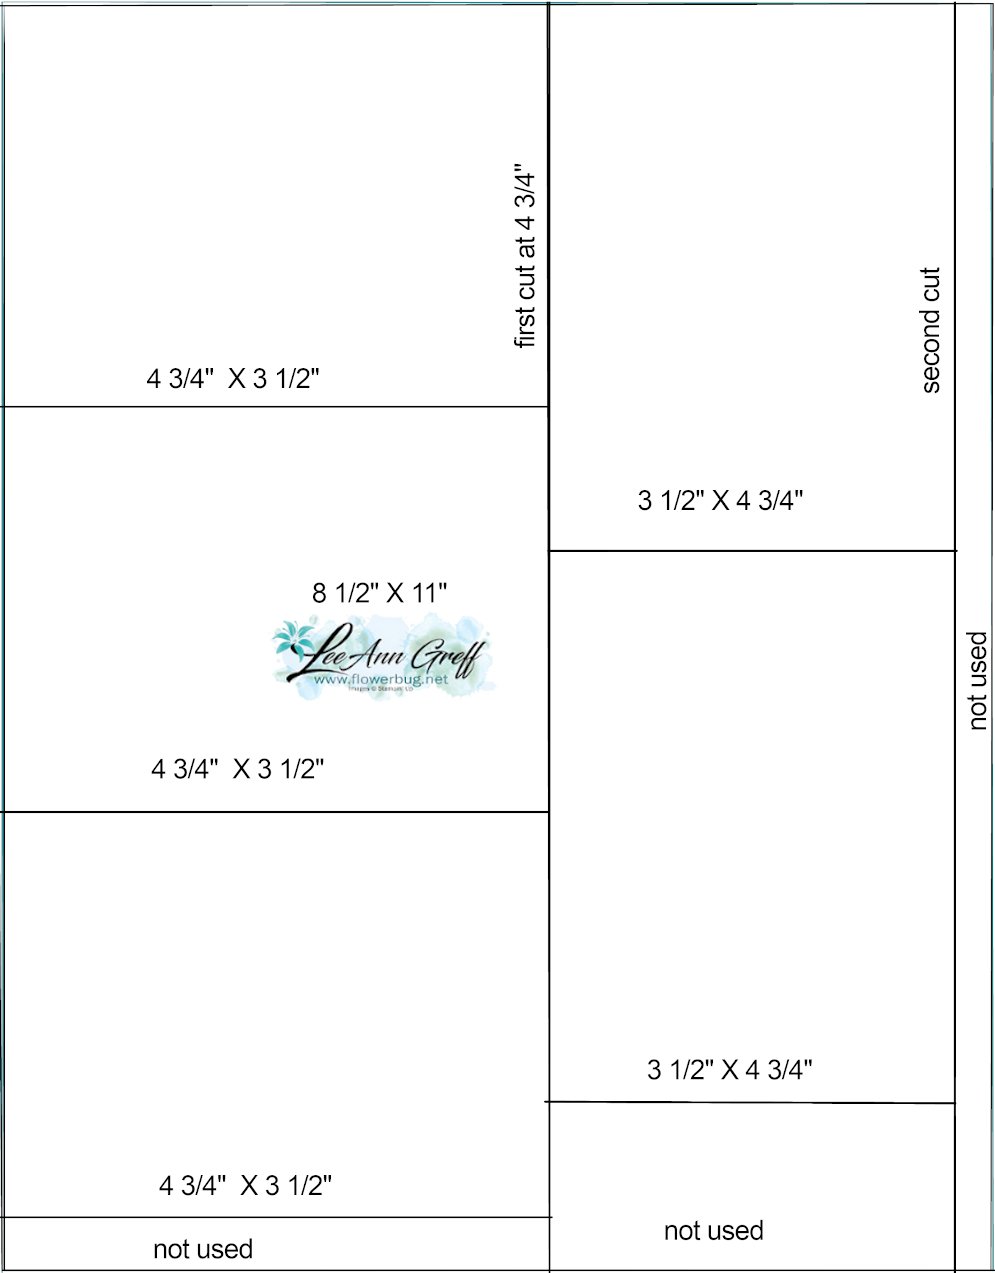
    Here is the main template that you stamp on.  It shows the cutting measurements that give you 5 pieces for your card fronts.  I frequently use these measurements for the inside of cards; especially when I make a bunch at a time.  Instead of just 4 layers you get 5 from one piece of 8 1/2" X 11" card stock. 

    Each piece measures 4 3/4" X 3 1/2" 

    In the photo below I stamped on the Basic White card stock (shown on the right) and then cut that into 5 pieces using the template above.  I stamped down the center mostly, leaving open areas in each section so I could stamp a greeting.  If it didn't work out (or I just want to), I add a die-cut or punched greeting. 

    To see how I did this the link for the video is here.


    Here's the other template for the colored layer under the stamped White piece.  In my case it's Cherry Cobbler. Each piece measures 4 7/8" X 3 5/8" giving you a narrow edge, but all 5 from one sheet with very little waste!  Love that! 

    What do you think?  Are you going to try the 5 at a time templates?  

    Click here or on the photo below to watch the video; it really is super easy. 

    ~~~

    October Specials

    Starter Kit special! Get $155 in product for just $99

    click here

    ~~~

    Order online here

    Host code links: GDCBRHF7 or SVBHWRCY

    Get a free embellishment from me with online orders over $50!


    Earn free products with my loyalty rewards! 

    Click here to download yours and earn a $50 shopping spree!

    Leave a Reply

    Your email address will not be published. Required fields are marked *

  • The Gorgeous Leaves of Holly bundle is not just for Christmas!


    The Leaves of Holly bundle is back!  It was unavailable for awhile but it's back in stock now.  

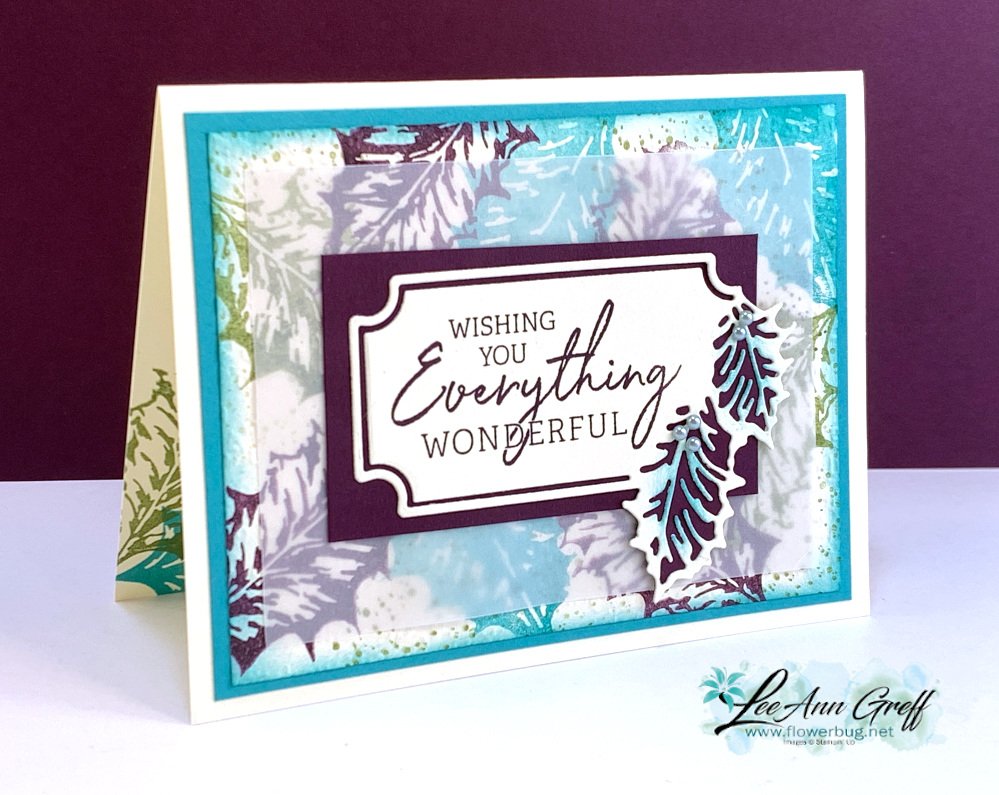
    I made this pretty card for last month's Flowerbug's Team swap.  The theme was Fall or Halloween.  I wanted to show that this bundle isn't just for Christmas.  What do you think? 

    I used Bermuda Bay, Blackberry Bliss and a bit of Old Olive here.  The greeting is from the Charming Sentiments set seen here.  

    After I stamped the card panel I felt it was a bit busy so I added a layer of Vellum card stock over it.  I love the soft feel that the vellum gives!  

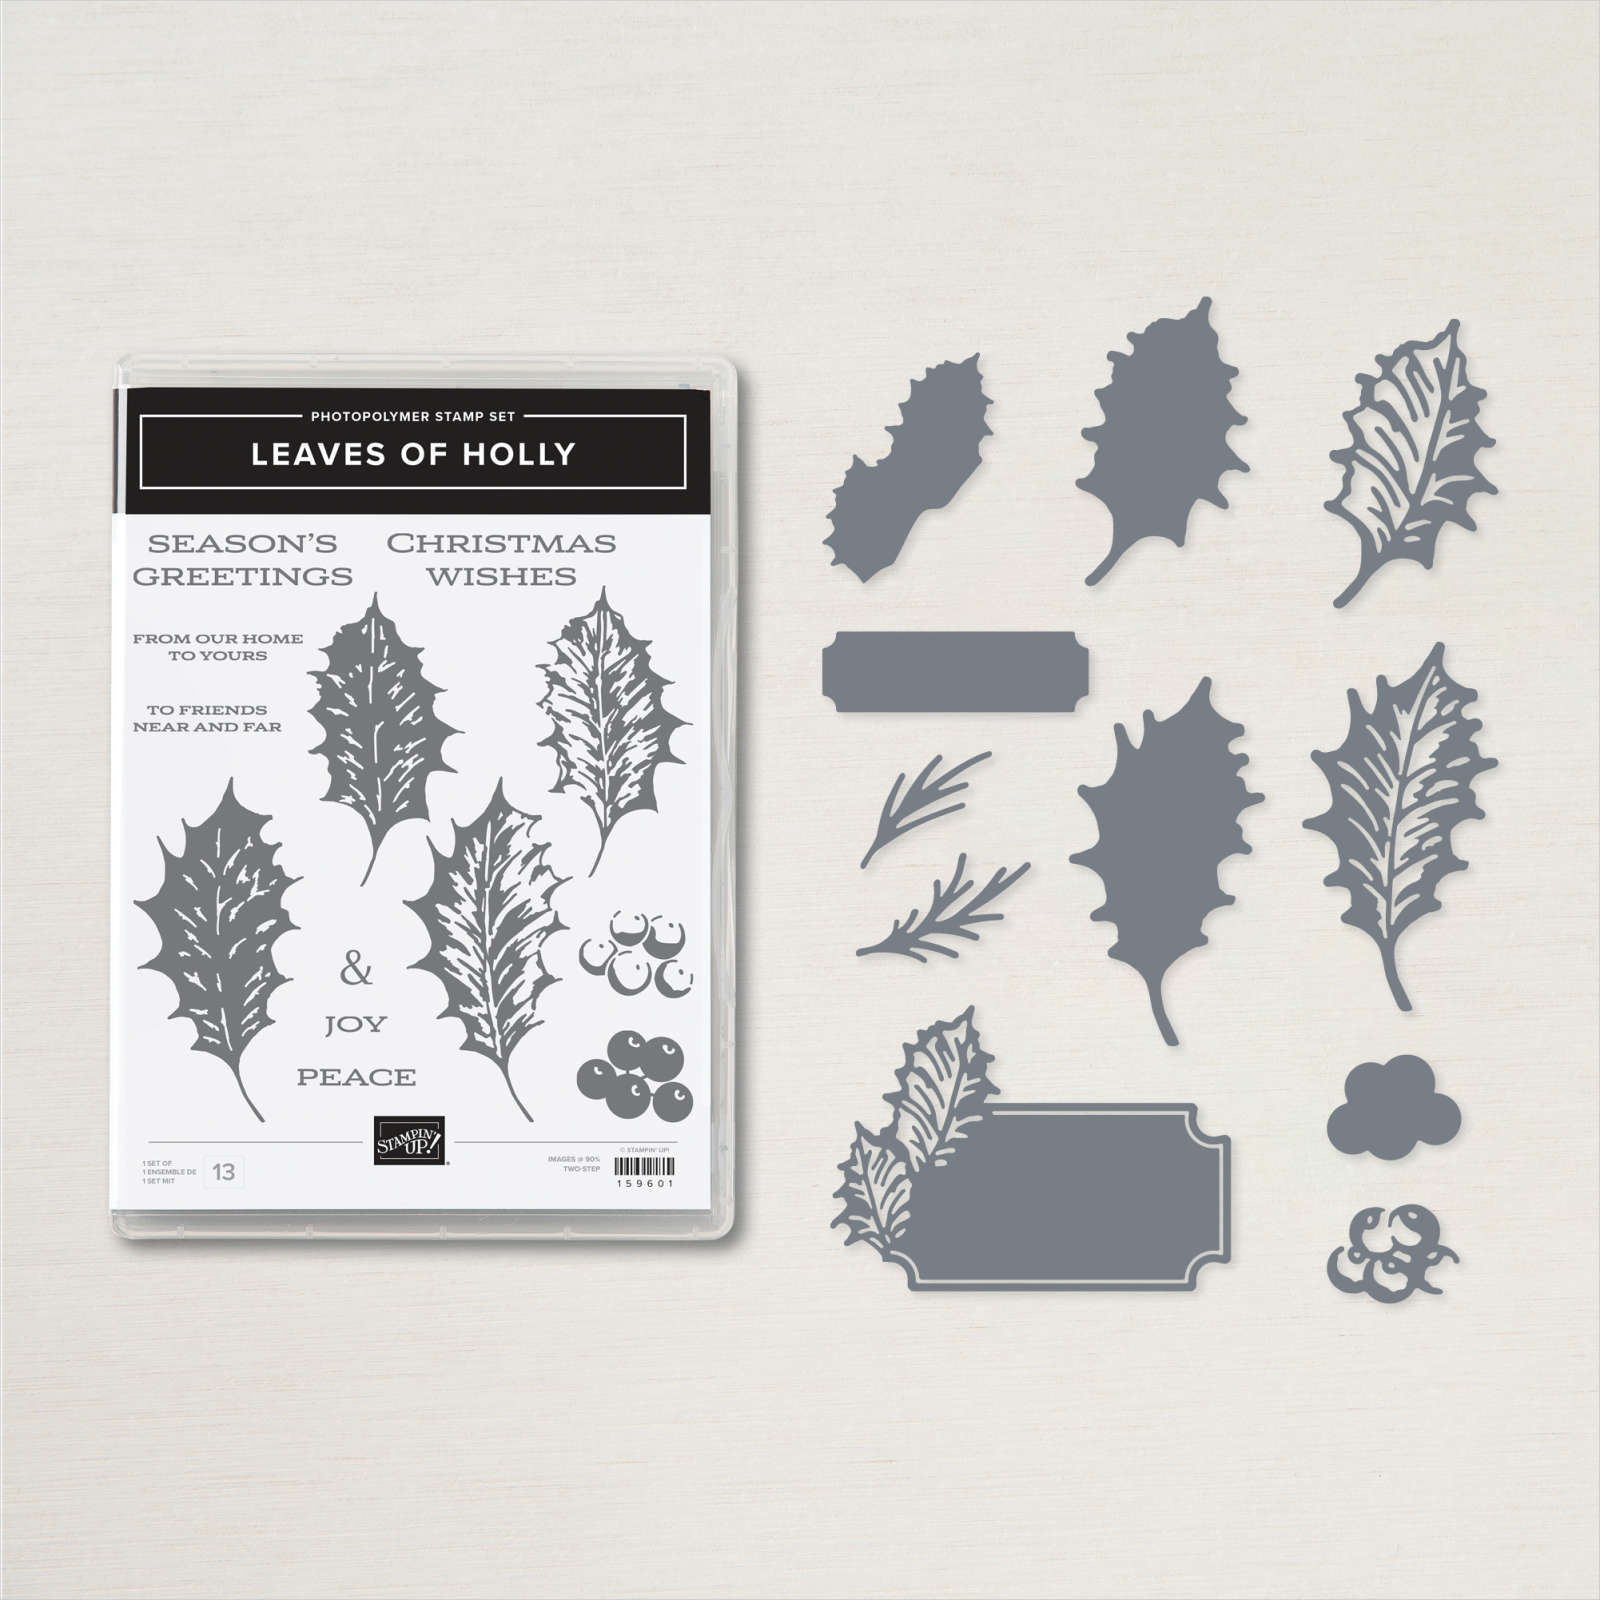
    Here's a peek at the Leaves of Holly bundle. It's full of pretty images and wonderful dies.  The greeting die-cut with the leaves attached is my very favorite; see it on the bottom left below. See it in my store here. 

    For added texture I added sponging around the edge and on the die-cut leaves.  

    You can see another group of cards I did on a video I just shared.  It features my 5 at a time templates.

    Click here or on the image below to see it: 

    ~~~

    October Specials

    Starter Kit special! Get $155 in product for just $99

    click here

    ~~~

    Order online here

    Host code links: GDCBRHF7 or JPJ4FKYJ

    Get a free embellishment from me with online orders over $50!


    Earn free products with my loyalty rewards! 

    Click here to download yours and earn a $50 shopping spree!

    Leave a Reply

    Your email address will not be published. Required fields are marked *


Notice: LeeAnn Greff, Independent Stampin’ Up! Demonstrator, Manager. The content of this website is my sole responsibility as an independent Stampin’ Up! demonstrator and the use of, and content of, the classes, services, or products offered on this website is not endorsed by Stampin’ Up! Copyright 2025