/


Latest Post

Snowman Magic WOW card; amazing work by Candace!


Last weekend we held our monthly Flowerbug's Team swap.  Our theme was fun folds!  I know you're going to love seeing their wonderful creations. 

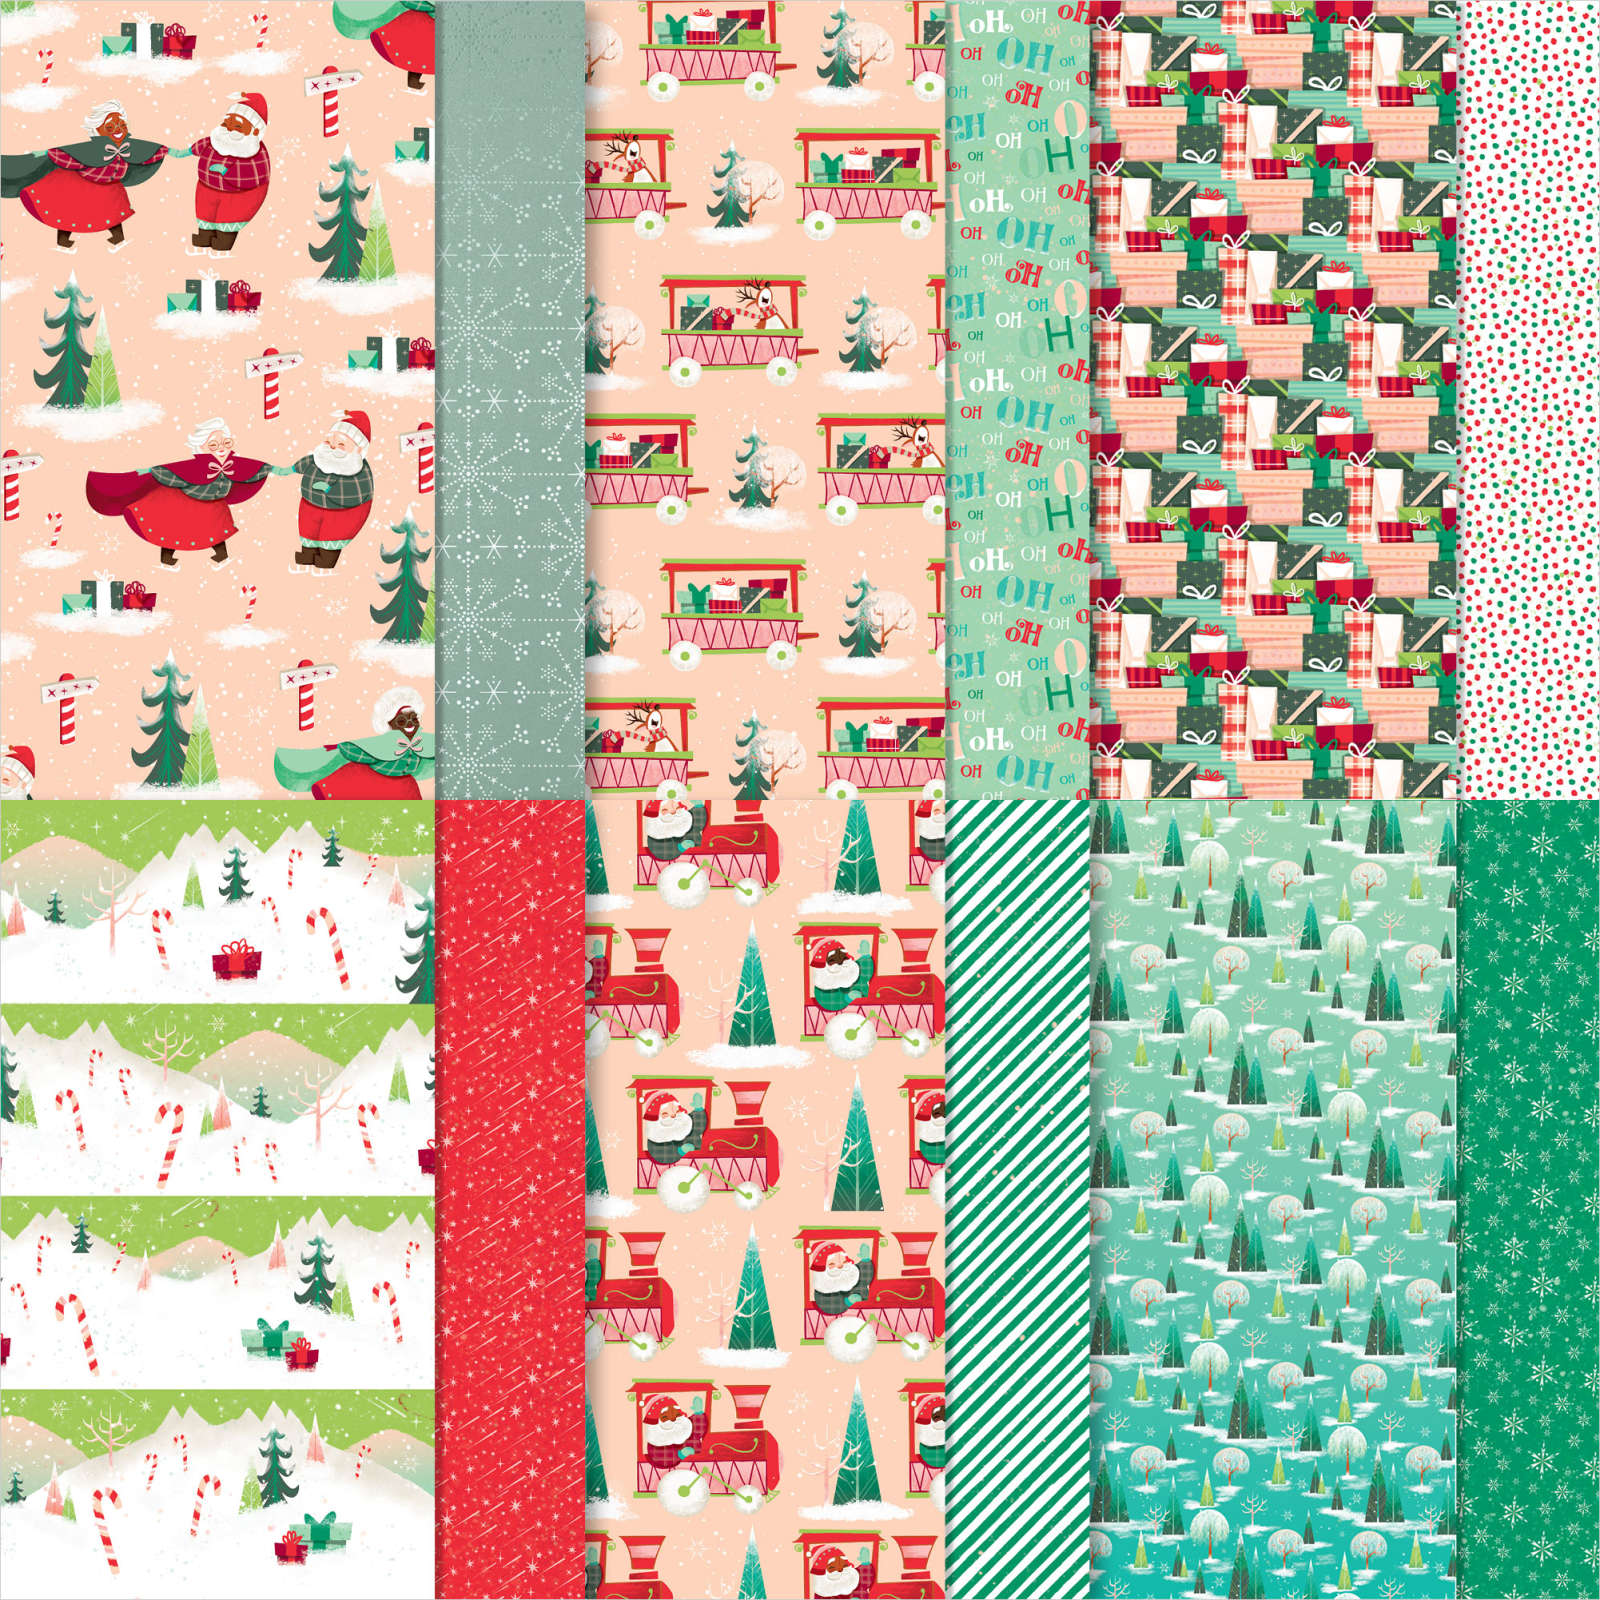
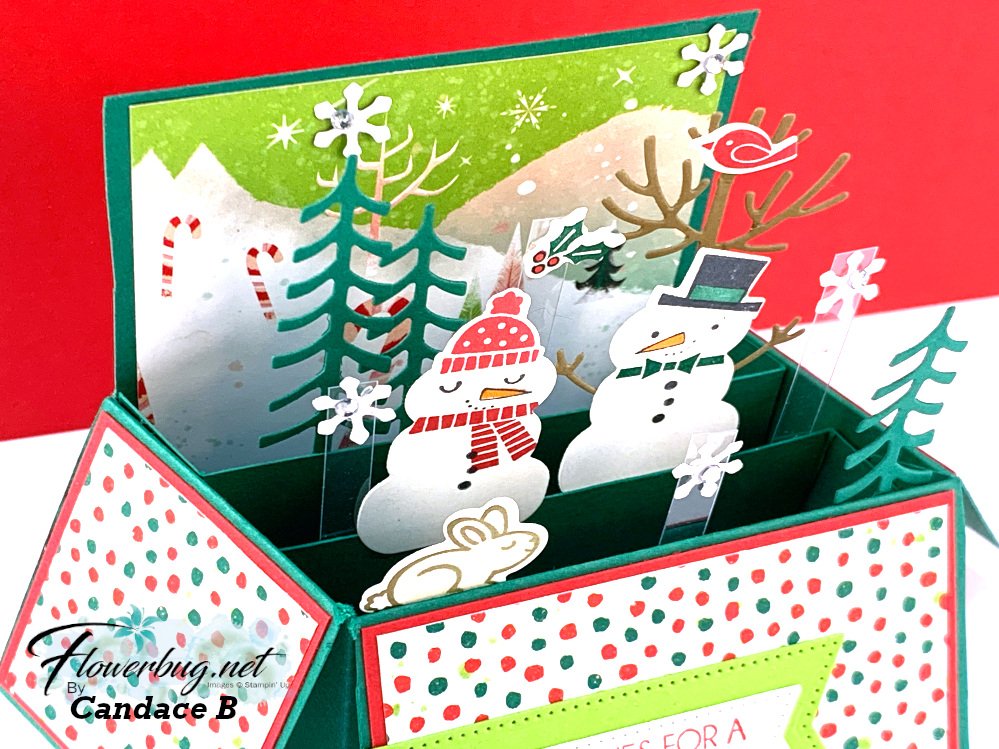
Today I'm sharing two cards featuring the Santa Express designer paper. This first is made by Candace. She used the Snowman Magic bundle seen here in the 2022 Holiday Catalog.  

Amazing, right?!  

It folds flat for mailing and fits in a standard A2 envelope.  

I'm going to do my best to provide the correct card stock measurements for this:  

  • Shaded Spruce 2 pieces at 4" X 6" score on the long sides at 2" & 5 1/2"; turn and score on the short side at 2".  Cut up to the score lines and trim off the extra 1/2" strip.  
  • inside pieces are 1" X 5 1/2" scored at 3/4" from both ends.  The scored ends are folded and adhered to the outer edges of the box inside. 

She used 1/4" strips of Window Sheets to hold up the snowflakes and holly.  The snowmen, trees and bunny are adhered to the box and inside strips.  It's so darn cute! 
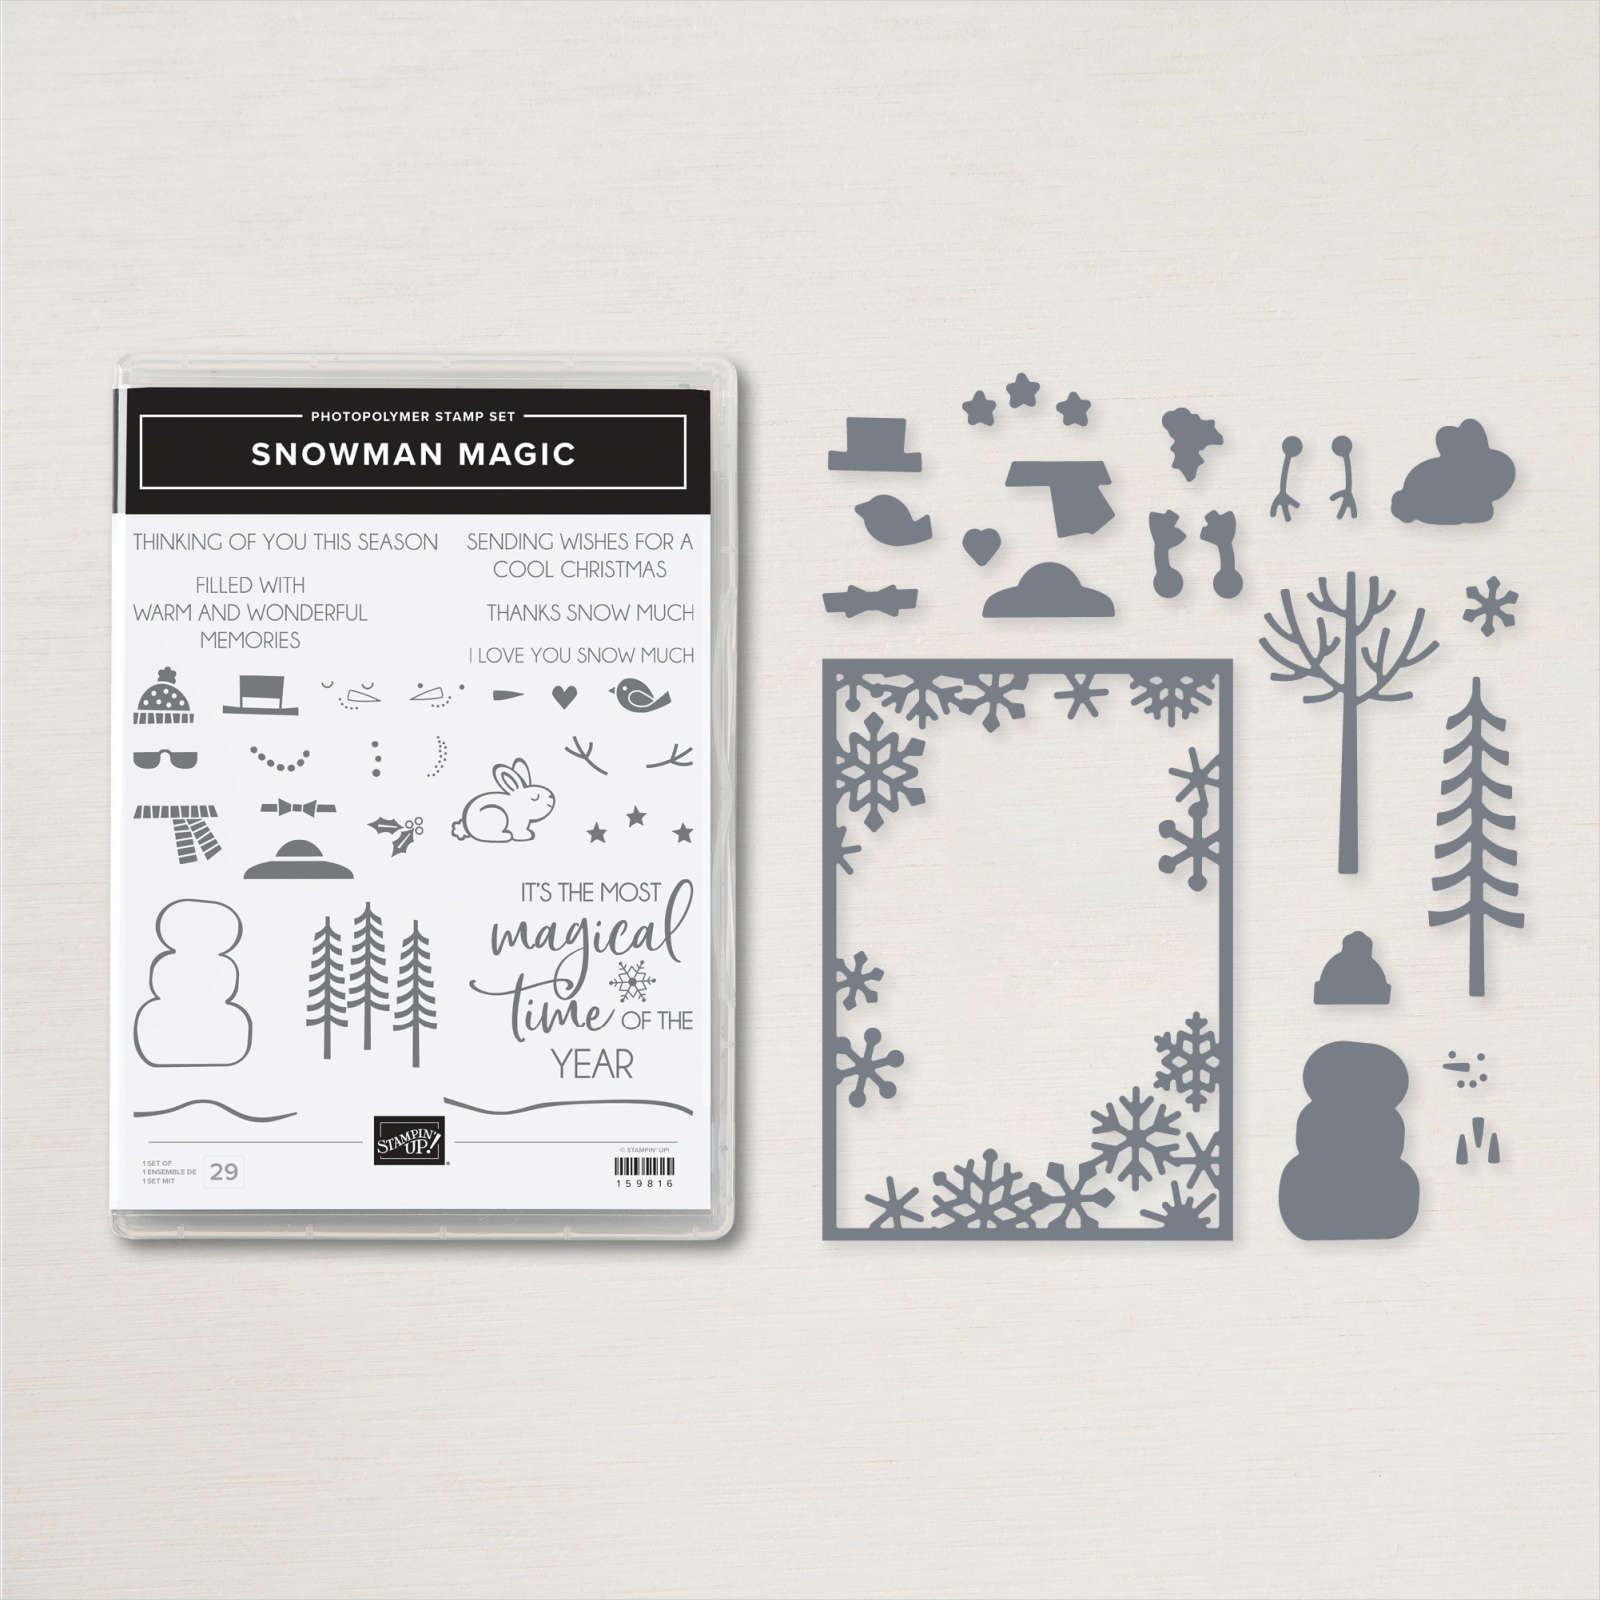
All of these elements are in the Snowman Magic bundle! 
Next is another incredible card made by Brenda; she chose to use the Santa Express designer paper also and added the coordinating Santa's Delivery bundle to hers.

It's a side-step fun fold card.  She chose to use Petal Pink and Pear Pizzazz for her card base & layers.  I love the jumping penguins and that smoke stack!  

Here are the measurements:

  • Card base 5 1/2" X 6" scored in half at 4 1/4".  Then make a mark at the 1" and at 6 3/8" at the 3" mark across.  
  • Now you'll cut from those marks down the center of the card.  
  • Next score up to the cut line at 1", 2", 3 1/4" and 6 3/8" 

She cut the trains from the Santa Express designer paper using the Santa's Train dies; which coordinate perfectly.  The cute penguins & smoke are stamped, colored & die-cut.  They're added with 1/4" strips of Window sheets so they pop up and flutter when opened.  Just adorable!  

See the Santa's Train bundle here and the Santa Express DSP here. 

Remember some of these items can sell out before the catalog ends.  Already we are out of the Lights Aglow specialty DSP. 

~~~

Order online here

Host code link: XZPZ6TDV  or BMGZZDPU

November Specials: 

1. Get a pack of mini Stampin' Dimensionals from me with online orders over $55!
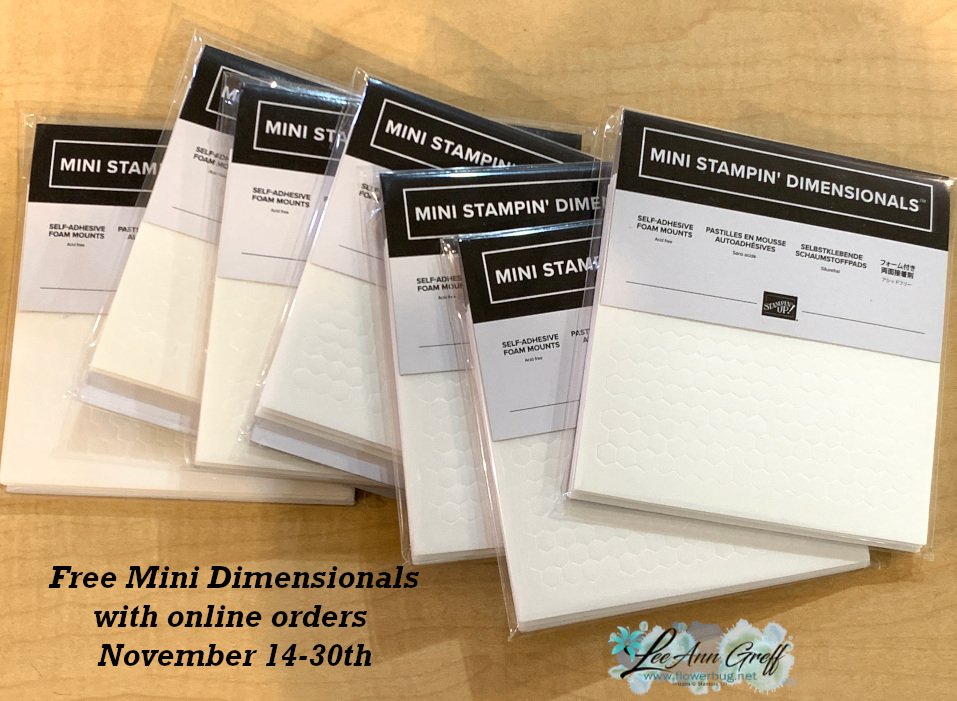

2. All orders in November will receive a big project tutorial – a collection of 12 cards featuring this new collection of products.

Earn free products with my loyalty rewards! 

Click here to download yours and earn a $50 shopping spree!
All Posts

  • Fun way to use paper strips! Live video tonight!


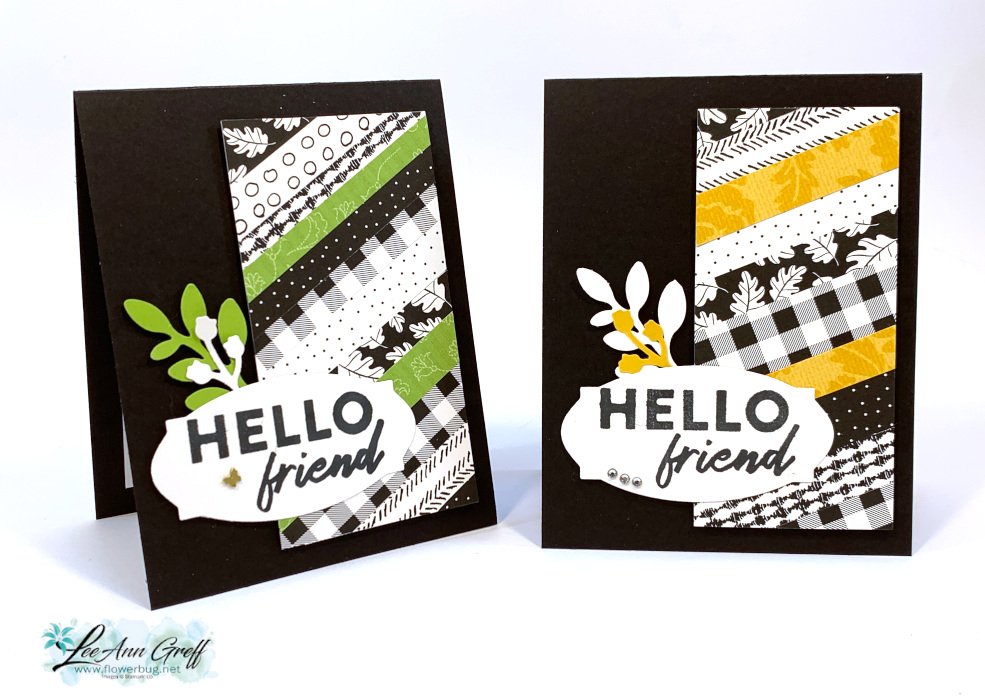
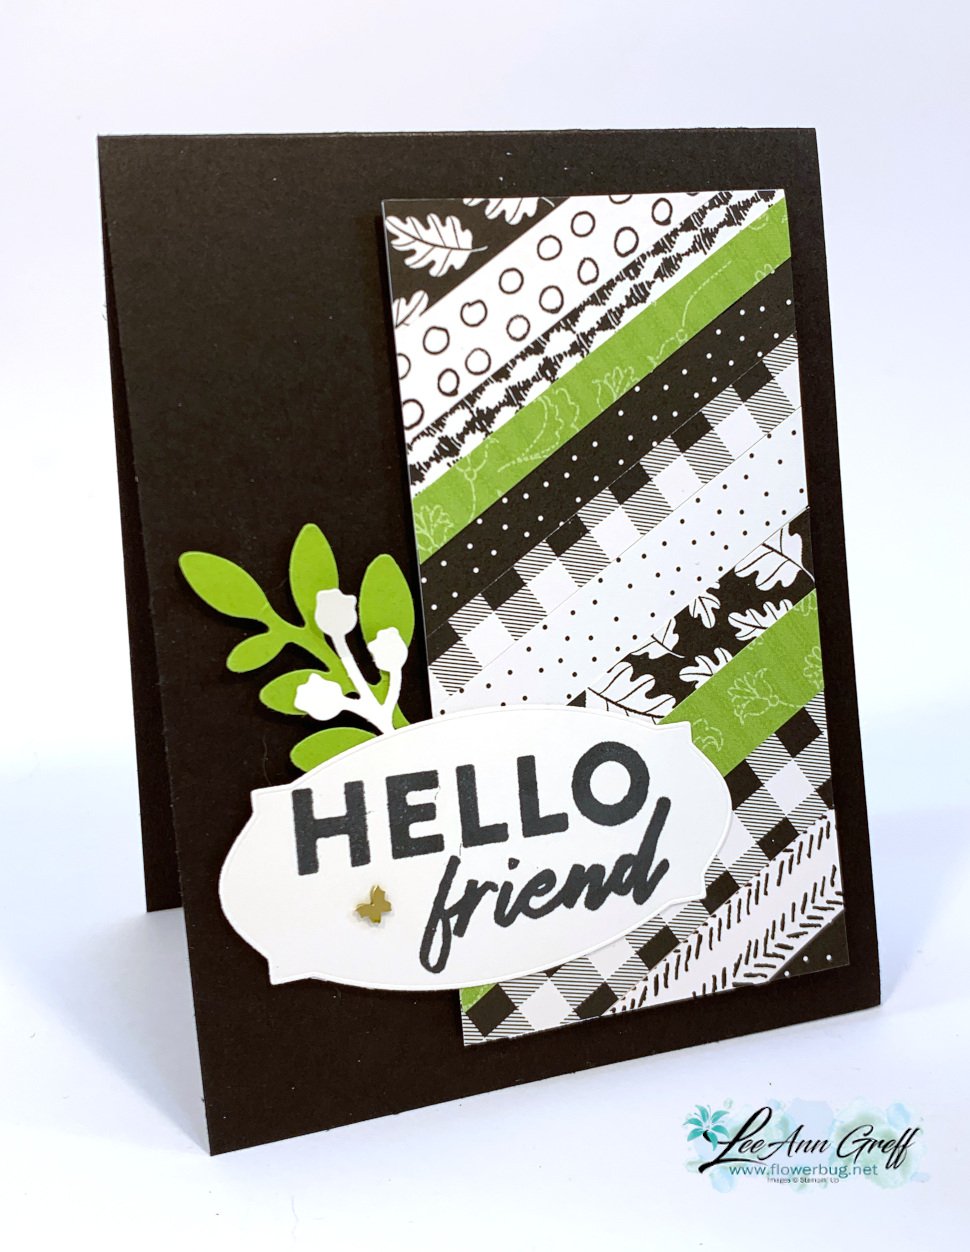
    We made these cards on FB Live Monday night.  What a fun and easy way to use up your extra designer paper pieces! Click here to watch the video. 

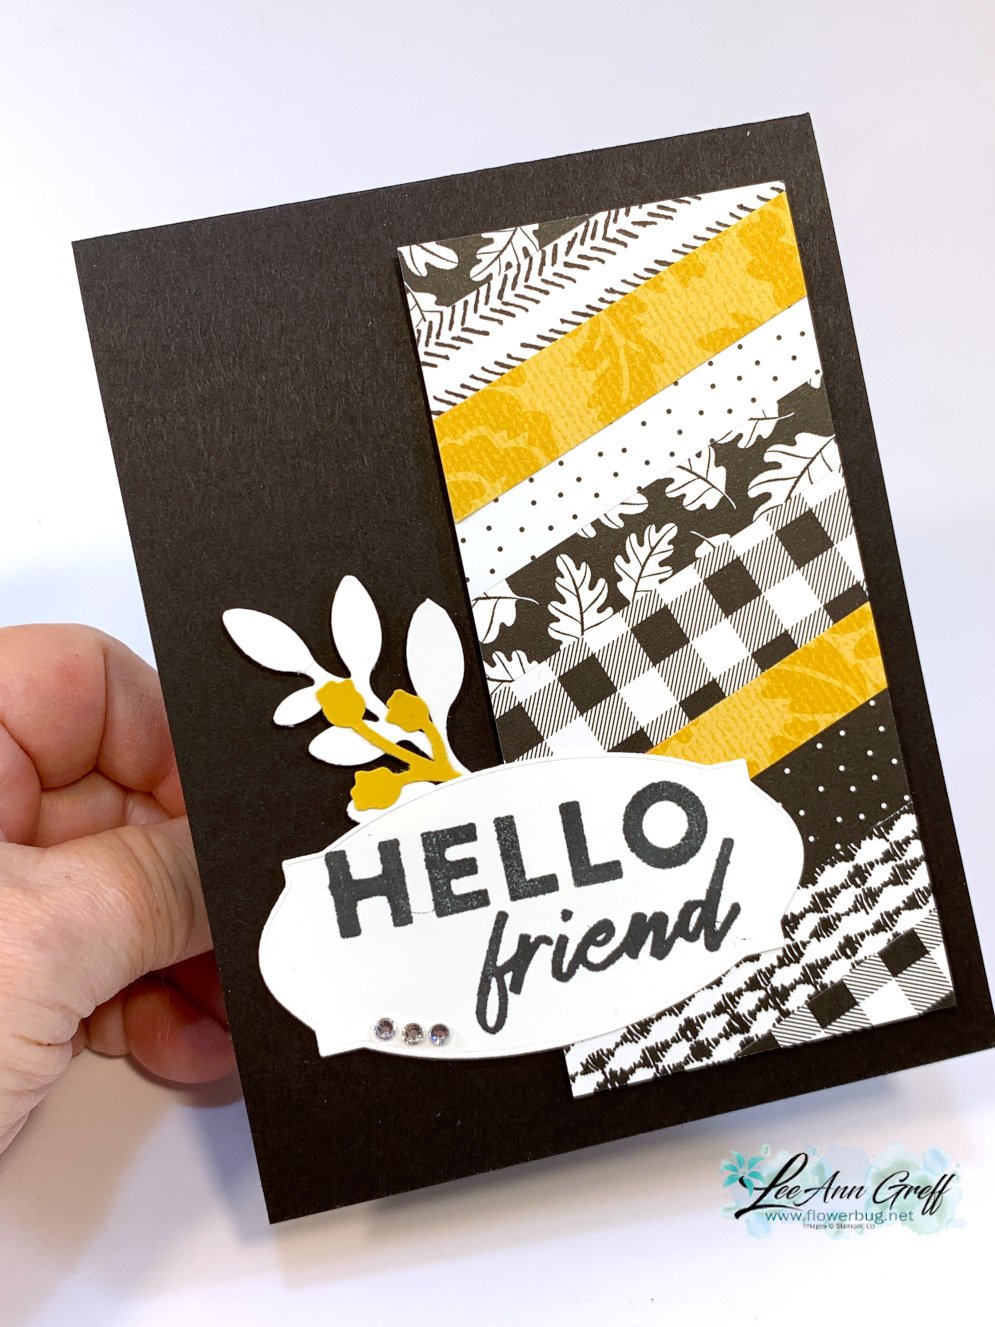
    I used the Pattern Party designer paper for these cards. It's a host choice in the back of the annual catalog seen here.  One side is Black & White and the other is colorful prints. I love the black & white patterns with a pop of color! 

    Tips: 

    • I start out with a 2 1/4" X 4 3/4" piece of neutral CS.  This is what I adhered the strips of Designer Paper to. 
    • I added Seal adhesive over the entire piece and added the strips one by one. 
    • Apply one strip across the middle at an angle first. Then keep filling in. 
    • I trimmed the excess off the edges once I had it well covered with strips.  
    • My DSP strips measure between 1/4" and 5/8" wide and about 3" long.  It doesn't matter how wide your strips are; it looks great if they're different widths.  
    • Add dimensionals to the back of this piece for added dimension. 
    • Add a greeting and accents if desired. 

    You might wonder where this greeting is from.  It's an upcoming Sale-a-Bration stamp set called 'Hello Friend'.  It's in a bundle with a pack of Designer Paper.  It will be free with a $100 purchase during SAB in January & February.  Of course Demo's can earn it free now during our pre-order period. 

    The other new items here is a punch.  Can you spot it?  It's called the bough punch and has two options in the punch.  The large leaf and the 'buds' too.  

    Below is the video for you: 

    ~~~

    December Specials:

    Host code:  6YCWV7QN

     *click here to order 

    Use the host code above & get a free card stock sampler ring with a $50 order in December! 

    See the last chance list here

    See the July-December catalog carry over list here

    Leave a Reply

    Your email address will not be published. Required fields are marked *

  • Last of the unique ‘Gift Card’ ideas with video!


    I've shared two other special gift card ideas and today I have another.  It's the last one I shared in this video. 

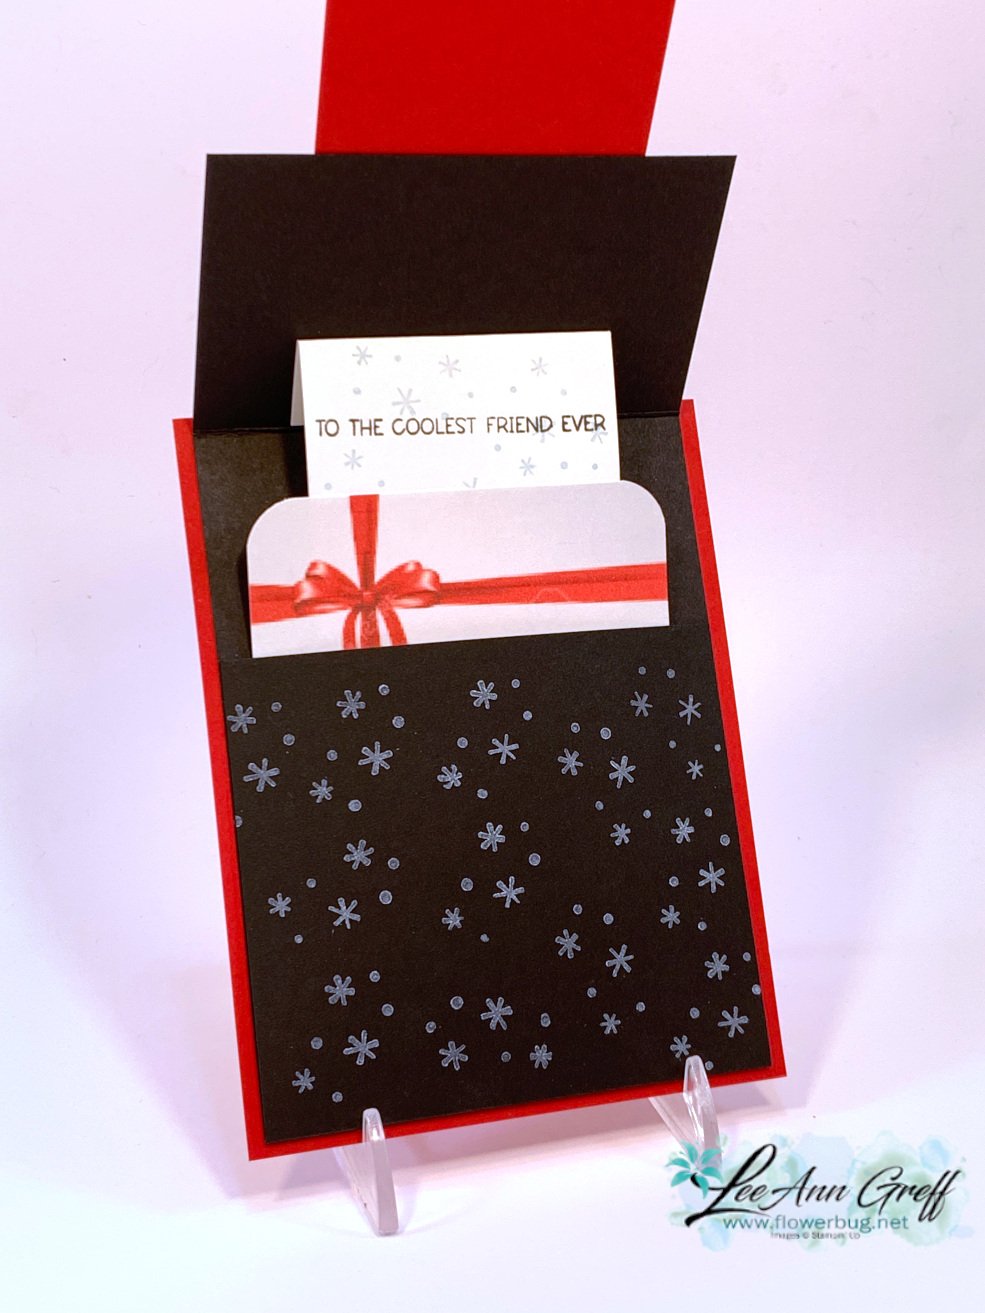
    It features the Penguin Place bundle seen here.   And it's now available but on low inventory; once more.  The punch was out of stock for a long time. 

    This penguin is super cute and quite versatile.  Certainly not just for Christmas!

    Details:

    • His main body is punched out of Black glitter paper. 
    • I fussy cut his scarf from Heartwarming Hugs DSP. 
    • I stamped the snowflakes on the Black CS using our White Craft ink.  

    This card opens up like this: 

    There's a fold inside that brings up the 'gift card' when you lift up the card front.  I did use Thick White CS for this so it stands up to lots of use. Isn't it fun?  It's quite easy too!

    Measurements for the Pull-Up Penguin Gift Card

    • Card base 4 ¼” X 5 ½”, DSP 2” X 3 ¾”
    • Black card 4” X 11” scored at 3 ½” & 8 ¾”
    • Inside Thick White 2 ½” X 5 ½” or 6” scored at 3/4" from each end
    • Front white 2” X 3”, Black 2 ¼” X 3 ¼”, Red 2 ½” X 3 ½”

    Below is the video tutorial.  It's the third & last project I share.  

    ~~~

    December Specials:

    Host code:  6YCWV7QN

     *click here to order 

    Use the host code above & get a free card stock sampler ring with a $50 order in December! 

    See the last chance list here

    See the July-December catalog carry over list here

    Leave a Reply

    Your email address will not be published. Required fields are marked *

  • Extra special Gift Card idea with a pop up ‘gift bag’ inside the card!


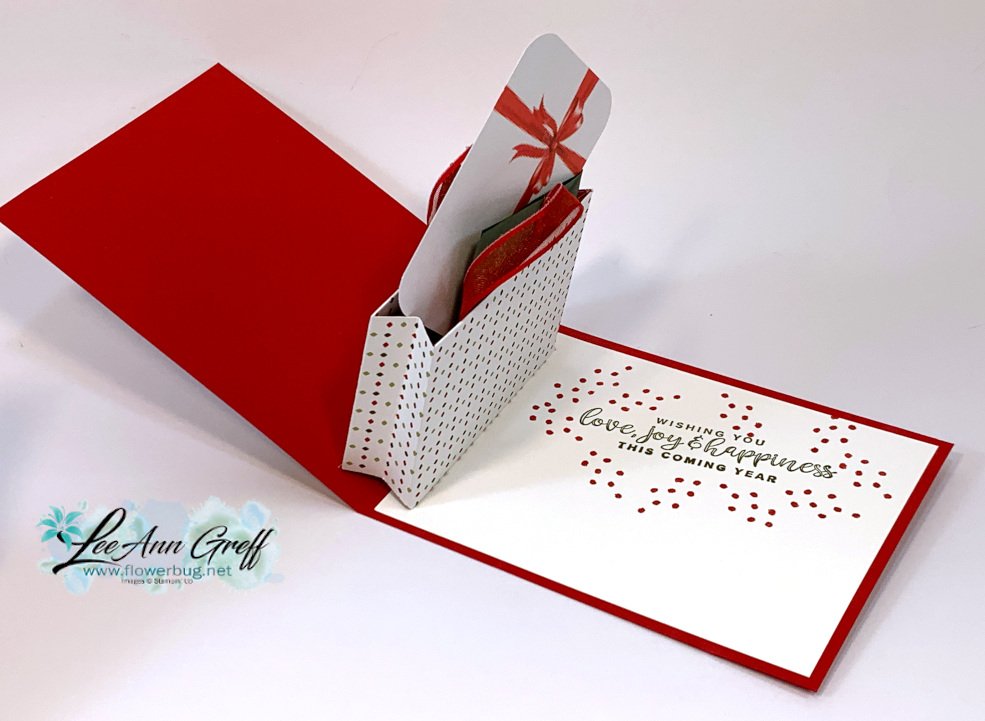
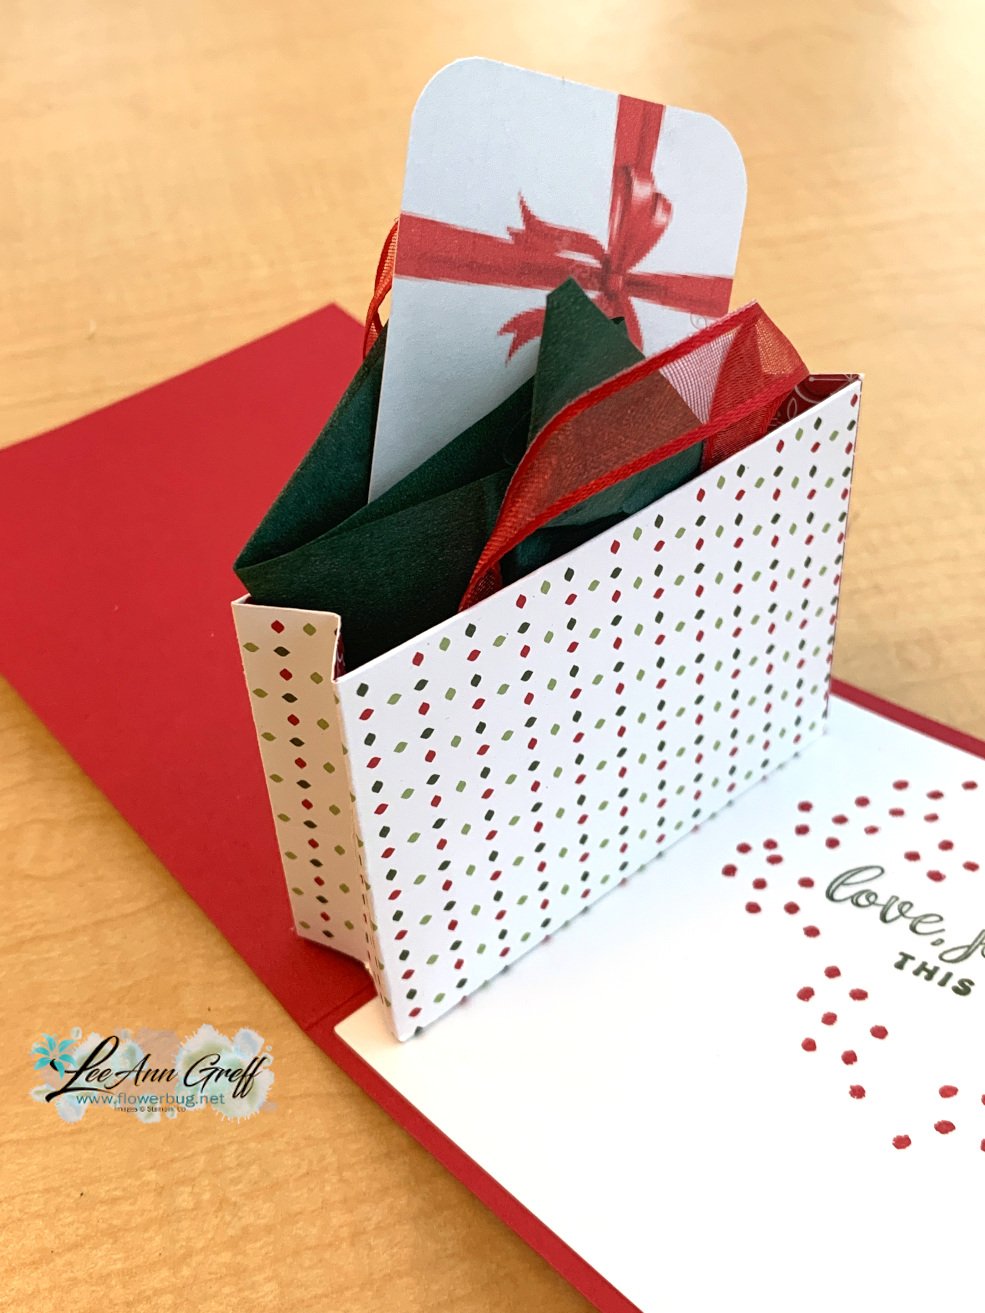
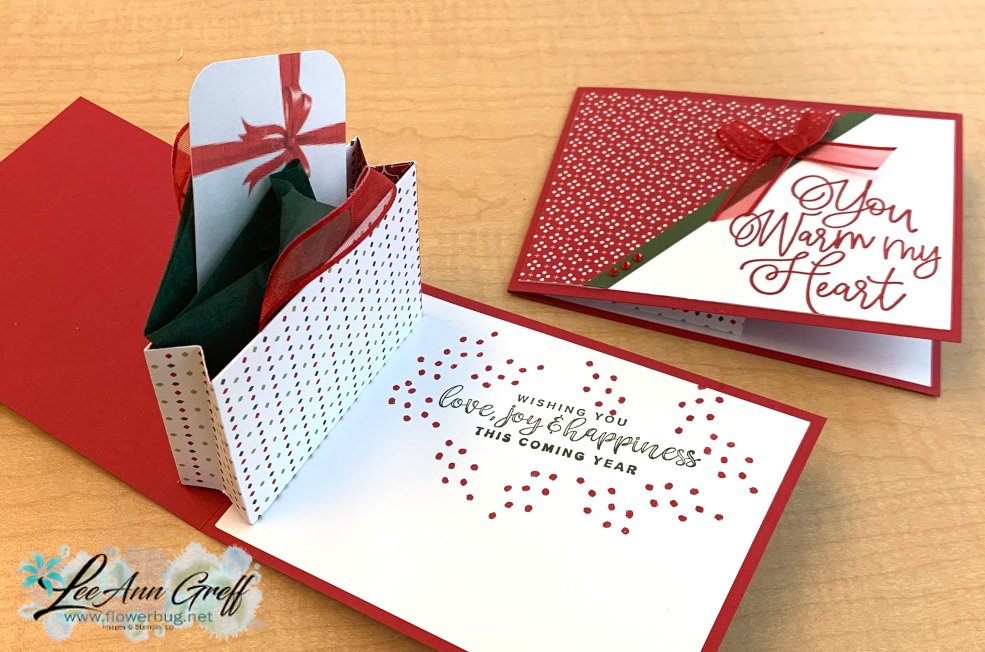
    Here's another gift card idea for you.  It looks harder than it is; honestly! It's a 'gift bag' inside the card! 


    Here's the front view:  I used the angled Heartwarming Hugs designer paper piece I cut off from this card I shared yesterday.  I love it when I can use my paper efficiently! 

    I kept the front very simple as you can see.  The greetings are from the Encircled in Warmth stamp set seen here.

    I even added 'tissue' using the Ever Eden cotton paper!  It's a 6" piece I folded into points. 


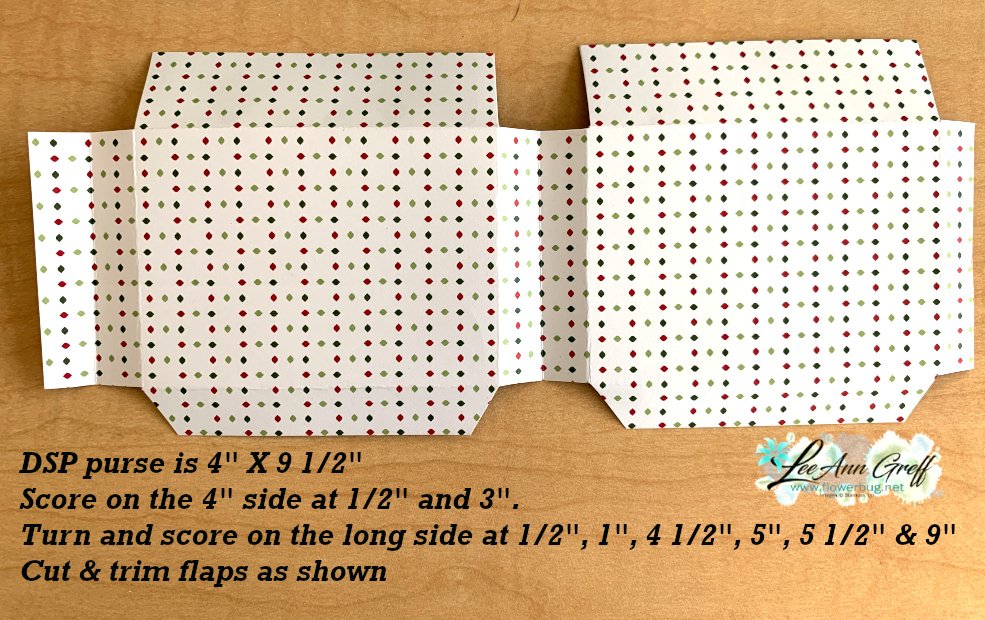
    I used our Real Red sheer ribbon on the front for both the bow and the 'handles' inside the bag. Below is a photo of the gift bag cut out.  Measurements are included. 

    Pop-up Gift Bag card measurements:

    • Card base 4 1/4" X 11"
    • White – two at 4" X 5 1/4"
    • DSP 4” X 5 ¼” cut one section off diagonally
    • Purse 4” X 9 ½” scored on the 4” side at ½” & 3”, scored on the long side at ½”, 1”, 4 ½”, 5”, 5 ½” & 9”


    Below is the video for 3 different gift card options.  I'll share details on one more unique card tomorrow. 

    ~~~

    December Specials:

    Host code: Z2RQ7BB6 or 6YCWV7QN

     *click here to order 

    Use the host code above & get a free card stock sampler ring with a $50 order in December! 

    See the last chance list here

    See the July-December catalog carry over list here

    Leave a Reply

    Your email address will not be published. Required fields are marked *


Notice: LeeAnn Greff, Independent Stampin’ Up! Demonstrator, Manager. The content of this website is my sole responsibility as an independent Stampin’ Up! demonstrator and the use of, and content of, the classes, services, or products offered on this website is not endorsed by Stampin’ Up! Copyright 2025