/


Latest Post

Look at these awesome Sale-a-Bration Team Swaps


This weekend we held our Team meeting & swap and I can't wait to share them all with you!

The cards today all feature products from our Sale-a-Bration promotion – it ends in just 2 weeks!  I love getting something free with my purchases.  See all of the SAB choices here. 

First up is Mary's card featuring the Rings of Love designer series paper.  She created a double Z fun fold card! 

Her colors include Night of Navy & Mint Macaron. She used the Charming Sentiments bundle for her greeting and popped it up onto a Mint Oval punched piece.  

Measurements:

  • Night of Navy 4 1/4" X 11" scored at 2 3/4" & 5 1/2"
  • Mint Macaron 9 3/4" X 3 1/4" scored at 4 1/4" & 7 1/4"
  • DSP is 4" X 3"
  • White is 2 1/4" X 3" 

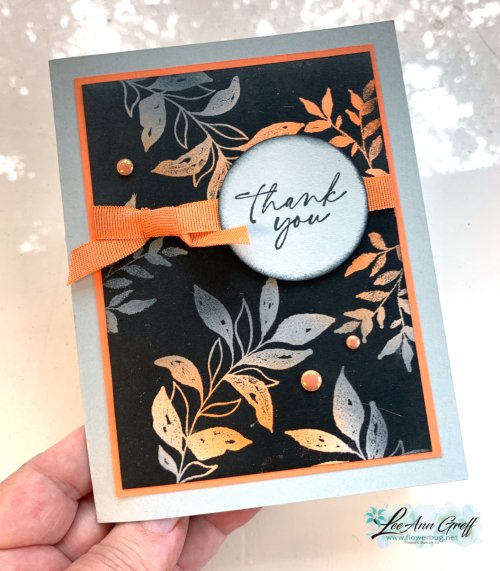
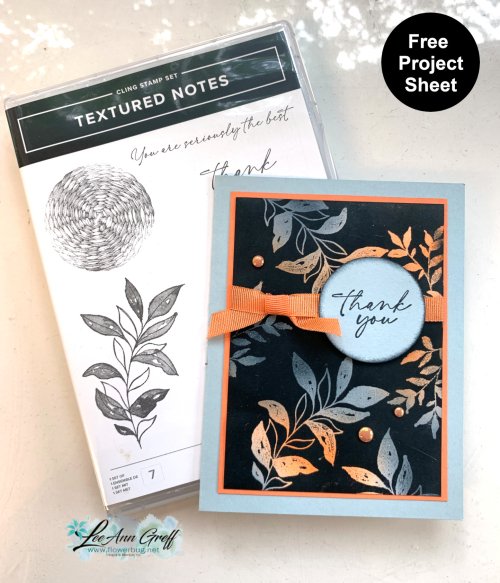
Next is a sweet card made by Karen; it's a perfect layout for quick cards that highlight your designer paper!  She also used the Rings of Love designer paper; it's free in August with a $50 order.  See it here. 

Her colors are also Night of Navy with Mint Macaron. She colored her White seam binding ribbon Navy with a Blends marker.

Measurements:

  • White card base 5 1/2" X 8 1/2" scored in half at 4 1/4"
  • Night of Navy 3 1/4" X 4 1/4"
  • Designer paper 3" X 4"
  • Mint greeting strip 3 1/4" X 3/4"

Next is a pretty card made by Laura.  She featured the Wonderful You Designer Paper which is part of the Wonderful You stamp set & designer paper bundle seen here.  They're both free with a $100 Stampin' Up! order in August. 

She used the Stylish Shapes stitched square dies to cut the flowers out of the designer paper.  No stamping needed! 


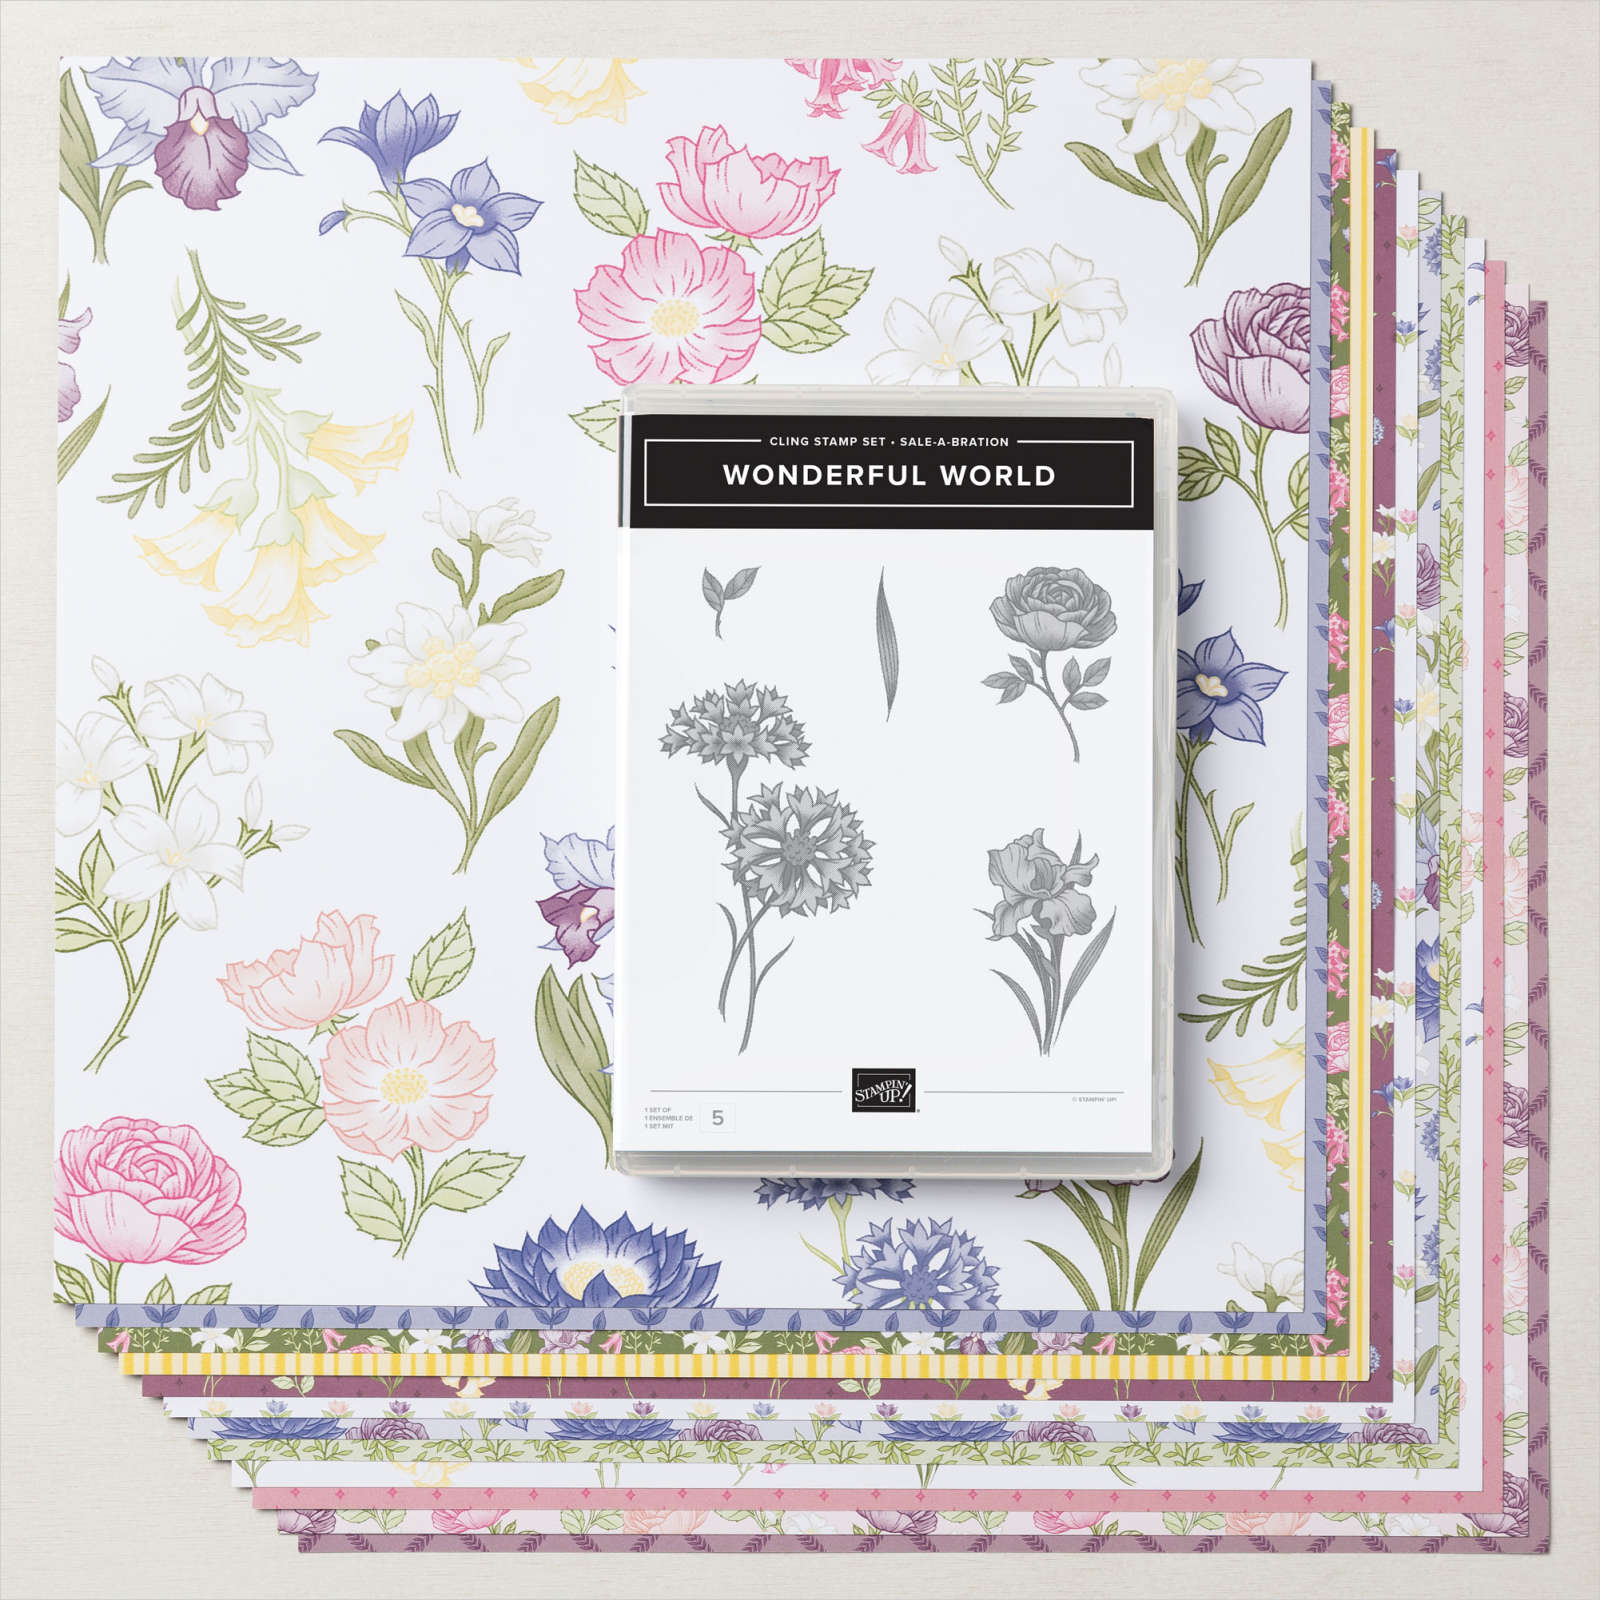
The Fern 3D embossing folder is so pretty with these delicate flowers.  

Measurements:

  • White card base 5 1/2" X 8 1/2" scored at 4 1/4"
  • Mossy Meadow 5 1/2" X 2" and 5 1/2" X  1/2"
  • Designer Paper is 5 1/2" X 1" 
  • The die-cut squares are 1 1/2"

Stop in for more amazing swap cards tomorrow…..

~~~

August Specials

Get free items here in August during Sale-a-Bration! 


Host code: YFR367QW


Get these pretty gems free! *click here to order 

Earn free products with my loyalty rewards! 

Click here to download yours and earn a $50 shopping spree!

All Posts

  • Last card in the Joseph’s Coat series with a video & free project sheet for each!


    Here’s the last card made with the Joseph’s Coat technique this week.  You can see the video tutorial below.  

    It features the Textured Notes stamp set seen here.  I love this set! But I love the dies in the bundle even more.  See the bundle here. 

    I used two of our newest In Colors here – Secret Sea and Timid Tiger.  I love the fact that the Secret Sea matches the Cloud Cover card stock I used for the card base; when sponged lightly. 

    Both of these colors are part of the big In Color sale during August, 2025!  It includes card stock, inks, markers, designer papers, embellishments, kits and lots more!  Check out the many discounted products here. 

    If you’re wondering how to make this incredible colorful effect please watch the video below.  I also gave the step by step directions in this post.  

    Here’s the free project sheet for this pretty card. Click on the following link to print or download it.  Download Textured Notes Joseph’s Coat technique

    The video tutorial for this card and two more versions is below.  Be sure to follow me on YouTube here so you don’t miss any of my tutorials. 

    ~~~

    August Specials

    Lots of In Color products are discounted in August!!

    Go here to see them all. 

    Get a free card class with any online order over $55 during August!

    Order online here

    The last chance list has new products! See them here. 

    Leave a Reply

    Your email address will not be published. Required fields are marked *

  • Gorgeous Joseph’s Coat technique with free project sheet & video


    Here’s another beautiful card made with the Joseph’s Coat technique. I shared it on last week’s Live video.  It’s so fun!

    My colors include Secret Sea, Timid Tiger and Darling Duckling.  The stamp set is called Artistic Leaves and can be seen here. 

    This technique involved adding color to White card stock and then heat embossing images in Clear powder over the colors.  Next rub a dark ink pad (Memento Black here).  The embossed images resist the black ink – it must be water-based ink!  

    Watch the video below to see how it’s done.  It’s super fun and such a cool effect.  

    I stamped the inside leaf with color by inking it in Timid Tiger ink and adding Secret Sea to the outer edges.  Then I stamped the coordinating stamp in Darling Duckling.  

    Here’s the free project sheet for this card. Just click on the following link to print or download it.  Download Artistic Leaves Joseph’s Coat

    The video tutorial for this card and two more versions is below.  Be sure to follow me on YouTube here so you don’t miss any of my tutorials. 

    ~~~

    August Specials

    Lots of In Color products are discounted in August!!

    Go here to see them all. 

    Get a free card class with any online order over $55 during August!

    Order online here

    The last chance list has new products! See them here. 

    Leave a Reply

    Your email address will not be published. Required fields are marked *

  • A colorful Joseph’s Coat technique with Layered Thoughts


    Have you ever done the Joseph’s Coat technique?  It’s one of those techniques that makes you feel like an artist.

    I shared how to do it on last week’s Live video. The card I’m featuring today uses the Layering Thoughts technique with three of our newest In Colors – Strawberry Slush, Darling Duckling and Timid Tiger.  

    These colors – card stock, ink, refills, gems, markers and card stock are all 15% off in August. See these products and so much more here.  It’s a great time to grab these items while discounted. 

    This technique involves a few steps:

    1. sponge colors over your neutral card stock – I used White. 
    2. Tap or rub the embossing buddy over the layer. 
    3. Stamp your images using Versamark ink. 
    4. Heat emboss with Clear embossing powder and your heat tool. Let dry. 
    5. Rub a dark ink (memento black here) over the entire layer.  The embossed areas will resist the water based ink. 
    6. Dab off excess ink with a tissue or paper towel.  Done!  

    Here’s how I finished the inside.  I wanted to use all of the colors I colored on the front so I used my Stampin’ Write markers on the stamp before stamping. 


    Here is the free project sheet for this card. Click on the following link to print or download it.  Download Layered Thoughts Joseph’s Coat Technique

    I’ll be sharing the other cards in the next few days. Stay tuned! 

    The video tutorial for this card and two more versions is below.  Be sure to follow me on YouTube here so you don’t miss any of my tutorials. 

    ~~~

    August Specials

    Lots of In Color products are discounted in August!!

    Go here to see them all. 

    Get a free card class with any online order over $55 during August!

    Order online here

    The last chance list has new products! See them here. 

    Leave a Reply

    Your email address will not be published. Required fields are marked *


Notice: LeeAnn Greff, Independent Stampin’ Up! Demonstrator, Manager. The content of this website is my sole responsibility as an independent Stampin’ Up! demonstrator and the use of, and content of, the classes, services, or products offered on this website is not endorsed by Stampin’ Up! Copyright 2025