/


Latest Post

Pretty Perennials ‘Happy’ card with video


I wanted to use the Pretty Perennials bundle for my April clubs and I found a card like this on Pinterest.  I love the fresh color combination of Daffodil Delight, Smoky Slate and Calypso Coral!

The Perennial dies were used here along with a few others; the recently retired Stitched Shapes and the Stitched So Sweetly dies.  The pretty embossing folder is the Dainty Diamonds and I'm sad to say it did retire last month. 

Here's the Pretty Perennials bundle.  This did not make it in the new Annual catalog and is retiring next month and it will be while supplies last.  

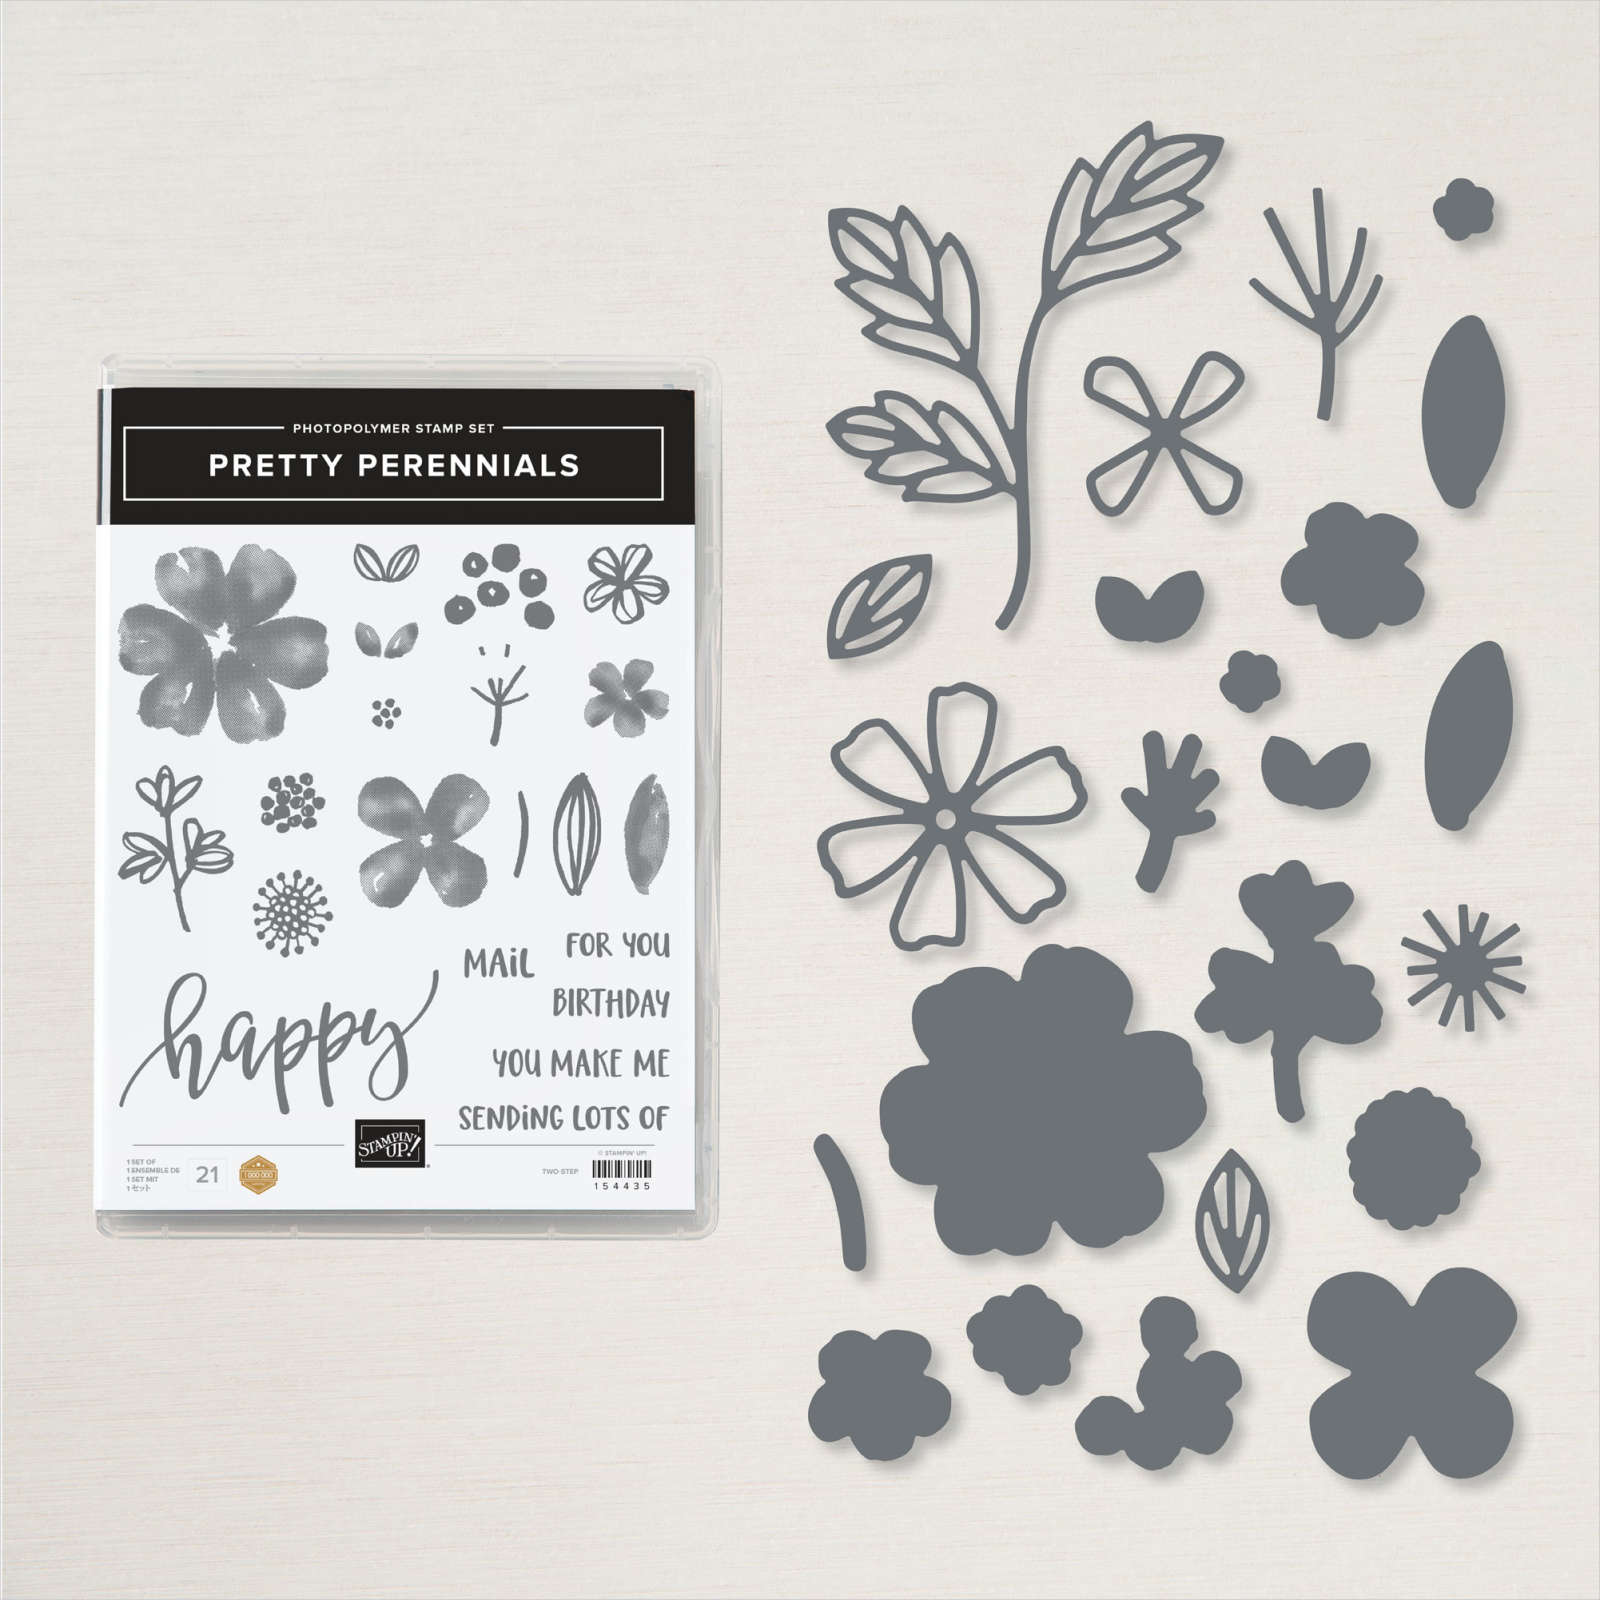
I love this set for the flowers but the greetings are the star in my opinion.  There are so many ways to use the 'happy' with the rest of the words.  My favorite is 'Happy Mail'.  Who wouldn't love getting a card with that saying?  It could also be stamped on the outside of your envelope as well.  

For the inside I used an oval die-cut and added a fun greeting from the Happiest of Birthday's set. 


I made a quick video on putting this card together.  You can see it below. 

 ~~~

May Specials & Promotions!

Get $55 in free product with purchase of the Stampin' Up! Starter Kit!  Choose $155 in product of your choice for just $99 and get FREE SHIPPING as well! 


Earn an extra $25 in free product if your order is over $250!  That means you get $50 in free product!  *combine your order with a friend.


Get a NEW embellishment from the Annual Catalog with an online order

over $50 before tax & shipping. 

Host code: WB2EX96R  Click here to order

Use this host code if your order is under $150. If it's over you'll still get the jewels but you'll also earn host benefits! Better yet, choose the Starter Kit and get $55 in FREE product and FREE Shipping as well!  Click here!

*All online orders in May receive a free PDF full of project ideas with 2 new catalog suites! 

All Posts

  • Wow! Halloween Scenic cards with Life is Beautiful stamp set with video!


    I am pretty pleased of these two cards I shared on Facebook Live yesterday.  I've been wanting to make some spooky Halloween cards with my Life is Beautiful stamp set and think they turned out amazing, IF I do say so myself!  

    This first one features a bright, white moon with a halo of purple around it.  I used a 2" circle punched 'mask' and sponged the Rich Razzleberry and Pacific Point background.  You can get my easy sponging tips in the video below. 

    Here I created a window scene with the Stitched Rectangle and Plaid Builder dies.  I share my quick method of creating this window in the video below. 

    I LOVE creating scenes with sponged backgrounds and the Life is Beautiful stamp set is perfect for it!  I used the following inks on the card above: Pacific Point, Rich Razzleberry, Black, Craft White and Pretty Peacock. 

    Do you like the White clouds?  I used the same image on the ground as I did on the clouds.  Love the versatility of this stamp! The pumpkins and greeting are from the Banner Year stamp set. 

    The colors above are Smoky Slate, Black and Pumpkin Pie.  I used a bit of Magic in This Night DSP, the Cobweb embossing folder and Plaid Builder, Stitched Rectangles and Ornate Frames dies.  The little birds are from the Mountain View stamp set. 

    I hope you enjoy watching the video below!  

    ~~~

    Current Host code is HYSHW6QB

    Get a free package of All the Trimming embellishments in September with an

    online order over $55. 

    *Remember that if your order is over $99 you should consider purchasing the Starter kit here.

    And if it's over $150 you should definitely get the Starter kit.  

    Order online here

     Get my Beautiful Autumn pdf tutorial free with any online order in September!


    It includes directions, photos and measurements for 13 cards!


    Leave a Reply

    Your email address will not be published. Required fields are marked *

  • Customize your cards with the Playful Alphabet!


    Who doesn't like a customized card WITH your name on it!  You won't find that at Hallmark!  Use the Playful Alphabet dies to create a one of a kind card. 

    I made this for my granddaughter Eliza. She is almost 7 and loves anything with her name on it. 

    The color palette was chosen by the designer paper Playing with Patterns.  It's full of bright, unique colors and patterns.  In fact, behind her name is a piece of the paper.  The gradation of colors sure fits the card well doesn't it?  

    I used the Stitched Nested Label dies.  I cut out the letters from the White die-cut and popped that up over a strip of the DSP.  I added some Seal Plus to the bottom edge and pressed my ribbon onto that in small loops.

    Her favorite color is turquoise; just like mine!  I chose two pieces of Designer paper for the card front and separated them with a strip of Crushed Curry.  You can see these products below in my store. 

    ~~~

    Current Host code is HYSHW6QB

    Get a free package of All the Trimming embellishments in September with an

    online order over $55. 

    *Remember that if your order is over $99 you should consider purchasing the Starter kit here.

    And if it's over $150 you should definitely get the Starter kit.  

    Order online here

     Get my Beautiful Autumn pdf tutorial free with any online order in September!


    It includes directions, photos and measurements for 13 cards!


    Leave a Reply

    Your email address will not be published. Required fields are marked *

  • Quarter Diagonal cards; watch on FB Live tonight!


    If you're like most stampers you have a LOT of Designer Paper stocked up.  I've been on a mission to use mine up and help you with ideas to use yours too.  There's always more we want; so here's a way to use some so you don't feel so bad about purchasing more!  Ha! 

    Below are the cards we're making tonight on Facebook Live – Stamp with Me.  It's the 2nd and 4th Monday nights each month at 7:30 pm CT.  Join me here. 

    Be sure to follow my FB page so you get notified when I'm live.  

    I chose to use the Magic in the Night designer paper; seen here in our Halloween DSP in the 2020 Holiday catalog.  I love the colors of Pretty Peacock, Cajun Craze, Black, Blackberry Bliss and White.  And as you can see some of the designs are not all Halloween!  

    The greetings and die-cuts are from the Celebration Tidings Bundle seen here.  I love that it has multiple holidays and these dies are amazing! 

    Here's how you create the diagonal layers; it's so easy! 

    For 2 cards, cut 2 pieces of Designer paper (or card stock) at 4" X 5 1/4". Then cut each in half on the diagonal. Next put those pieces back together on your paper trimmer to reform the full piece (just placing; not gluing) and cut on the diagonal in the other direction. Now you'll have 4 triangle shaped pieces from one 4" X 5 1/4" piece.
    I chose two coordinating pieces of DSP that would work on all 4 sides and that makes 2 full card fronts.

    For the card below I chose to use the Gilded Autumn specialty DSP.  The colors here are Early Espresso, Cajun Craze and Vanilla. 


    ~~~

    Current Host code is 7VPEDARH

    Get a free package of All the Trimming embellishments in September with an

    online order over $55. 

    *Remember that if your order is over $99 you should consider purchasing the Starter kit here.

    And if it's over $150 you should definitely get the Starter kit.  

    Order online here

     Get my Beautiful Autumn pdf tutorial free with any online order in September!


    It includes directions, photos and measurements for 13 cards!


    Leave a Reply

    Your email address will not be published. Required fields are marked *


Notice: LeeAnn Greff, Independent Stampin’ Up! Demonstrator, Manager. The content of this website is my sole responsibility as an independent Stampin’ Up! demonstrator and the use of, and content of, the classes, services, or products offered on this website is not endorsed by Stampin’ Up! Copyright 2025