/


Latest Post

Power of Hope meets Peacock Foil


For our February Flowerbug's Team swap we chose to do a swap featuring Sale-a-Bration cards.  They are all fantastic!  Over the top wonderful.  I cannot wait to share them all with you.  

Here's the one I made using the Power of Hope bundle seen here.  It's one of the free items you receive with purchase during our Sale-a-Bration promotion from now through March 31st; or while supplies last.  I do suspect this will sell out before March is over.  

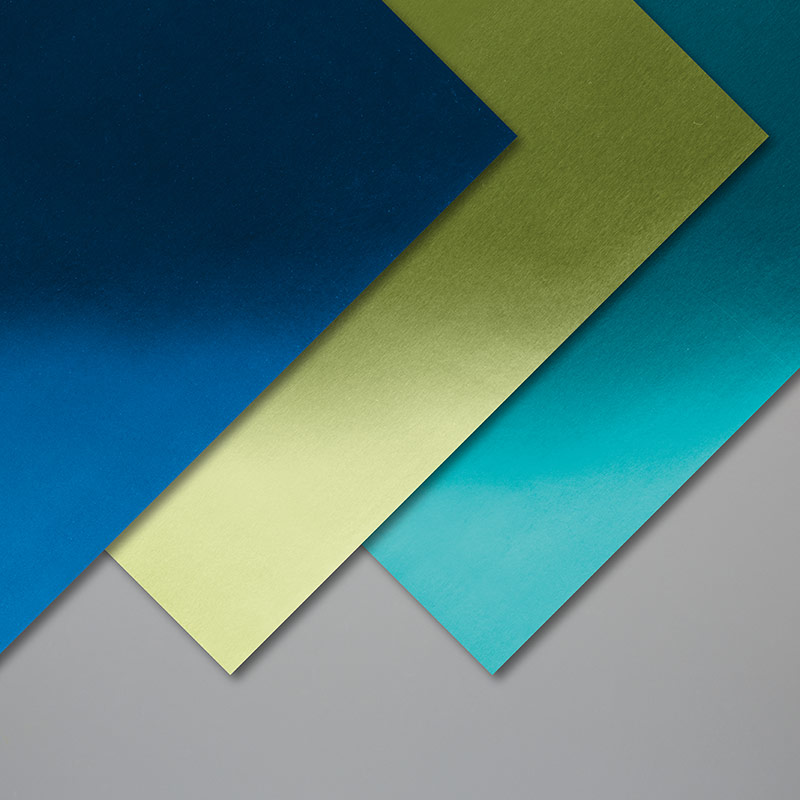
I textured the Noble Peacock Foil (seen here) with the Stone embossing folder from this bundle.  Adding texture to this pretty foil brings it over the top! I also added a layer of vellum and a few flags of Peacock foil.  It comes in 6 single-sided sheets of 12 X 12" foil paper. 2 each of 3 colors: Blueberry Bushel, Old Olive, Pretty Peacock.  There are Noble Peacock rhinestones that match this paper perfectly. 


Measurements:

  • White card base 5 1/2" X 8 1/2", White stamped layer  2 1/2" X 3 3/4"
  • Vellum 2 3/4" X 4"
  • Foil paper 2 1/2" X 4 3/4" plus two 3/8" strips
  • Black 4" X 5 1/4" 

Coordination Product Release – While supplies last!


~~~

Four February Specials besides Sale-a-Braton

and the Product Coordination Release! 

    1. Earn a ticket in the drawing for each $25 you order online in February for a free Little Ladybug stamp set!

Order online here

2. All online orders will receive a free pdf cards tutorial in an email.

3. And if your order is over $55 you'll get a free package of Champagne Rhinestones too!

February Host Code is 4CQKPWRV

Order online here

4. Choose any FREE stamp set when you purchase the Starter kit during Sale-a-Bration; of any value! Plus you'll get a free paper trimmer and a 6 X 6 sampler of new Designer Paper!  It's just $99 plus tax; shipping is free!  Click here to join my awesome Flowerbug's Team! 


All Posts

  • A cute Spooky Halloween cards


    I created this special card using the Spooky Halloween suite. I absolutely love this scene!

    I used the largest circle die in the Spotlight on Nature dies to create the mask around the large moon. I blended Petunia Pop ink onto a piece of White card stock. Then added the yellow die-cut moon. Next I sponged Secret Sea ink on the upper portion of the card.
    Lastly I added a curvy hills (cut with a scissors) and the die-cut house and fence pieces from the bundle.

    Check out those sparkly stars and die-cut bat! I heat embossed the word ‘spooky’ with White embossing powder and then colored the embossing purple with a Blends marker.

    You can see this neat bundle here.

    ~~~

    October Specials

    3 new kits and a Starter Kit special! See the kits here.

    And get the Starter kit here. *Choose your deal – $35 or $99 plus $90 in free products including free shipping, free Paper Pumpkin kit & free catalogs/business supplies!

    ~~~

    All online orders from me will receive a beautiful PDF of projects featuring the Modern Christmas suite.

    Reasons to ShopwithLeeAnn.com

    • Get a free PDF project tutorial with any online order! (changes monthly)
    • An order of $55 or more earns you a free 3 card stamping kit with pre-cut layers; ready to stamp & assemble
    • Earn 10% host rewards on each order you place (over $20). Redeem on a future order.
    • Join my Flowerbug’s Team and get $90 in free product of your choice in October! Details here.
    • Be a Paper Pumpkin subscriber and enjoy the free bonus project PDF tutorial every month. Subscribe here. Refills here.

    Leave a Reply

    Your email address will not be published. Required fields are marked *

  • Get a beautiful PDF of Modern Christmas projects!


    Any online order in October placed through me will receive a gorgeous PDF of projects featuring the new Modern Christmas suite. This is a beautiful suite filled with Black, White & Gold foil accents.

    It includes 10 projects with photos, directions. a supply list and measurements for each project. You can see this suite here.

    I created a card I want to share with you. I think it’s beautiful!

    My colors are Black, White & Gold. I used multiple sheets of the Modern Christmas Designer paper. Notice that some of the trees are raised. I fussy cut a section from the designer paper and added it over a die-cut circle of another set of trees. I layered that onto a Black die-cut circle from the Spotlight on Nature dies. Finally I added one of the new gold hoops around it all. Tip: adhere the gold hoops with tiny dashes of Multipurpose Liquid Glue. Works great!

    I hope you like this card; it’s one of the free projects included in the free PDF tutorial for anyone who orders from me in October. Click here to order!

    ~~~

    October Specials

    3 new kits and a Starter Kit special! See the kits here.

    And get the Starter kit here. *Choose your deal – $35 or $99 plus $90 in free products including free shipping, free Paper Pumpkin kit & free catalogs/business supplies!

    ~~~

    All online orders from me will receive a beautiful PDF of projects featuring the Modern Christmas suite.

    Reasons to ShopwithLeeAnn.com

    • Get a free PDF project tutorial with any online order! (changes monthly)
    • An order of $55 or more earns you a free 3 card stamping kit with pre-cut layers; ready to stamp & assemble
    • Earn 10% host rewards on each order you place (over $20). Redeem on a future order.
    • Join my Flowerbug’s Team and get $90 in free product of your choice in October! Details here.
    • Be a Paper Pumpkin subscriber and enjoy the free bonus project PDF tutorial every month. Subscribe here. Refills here.

    Leave a Reply

    Your email address will not be published. Required fields are marked *

  • Easy box to gift or store cards in with free project sheet


    I’m thrilled to share this fabulous box to gift or store hand made cards in. It starts with a box from our Kit Collection. They’re sturdy and look what you can do with one!

    I shared how to make this on last week’s Live video. I know many of you have purchased kits from Stampin’ Up! and hopefully have a few of these saved. The inside organizing sections are made with the thin card board from our designer paper packs. Recycle!

    I created a free project sheet so you can replicate this at home. I truly hope you do! Click here to download or print this project sheet and also watch the video below to see how it’s made and see my tips for success too.

    The photo above shows the two sets of cards I made with the Gathering Moments stamp set – 2 sets of colors too! Which do you prefer?

    Here’s the other version of the box I shared:

    Below is the video where I shared how to make the 5 at a time cards shown in the box and the box itself.

    ~~~

      To see all of the new Online items click here.  Or download & save the Download Online Exclusives flyer 

    Get a free project tutorial with any online order in September! 

    Leave a Reply

    Your email address will not be published. Required fields are marked *


Notice: LeeAnn Greff, Independent Stampin’ Up! Demonstrator, Manager. The content of this website is my sole responsibility as an independent Stampin’ Up! demonstrator and the use of, and content of, the classes, services, or products offered on this website is not endorsed by Stampin’ Up! Copyright 2025