Peaceful Poppies cards kit to go; RSVP by March 19th!
The cards kit to go features the Peaceful Poppies designer paper. It's full of hand painted blooms accented by watercolor effects all inspired by fields of poppies.
This kit to go includes $20 in actual product (before tax & shipping). You're getting the 10 cards pre-cut kit for just $5! See those beautiful die-cuts and trim pieces? They are included in my kits! I do the time consuming work for you so you can enjoy the fun of just stamping and assembly.
*If you like pre-cut card kits you will LOVE my monthly kits to go! Here are some comments from my subscribers:
– I made all the cards, and had a great time. I loved all the different folds and color choices. Thanks for making my week!
– Your directions are always so easy to follow and your projects are unique.
– I just received the January card kit and love it!
– I loved these cards; they were so fun to make.
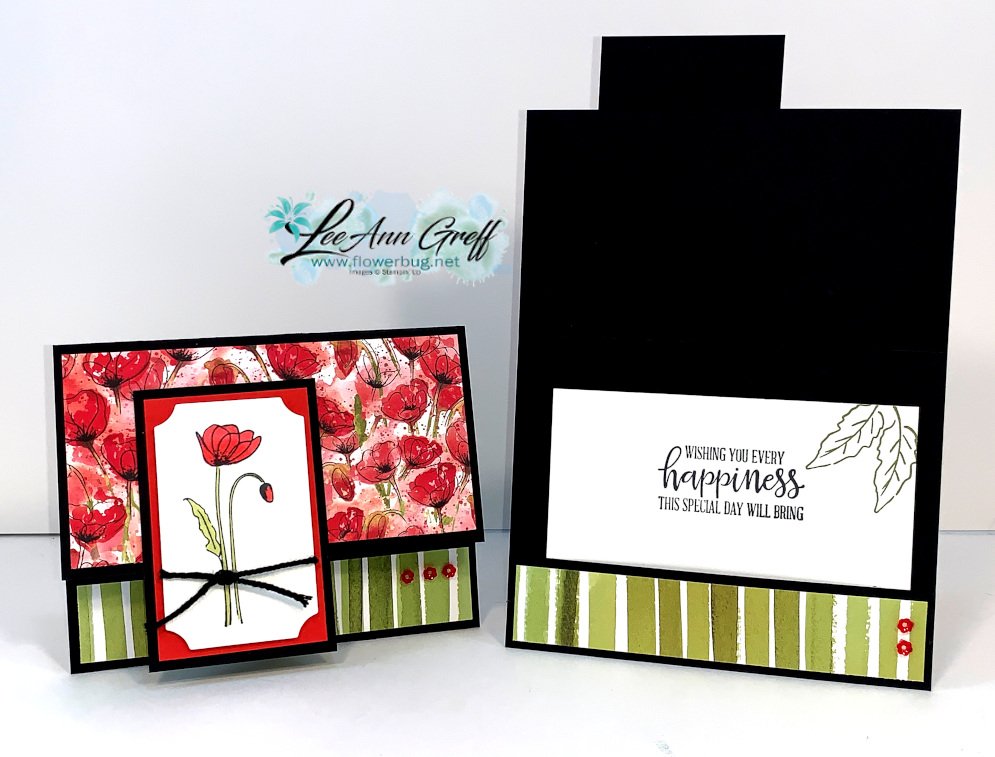
Here's one of the fun-fold cards in this month's kit. It has a pocket for your greeting and/or a gift card if you'd like to add one.
I did use the poppy image from the Painted Poppies set in the card above.
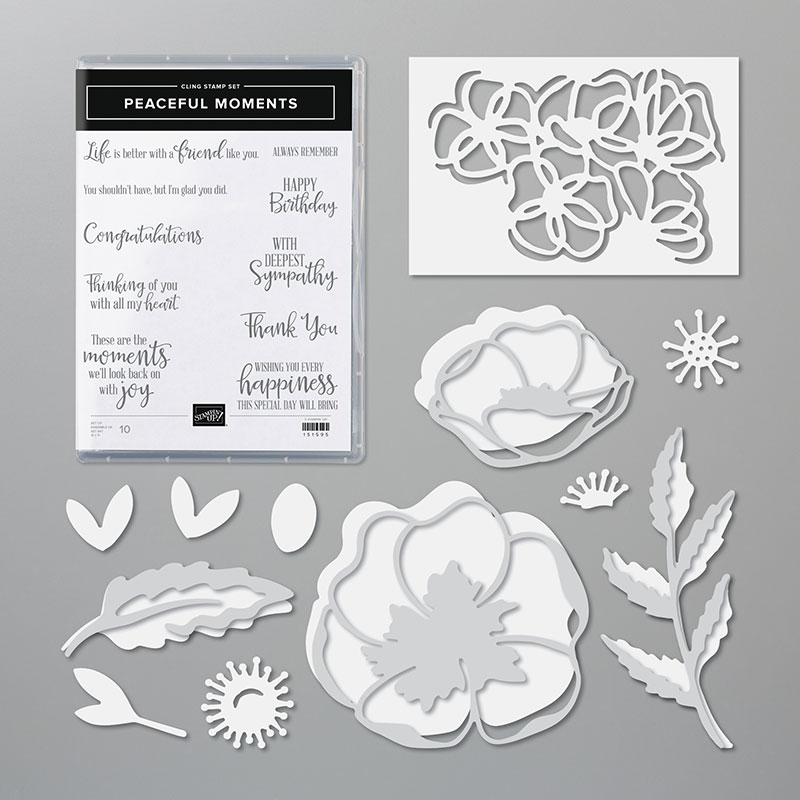
For my greetings I used the Peaceful Moments stamp set seen below. If you add it on you will get a free Sale-a-Bration choice with your kit. Or choose thePeaceful Moments bundle and earn you a free SAB choice. See your free choices here.
The Painted Poppies bundle is not available right now but should be back mid April! Both of these bundles coordinate together beautifully and are part of the Peaceful Poppies suite on pages 24-27 in the mini catalog.
– a pre-cut cards kit for 10 cards; including die-cuts and many punched pieces
– Free pdf instructions with photos, measurements (to make more), step by step instructions and a supplies list
– 1/2 package of the 12 X 12" Peaceful Poppies Designer Series Paper
– 1 full package of the Peaceful Poppies sequins
– 3 spools of colored Baker's twine in Poppy Parade, Black and Garden Green
**You have through March 19th to RSVP for this kit. It's $28 for locals and $36 for long distance and includes Priority Shipping.
If you'd like to add on the Peaceful Moments stamp set or the bundle (seen above) please let me know. If you do add it on, (or anything else of $30 or more) I will combine shipping AND you get a free Sale-a-Bration choice!See the free items here.
***Be sure to RSVP by the 19th to get your kit!
It's just $28 for locals and $36 for long distance people with Priority Shipping. Kits should be mailed out at the end of March and the pdf tutorial is emailed.
*You are subscribing to my monthly card kits but can cancel at any time.
*I can also send you a PayPal invoice for this month's kit. Email me at lagreff60@gmail.com
All Posts
Easter Friends; simply adorable! Video tutorial included.
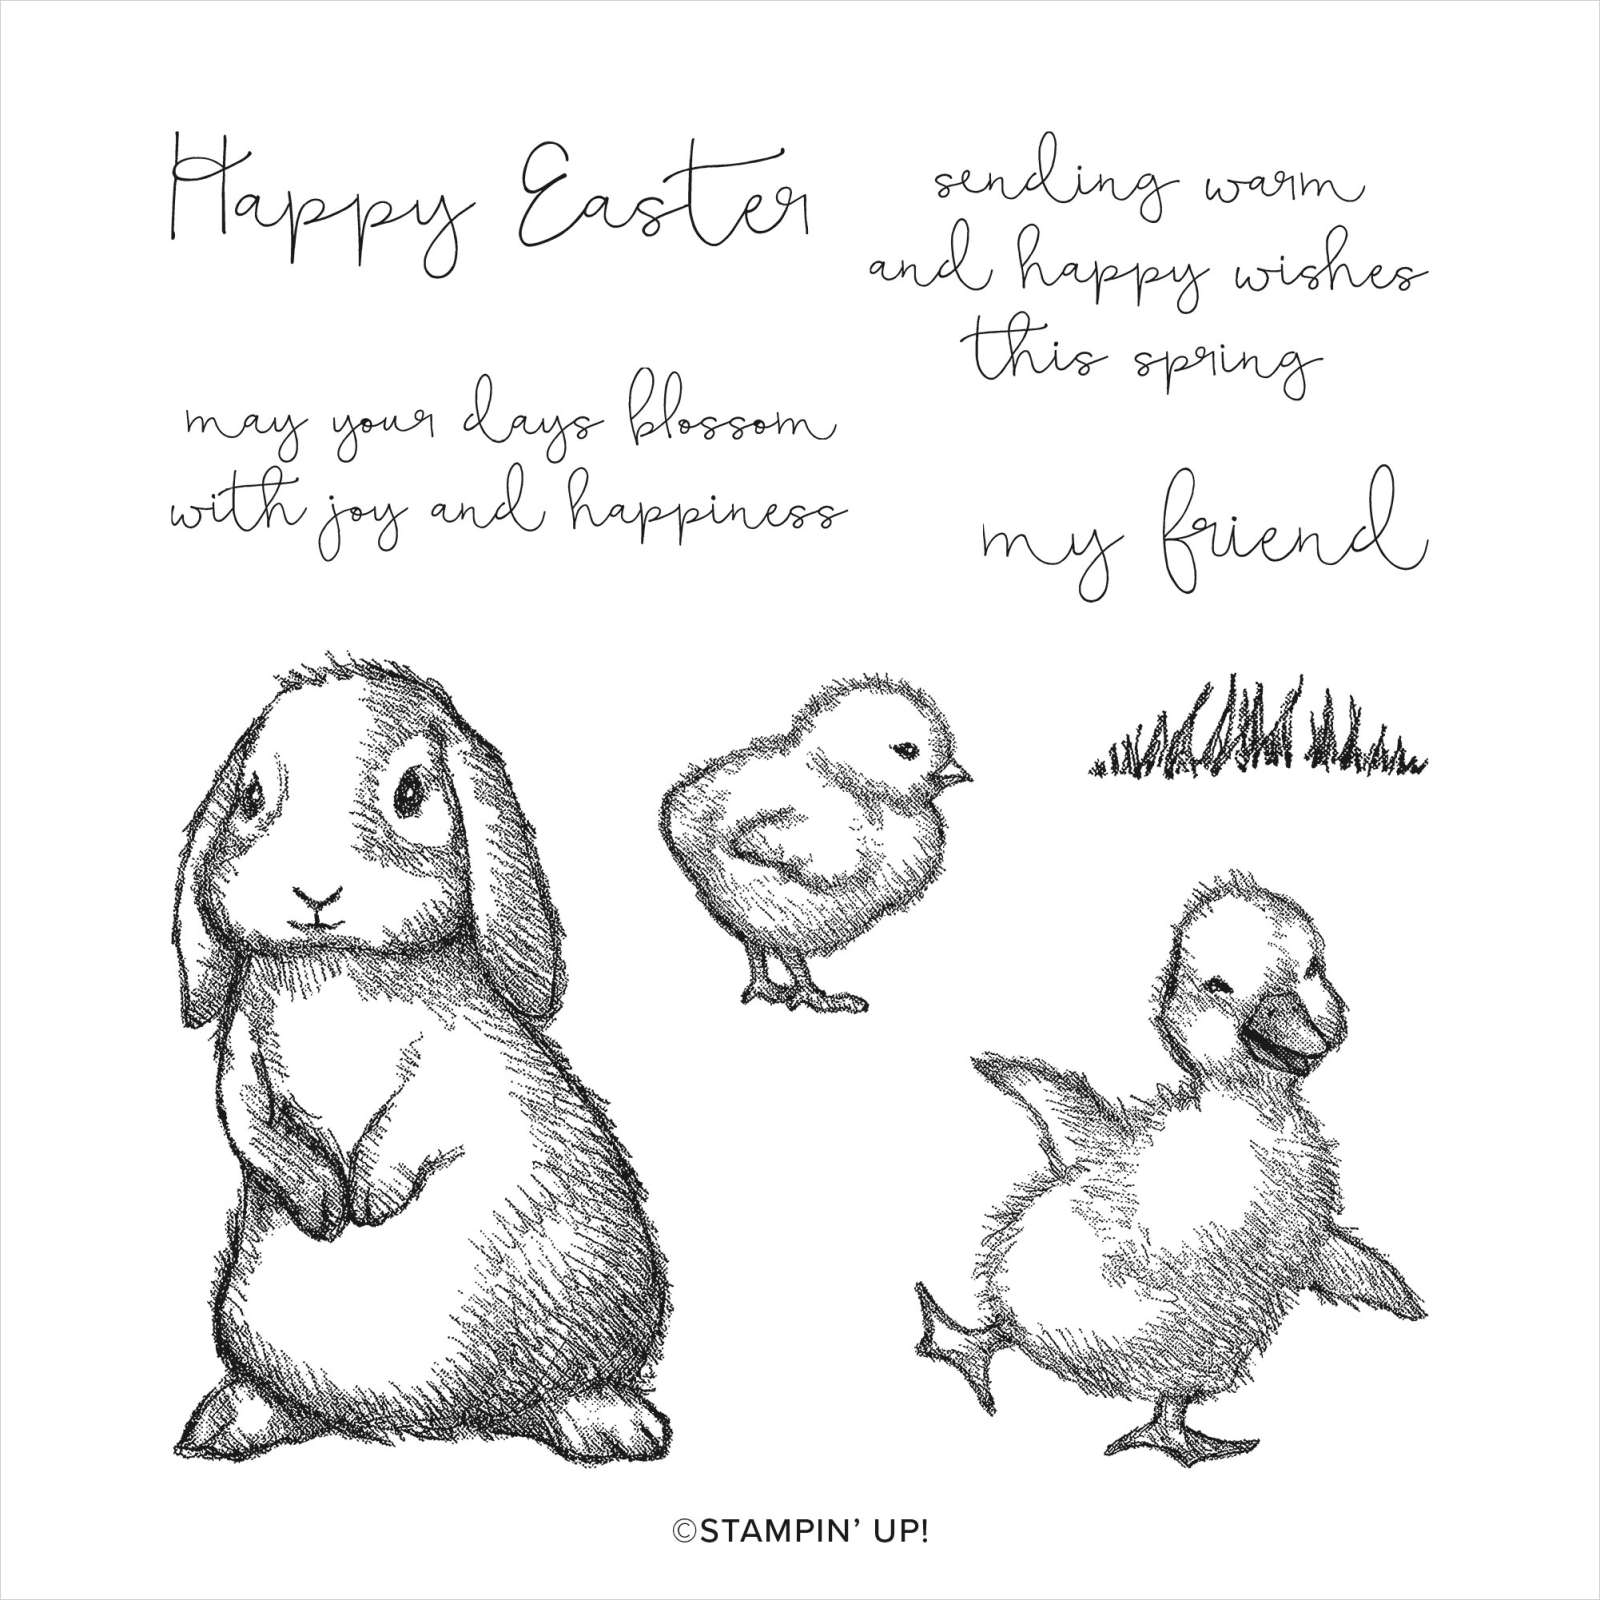
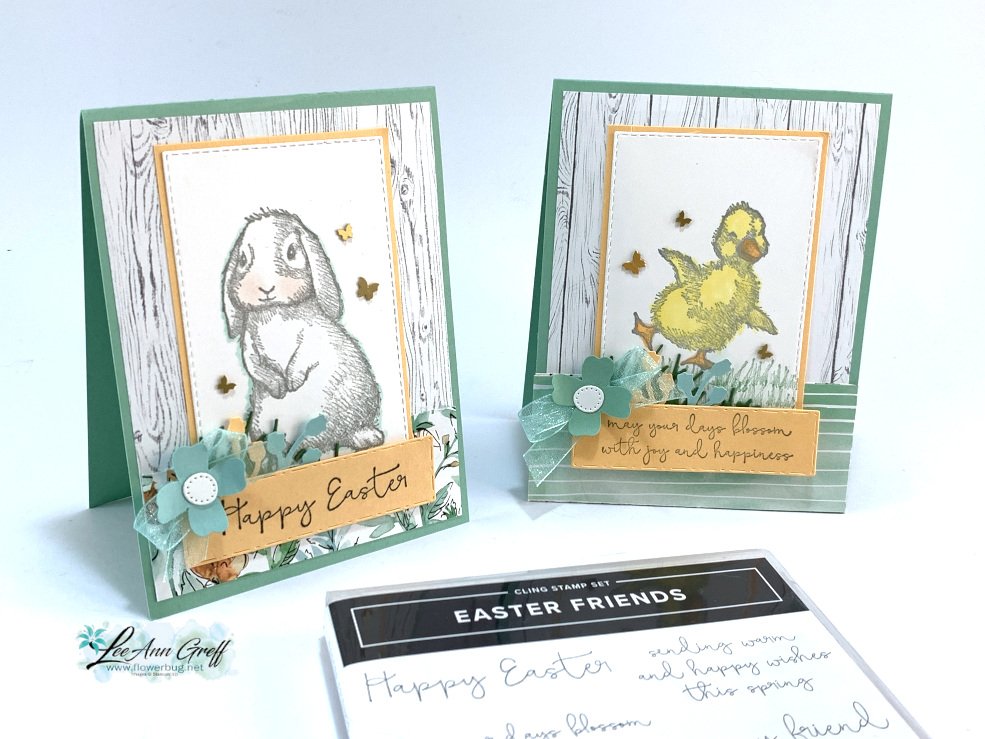
I chose the Easter Friends stamp set for one of our Club cards in March. It truly has adorable images! See it here.
I shared a few other projects during a recent Facebook Live. Click here to see it.
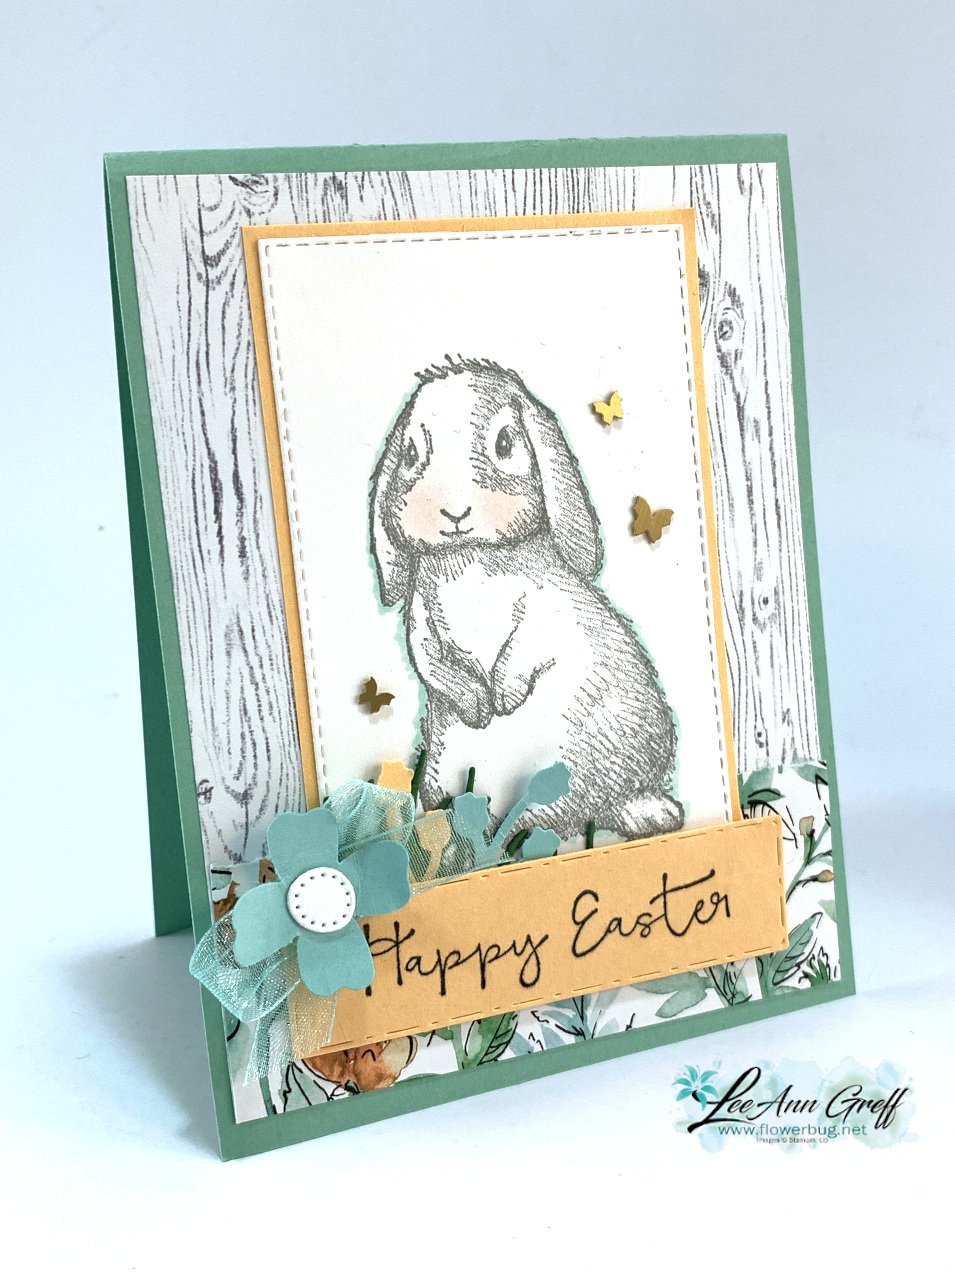
I stamped him/her in Smoky Slate and added a tiny bit of blush on his cheeks. I added a light line of Pool Party blends marker around the edge. The designer papers on this card include the Heart & Home and Hand Penned DSP's. These will likely be on the retiring list which comes out on Wednesday, March 23rd.
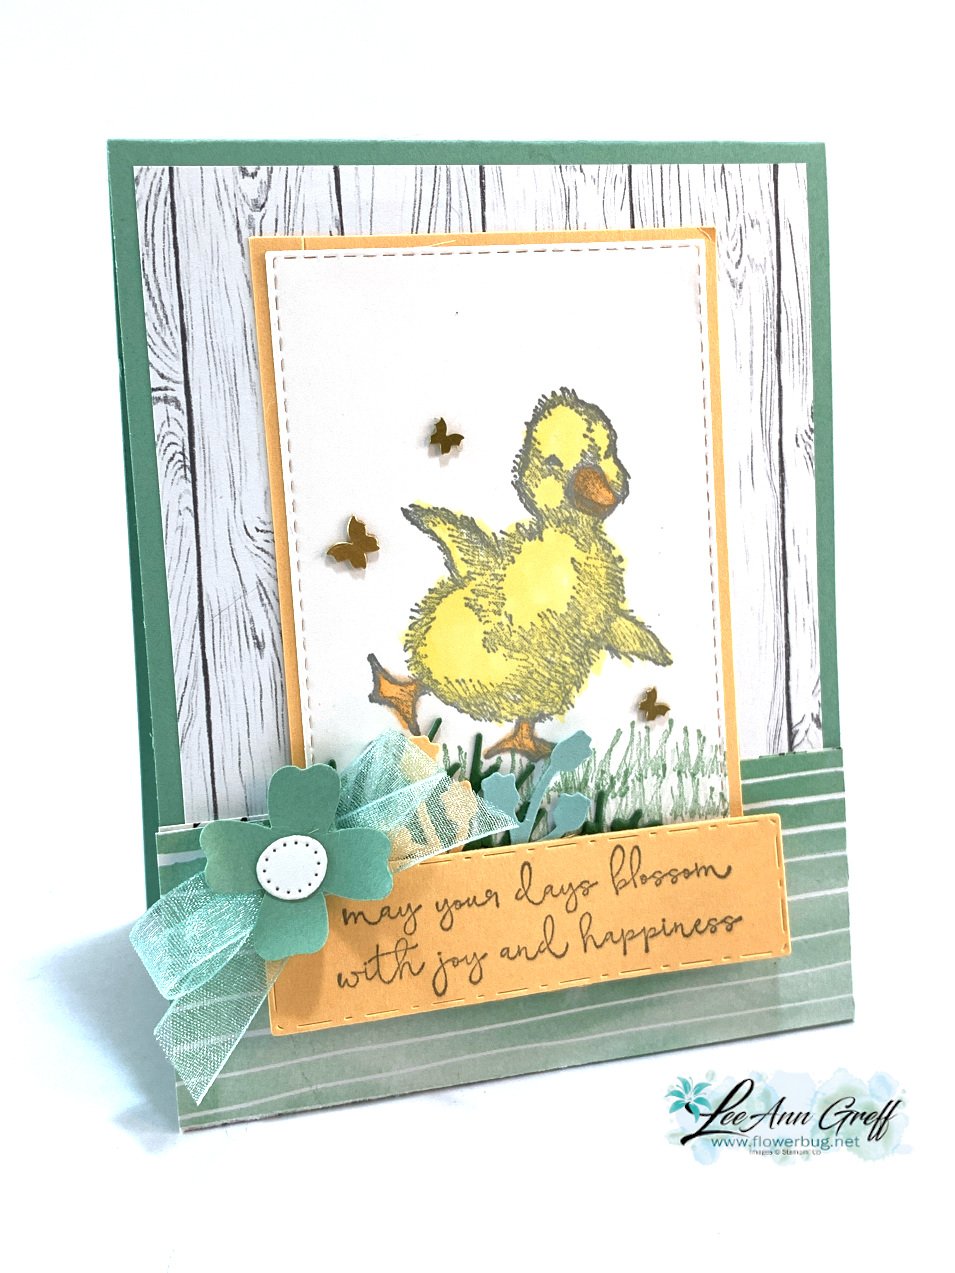
They could choose between the bunny or the duck. The duck is colored in with Blends markers; So Saffron & Pale Papaya. All greetings are from the Easter Friends stamp set; stamped in Basic Gray.
Sentimental Swirls; a super fun stamp set with a Video for multiple card ideas!
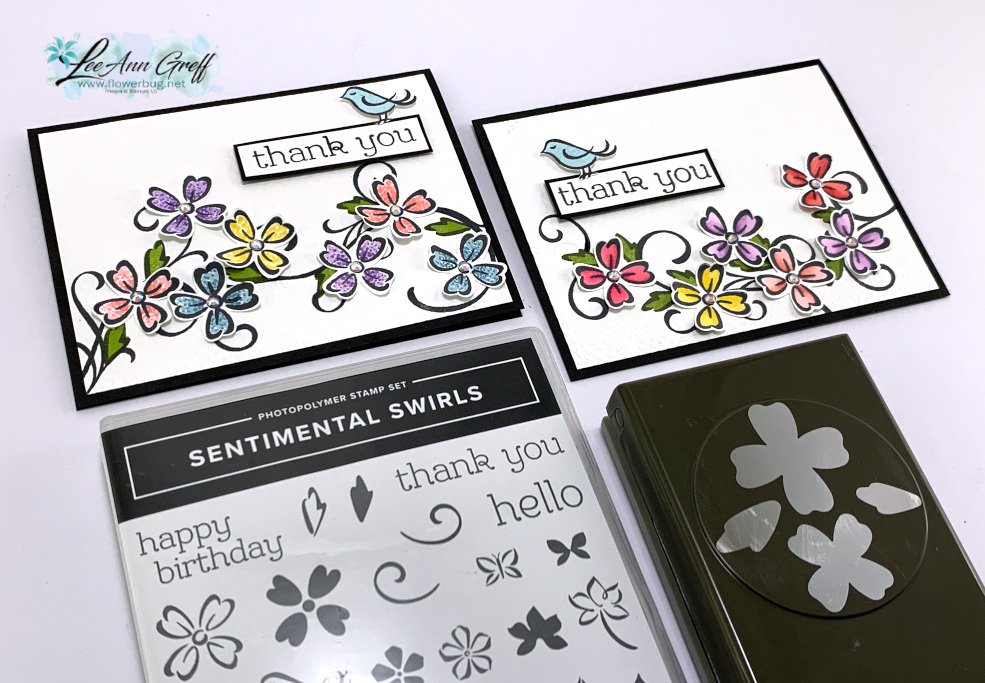
I played with the Sentimental Swirls stamp set on last Tuesday's FB Live video. Honestly I didn't want to stop! This set is so friendly and easy to create with.
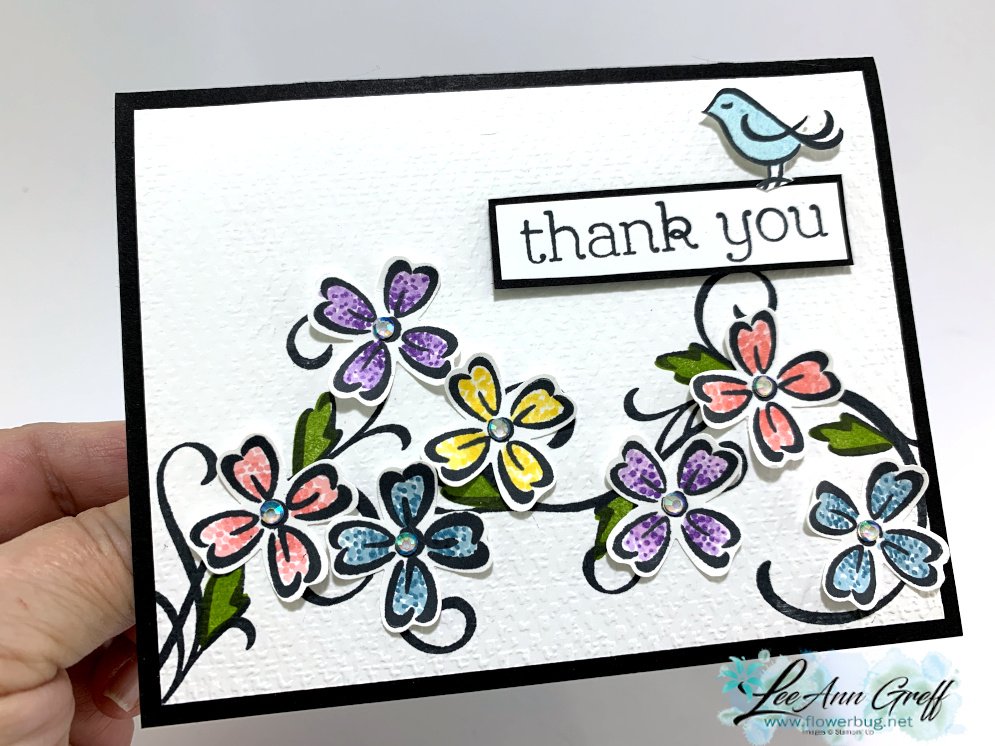
Here I stamped the swirls and leaves first using Black Memento ink. I added the solid leaf image using Granny Apple Green. Then added texture with the Tasteful Textile embossing folder.
The flowers were stamped on scraps of White paper and colored in with Blends markers. I curled them a bit and added with mini dimensionals. The bird is fussy cut and added with Dimensionals.
The card on the left below features the dot coloring technique. I used the bullet tip of my Blends markers to color the flowers. Fun technique! Watch the video below to see it in action.
This set coordinates beautifully with the Flowers & Leaves punch in the Annual Catalog. Below you see both cards along with the coordinating stamp set & punch.
For the next card I again stamped the lovely swirl in Black Memento ink onto a scalloped rectangle from the Scalloped Contours dies. I added a few sets of leaves here and there among the swirls. The flowers were stamped on a separate scrap of White and punched out.
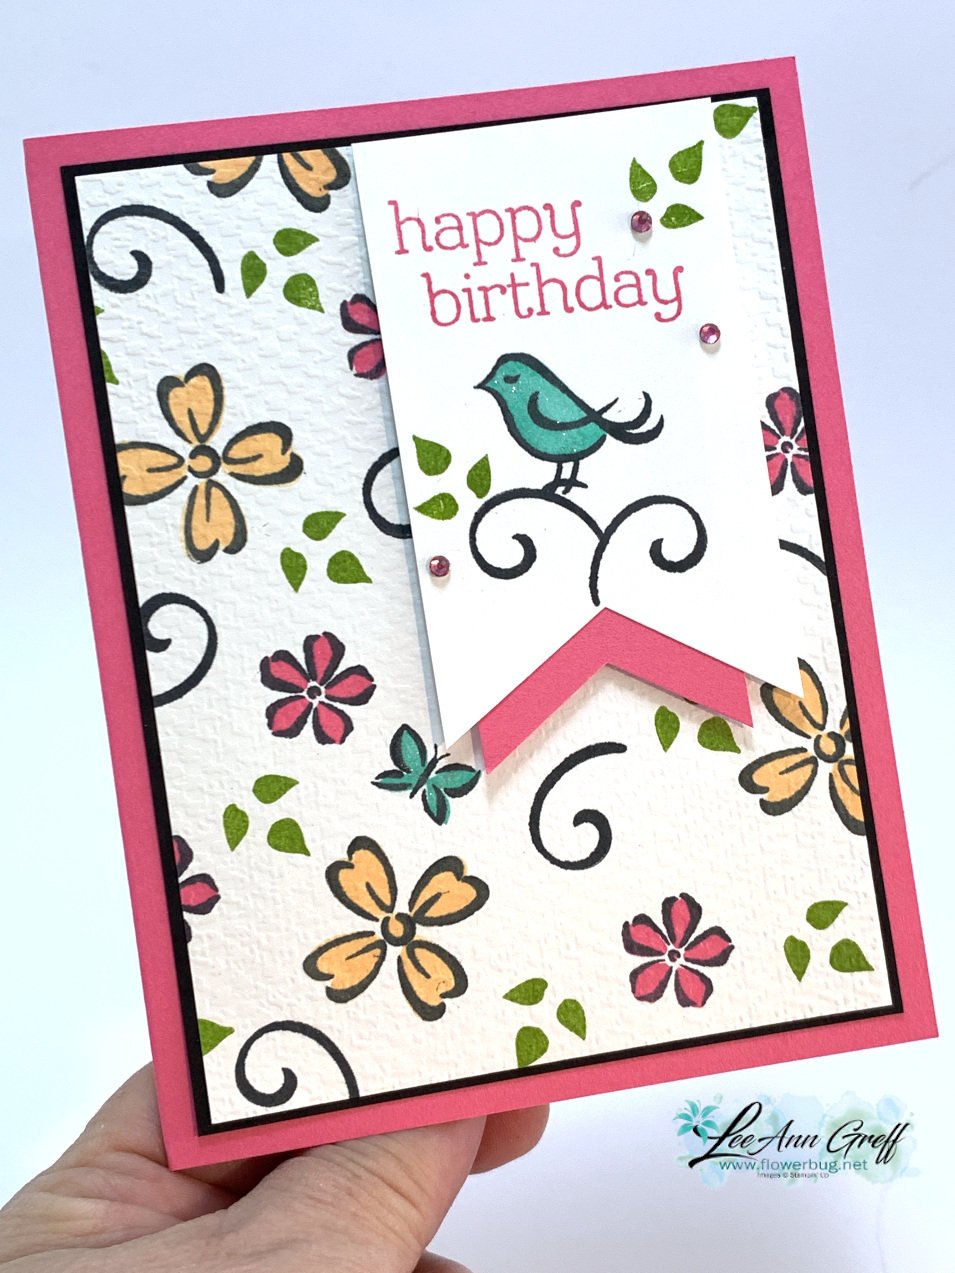
I also shared this cute card too. I stamped a scattered background on a piece of White CS before texturing it with the same Tasteful Textile embossing folder. It is my 'go to' choice for a simple texture.
The color here is Polished Pink with bits of Pale Papaya, Granny Apple Green & Coastal Cabana. The White tag is 2" X 3 1/4" & the smaller Polished Pink is 1 3/4" wide.
Click on the photo below to watch the video for these projects & more too!
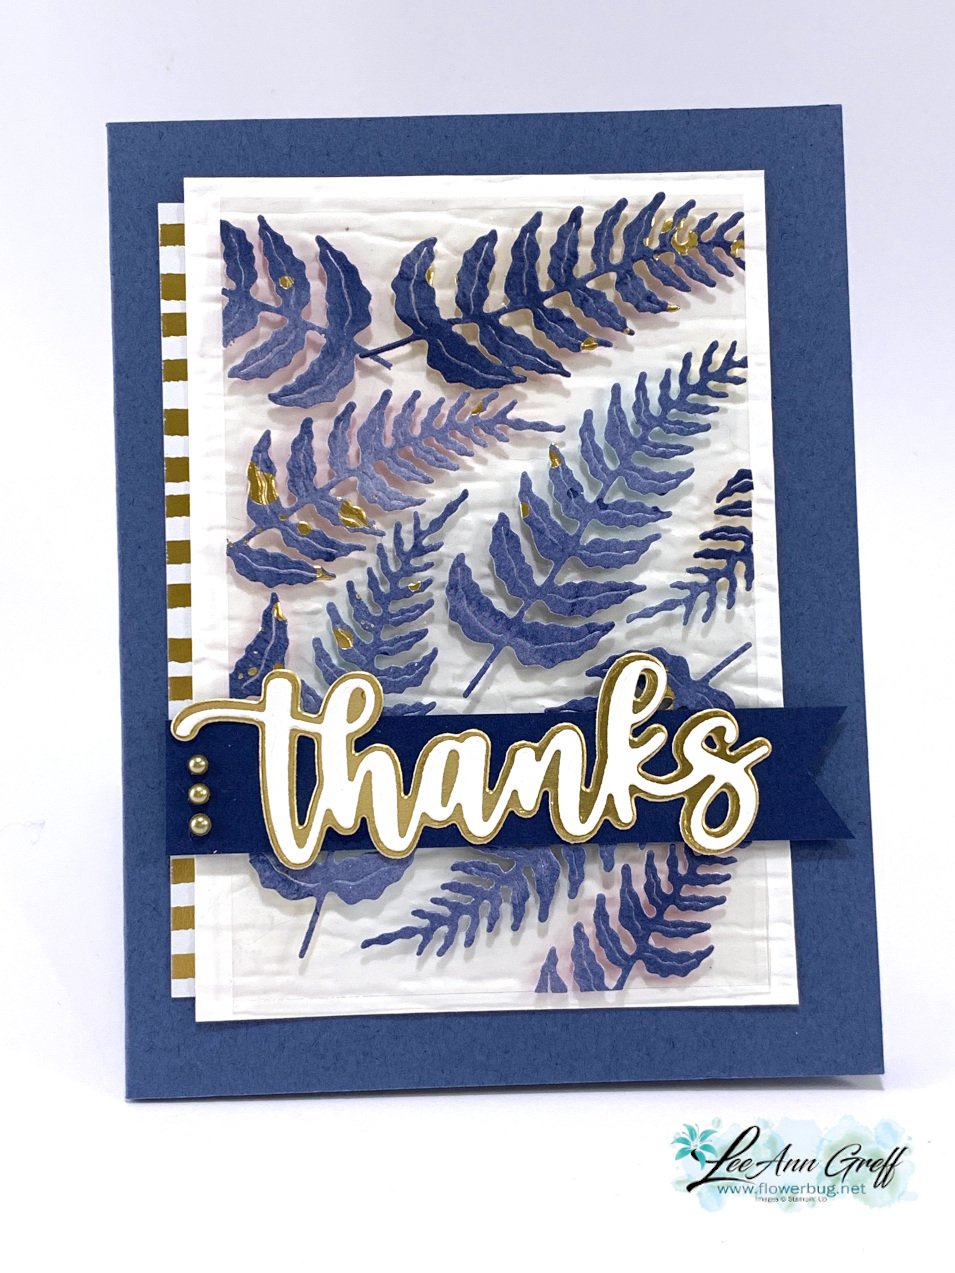
How to achieve the Floating Technique? Lots of examples!
Our current Team creative challenge for my Flowerbug's group is to make a card using the Floating Technique. It's a fun technique that uses a window sheet or transparency.
Here are some of mine I shared on a recent Facebook Live video you can see here.
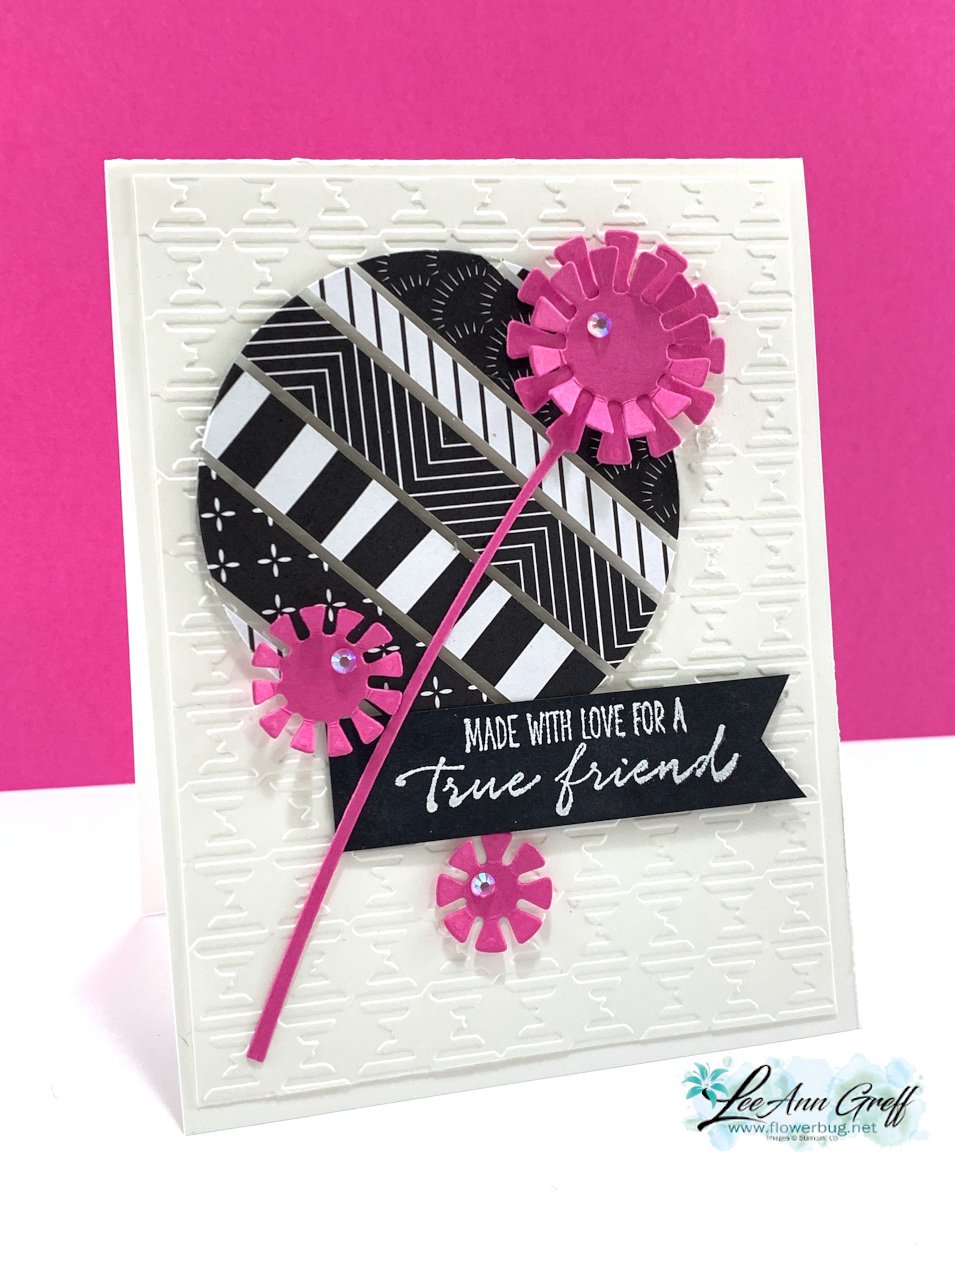
This first one features Black & White with a 'pop' of color – Magenta Madness in this case. Magenta Madness is retiring next week!
I used the Dandy Wishes dies and the Layering Circles dies here. I adhered a bunch of strips of the All Together designer paper to a window sheet, leaving space between them. I cut it out with the largest circle in the set and popped it up on a Gingham textured White layer.
I added die-cuts from the neat Dandy Wishes dies and a heat embossed image from the Garden Wishes stamp set. This set is in a bundle with the Dandy Wishes dies and on sale in March! See it here.
This next card features Misty Moonlight and the Abstract Beauty DSP. I cut the feathers from this pretty DSP that has touches of Gold on it using the Iconic dies seen here.
For this card the window sheet is a simple rectangle. After adding the feathers I trimmed off the excess and added it to the card with mini dimensionals.
Other details:
the greeting die-cuts are the Amazing Thanks dies seen here.
The textured White layer is done with the Bark 3D embossing folder.
That strip of gold & white strips is also from the Abstract Beauty DSP.
Colors are Gold, White, Misty Moonlight and Night of Navy
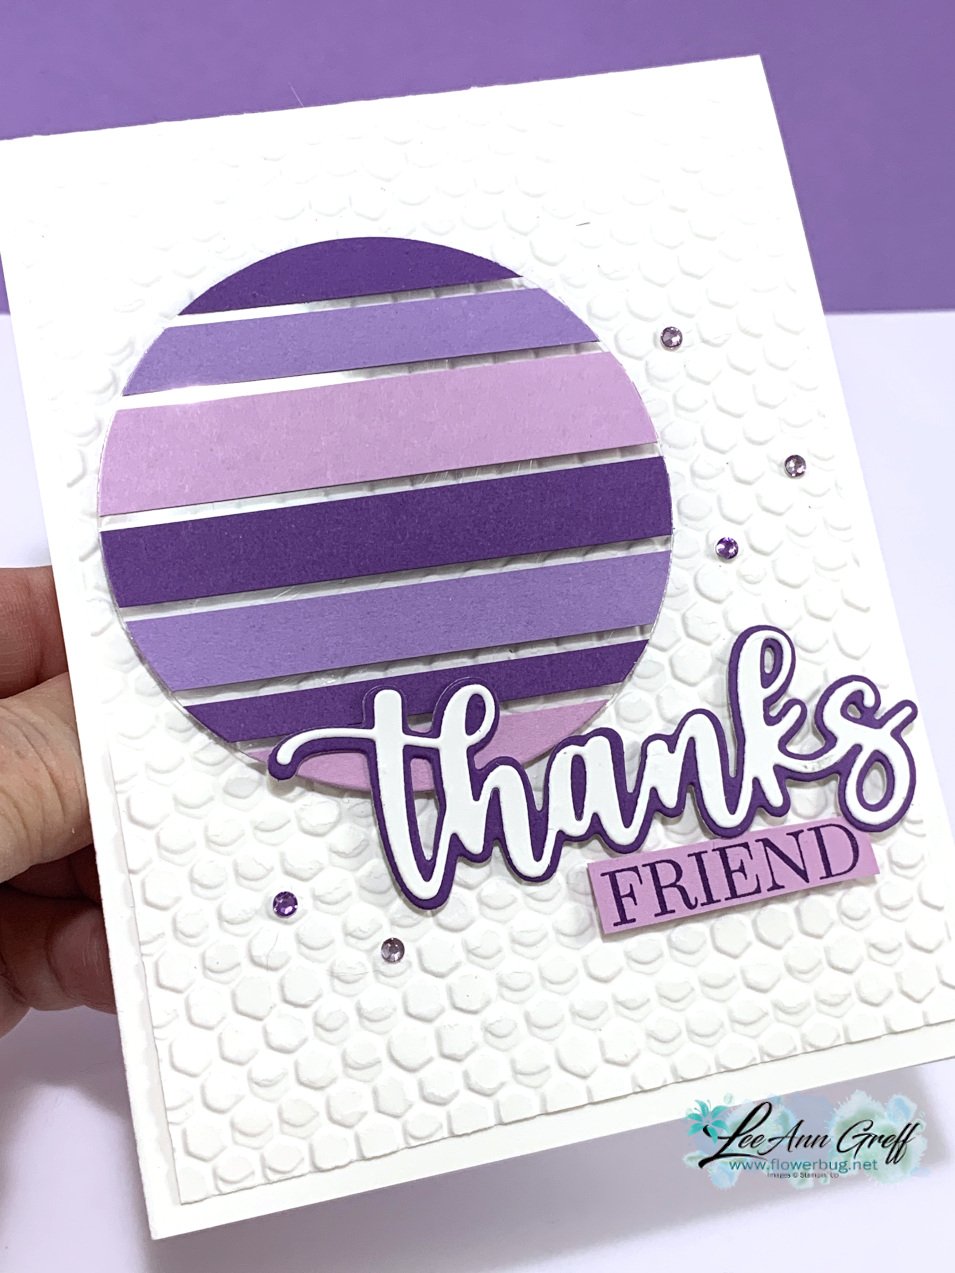
Next is a card done in purples – Fresh Freesia, Highland Heather & Gorgeous Grape.
Notice: LeeAnn Greff, Independent Stampin’ Up! Demonstrator, Manager. The content of this website is my sole responsibility as an independent Stampin’ Up! demonstrator and the use of, and content of, the classes, services, or products offered on this website is not endorsed by Stampin’ Up! Copyright 2025






















Leave a Reply