/


Latest Post

Peaceful Poppies cards kit to go; RSVP by March 19th!


The cards kit to go features the Peaceful Poppies designer paper. It's full of hand painted blooms accented by watercolor effects all inspired by fields of poppies.   

The 5 designs include two unique fun fold cards which are easy to make yet special for the recipient. 
 
 
This kit to go includes $20 in actual product (before tax & shipping).  You're getting the 10 cards pre-cut kit for just $5!  See those beautiful die-cuts and trim pieces? They are included in my kits!  I do the time consuming work for you so you can enjoy the fun of just stamping and assembly. 
*If you like pre-cut card kits you will LOVE my monthly kits to go!  Here are some comments from my subscribers:

– I made all the cards, and had a great time.  I loved all the different folds and color choices.  Thanks for making my week!

– Your directions are always so easy to follow and your projects are unique.

– I just received the January card kit and love it!

– I loved these cards; they were so fun to make. 

Here's one of the fun-fold cards in this month's kit.  It has a pocket for your greeting and/or a gift card if you'd like to add one.
 
 
I did use the poppy image from the Painted Poppies set in the card above. 
For my greetings I used the Peaceful Moments stamp set seen below.  If you add it on you will get a free Sale-a-Bration choice with your kit. Or choose the Peaceful Moments bundle  and earn you a free SAB choice. See your free choices here.
The Painted Poppies bundle is not available right now but should be back mid April! Both of these bundles coordinate together beautifully and are part of the Peaceful Poppies suite on pages 24-27 in the mini catalog.
 
  
The cards kit to go includes the following:

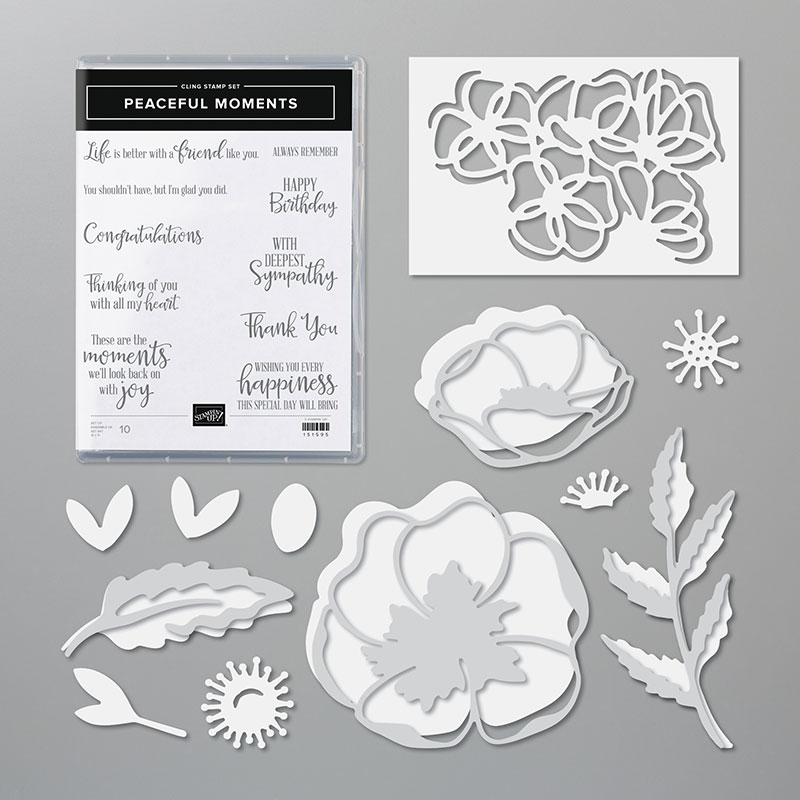
– a pre-cut cards kit for 10 cards; including die-cuts and many punched pieces

– Free pdf instructions with photos, measurements (to make more), step by step instructions and a supplies list

– 1/2 package of the 12 X 12" Peaceful Poppies Designer Series Paper

– 1 full package of the Peaceful Poppies sequins

– 3 spools of colored Baker's twine in Poppy Parade, Black and Garden Green

**You have through March 19th to RSVP for this kit.  It's $28 for locals and $36 for long distance and includes Priority Shipping.
 
If you'd like to add on the Peaceful Moments stamp set or the bundle (seen above) please let me know.  If you do add it on, (or anything else of $30 or more) I will combine shipping AND you get a free Sale-a-Bration choice! See the free items here. 
 
***Be sure to RSVP by the 19th to get your kit! 
 
It's just $28 for locals and $36 for long distance people with Priority Shipping. Kits should be mailed out at the end of March and the pdf tutorial is emailed.  
 

*You are subscribing to my monthly card kits but can cancel at any time. 

*I can also send you a PayPal invoice for this month's kit.  Email me at lagreff60@gmail.com

All Posts

  • Star & Snowflake Ornaments; so pretty!


    I had to give these gorgeous star projects a try!  Sara from Stampin' Up! made them for a tree topper but they were one sided.  I decided to turn her idea into ornaments by making them 2-sided.  

    They're made with our Stitched Stars dies seen here.  I used the largest and third smallest to make these. I used the Gingerbread & Peppermint DSP but unfortunately it was on the retired list and is sold out now. 

    You probably wonder where the snowflakes come from.  They are called 'Wonderful Snowflakes' and they also just sold out! The retiring list can be so hard; items you want can be gone in an instant! 

    You need a good stack of Dimensionals between each layer like this: 

    You can see why you need a smaller star inside; to support the stacks of Dimensionals. *There's a second stack under that smaller star.  You'll add a second large star on top of the dimensional stack seen above. 

    Tips:

    • I found a stack of 4 to work best.
    • I added a rolled up mini glue dot to the tip of each star point to secure them together.  It's not necessary but does finish if off so they stay closed. 
    • Add the cord with a glue dot to one of the star points. 

    They were so fun to make I couldn't stop! I plan to add these to my cookie trays or to Christmas presents instead of a traditional bow. 

    I thought this last one would look sort of ho hum in this pattern.  But once I added our Red Rhinestones to the snowflake it sure came to life!  

    Below is the video to see exactly how to make these pretty ornaments.  They're the third project I share. 

    ~~~

    December Specials:

    Host code:  6YCWV7QN

     *click here to order 

    Use the host code above & get a free card stock sampler ring with a $50 order in December! 

    See the last chance list here

    See the July-December catalog carry over list here

    Leave a Reply

    Your email address will not be published. Required fields are marked *

  • Origami Christmas Tree card; soooo easy!


    I make one of these trees almost every year.  Why? Because they are easy & fun and we always have new Designer Paper for me to play with. 

    All you need are four squares of DSP. No scoring or other measurements.  Watch the video here or below to see how it's done. 

    Here are the supplies:

    • Card stock – Old Olive & Mossy Meadow card bases, Real Red & Cherry Cobbler layers, White greeting strip & inside
    • Designer Paper – Heartwarming Hugs (out of stock now) and Sweet Stockings
    • Greeting image from the Christmas Cheer stamp set
    • Star topper from the Starlit punch
    • Embossing folder – Evergreen Forest (out of stock temporarily) 

    Measurements: 

    • Card base 5 ½” X 8 ½”
    • DSP – 4 square pieces at 1 ¼”, 1 ¾”, 2 ¼” & 2 ¾”
    • Textured front & White inside are 4” X 5 ¼”

    Below is the video for you. I share another special card project and some pretty star/snowflake ornaments as well.  

    ~~~

    December Specials:

    Host code:  6YCWV7QN

     *click here to order 

    Use the host code above & get a free card stock sampler ring with a $50 order in December! 

    See the last chance list here

    See the July-December catalog carry over list here

    Leave a Reply

    Your email address will not be published. Required fields are marked *

  • Easy Christmas Ornament card


    I think this is pretty clever & unique; it's a 'faux' Christmas ornament on a card. And it's quick & easy too!  

    It looks so real; like you could lift it off!  And you actually could if you use temporary adhesive; or add it to a pocket.  

    I shared this project on a FB Live last week.  It's the second project I made in this video.  

    Products used:

    • Merry Melody embossing folder on the White CS
    • The ornament is made with the largest smooth circle in our Circles dies. 
    • The DSP is called Painted Christmas and is in low inventory right now.  
    • Elegant Trim for the 'hanger'. 
    • Brushed Metallic specialty CS for the 'hanger'. 
    • Heat embossing for the greeting – from the Words of Cheer stamp set. 
    • CS is Real Red, White & Evening Evergreen 

    Here's a close-up of it. 

    I give a few hints in the video on achieving this.  Basically you want to stamp your greeting first and add it to your DSP.  THEN cut both pieces out at the same time with your circle die. 

    Below is the video for you. I share another special card project and some pretty star/snowflake ornaments as well.  

    ~~~

    December Specials:

    Host code:  6YCWV7QN

     *click here to order 

    Use the host code above & get a free card stock sampler ring with a $50 order in December! 

    See the last chance list here

    See the July-December catalog carry over list here

    Leave a Reply

    Your email address will not be published. Required fields are marked *


Notice: LeeAnn Greff, Independent Stampin’ Up! Demonstrator, Manager. The content of this website is my sole responsibility as an independent Stampin’ Up! demonstrator and the use of, and content of, the classes, services, or products offered on this website is not endorsed by Stampin’ Up! Copyright 2025