/


Latest Post

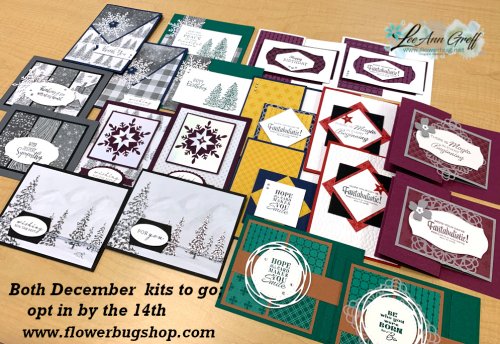
Peaceful Place card kit to go; beautiful ‘winter’ cards for any occasion!


The Peaceful Place specialty designer paper is gorgeous in it's silver, black, gray & white color theme. This paper does the work for you in creating simple yet elegant cards.

I have a limited supply of these; opt in by December 14th. 

This kit to go includes 10 pre-cut cards (2 each of 5 designs). The PDF tutorial includes directions to make 10 beautiful cards; & $20 in Stampin' Up! product. Product includes 1/2 pkg. of the Peaceful Place specialty designer paper, a share of Wonderful snowflakes, silver cord & clear rhinestones.  

*this is the card kit my subscribers will receive.  If you'd like to automatically receive my kits each month opt in here. 

You'll receive the PDF tutorial immediately after payment in an email.  The pre-cut kit will be mailed out before Christmas, barring back orders. 

The PDF tutorial includes photos, measurements, step by step directions and a supplies list. You'll use the measurements listed to cut your new Designer paper to complete your cards. 

You will need the following to complete the cards like mine: 

  • Shaded Spruce, Blackberry Bliss, Black or Rich Razzleberry inks. 
  • I used the Peaceful Cabin & Peaceful Moments stamp sets but you can easily substitute other greetings. Or add either set or bundle on at an extra 10% discount!  Contact me for payment.
  • You will also need a tree image for two cards. 
  • adhesives, a paper trimmer, scissors 

Below are the links to order; remember I have a limited supply of these; opt in soon! 

~~~

December Specials:

Host code: Z2RQ7BB6 or 6YCWV7QN

 *click here to order 

Use the host code above & get a free card stock sampler ring with a $50 order in December! 
See the last chance list here

See the July-December catalog carry over list here

All Posts

  • Life is Beautiful with a beautiful masked & sponged window technique!


    I like to join many online card swaps in groups with friends from all over the country; especially when new catalogs come out. 

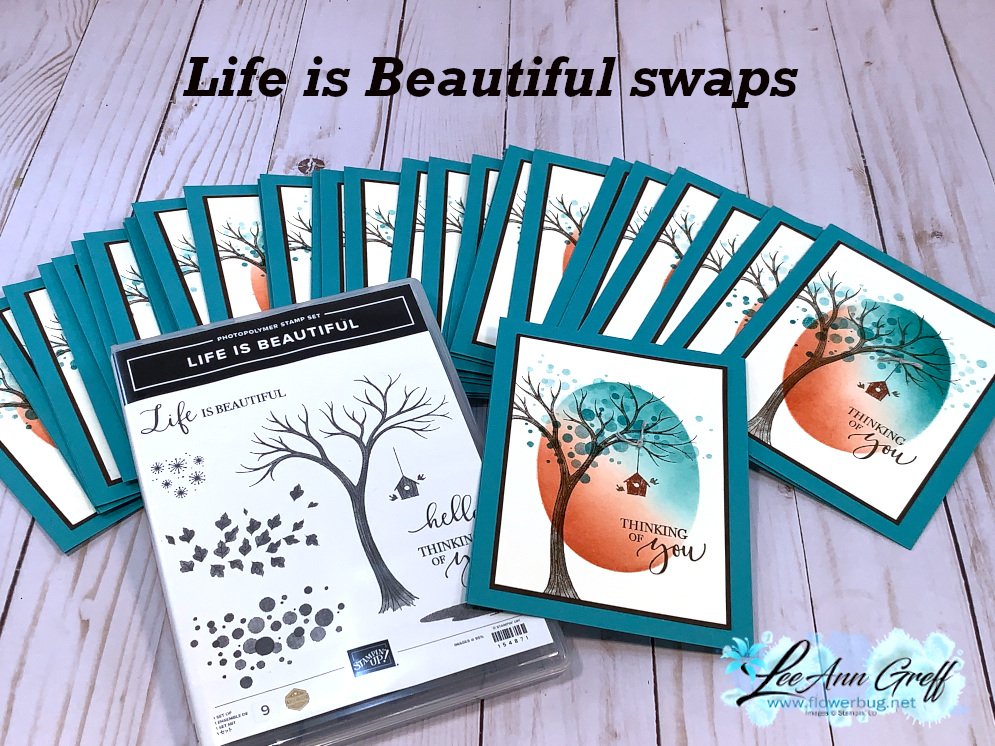
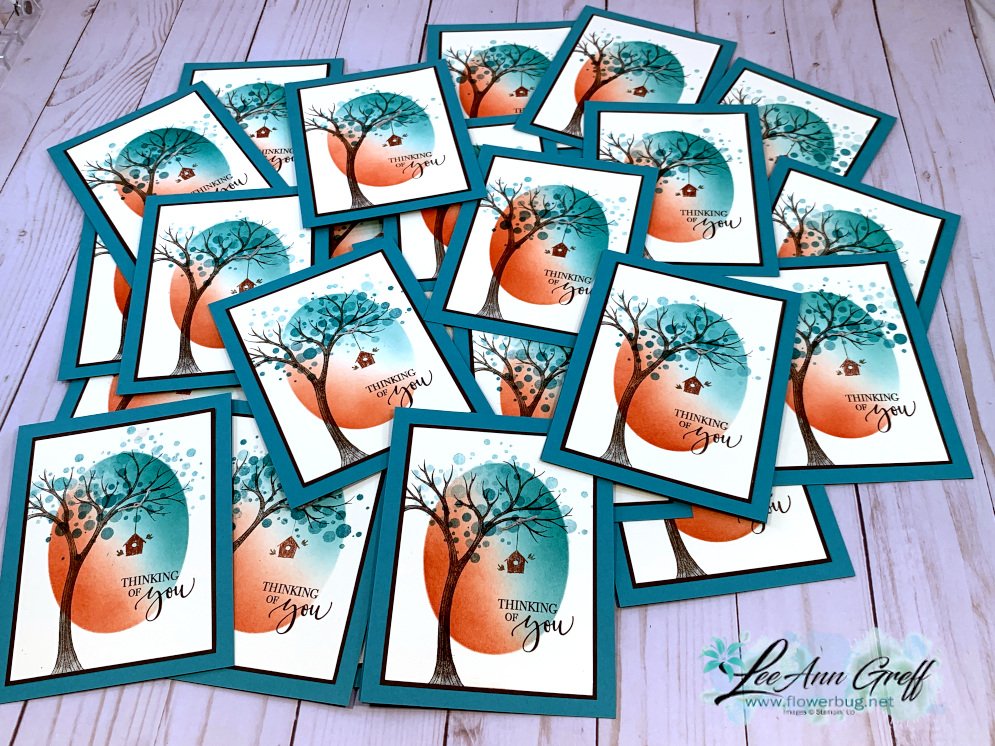
    Here is a swap I made with my Life is Beautiful stamp set; the set I helped create as a Million Dollar Achiever with Stampin' Up!  I achieved this over a year ago but the stamp set just came out this month.  You can order it now here. 

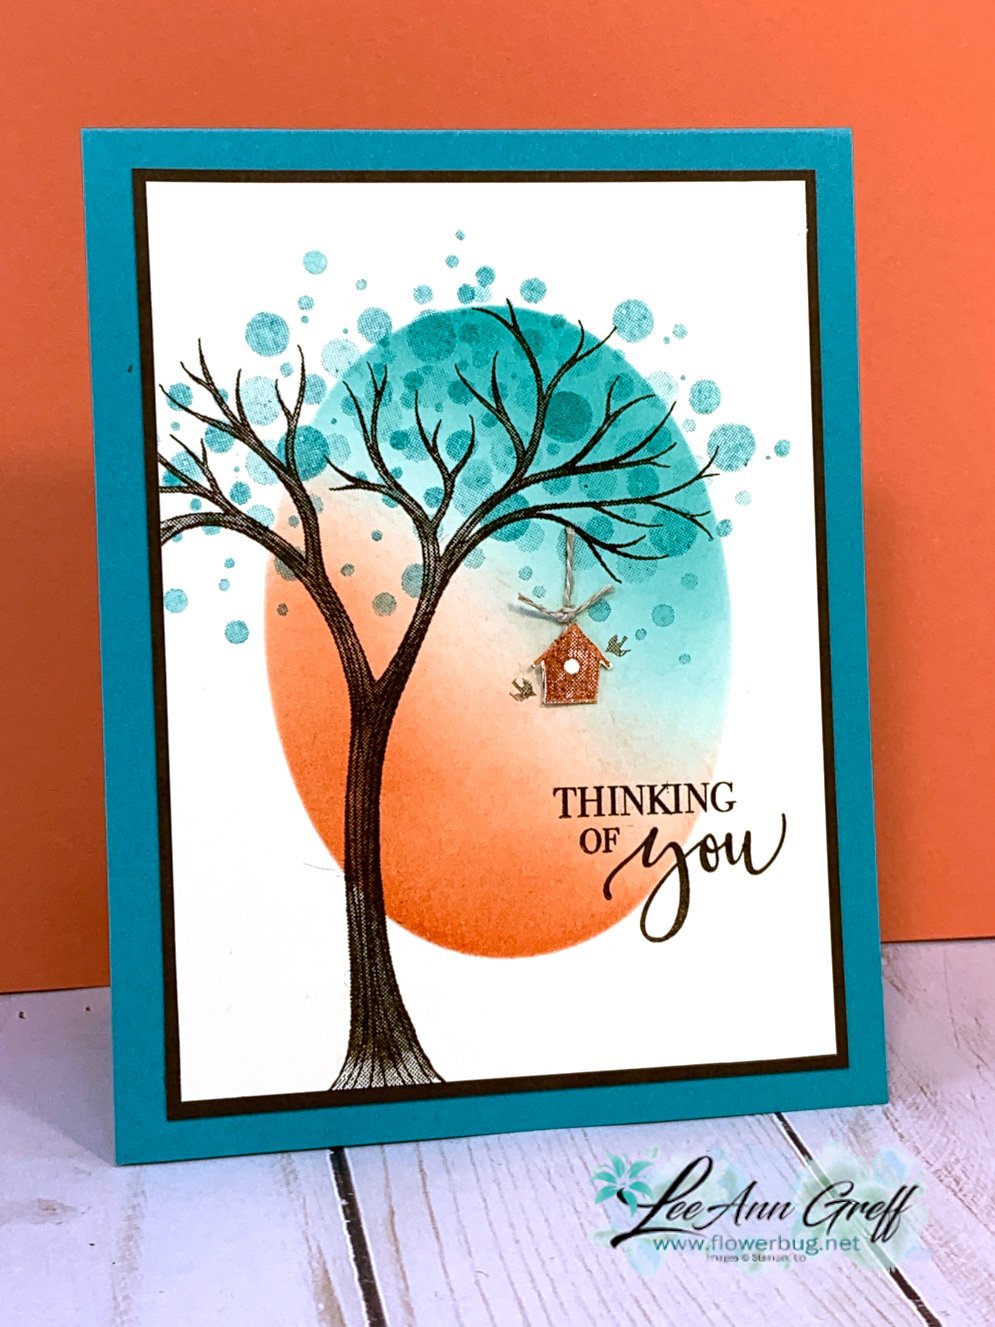
    I chose to use Bermuda Bay, Early Espresso and Very Vanilla card stock. The inks are Bermuda Bay, Early Espresso and Calypso Coral.  I absolutely LOVE creating masked windows! Sponging is a learned art and I have some great tips for you.  I shared this card on Facebook Live Tuesday, August 11th and uploaded the video to YouTube below.  

    This card is one I am so pleased with.  It shows off the pretty images included in the set so perfectly. 

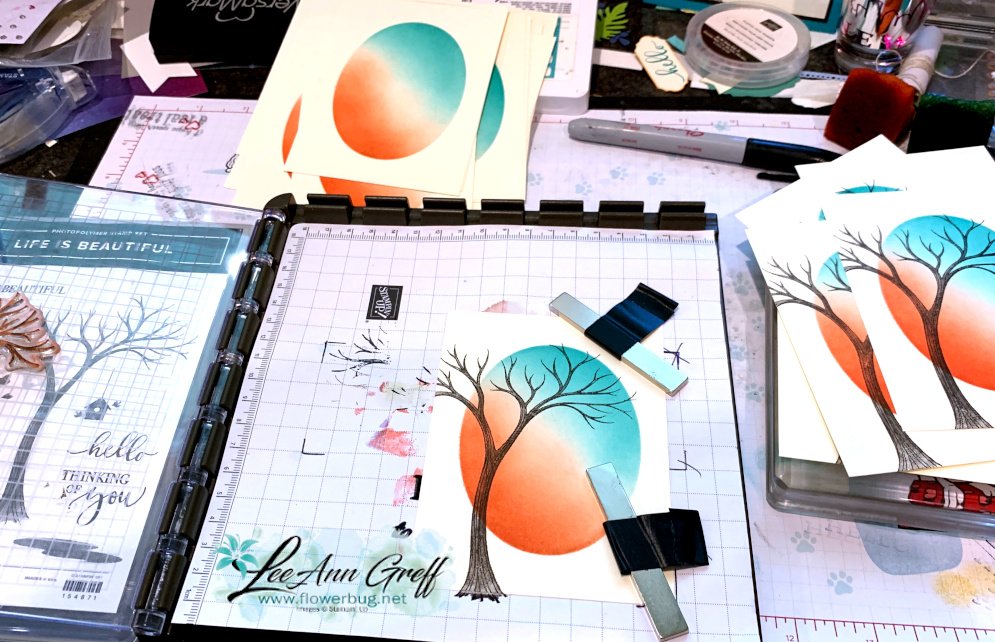
    Do you make doubles or more of your favorite cards?  I actually really like making multiples of the same card.  But when you're doing a time consuming technique like this one it can little 'old'!  However, using the Stamparatus when making multiple cards is the ONLY way to go!  It sure makes quick work of making many of the same card.  I don't usually like to show my 'messy desk' pictures but you can see what happens to my desk area when I'm working! It gets smaller and so crowded! Ha!


    Watch the video below for step by step tutorial on making this pretty card.  Plus I share tons of card ideas for this pretty and versatile stamp set! 

    ~~~

    Bonus Days are here!

     
    Redeem your $5 coupons now!  

    ~~~

    Current Host code is QW7SUYVX

    Get a free package of new Iridescent Pearls in August with an online order over $55. 

    Order online here

     Get my Flowers for Every Season pdf tutorial free with all online order in August!


    It includes directions, photos and measurements for 12 cards!

    Leave a Reply

    Your email address will not be published. Required fields are marked *

  • Life is Beautiful swap with Love of Leaves dies


    Here's another card I made for an online card swap I joined in July.  I have been having so much fun playing with my Life is Beautiful stamp set!  

    The colors are Bermuda Bay, Early Espresso and Pumpkin Pie; one of my favorite color combo's for Fall.  I added some sponging and a pretty die-cut from the Ornate Frames die seen here.  The Linen thread behind the greeting is simply a big bow. 

    This card is included in my August card kit to go.  The kit includes the Life is Beautiful stamp set AND an 8 cards pre-cut kit. You have through August 20th to get this kit and the pdf tutorial is also included. It's just $28; a steal for a stamp set AND cards kit!   Read all about it here.

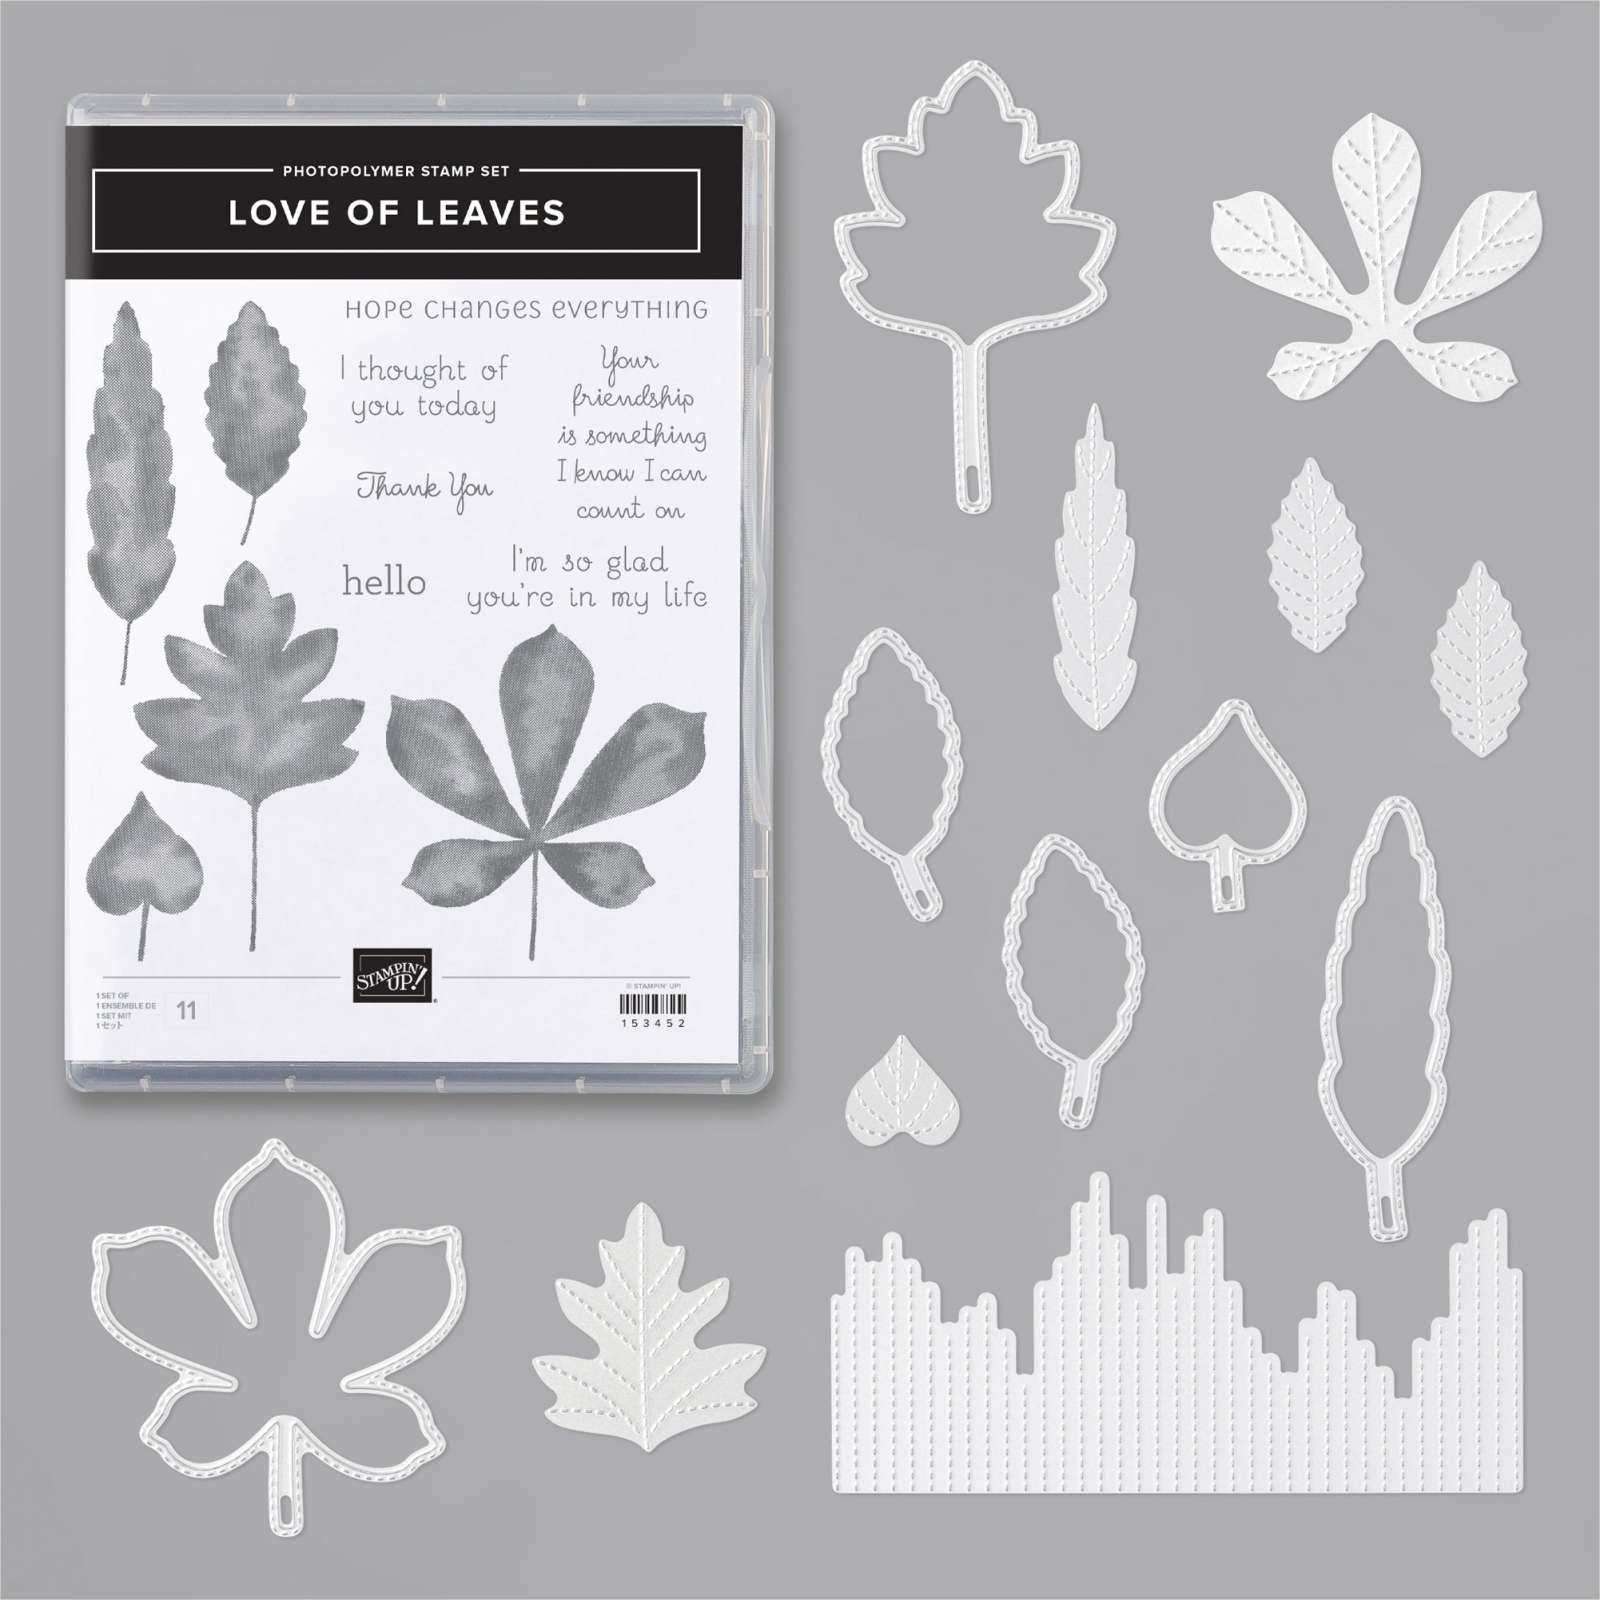
    Did you notice the stitching on the bottom of this card?  That's done with the Love of Leaves dies seen here: 

    ~~~

    Bonus Days are here!

     
    Redeem your $5 coupons now!  

    ~~~

    Current Host code is QW7SUYVX

    Get a free package of new Iridescent Pearls in August with an online order over $55. 

    Order online here

     Get my Flowers for Every Season pdf tutorial free with all online order in August!


    It includes directions, photos and measurements for 12 cards!

    Leave a Reply

    Your email address will not be published. Required fields are marked *

  • 2 Techniques with video; Starburst & Masking!


    I made these technique cards on a Facebook Live in July and I know not everyone is on Facebook.  So I'm posting it here for you too. I offer a FB Live every Tuesday at 11 am CT and one the 2nd & 4th Monday evenings at 7:30 pm CT all using current Stampin' Up! products.  Join me here. 

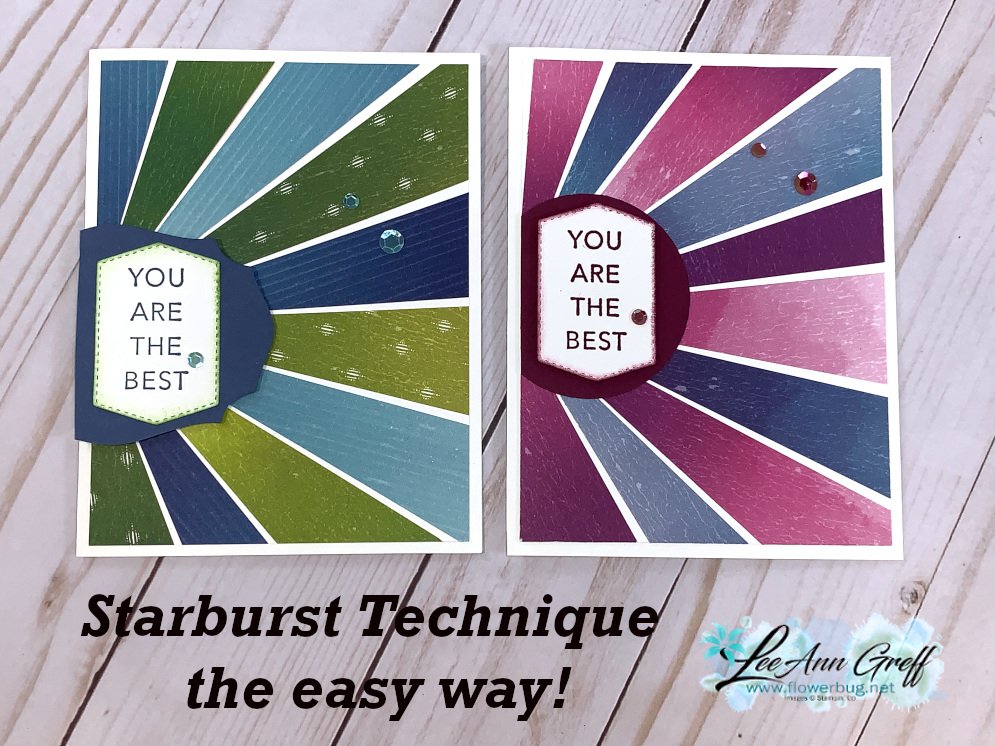
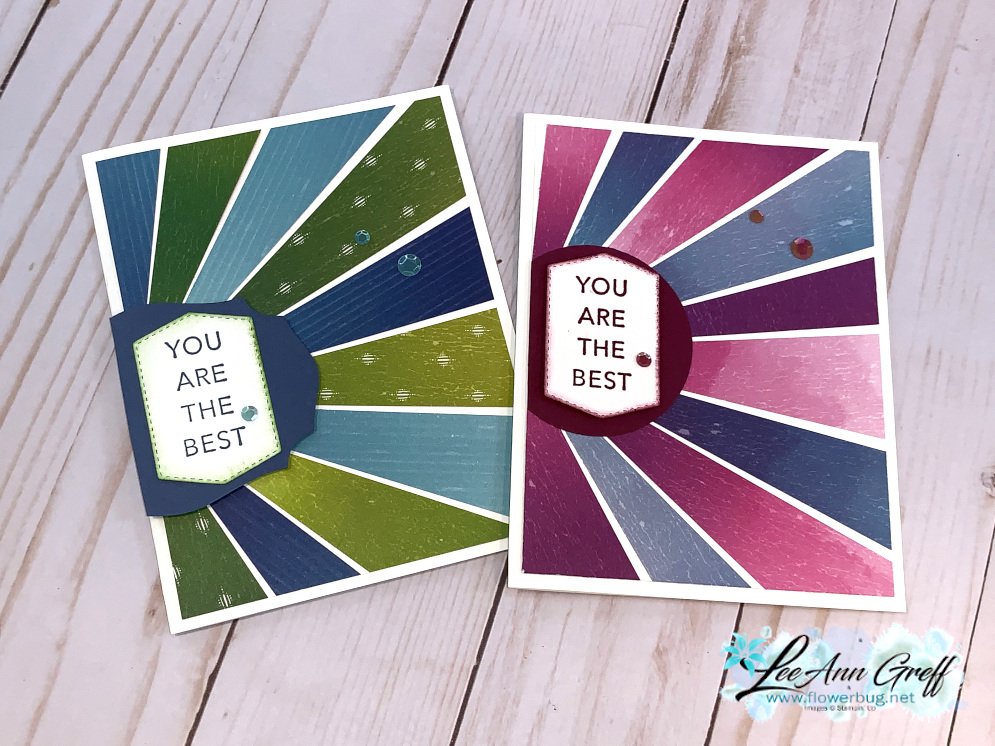
    I had a request to teach the Starburst technique and came up with this easy version. 

    I used the unique and colorful Artistry Blooms designer paper from the Annual Catalog along with the Tasteful Touches stamp set and Artistry Blooms adhesive backed sequins.  The link to the videos is below but here are the basics: 

    Measurements:

    • Card base 5 1/2" X 8 1/2"
    • White CS 4" X 5 1/4"
    • Artistry Blooms DSP – cut 5 strips measuring 1 1/2" X 5" and then cut these in half on the diagonal.  Now mix and match them to the 4" X 5 1/4" piece leaving a tiny bit of space between them.  

    I added greetings and die-cuts from the Tasteful Touches bundle seen here. 

    Here are the other cards I made using the masking technique and the Tasteful Touches stamp set.


    Which do you prefer?  Yellow or pink?

    Here's a link to the video on Facebook.  Click below to watch it on YouTube.


    ~~~

    Bonus Days are here!

     
    Redeem your $5 coupons now!  

    ~~~

    Current Host code is QW7SUYVX

    Get a free package of new Iridescent Pearls in August with an online order over $55. 

    Order online here

     Get my Flowers for Every Season pdf tutorial free with all online order in August!


    It includes directions, photos and measurements for 12 cards!

    Leave a Reply

    Your email address will not be published. Required fields are marked *


Notice: LeeAnn Greff, Independent Stampin’ Up! Demonstrator, Manager. The content of this website is my sole responsibility as an independent Stampin’ Up! demonstrator and the use of, and content of, the classes, services, or products offered on this website is not endorsed by Stampin’ Up! Copyright 2025