/


Latest Post

Paper Tags Joseph’s Coat technique with video tutorial


I played with the Paper Tags stamp set and the Irresistible Designs Specialty Paper for last week's video.  Here's my favorite project: 
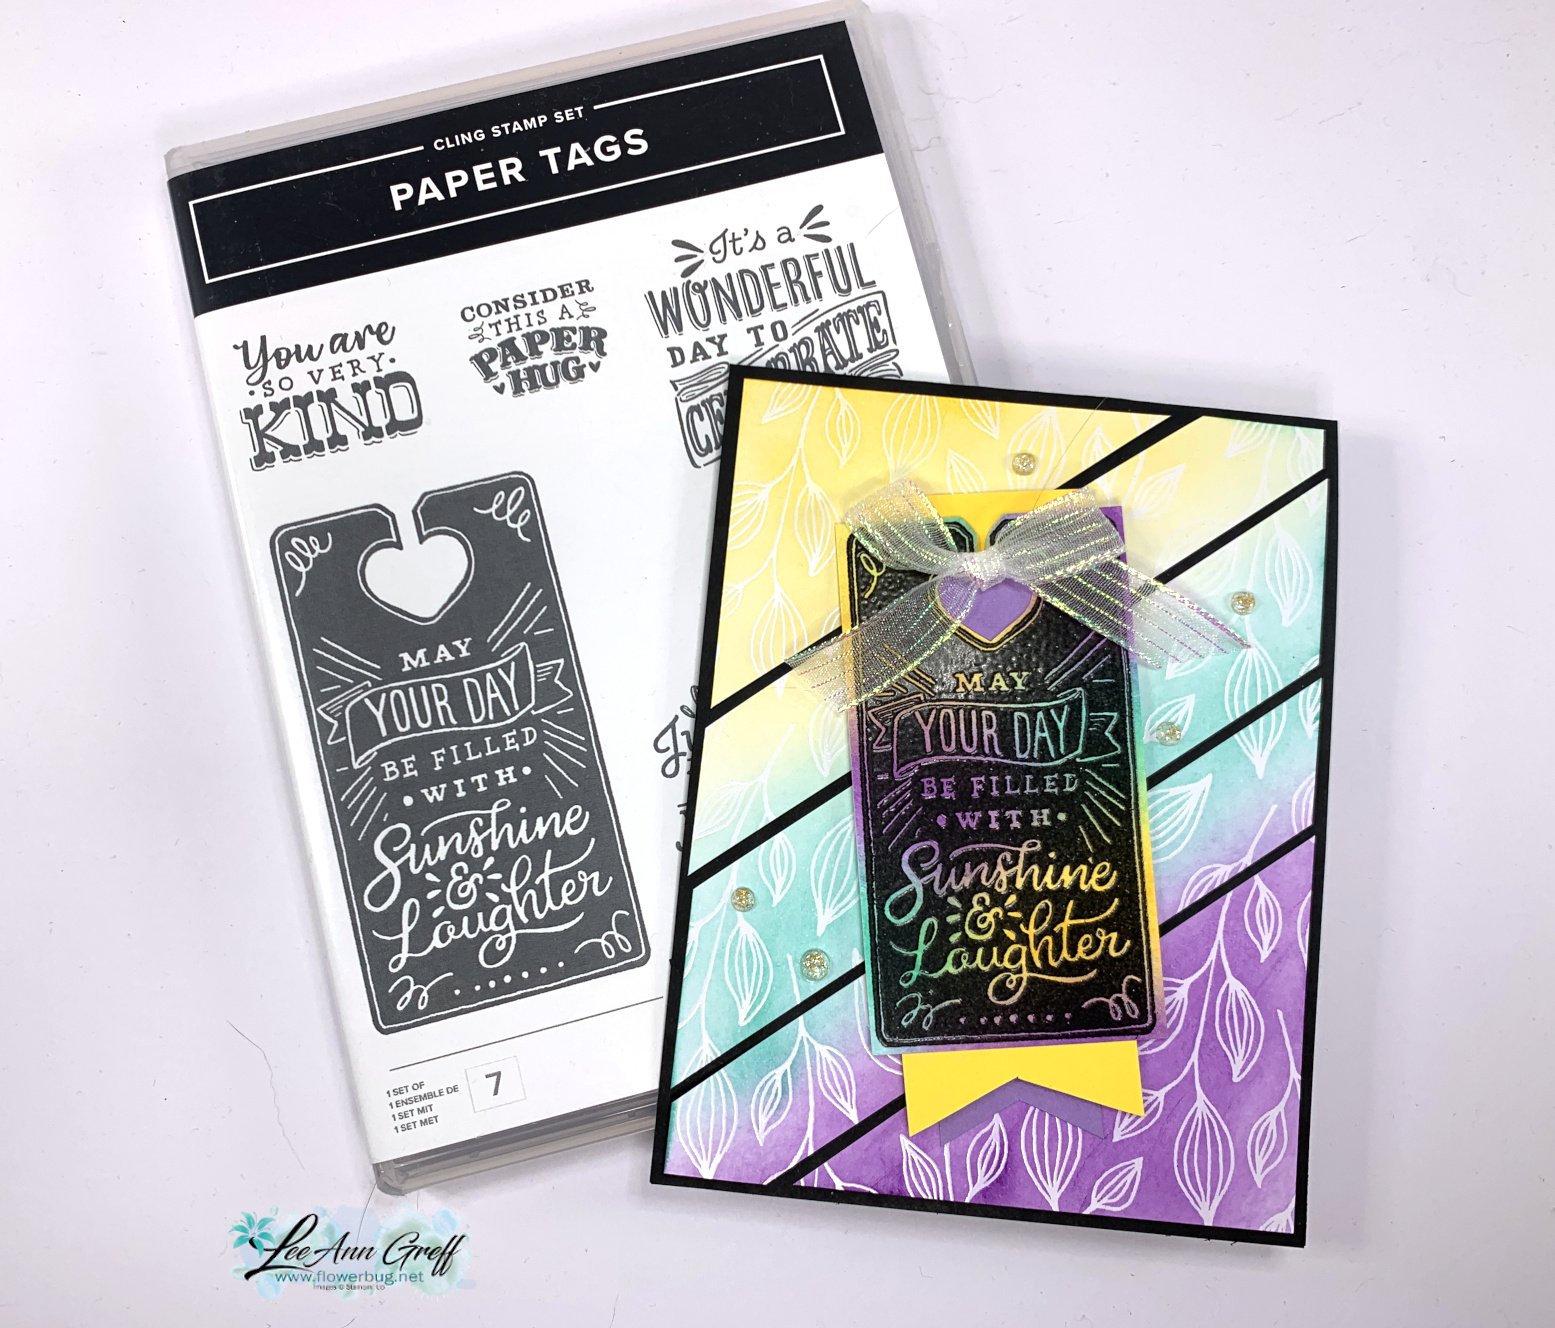
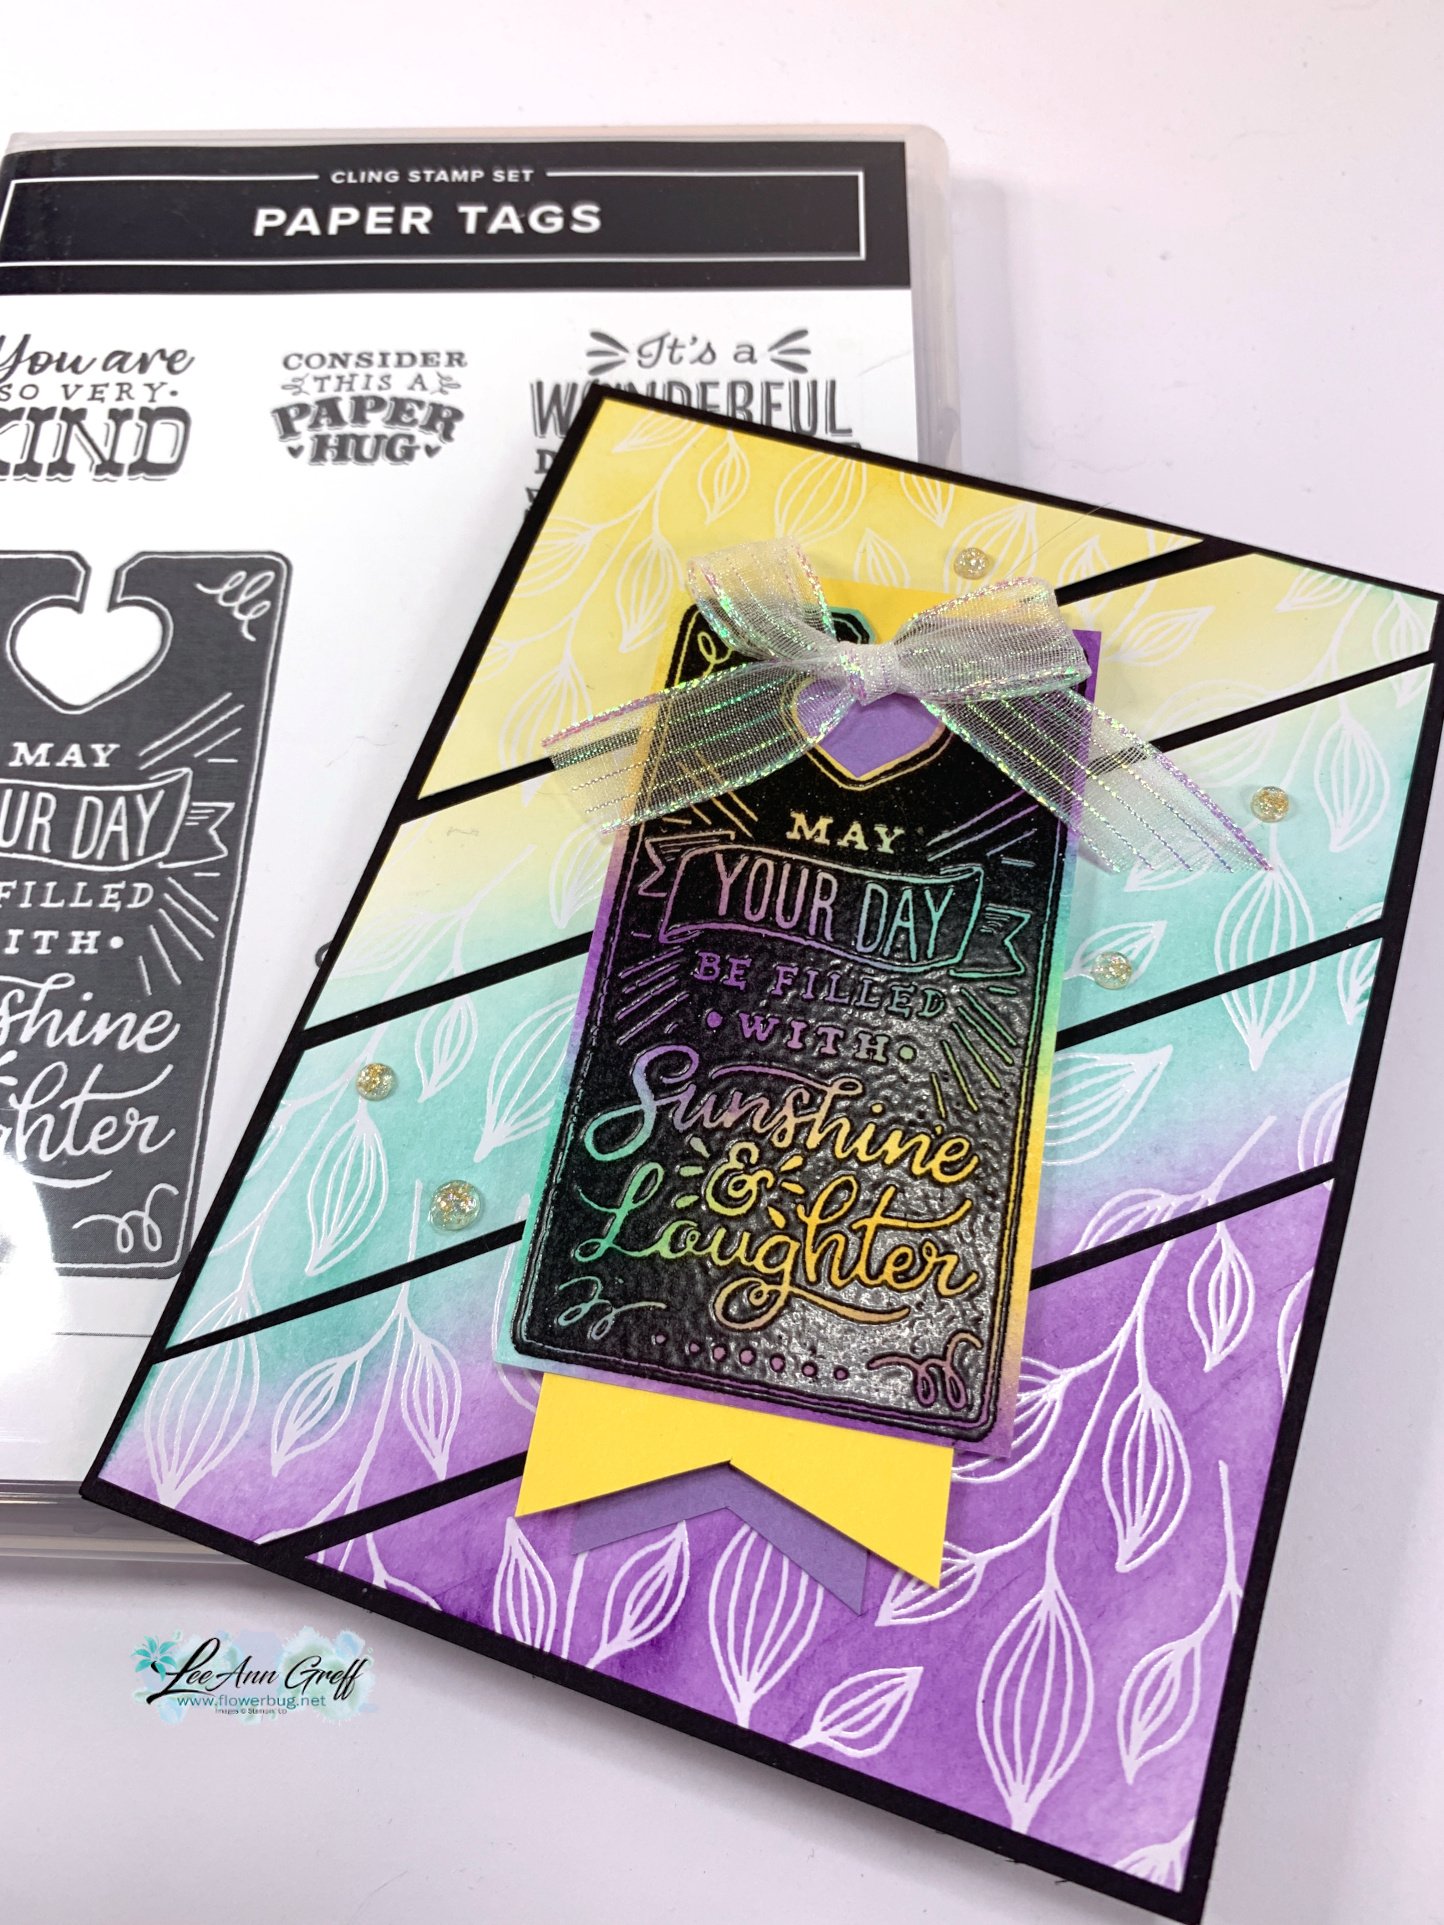
The colors include Daffodil Delight, Coastal Cabana and Gorgeous Grape in inks.  The card stock is Black, White, Daffodil and Highland Heather. 

For the colored designer paper panel I started with a piece at 4" X 5" and blended the three inks on it diagonally. This Irresistible specialty paper seen here resists the ink where they printed the resist designs. Once you add ink, it reveals their pattern.  So cool!  

After I blended the colors on I randomly cut the single panel into 5 pieces on the diagonal. I share how I did this in the video here. I adhered each panel one at a time starting in the corner. You may need to trim one of the pieces slightly to fit the card base.  


For the inside of the card I stamped the greeting and added color to it with coordinating Blends markers. 

Here's how you do the Joseph's Coat technique:

  1. Sponge or blend multiple colors onto your neutral cardstock. 
  2. Swipe the embossing buddy over this layer; tap off excess powder. 
  3. Ink the stamp image in Versamark ink; stamp onto the layer. 
  4. Immediately heat emboss with Black embossing powder. 

Once I had my tag, I trimmed it by hand (there are coordinating dies) and added a few extra pieces to lengthen the tag and add more layers. I finished it off with a bow. 
Here's the free project sheet with directions, photo, measurements and a supplies list: Download Paper Tags Joseph's Coat card

Below is the video tutorial for this card and another I shared in the video:

~~~

June Specials:

The Suite Sale is on! 

Buy one get 50% the second item – on all available suite products. 

Shop here or see products below: 

~~~

Last Chance List has been updated!  see it all here. Don't miss out on the deals!

~~~

Earn free card kits in June with online orders! Get 4 kits with a $50 order and orders over $80 receive all 6 cards. All you need are greetings, gems and adhesives to assemble. 

Order here 

~~~

Get my Celebratory Sips PDF tutorial free with any online order in June!

All Posts

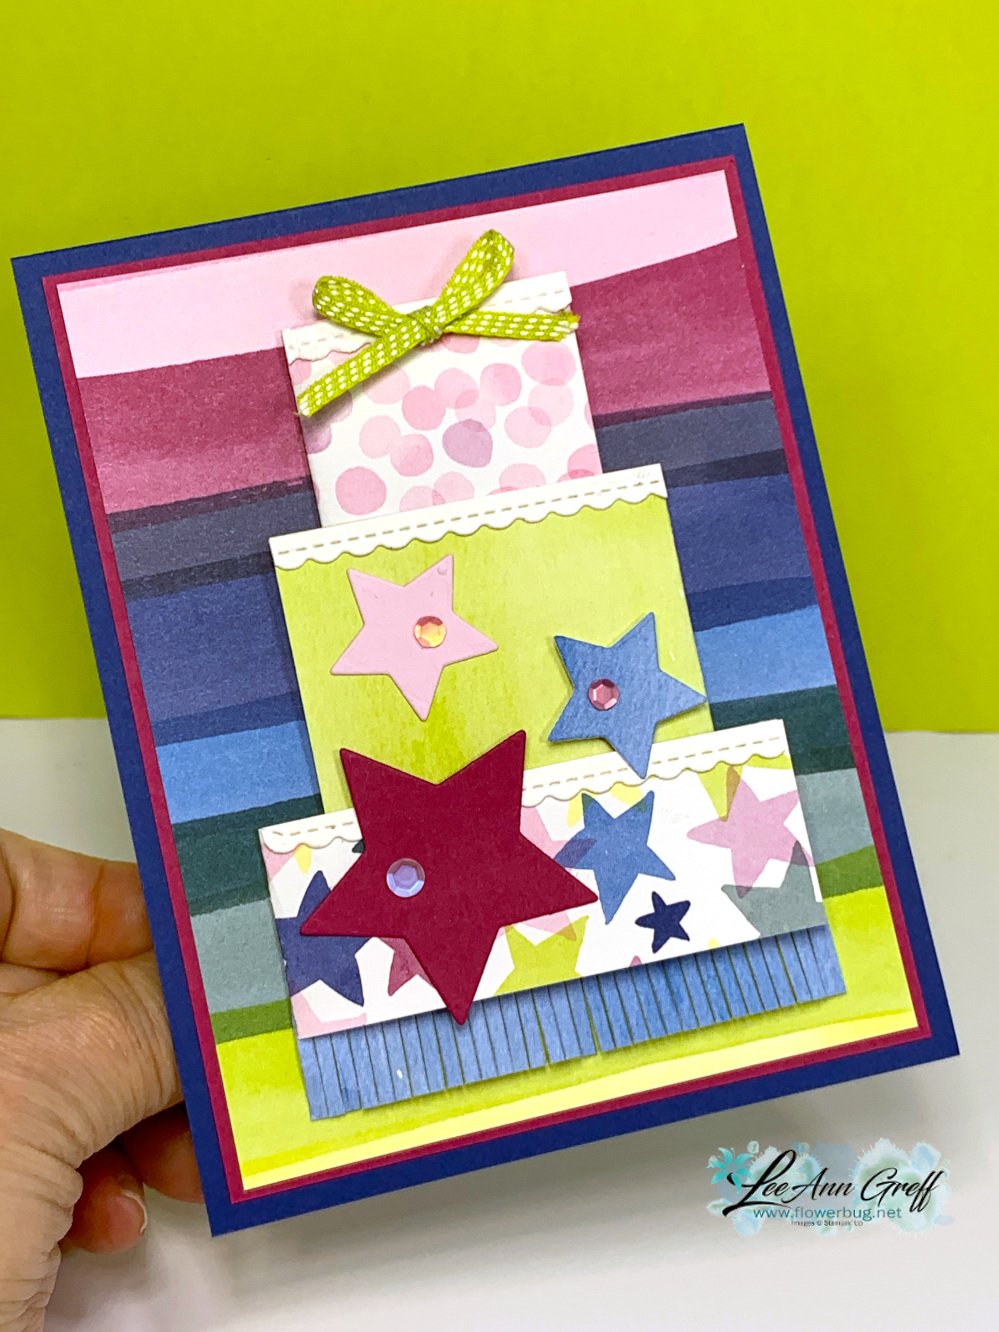
  • Clever & Amazing interactive triple-tier cake card with video tutorial!


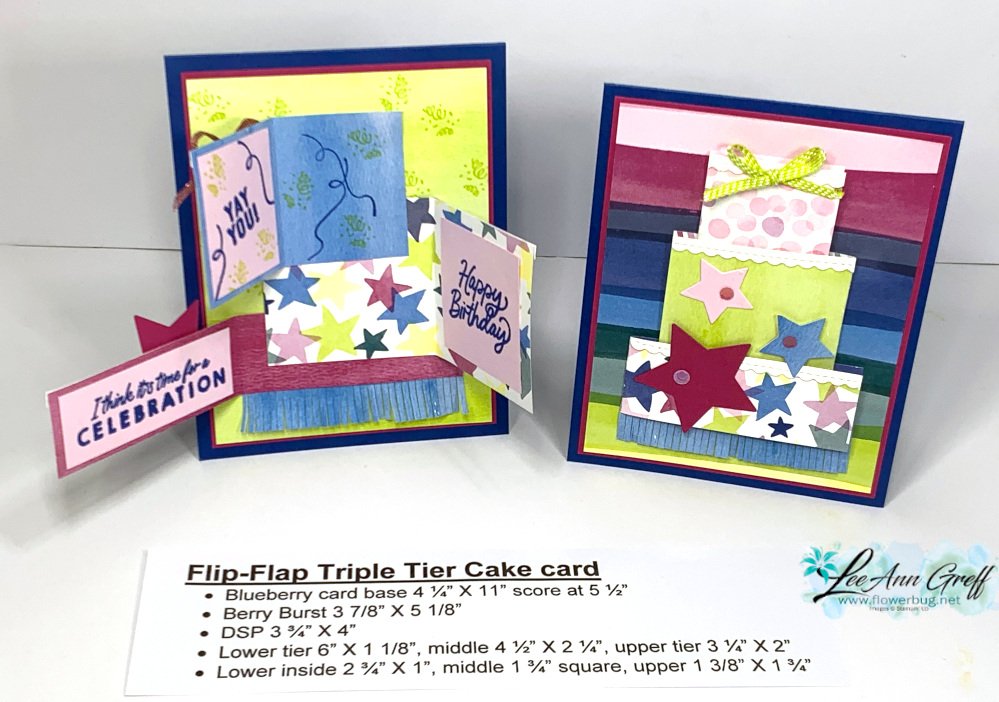
    This card might look like an ordinary card with a layered cake on front but it's not! 


    Each layer opens up to reveal more inside! Click on the very short video below to see it in action!

    The Bright & Beautiful designer paper is new in Stampin' Up!'s annual catalog.  It's filled with fun and colorful patterns in many of our new core colors.  Love this paper!  


    If you've followed me for awhile you know I like to create interesting fun fold cards. I saw something like this card online and knew my stampers would like to see it.  

    I cut strips or pieces of the Bright & Beautiful designer paper into sizes that would make a nicely layered cake.  Each piece is folded in half. Once you open them there's an inside message on each layer.  So cool! 

    And the best thing is that the middle star die-cut hold the lower flap closed which then holds each layer closed. 


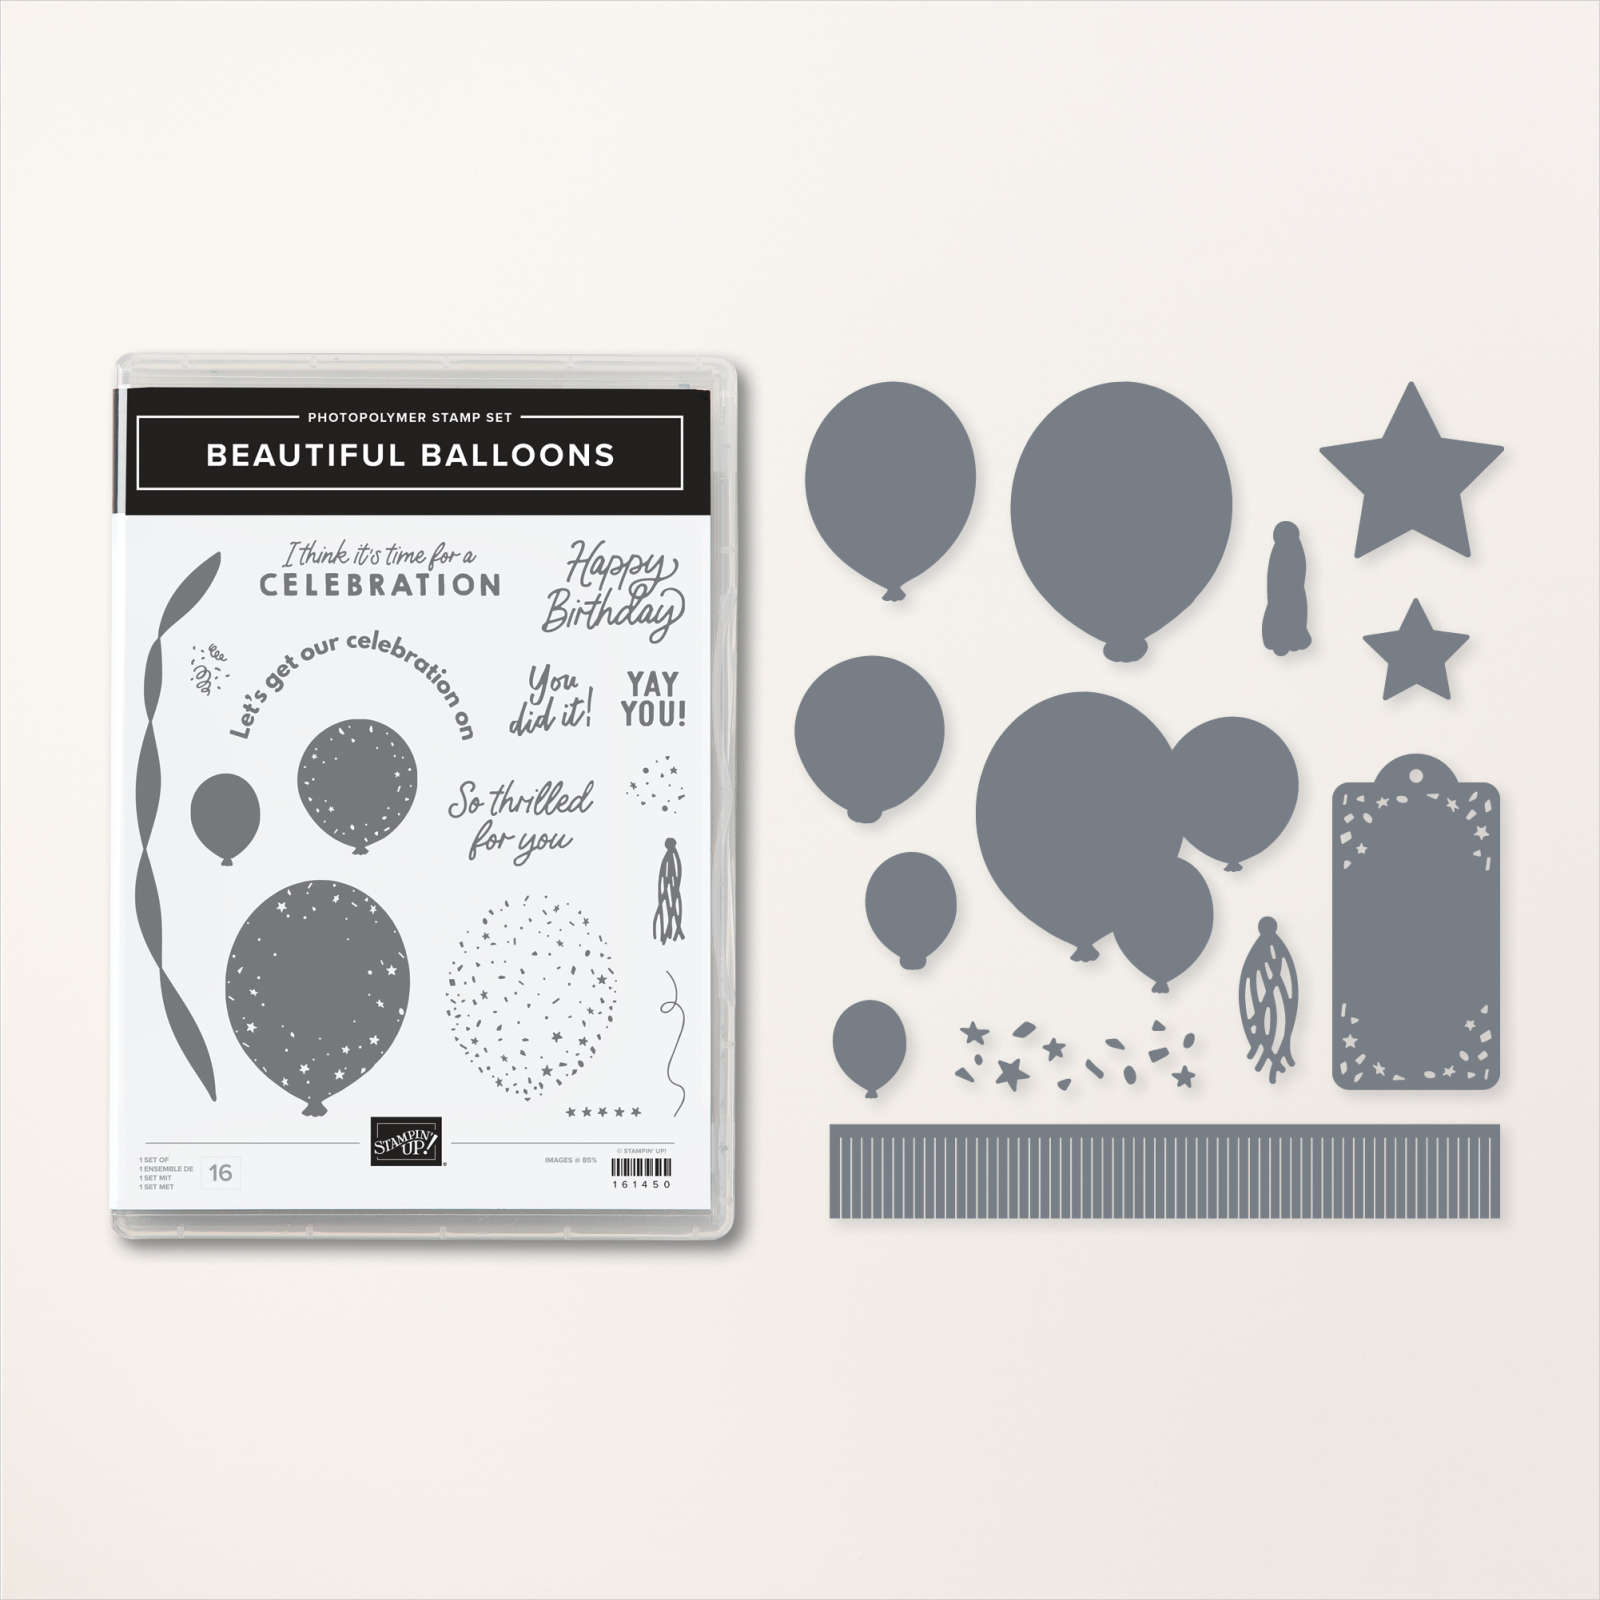
    I have enjoyed playing with the Beautiful Balloons bundle this month.  You cannot go wrong with balloons; they're great for birthday's, graduations, weddings or any celebratory event. 


     You can see this bundle here online.  

    Click here or on the photo below to watch how it's made. 

    ~~~

    May Specials:

    *current host codes: ZHZ6CPYU or AJVB3B3V 

    Get a free updated cardstock color sampler with online orders over $55 using a host code.

    Offer good through May 17th  

    My new catalog designer paper share is open for a limited time. 

    Get 80 sheets of 6 X 6" DSP – all from the new catalog for just $28.50 plus shipping.  Reserve your spot here. 

    Earn free products with my loyalty rewards! 

    Click here to download yours and earn a $50 shopping spree!

    Leave a Reply

    Your email address will not be published. Required fields are marked *

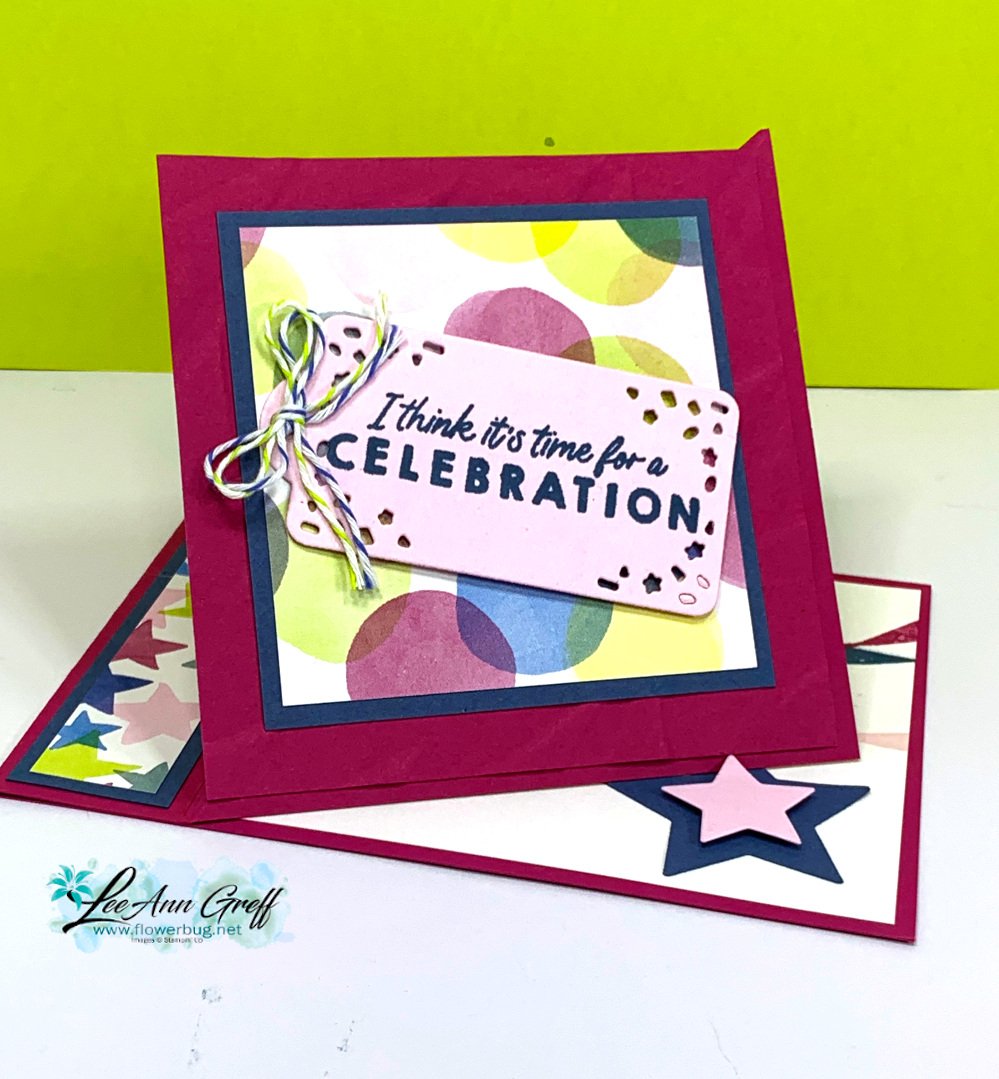
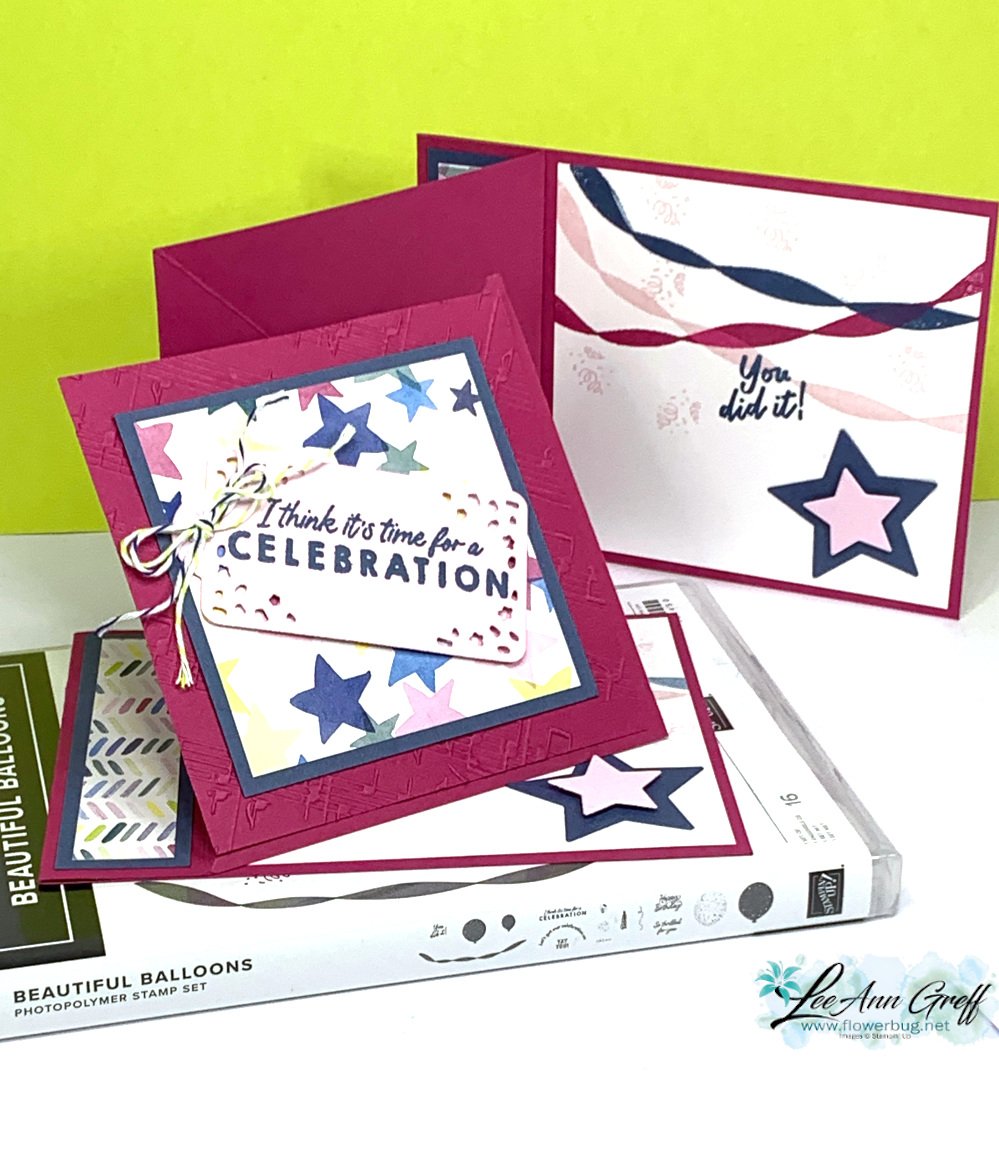
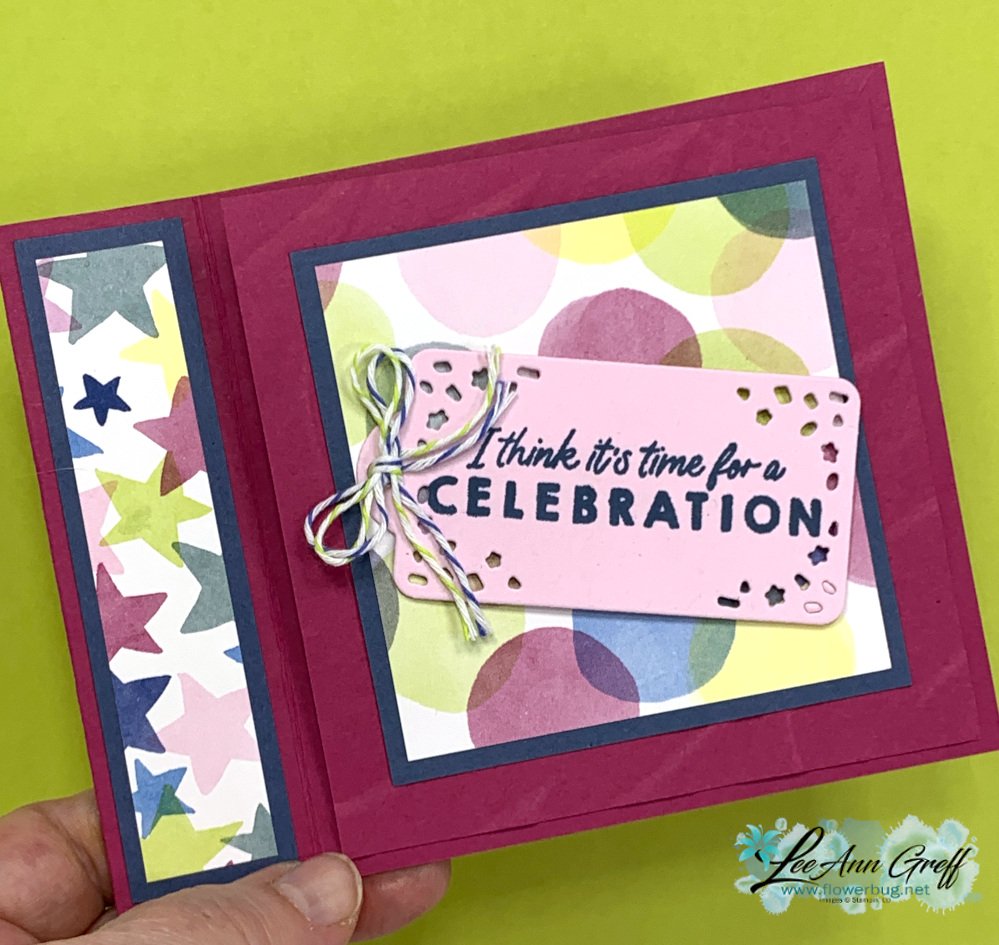
  • Have you made a ‘Book-binding Easel’ card yet? It’s so neat!


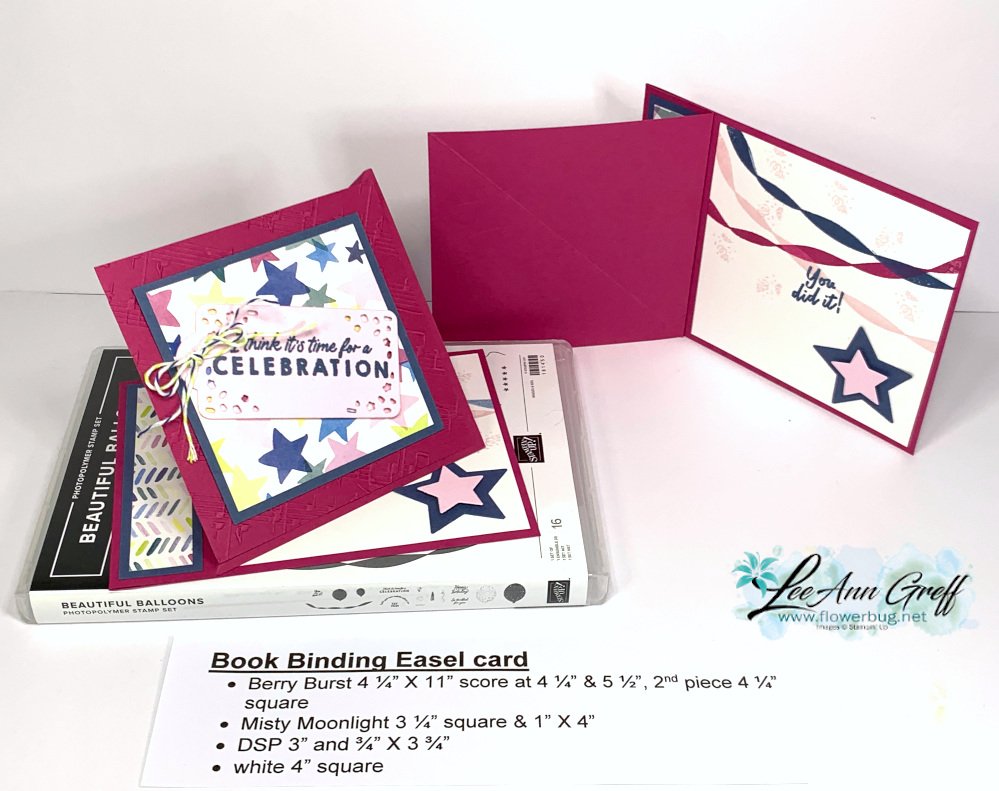
    This cool card is made like a traditional book binding fold but turned into an easel card too! 

    I used Berry Burst & Misty Moonlight or Blueberry Bushel for my layers. That cute tag on the front is from the Beautiful Balloons dies.  The stars that hold up the easel are die-cuts from the same dies.  You need to add a Dimensional on one of them. Watch the video here or scroll down. 

    You can see this bundle here online.  

    I stamped the inside with the banner in multiple colors, some stamped off.

    Here's what the card looks when it's flat: 

    I am so glad that we have Berry Burst back! 

    Measurements:

    • Berry Burst 4 ¼” X 11” score at 4 ¼” & 5 ½”, 2nd piece 4 ¼” square
    • Misty Moonlight 3 ¼” square & 1” X 4”
    • DSP 3” and ¾” X 3 ¾”
    • white 4” square

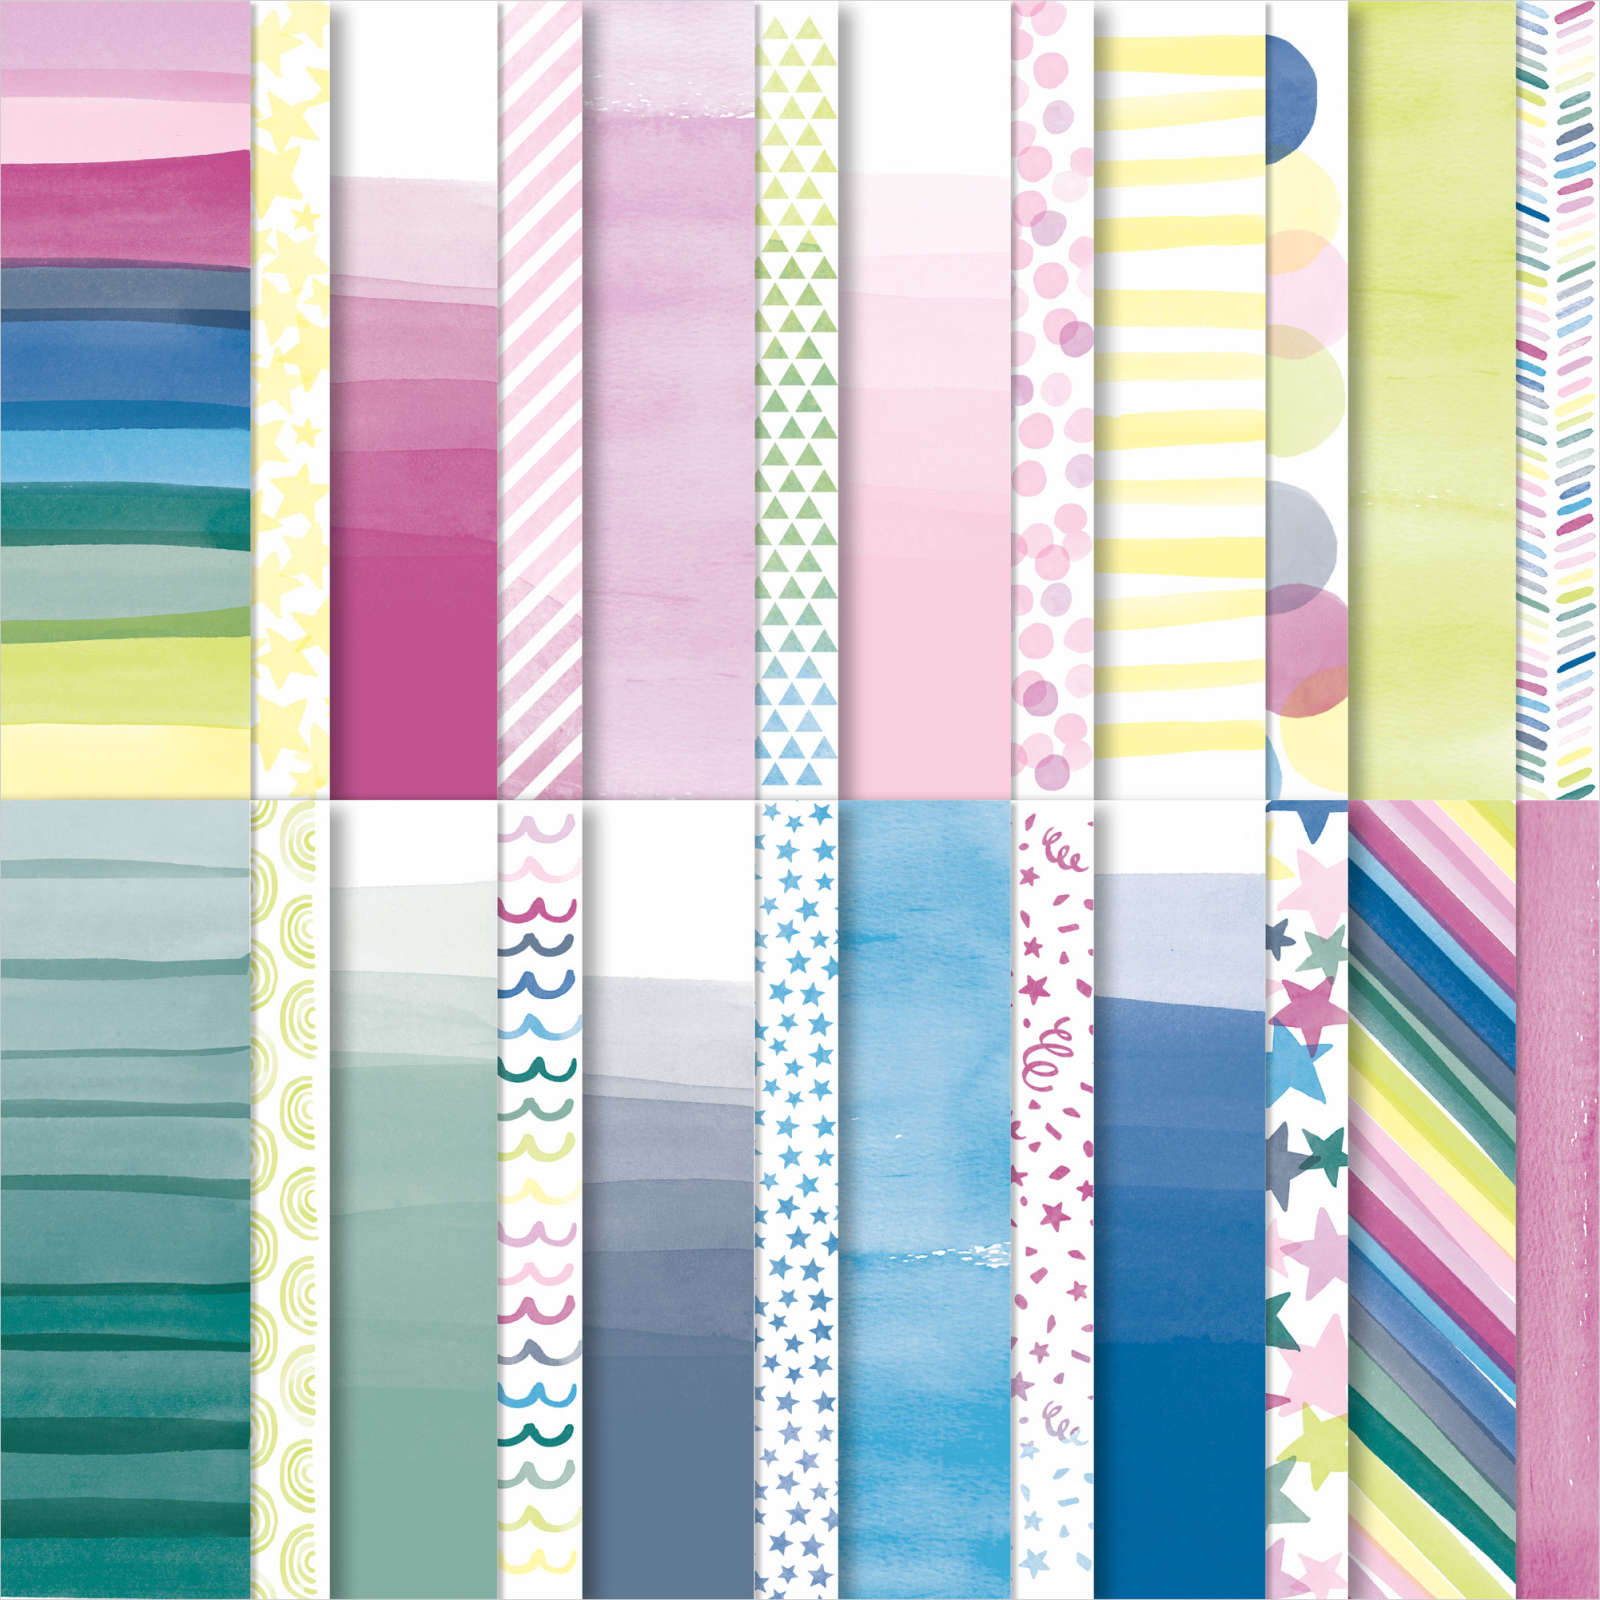
    You can see the Bright & Beautiful designer series paper  here.  

    *I'll be featuring this fun designer paper in June's card kit to go. 

    Click on the photo below to watch the video; I share another amazing fun fold card after this project!

    ~~~

    May Specials:

    *current host codes: CNSGEFEE or AJVB3B3V 

    Get a free updated cardstock color sampler with online orders over $55 using a host code.

    Offer good through May 17th  

    My new catalog designer paper share is open for a limited time. 

    Get 80 sheets of 6 X 6" DSP – all from the new catalog for just $28.50 plus shipping.  Reserve your spot here. 

    Earn free products with my loyalty rewards! 

    Click here to download yours and earn a $50 shopping spree!

    Leave a Reply

    Your email address will not be published. Required fields are marked *

  • Beautiful Balloons with Bright & Beautiful designer series paper


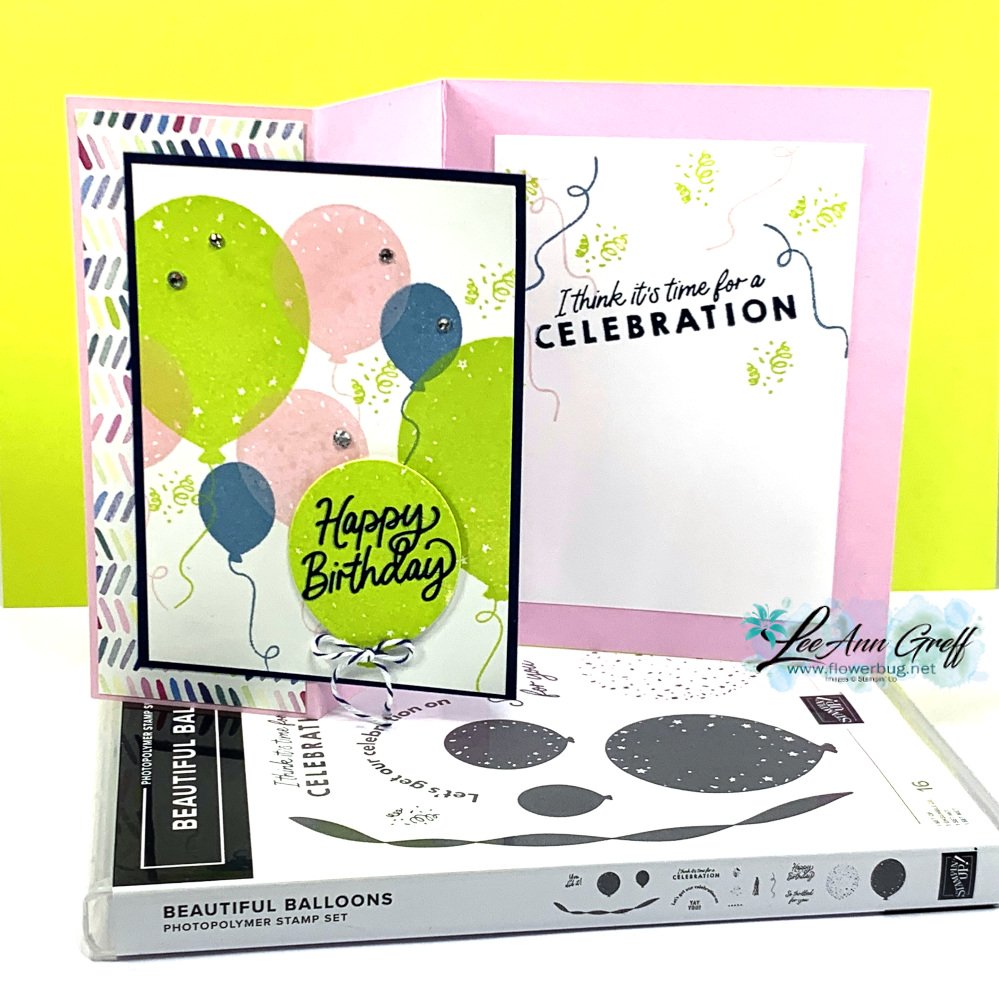
    I've been playing with the Beautiful Balloons bundle and thought making my own background with the balloon images would be cool.  

    I chose a few of our newest colors to compliment the Bright & Beautiful designer series paper seen here.  My colors are Bubble Bath, Lemon Lime Twist and Boho Blue.  I love that the images appear somewhat translucent like real balloons.  

    *I'll be featuring this fun designer paper in next month's card kit to go. 

    It's an easy fun fold card too. I stamped the greeting on a stamped large balloon and die-cut it with one of the dies in the bundle.   

    Measurements:

    • Bubble Bath card stock is 8 1/2" X 5 1/2" & scored at 2 1/8" and 4 1/4"
    • designer paper is 1 7/8" X 5 1/4"
    • White 3 1/4" X 4 1/2" 
    • Black 3 3/8" X 4 5/8" 

    I had fun stamping the inside (3 1/2" X 4 3/4") with the balloon string and confetti images.  

    You can see this bundle here online.  

    ~~~

    May Specials:

    *current host codes: CNSGEFEE or AJVB3B3V 

    Get a free updated cardstock color sampler with online orders over $55 using a host code.

    Offer good through May 17th  

    My new catalog designer paper share is open for a limited time. 

    Get 80 sheets of 6 X 6" DSP – all from the new catalog for just $28.50 plus shipping.  Reserve your spot here. 

    Earn free products with my loyalty rewards! 

    Click here to download yours and earn a $50 shopping spree!

    Leave a Reply

    Your email address will not be published. Required fields are marked *


Notice: LeeAnn Greff, Independent Stampin’ Up! Demonstrator, Manager. The content of this website is my sole responsibility as an independent Stampin’ Up! demonstrator and the use of, and content of, the classes, services, or products offered on this website is not endorsed by Stampin’ Up! Copyright 2025