/


Latest Post

Look at these Sweet Thoughts Memories & More card – Fast & Fabulous!


Do you ever want to craft & create but don't have enough time to get out multiple supplies and think up ideas?  Time should never stop you from creating!  

I made a few of these cards on last week's Live video and afterwards made more; all in just a few minutes! 

I didn't need any inks or stamps; I used the greetings in the card pack.  So fast!  

I used the Sweet Thoughts card pack seen here; it's 40% off right now. And the cards & envelopes are also on sale. See them here. 

There are times you need to make quick, easy cards just to get your creative fix! 

I did use a paper trimmer to cut some of the cards into pieces. For instance notice the colorful striped edges on a few of the cards.  Those are all from one M & More card; I cut it into 3 pieces.  

Who wouldn't love to give or receive these pretty cards?! 

I used just half a package of these beautiful cards to make these 15 full cards.  These Memories & More cards in the pack are discounted right now in the Last Chance list. They're now $6 instead of $10.  See them here. 

The photo of the cards above does not do them justice! Check out the stack on the above left.  The package includes 6 sheets of adhesive die-cuts that are fun to embellish with.

You can use these for cards OR scrapbooking.  I shared my Sweet Thoughts scrapbook pages on Friday's post; see it here. Click here to see my pre-cut scrapbook kit (or tutorial) in my Shop.  

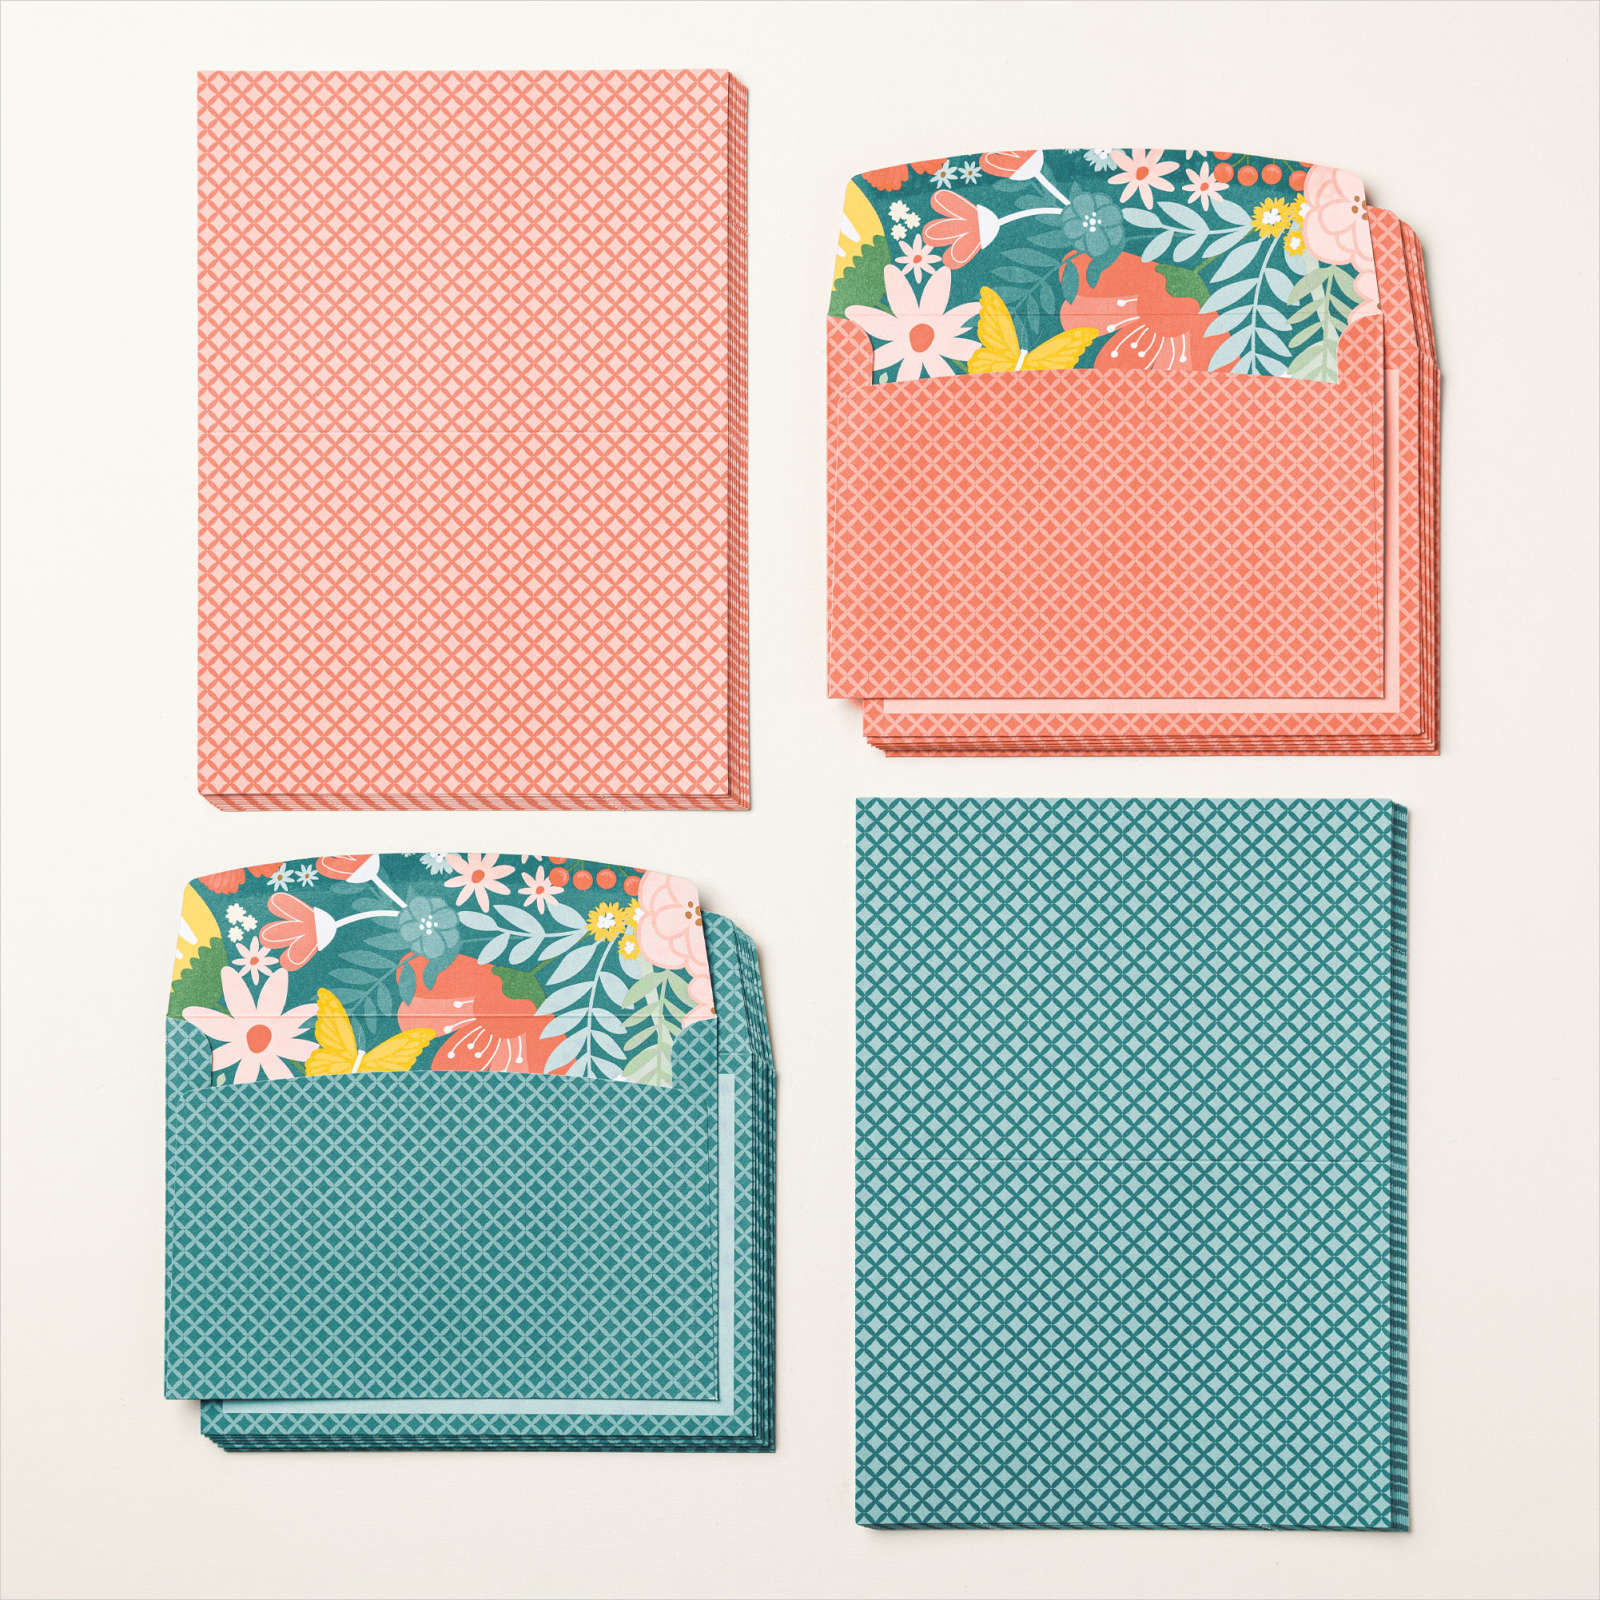
You can see the envelopes behind these cards.  They are included in the cards & envelopes pack seen here. They're larger than our standard cards – finished size is 6 1/4" X 4 1/4" and are also discounted to $8 instead of $10. 

I did add Iridescent Pearls and a few ribbons to these cards. Not necessary but always fun to embellish! 

I hope you don't let time stop you from crafting. Add a few of these Memories & More cards or a kit from our Kit Collection for those times you want to create easily without much 'work'.  

~~~

April Specials: 

*current host code link:  W62MPU2R

~~~

Here's a link to the Last Chance list 

A free gift with orders in April:

Check out my available Kits & Tutorials here:

All online orders in April will receive a free multi-project tutorial!

All Posts

  • All Around Wreath for Christmas


    Have you noticed the All Around Wreath bundle in the annual catalog? Click here; it's quite the gem!  So many occasions are covered in the greetings and die-cuts.  

    Marilyn made this pretty Christmas themed wreath for our Team Christmas card swap. 

    She chose to use two shades of green here; Mossy Meadow with Pear Pizzazz along with a few touches of Gold.  The pears are heat embossed in Gold powder as well as the shimmery thread.  

    Other details:

    • The greeting is die-cut with the Hippo & Friends dies seen here
    • The Vanilla layer is textured with the Pinewood Planks embossing folder
    • She used the same wreath die-cut but in two colors, separating them slightly on the card. 

    ~~~

    November Specials!

    Current Host code is GRC9VVUU


    All online orders receive my FREE Curvy Celebrations 22 project PDF Tutorial! 


    Leave a Reply

    Your email address will not be published. Required fields are marked *

  • Retro style circles layout; super easy! Catch the Live video tonight!


    Tonight at 7:30 pm Central Time I'm sharing how to make these retro style circle cards on Facebook Live.  Click here to join me.   You can also see this video below!

    Basically you need three sizes of circle dies or punches for the start of this layout.  Cut them in half and layer together with the edges meeting on one side. Adhere and add a long greeting between the two. 

    Watch how on my FB Live replay!

    Measurements:

    • 5 1/2" X 8 1/2" card base
    • 3 1/2" X 4 3/4" Whisper White; the greeting strip is about 5" long and either 1/2" or 3/4" wide depending on your greeting image.
    • 1" X 5 1/2" horizontal strip
    • Circles from the Stitched Shapes dies are the largest three circles. 

    You'll want ink, stamps and embellishments that coordinate with your Designer Paper.  Remember you could use card stock instead of DSP. 


    Products used:

    • Designer papers – Heartwarming Hugs, new Classic Christmas & Snowflake Splendor
    • Stamps – Tree Angle, Snowflake Wishes & Curvy Christmas
    • Colors – Real Red & Olive, Seaside Spray & Night of Navy, Sahara Sand & Cherry Cobbler  
    • Other: Stitched Shapes dies, Curvy Dies & Pick a Banner punch

    ~~~

    November Specials!

    Current Host code is GRC9VVUU


    All online orders receive my FREE Curvy Celebrations 22 project PDF Tutorial! 

    Leave a Reply

    Your email address will not be published. Required fields are marked *

  • Curvy Christmas & the Postage Punch


    Check out this easy card using the new Curvy Christmas stamp set and the Postage Punch!  

    It's super simple! Here's how I made it:

    1. Stamp the curvy trees image on the White CS using Shaded Spruce ink.  Color the trees with a Light Shaded Spruce Blends marker.  Add a tiny star using Cherry Cobbler ink on one tree. Adhere it to the Cherry Cobbler layer and to the main card.
    2. Punch out three pieces of Classic Christmas designer paper with the Postage Punch seen here.  Adhere to the White CS. 
    3. Stamp the greeting in Cherry Cobbler ink on a 1/2" strip of White CS.  Punch the ends with the Banners Pick a Punch. Add it to the card with mini dimensionals. 
    4. Finish with a few Holiday rhinestones. 

    You can see this stamp set here; it's only available through January 4th.  And the Classic Christmas Designer Paper is here while supplies last. 

    Remember that everyone who orders any of these products or places an online order with me in November will receive a free 22 project PDF tutorial featuring the Curvy Celebration products! 


    ~~~

    November Specials!

    Current Host code is GRC9VVUU


    All online orders receive my FREE Curvy Celebrations 22 project PDF Tutorial! 

    Leave a Reply

    Your email address will not be published. Required fields are marked *


Notice: LeeAnn Greff, Independent Stampin’ Up! Demonstrator, Manager. The content of this website is my sole responsibility as an independent Stampin’ Up! demonstrator and the use of, and content of, the classes, services, or products offered on this website is not endorsed by Stampin’ Up! Copyright 2025