/


Latest Post

Little Ladybug Spinner Card!!


This fabulous spinner card was made by my friend Susie Wood; she sent one to me as we like to make cards for each other to share with our customers.  I love her style so much.  Visit her blog here. 

Isn't it adorable?!  It's classic Red, Black & White; perfect for the Ladybug set. The center circles are 1 3/4" and 2" in size. The Black piece is 4" X 3 1/4" in size and that circular opening is 2 3/8" using the Circles Collection dies and punches.

This cute stamp set is FREE with any $300 order placed during Sale-a-Bration; January through March 2020.  If you don't think you can swing that large of an order I have a few suggestions for you. 

  1. Have a workshop/party and invite your friends. Their orders will add up so you can earn it free!
  2. Place one big order (if you can). You'll get 6 free $50 Sale-a-Bration items at the same time and earn $36 in free hostess benefits. 
  3. Have a book party; inviting your fellow stamping friends to order. I can open a host code so all of the orders can be shipped to each person's ome. Sale-a-Bration is a great time to order!  Free products for each $50 you spend.
  4. Purchase the starter kit and join as a Demonstrator!  Then you get 20% off your $300 order so you're really spending just $240 to earn this set!  Plus you would get 6 free Sale-a-Bration items at the same time and $36 in free hostess benefits. 

All you need for a spinner card is a window, something to spin and some string or thread.  She used our Silver metallic thread here.  The window is made with our Circles Collection Framelits. 

Watch the FB live replay video below to see how it's done. 

You might wonder where the black polka dots came from. She used a sponge dauber!  So easy!! 

Below you can see both cards I demonstrated on my Facebook Live this week.  Click below to see it. Be sure to follow my page so you don't miss it each week on Tuesday's at 11 am CT. 

~~~

Three January Specials just for you! 

1. All January online orders will earn a ticket in the drawing for a free Little Ladybug stamp set!

2. All online orders will receive a 10 cards pdf tutorial in an email.


3. And if your order is over $65 you'll get a free Coastal Weave embossing folder too!

January Host Code is GEEFZCZV

Order online here

All Posts

  • Vertical Slider card – a neat and easy fun fold with video


    Tomorrow on December 1st there are two wonderful things happening; deals you won't want to miss!

    There will be a Clearance Rack refresh AND the Last Chance list starts too. BOTH of these will have numerous products discounted up to 60%. 


    I'm not sure what will be on the Clearance Rack but I do know what's on the Last chance list.  Download 2022 Holiday Catalog Last Chance here

    Go here to see them all Thursday, December 1st.

    ~~~

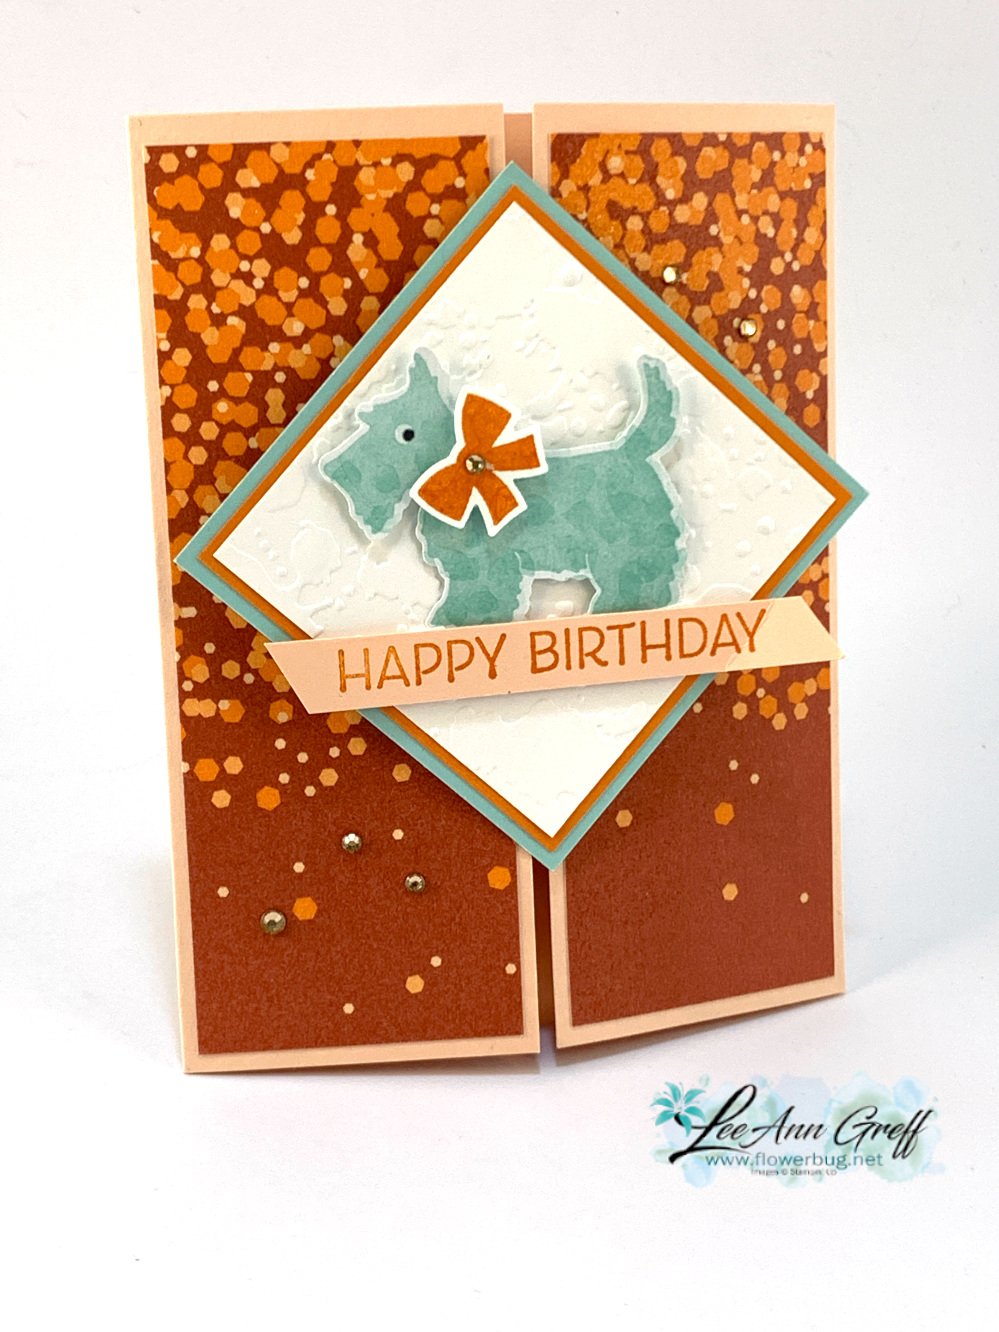
    I am loving this Vertical slider fun fold design!  I've made two so far and I can easily see me making more.  

    It basically a gatefold card but the additional layer holds it closed. 

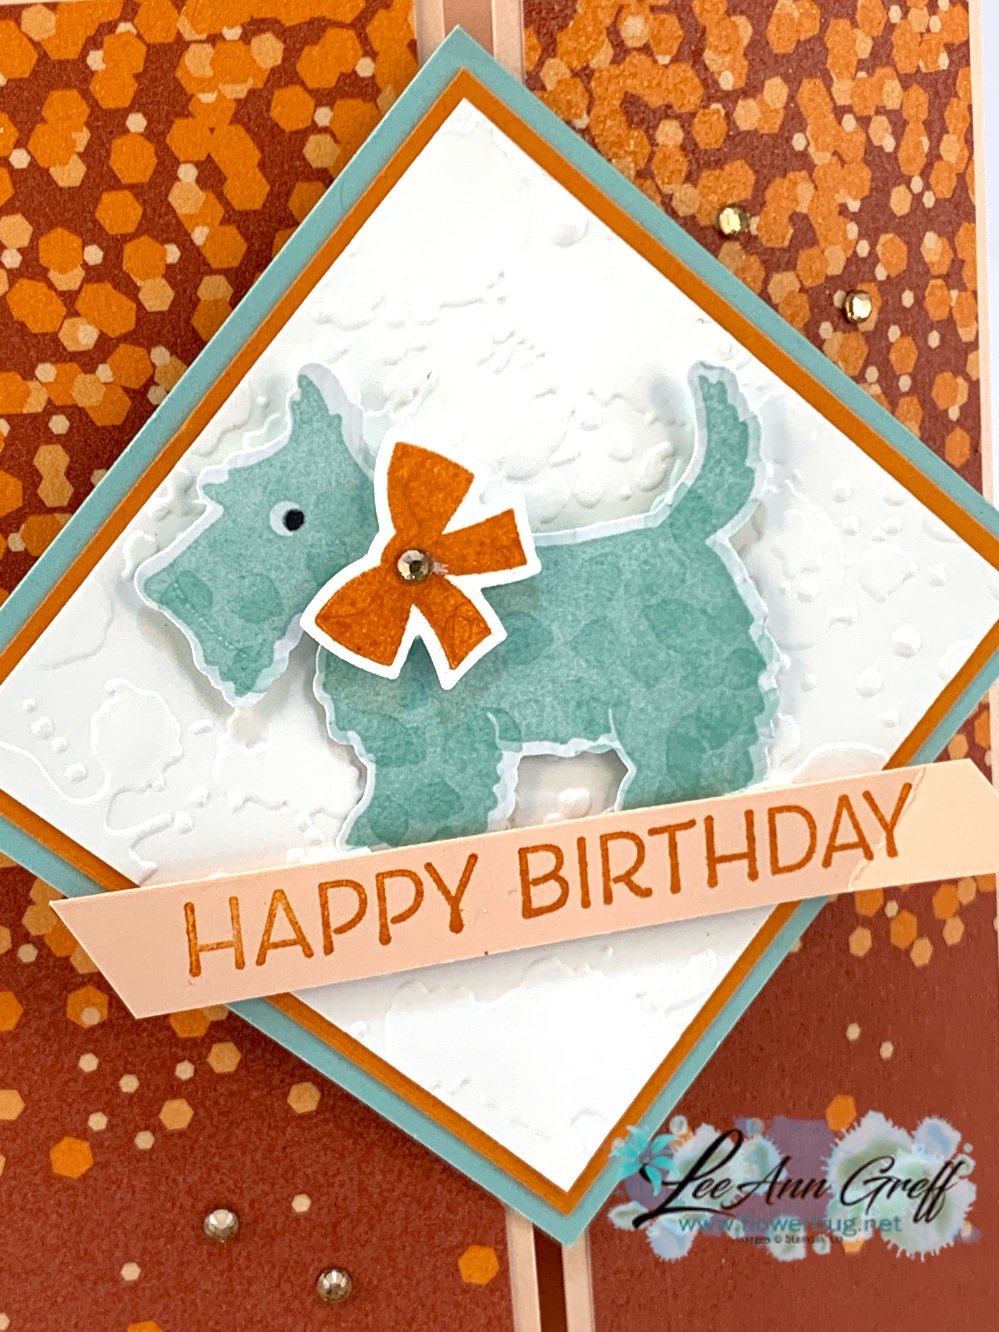
    I chose quite unique colors for the Scottie dog.  Think of it as a stuffed animal; ha!  The colors include Pool Party, Petal Pink and Pumpkin Pie.  I wanted to use the Metallic & Shimmer 6 X 6" DSP; I think it's perfect for a celebratory card with the shimmer & dots.  

    The Scottie Dog punch is 30% off starting December 1st; instead of $19, it will be $13.30!  

    For the inside I used the ribbon image from the Christmas Scottie stamp set and the greeting is from Charming Sentiments.  

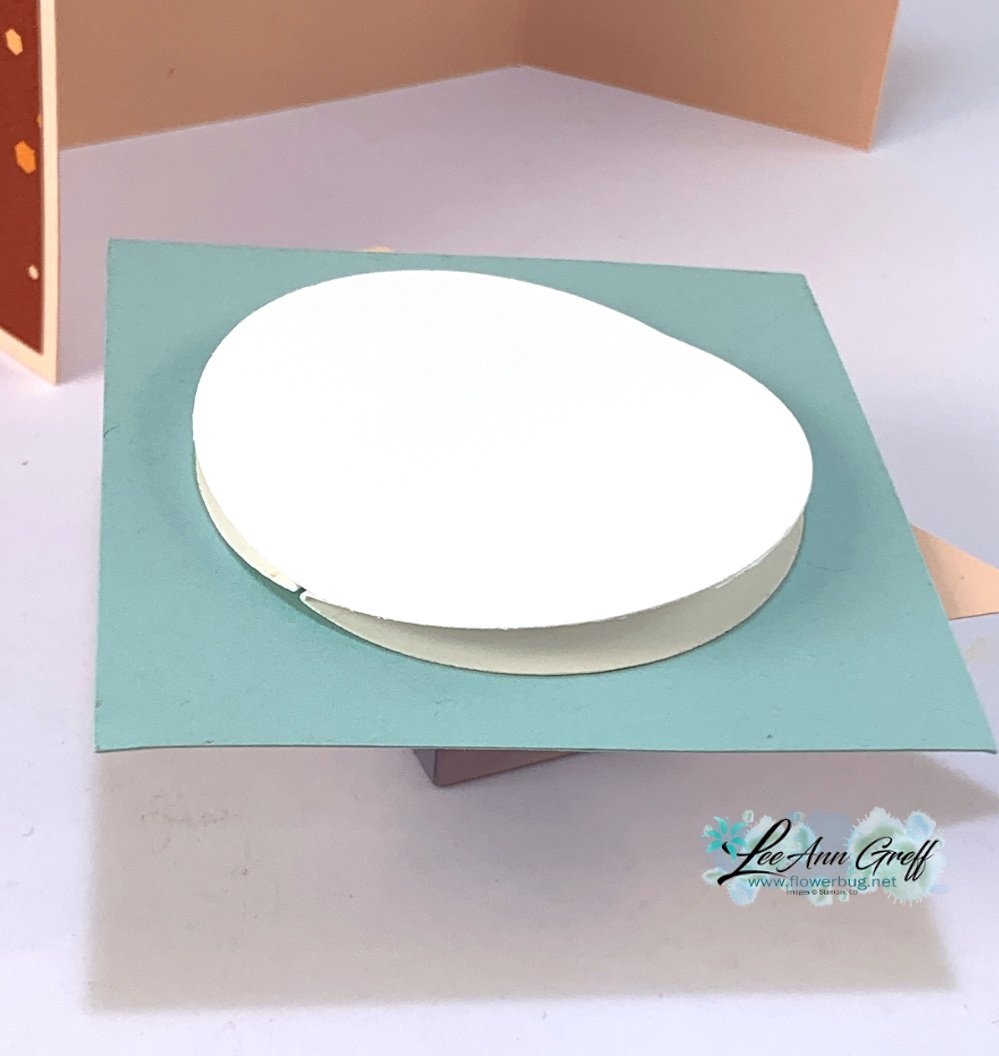
    The main element comes off when you open the card; plus it slides up and down too.   It consists of three 2 1/4" circles.  2 are scored in half and adhered to the back of the main element.  Then the last one is adhered over both folded circles.  

    What do you think?  Do the colors work for you?  

    Measurements:

    • Petal Party card base 5 1/2" X 8 1/2" scored at 2 1/8" from each end
    • White 2 5/8" square
    • Pumpkin 2 3/4" square
    • Pool Party 2 7/8" square 
    • DSP 1 7/8" X 5 1/4"

    In the video below I share another version of this Vertical Slider card; plus another special fold and easy treat bags.  

    ~~~

    Order online using the links below:

    Host code links: KA9ZYZB6 or DXYW7GV3

    November Specials: 

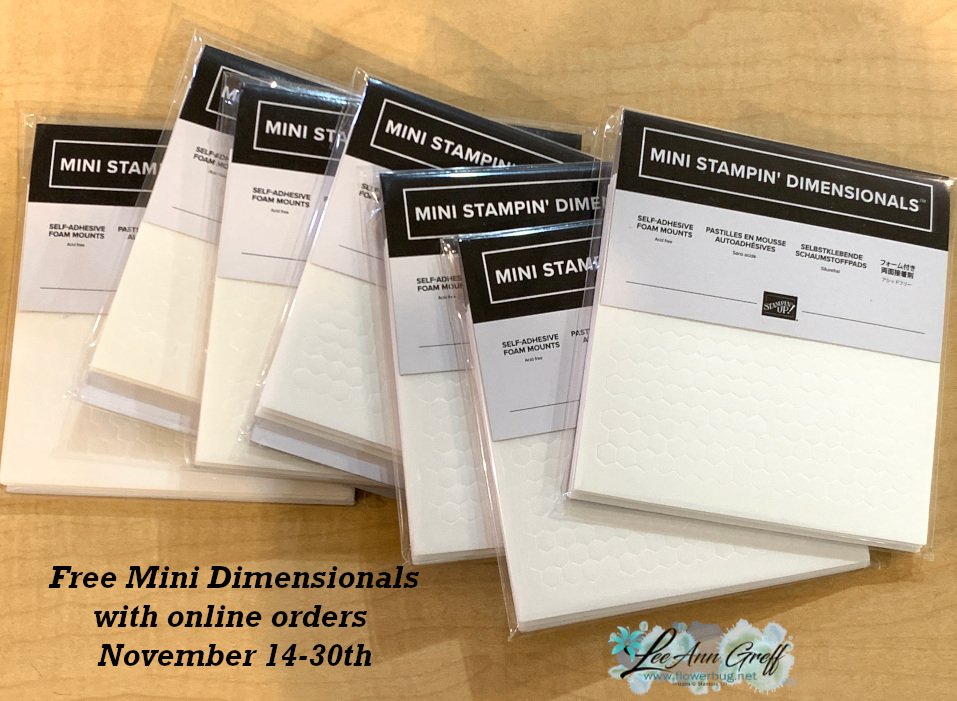
    1. Get a pack of mini Stampin' Dimensionals from me with online orders over $55!


    2. All orders in November will receive a big project tutorial – a collection of 12 cards featuring this new collection of products.

    Earn free products with my loyalty rewards! 

    Click here to download yours and earn a $50 shopping spree!

    Leave a Reply

    Your email address will not be published. Required fields are marked *

  • Leaves of Holly card with a gift card option & video


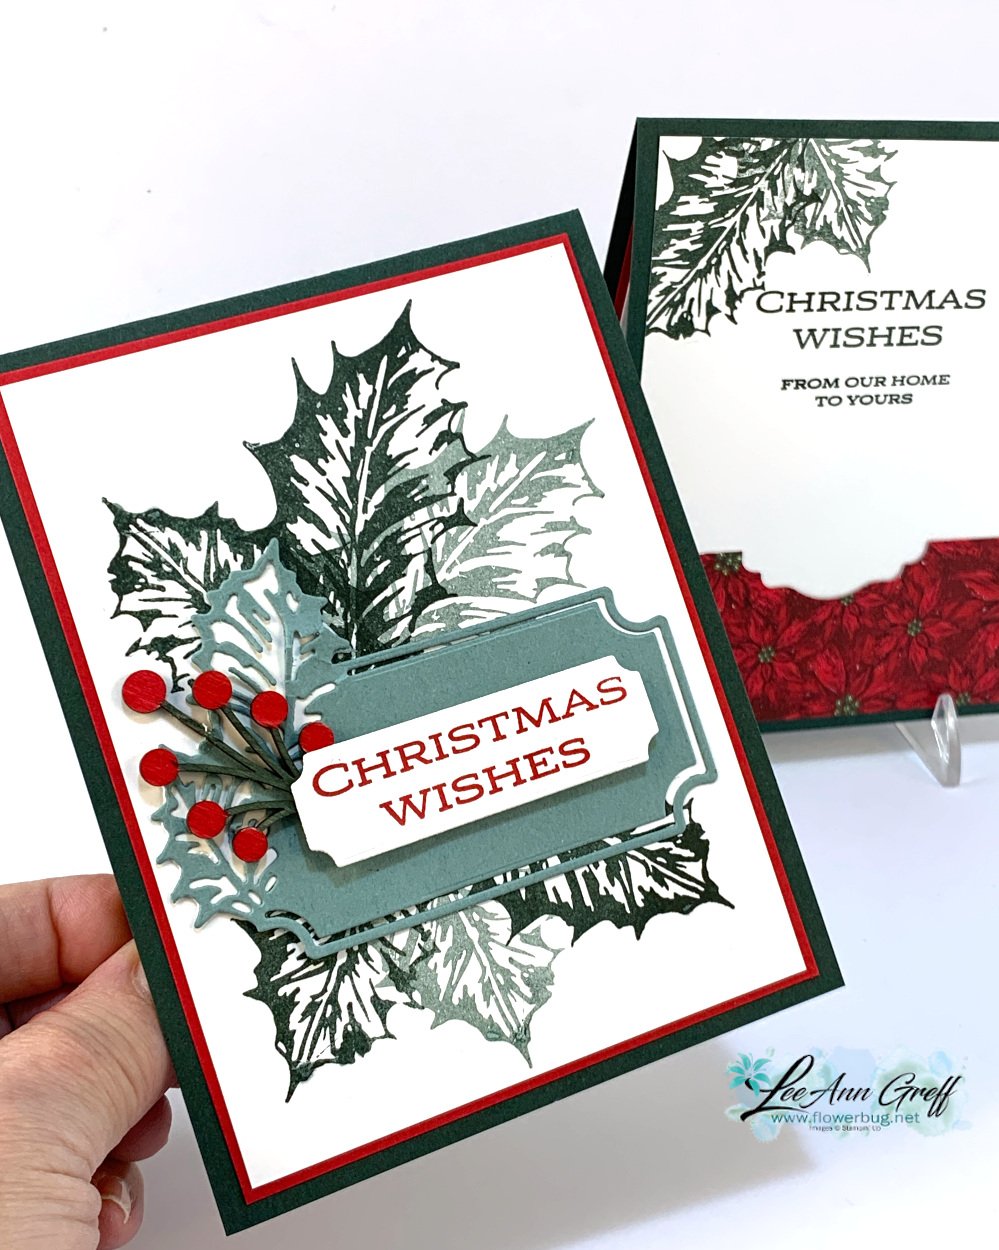
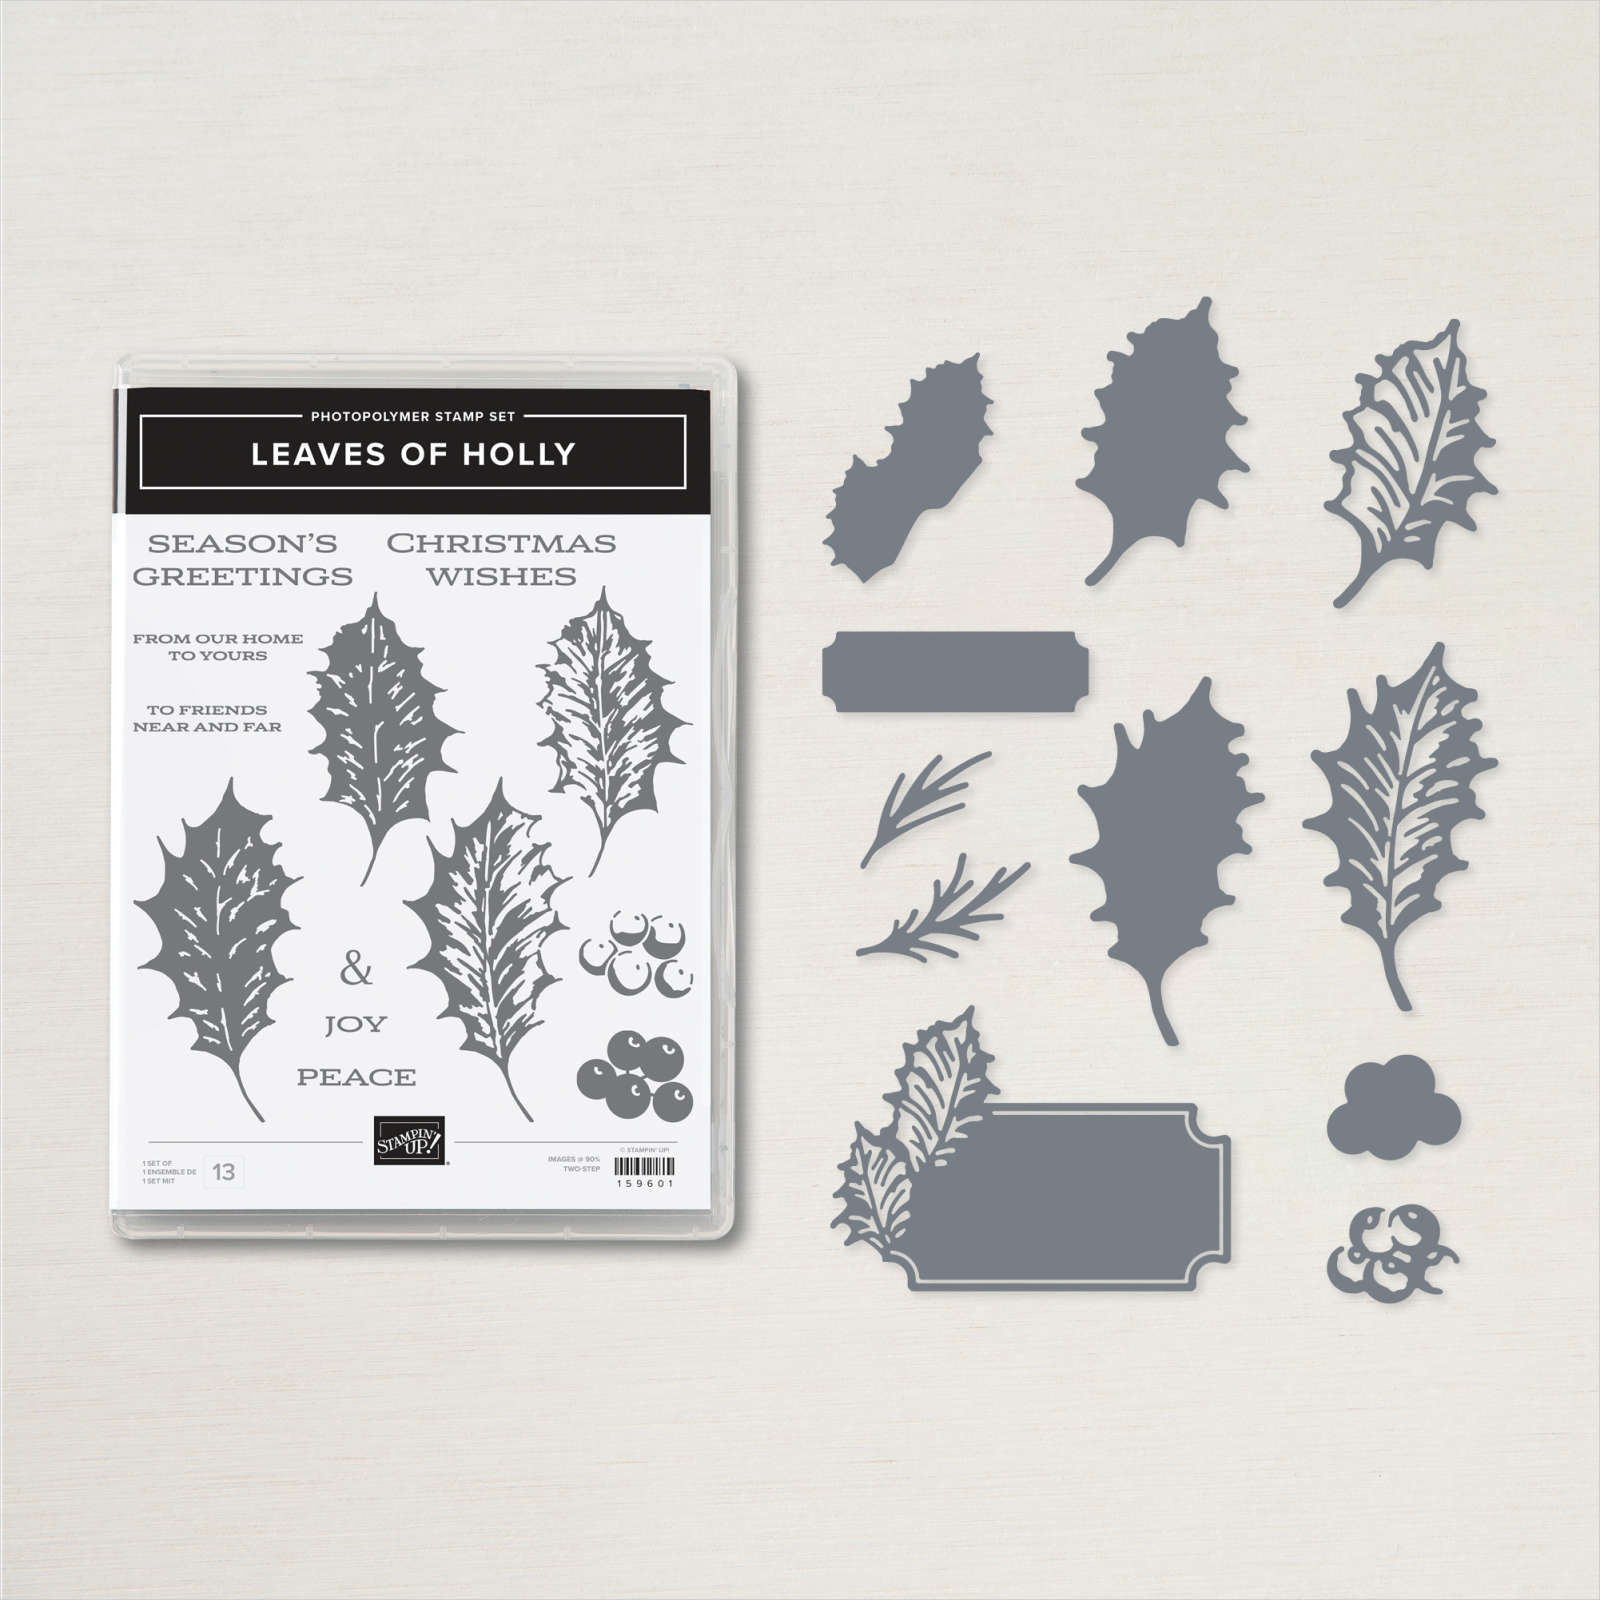
    We made this pretty Christmas card at my November Card Clubs.  It features the Leaves of Holly bundle seen here. 

    I chose these colors – Evening Evergreen, Real Red, White & Soft Succulent.  I sure love the dies in this set; the greeting label with the attached holly leaves is special. 

    *Unfortunately the Holly Berry dies are unavailable right now; they expect they'll be back in stock around December 19th.  

    I think this is a classic Christmas bundle you'd find yourself using often.  It's retiring on December 1st and while supplies last. 

    I gave my gals a choice of 'berry' options.  On the left card below we added two die-cuts from the bundle.  On the right card we added a Textural Element that is colored with Blends markers.  It was almost a tie on which option they chose.  

    I stamped the two more open leave images 2-3 times each in the two green colors and added the greeting element over them.  You can see how in the video below.  It's actually an easy card to make. 

    If you want to add an easy gift card option to any card simply add a strip of DSP across the bottom of the inside. Punch the center with any circle or decorative punch and aAttach it with glue on the outer and lower edges only.  


    Click here to watch it or on the photo below.  There's a special wiper fun fold card shown too!  

    ~~~

    Order online here

    Host code link: KA9ZYZB6

    November Specials: 

    Check out the Last Chance items from the Holiday Catalog; it starts December 1st

    1. Get a pack of mini Stampin' Dimensionals from me with online orders over $55!


    2. All orders in November will receive a big project tutorial – a collection of 12 cards featuring this new collection of products.

    Earn free products with my loyalty rewards! 

    Click here to download yours and earn a $50 shopping spree!

    Leave a Reply

    Your email address will not be published. Required fields are marked *

  • ‘Ornament’ Christmas cards for quick & easy card making!


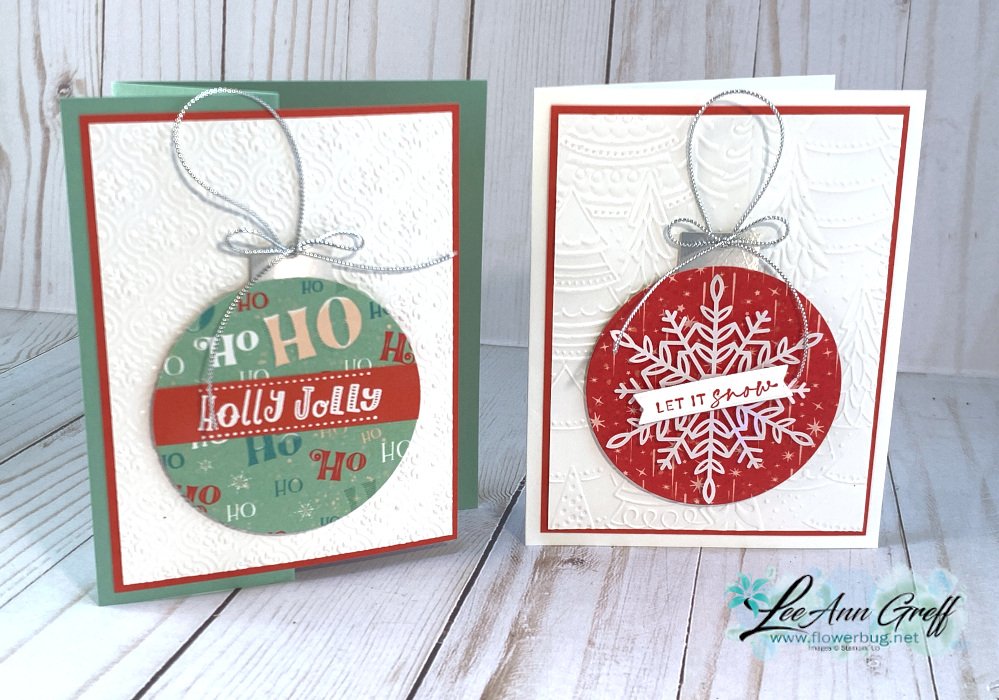
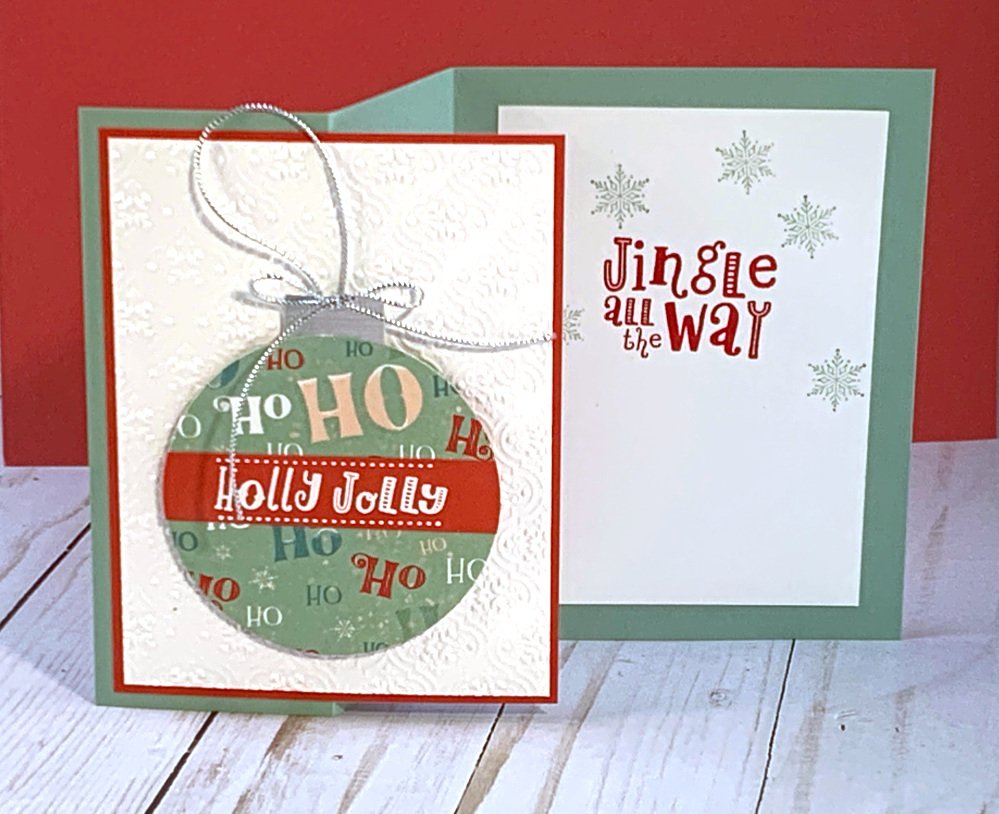
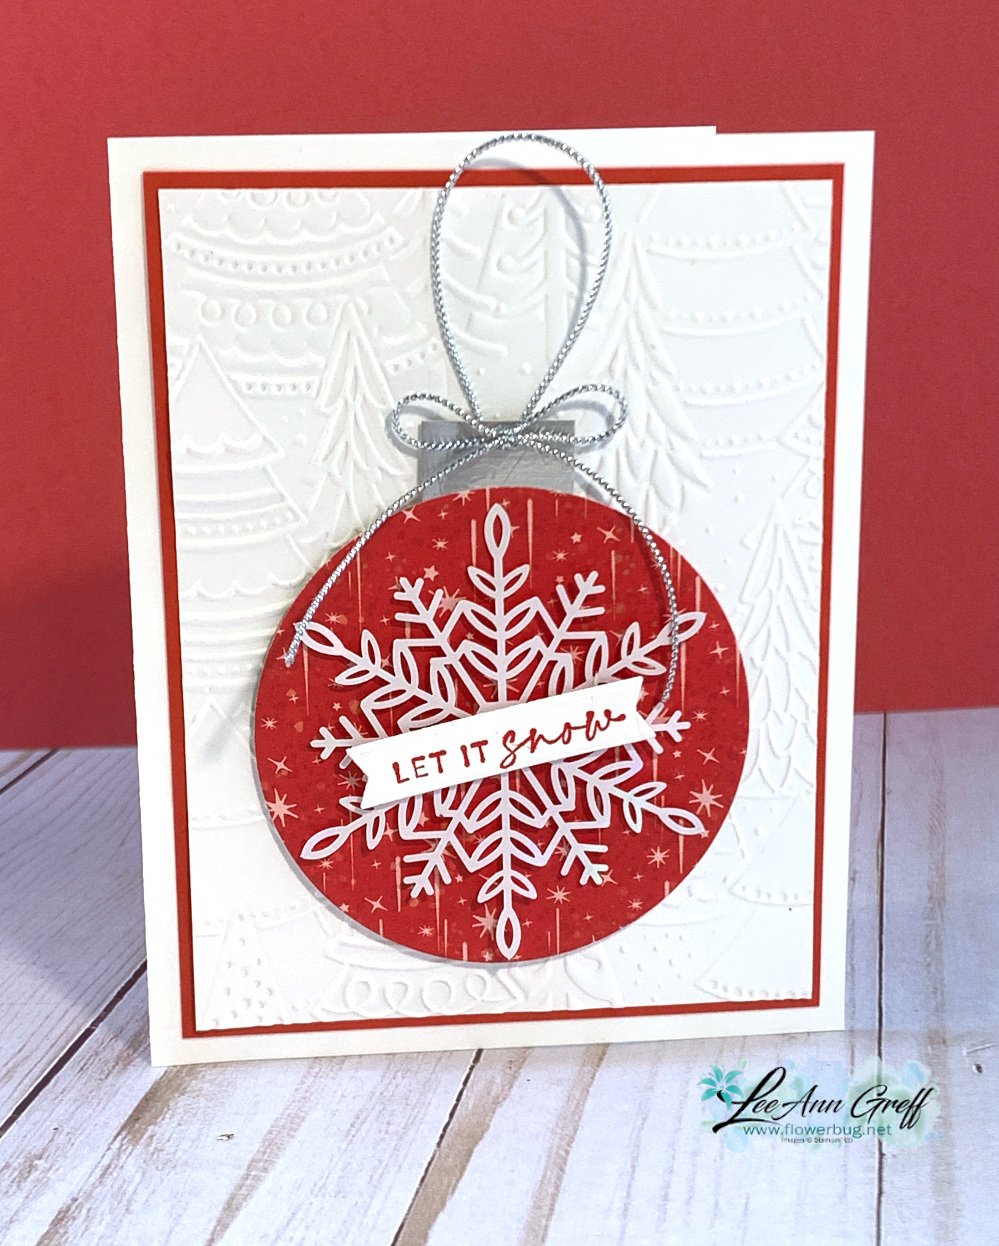
    We're making ornament cards on tonight's Stamp with Me Live.  It's a quick & easy idea for your Christmas cards!


    The designer paper is the Santa Express seen here.  It's filled with lots of great patterns; not just Santas & trains.  

    Join me here Live at 7:30 pm CT.  The video will be on my YouTube channel by Tuesday, November 29th too. 

    I chose an 'easy' card so those who feel rushed in getting their Christmas cards made. Plus these cards use your DSP and an embossing folder too; both make a card special. 
     
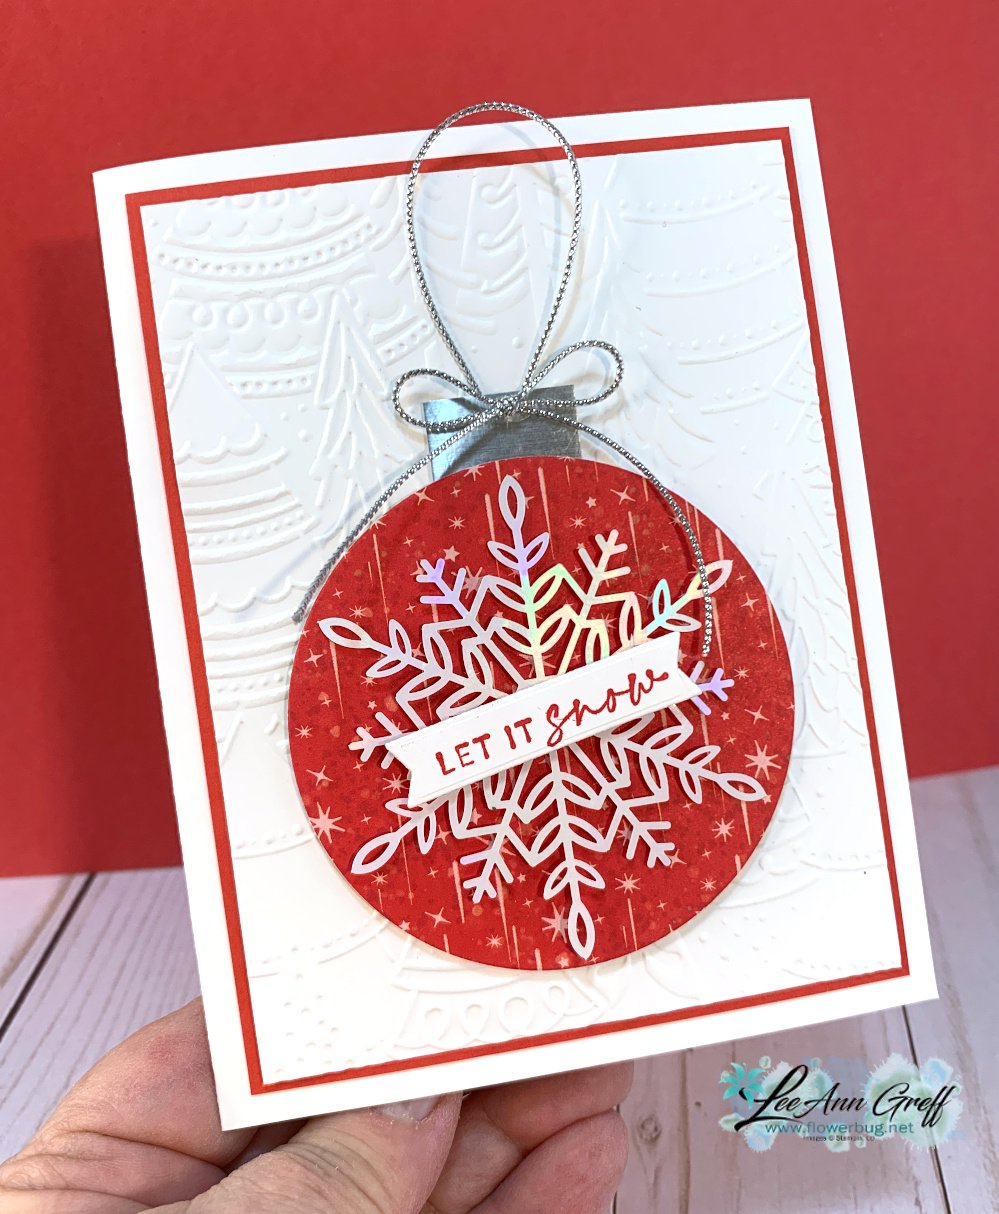
    I added a Wonderful Snowflake to the designer paper circle for a quick, beautiful iridescent element.  These snowflakes will be well discounted on Thursday with the Last Chance List seen here: Download 2022 Holiday Catalog Last Chance
     
    The greeting is from the Joyful Flurry stamp set. 
     
    Join me here when I share some tips on making these fun and easy cards tonight. 
     
    Gather these supplies:
    • Card bases 5 1/2" X 8 1/2"
    • White or neutral background layer 3 3/4" X 5", will be textured
    • Another layer 4" X 5 1/4"
    • 'ornament' circles cut from DSP – mine are almost 3" around
    • Silver or gold paper (or other) for the top of the ornament
    • Twine or thin ribbon
    Other items: Greeting stamps, ink, embossing folder, snowflakes
     
    I made one card into an easy fun fold by folding the front of the card base back on itself. For this one I chose to add greetings from the Holly Jolly Wishes stamp set. 

    The card base is Mint Macaron with White & Poppy Parade accents. 

    To catch all of my videos, follow me on my FB page here.  Or on YouTube here.   


    Which do you like better?  

    ~~~

    Order online here

    Host code link: KA9ZYZB6

    November Specials: 

    Check out the Last Chance items from the Holiday Catalog; it starts December 1st

    1. Get a pack of mini Stampin' Dimensionals from me with online orders over $55!


    2. All orders in November will receive a big project tutorial – a collection of 12 cards featuring this new collection of products.

    Earn free products with my loyalty rewards! 

    Click here to download yours and earn a $50 shopping spree!

    Leave a Reply

    Your email address will not be published. Required fields are marked *


Notice: LeeAnn Greff, Independent Stampin’ Up! Demonstrator, Manager. The content of this website is my sole responsibility as an independent Stampin’ Up! demonstrator and the use of, and content of, the classes, services, or products offered on this website is not endorsed by Stampin’ Up! Copyright 2025