/


Latest Post

Little Ladybug Spinner Card!!


This fabulous spinner card was made by my friend Susie Wood; she sent one to me as we like to make cards for each other to share with our customers.  I love her style so much.  Visit her blog here. 

Isn't it adorable?!  It's classic Red, Black & White; perfect for the Ladybug set. The center circles are 1 3/4" and 2" in size. The Black piece is 4" X 3 1/4" in size and that circular opening is 2 3/8" using the Circles Collection dies and punches.

This cute stamp set is FREE with any $300 order placed during Sale-a-Bration; January through March 2020.  If you don't think you can swing that large of an order I have a few suggestions for you. 

  1. Have a workshop/party and invite your friends. Their orders will add up so you can earn it free!
  2. Place one big order (if you can). You'll get 6 free $50 Sale-a-Bration items at the same time and earn $36 in free hostess benefits. 
  3. Have a book party; inviting your fellow stamping friends to order. I can open a host code so all of the orders can be shipped to each person's ome. Sale-a-Bration is a great time to order!  Free products for each $50 you spend.
  4. Purchase the starter kit and join as a Demonstrator!  Then you get 20% off your $300 order so you're really spending just $240 to earn this set!  Plus you would get 6 free Sale-a-Bration items at the same time and $36 in free hostess benefits. 

All you need for a spinner card is a window, something to spin and some string or thread.  She used our Silver metallic thread here.  The window is made with our Circles Collection Framelits. 

Watch the FB live replay video below to see how it's done. 

You might wonder where the black polka dots came from. She used a sponge dauber!  So easy!! 

Below you can see both cards I demonstrated on my Facebook Live this week.  Click below to see it. Be sure to follow my page so you don't miss it each week on Tuesday's at 11 am CT. 

~~~

Three January Specials just for you! 

1. All January online orders will earn a ticket in the drawing for a free Little Ladybug stamp set!

2. All online orders will receive a 10 cards pdf tutorial in an email.


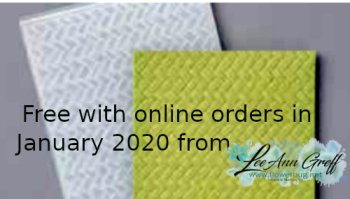
3. And if your order is over $65 you'll get a free Coastal Weave embossing folder too!

January Host Code is GEEFZCZV

Order online here

All Posts

  • Fun Fold cards kit with multiple options; include the stamp set, ‘2 kits’, extra product or PDF tutorial


    Before I share these projects I have to tell you that tomorrow, December 8th, is a FREE SHIPPING day!

    All orders over $50 ship free! 

    It's a great time to get those last items on your wish list and save $$!  

    Use either host code below to get a free gift from me (details below). 

    Z2RQ7BB6 or 6YCWV7QN

     *click here to order 

    ~~~

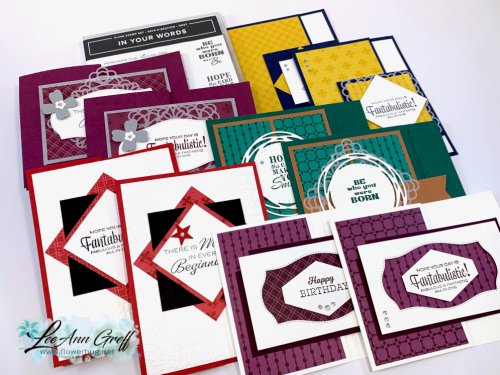
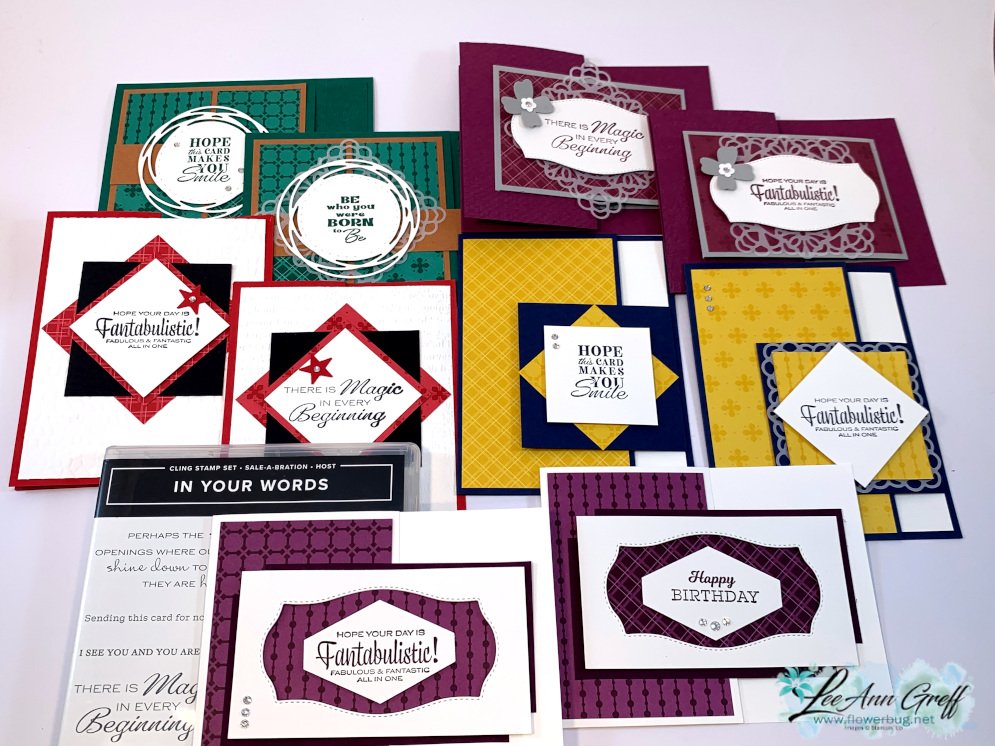
    Here's my second card kit & tutorial option in December.  They're all fun fold cards for any occasion. Everyone loves giving AND making fancy fold cards! See the other kit to go I'm offering here. 

    I have quite a few of the In Your Words stamp sets; from Sale-a-Bration earlier this year so I am offering a limited amount of these kits that include the stamp set. 

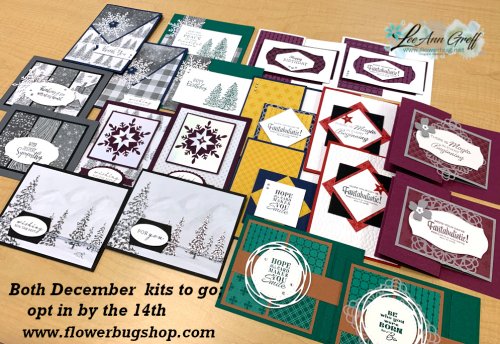
    This kit includes the tutorial & supplies to make 10 special fun fold 'all occasion' cards; 2 each of 5 designs. Opt in by December 14th!

    There are actually 4 options for these cards! 

    1. 10 pre-cut cards, the In Your Words stamp set, 1/2 pkg. of Regals DSP & a share of square doilies.  You'll need your own ink, rhinestones, a paper trimmer and adhesive. $30 plus shipping. Click here. 
    2. 10 pre-cut cards, the Regals DSP, 1/2 pkg. square doilies & clear rhinestones. You'll need your own greeting stamps, ink, a paper trimmer and adhesive. $28 plus shipping.  Click here
    3. Choose both of my December kits to go – 20 pre-cut cards & product valued at about $40.  *see photo below. You'll need your own greeting stamps, ink, a paper trimmer and adhesive. $56 plus shipping; click here
    4. Choose the PDF Tutorial only here.  It is emailed to you immediately after payment. 

    Contact me here with any questions.  Locals do not pay shipping. 

    Below is a photo of both December kits to go

    Once you purchase a kit or tutorial, you'll receive the PDF tutorial immediately after payment via email.  The kit ships via Priority Mail before Christmas (barring back-orders).  

    It includes all pre-cut & punched pieces, product and the PDF tutorial. It does not include pre-stamped images or ink. 

    The PDF tutorial includes photos, measurements, step by step directions and a supplies list. You'll use the measurements listed to cut your new Designer paper for your cards. 

    You will need the following to complete the cards like mine: 

    • Night of Navy, Blackberry Bliss, Black and/or Rich Razzleberry inks
    • greeting images (plus a tree image for two cards)
    • adhesives, a paper trimmer & rhinestones depending on which kit you choose. 

    Here's a link to my entire shop – kits, tutorials, glue stands & I've not added my cookbooks!  

    ~~~

    December Specials:

    Host code: Z2RQ7BB6 or 6YCWV7QN

     *click here to order 

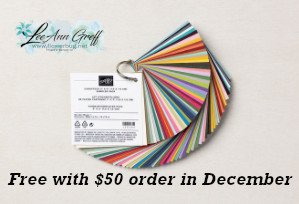
    Use the host code above & get a free card stock sampler ring with a $50 order in December! 

    See the last chance list here

    See the July-December catalog carry over list here

    Leave a Reply

    Your email address will not be published. Required fields are marked *

  • Peaceful Place card kit to go; beautiful ‘winter’ cards for any occasion!


    The Peaceful Place specialty designer paper is gorgeous in it's silver, black, gray & white color theme. This paper does the work for you in creating simple yet elegant cards.

    I have a limited supply of these; opt in by December 14th. 

    This kit to go includes 10 pre-cut cards (2 each of 5 designs). The PDF tutorial includes directions to make 10 beautiful cards; & $20 in Stampin' Up! product. Product includes 1/2 pkg. of the Peaceful Place specialty designer paper, a share of Wonderful snowflakes, silver cord & clear rhinestones.  

    *this is the card kit my subscribers will receive.  If you'd like to automatically receive my kits each month opt in here. 

    You'll receive the PDF tutorial immediately after payment in an email.  The pre-cut kit will be mailed out before Christmas, barring back orders. 

    The PDF tutorial includes photos, measurements, step by step directions and a supplies list. You'll use the measurements listed to cut your new Designer paper to complete your cards. 

    You will need the following to complete the cards like mine: 

    • Shaded Spruce, Blackberry Bliss, Black or Rich Razzleberry inks. 
    • I used the Peaceful Cabin & Peaceful Moments stamp sets but you can easily substitute other greetings. Or add either set or bundle on at an extra 10% discount!  Contact me for payment.
    • You will also need a tree image for two cards. 
    • adhesives, a paper trimmer, scissors 

    Below are the links to order; remember I have a limited supply of these; opt in soon! 

    ~~~

    December Specials:

    Host code: Z2RQ7BB6 or 6YCWV7QN

     *click here to order 

    Use the host code above & get a free card stock sampler ring with a $50 order in December! 

    See the last chance list here

    See the July-December catalog carry over list here

    Leave a Reply

    Your email address will not be published. Required fields are marked *

  • Merriest Moments ‘5 at a time’ cards with free templates


    Here's another set of my '5 at a time' cards I shared yesterday here.  I used the Merriest Moments stamp set. This stamp set is carrying over to next year's Holiday catalog along with the dies & Hybrid embossing folder but they will not longer be in a bundle at 10% off.

    See the carry over list here.  And the retiring or Last Chance list here  

    My colors include Cherry Cobbler, Shaded Spruce, Sahara Sand & White.  I love the unusual addition of the Sahara Sand.  I chose it to blend in softly instead of another attention grabber. 

    See the texture?  After I stamped I used the Timeworn Type 3D embossing folder before layering the pieces and finishing the cards. I used the Double Oval punch here. 

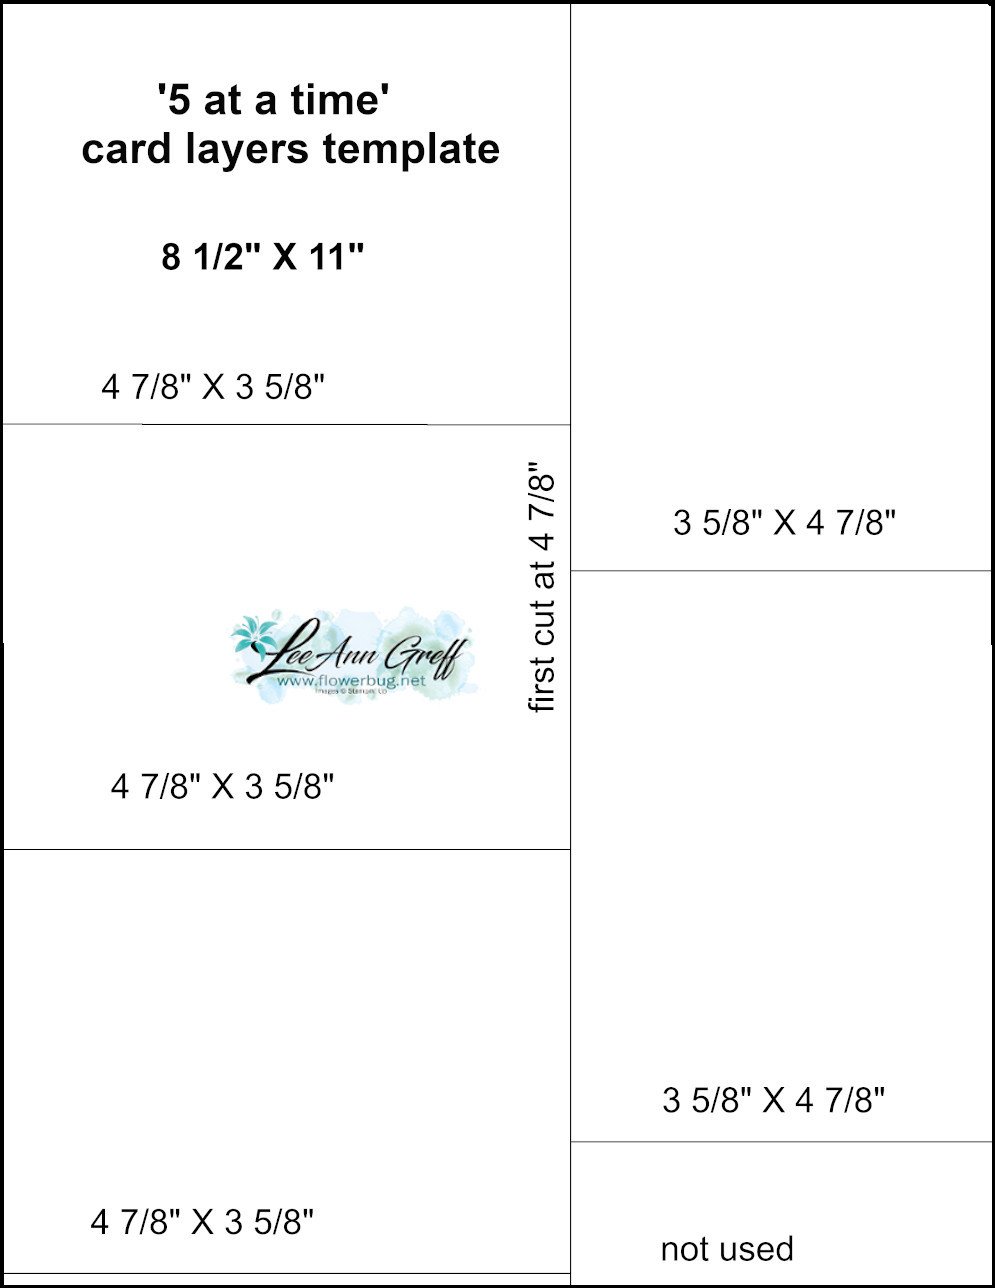
    If you missed yesterday's post I shared these '5 at a time' cards on a recent FB Live video seen here.  I created two templates that layer each other for quick set of 5 A2 sized finished cards.  And they sized perfectly for very little waste. 

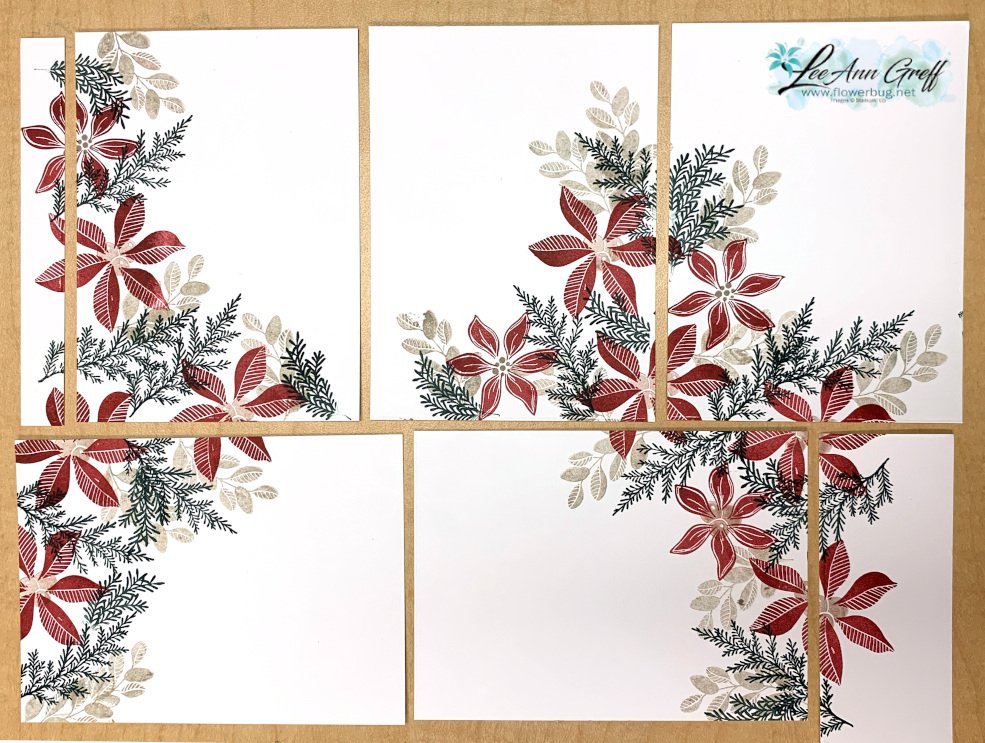
    Below is how the White card stock is stamped.  Can you see that the images concentrate on two sides of each piece leaving one corner free & clear? This keeps the cards from being too busy. 

    Before I stamped I scored on the 4 3/4" and 3 1/2" lines (using the measurements on the template) leaving the piece intact. You could also draw a light pencil mark so you know where to stamp. Then after stamping I can cut on the scored lines. 

    Below are the templates.  Remember these are 8 1/2" X 11" to start with.  


    As you can see these templates have very little waste. 

    I hope you watch the video below to see the tips & tricks on using these templates. 

    ~~~

    December Specials:

    Host code: Z2RQ7BB6 or 6YCWV7QN

     *click here to order 

    Use the host code above & get a free card stock sampler ring with a $50 order in December! 

    See the last chance list here

    See the July-December catalog carry over list here

    Christmas cards stamp a stack; limited supply! 

    Leave a Reply

    Your email address will not be published. Required fields are marked *


Notice: LeeAnn Greff, Independent Stampin’ Up! Demonstrator, Manager. The content of this website is my sole responsibility as an independent Stampin’ Up! demonstrator and the use of, and content of, the classes, services, or products offered on this website is not endorsed by Stampin’ Up! Copyright 2025