/


Latest Post

Lily Pond Lane card kit – limited quantities!


The adorable Lily Pond Lane designer paper is the star of these colorful cards. I created 5 card designs; 3 of which are fun folds. What I like about this DSP is how versatile it is; young or old, men, women or kids – it's great for anyone! 
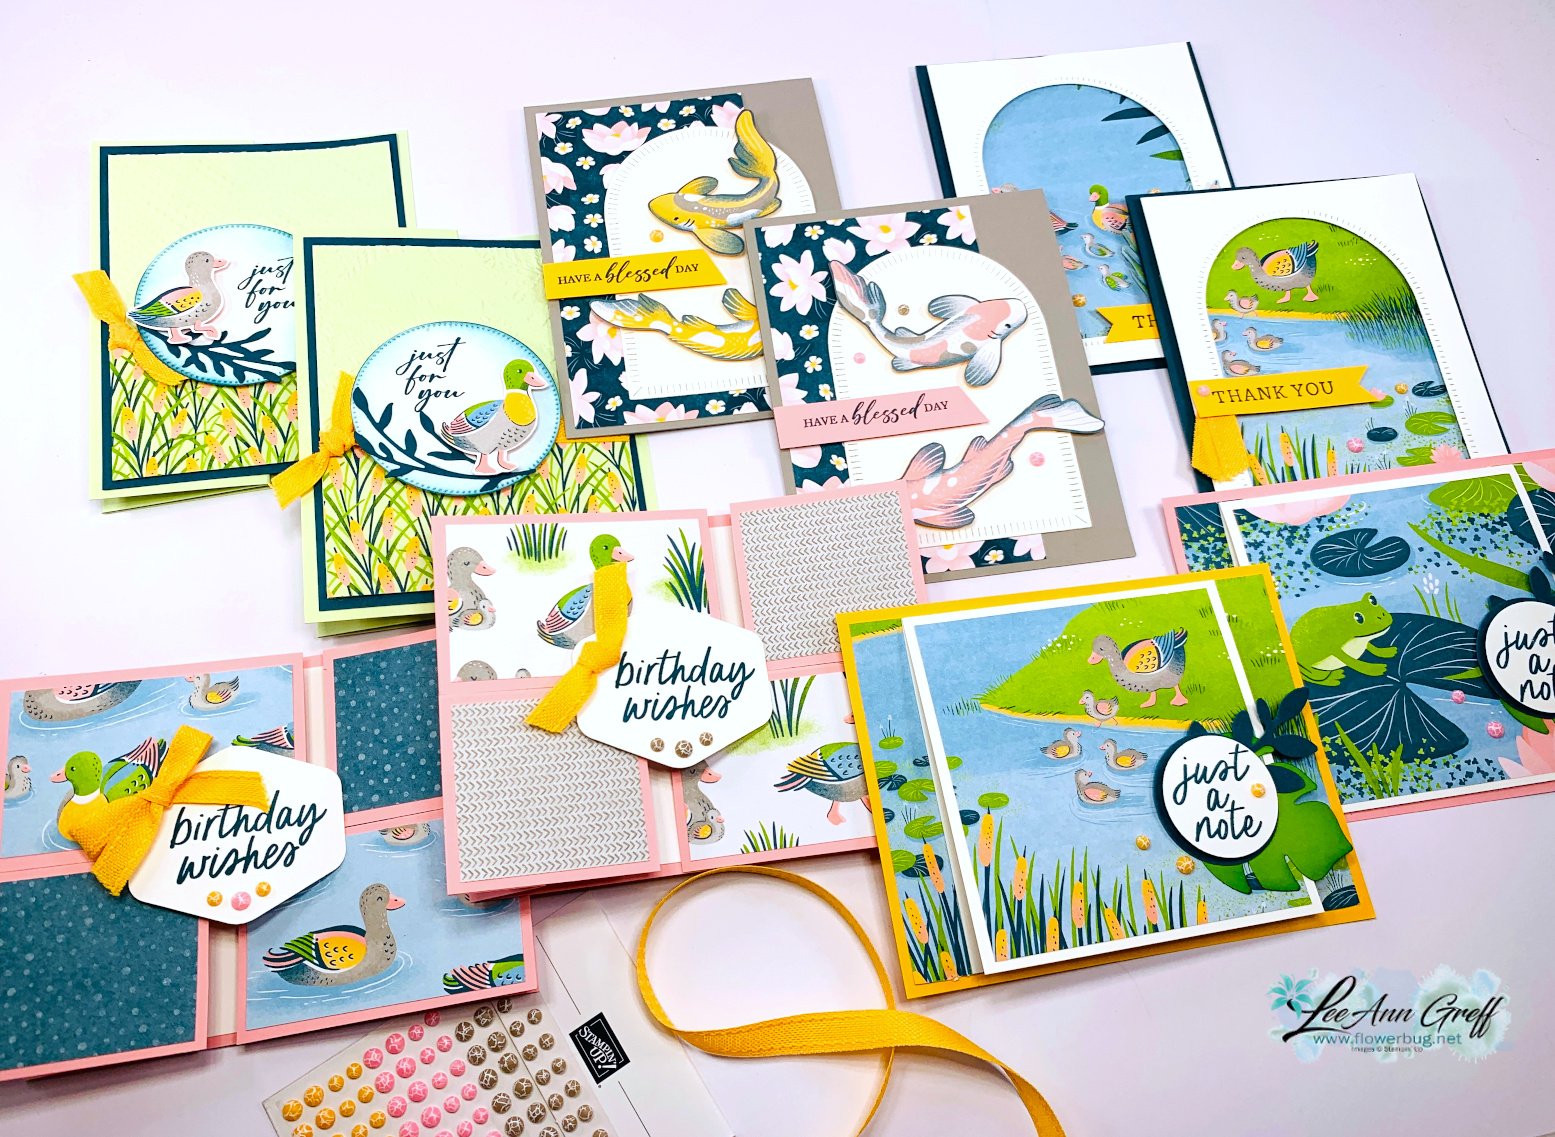
Each month I create two card kits where the DSP is the focus of the projects. These cards can be purchased as a pre-cut kit to go or choose the PDF tutorial option. Those who choose the kit will make 2 each of the 5 cards for a total of 10 cards.

I have a limited number of kits available due to limited stock; opt in soon! 

This kit includes the following Stampin' Up! products:

  • 10 pre-cut cards including die-cuts and punched pieces
  • 1/2 pkg of Lily Pond Lane 6 X 6" designer paper (some fussy cutting needed)
  • a share of Dappled Dots gems
  • a share of Peach Pie 3/8" ribbon
  • the free PDF tutorial with measurements, photos, supplies list and step by step directions.

You will need the following to complete the cards:

  • Pretty Peacock ink (or a similar color)
  • Greeting images (i used Simply Said & Unbounded Love but any will work)
  • Paper snips scissors & Paper Trimmer, Adhesives 

Opt in for the pre-cut card kit ($30) with products here.  Or choose the PDF tutorial option for $15 here. 

The card kit will mail out at the end of July. The PDF tutorial is emailed to you immediately after payment.  Add on a second kit to go & save on postage.

See my other available kits or tutorials here. 

~~~

*current host code links: 4QYAPERK or 3A73HXYB


Earn $5 coupon for every $50 you spend in July; redeem in August. 

~~~

All online orders will receive my PDF tutorial featuring the Full of Life suite

All Posts

  • Life is Beautiful swap with Love of Leaves dies


    Here's another card I made for an online card swap I joined in July.  I have been having so much fun playing with my Life is Beautiful stamp set!  

    The colors are Bermuda Bay, Early Espresso and Pumpkin Pie; one of my favorite color combo's for Fall.  I added some sponging and a pretty die-cut from the Ornate Frames die seen here.  The Linen thread behind the greeting is simply a big bow. 

    This card is included in my August card kit to go.  The kit includes the Life is Beautiful stamp set AND an 8 cards pre-cut kit. You have through August 20th to get this kit and the pdf tutorial is also included. It's just $28; a steal for a stamp set AND cards kit!   Read all about it here.

    Did you notice the stitching on the bottom of this card?  That's done with the Love of Leaves dies seen here: 

    ~~~

    Bonus Days are here!

     
    Redeem your $5 coupons now!  

    ~~~

    Current Host code is QW7SUYVX

    Get a free package of new Iridescent Pearls in August with an online order over $55. 

    Order online here

     Get my Flowers for Every Season pdf tutorial free with all online order in August!


    It includes directions, photos and measurements for 12 cards!

    Leave a Reply

    Your email address will not be published. Required fields are marked *

  • 2 Techniques with video; Starburst & Masking!


    I made these technique cards on a Facebook Live in July and I know not everyone is on Facebook.  So I'm posting it here for you too. I offer a FB Live every Tuesday at 11 am CT and one the 2nd & 4th Monday evenings at 7:30 pm CT all using current Stampin' Up! products.  Join me here. 

    I had a request to teach the Starburst technique and came up with this easy version. 

    I used the unique and colorful Artistry Blooms designer paper from the Annual Catalog along with the Tasteful Touches stamp set and Artistry Blooms adhesive backed sequins.  The link to the videos is below but here are the basics: 

    Measurements:

    • Card base 5 1/2" X 8 1/2"
    • White CS 4" X 5 1/4"
    • Artistry Blooms DSP – cut 5 strips measuring 1 1/2" X 5" and then cut these in half on the diagonal.  Now mix and match them to the 4" X 5 1/4" piece leaving a tiny bit of space between them.  

    I added greetings and die-cuts from the Tasteful Touches bundle seen here. 

    Here are the other cards I made using the masking technique and the Tasteful Touches stamp set.


    Which do you prefer?  Yellow or pink?

    Here's a link to the video on Facebook.  Click below to watch it on YouTube.


    ~~~

    Bonus Days are here!

     
    Redeem your $5 coupons now!  

    ~~~

    Current Host code is QW7SUYVX

    Get a free package of new Iridescent Pearls in August with an online order over $55. 

    Order online here

     Get my Flowers for Every Season pdf tutorial free with all online order in August!


    It includes directions, photos and measurements for 12 cards!

    Leave a Reply

    Your email address will not be published. Required fields are marked *

  • 3 in 1 Triple Panel cards


    I made these pretty cards on last week's Facebook Live 'Stamp with Me' Monday night. *See video below

    The 2nd & 4th Monday's you can stamp with me Live on Facebook here.  The next one is Monday, August 10th. I post the measurements & supplies ahead of time so you can prepare.  Then afterwards you can share your cards too! 

    I chose to use a Triple Panel technique; at least that's what I'm calling it.  I saw a sketch like it and created my own version here.  You start out with 3 pieces of card stock or designer paper and cut them all the same way.  

    I used Bumblebee, Night of Navy and Smoky Slate for the cards above along with the Tasteful Touches bundle.  That pretty leaf die-cut is from the Birds & More dies set. 

    Measurements:
    Three pieces of card stock or DSP measuring 4 1/4" X 5 1/2".
    Cute one full 5 1/2" X 8 1/2" card base of each color you use.
     
    Cutting directions:
    1st cut: Cut the first small triangle off of each piece. (On the bottom right card it's the Navy piece) Make a mark 1 1/2" from the bottom left corner and 2" from the bottom right corner. Cut this triangle off of all three pieces.
    2nd cut: Make a mark from the upper left corner across at 1 3/4". Make a mark 2" from the lower left angled edge. Cut.
    The 3rd cut isn't necessary as you'll use the angled piece left from the first two cuts.
    Now you have three different colored pieces for each card. Mix & match one color per card!

    On the cards above the colors are Bermuda Bay, Black and Smoky Slate and the same Tasteful Touches bundle and leaf die from above. 


    ~~~

    Bonus Days are here!

     
    Redeem your $5 coupons now!  Don't forget!   

    ~~~

    Current Host code is QW7SUYVX

    Get a free package of new Iridescent Pearls in August with an online order over $55. 

    Order online here

     Get my Flowers for Every Season pdf tutorial free with any online order in August


    It includes directions, photos and measurements for 12 cards!

    Leave a Reply

    Your email address will not be published. Required fields are marked *


Notice: LeeAnn Greff, Independent Stampin’ Up! Demonstrator, Manager. The content of this website is my sole responsibility as an independent Stampin’ Up! demonstrator and the use of, and content of, the classes, services, or products offered on this website is not endorsed by Stampin’ Up! Copyright 2025