/


Latest Post

Lights of Aurora scenic card with project sheet & video tutorial


I shared this pretty card on last week’s Live video:

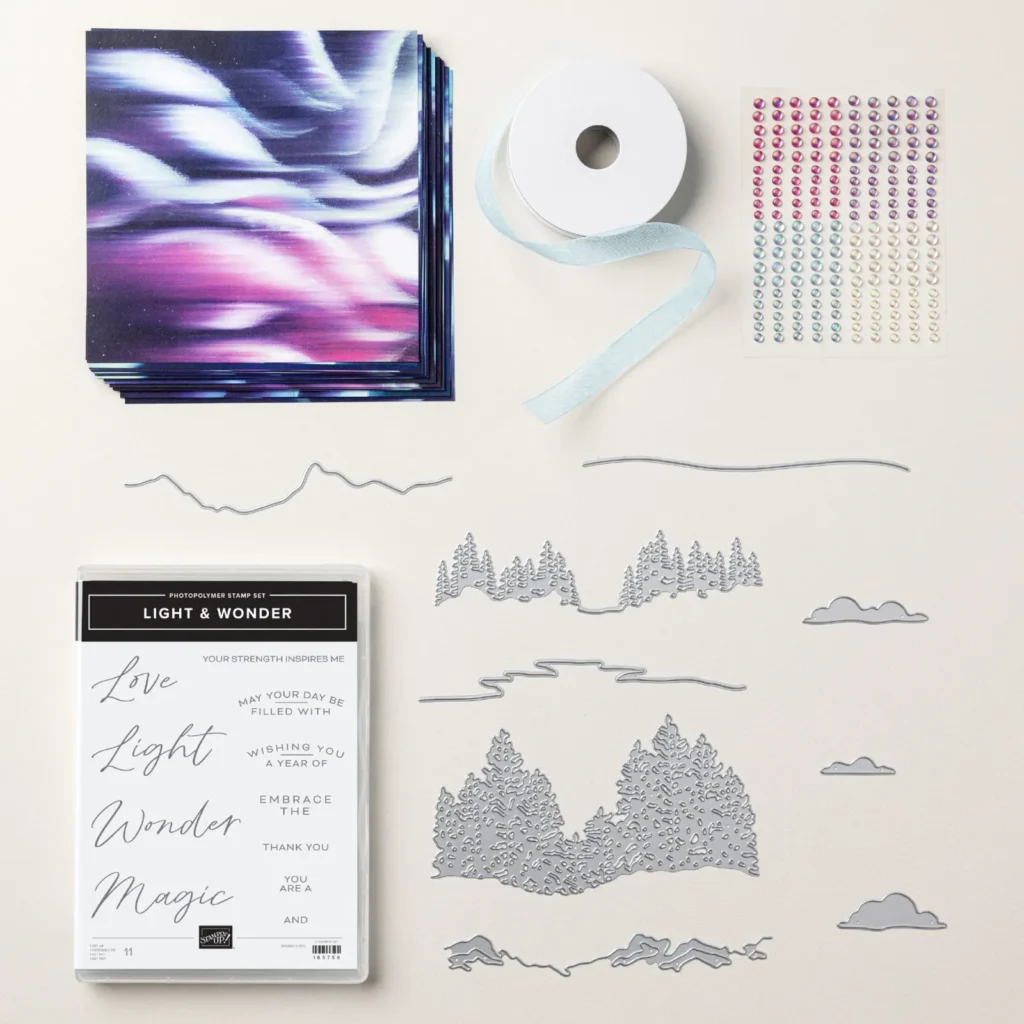
It features the Lights of Aurora suite seen here. I made sure to cute my designer paper at 3″ wide so I could get 2 pieces from each 6″ piece. We made this pretty card at my September card clubs.

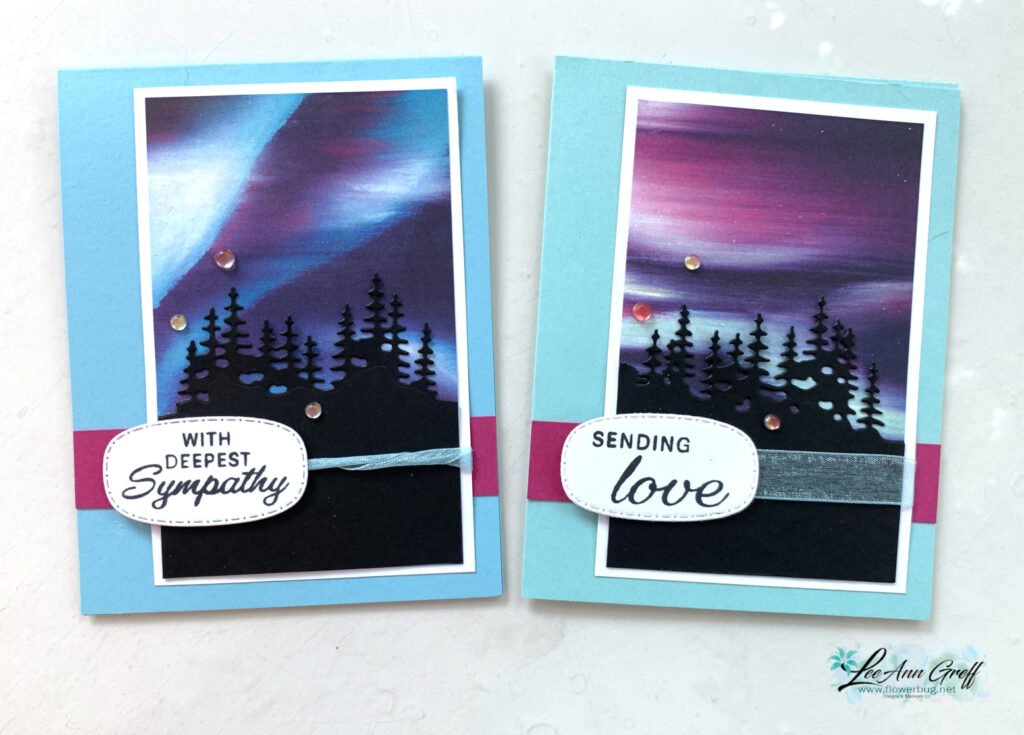
Besides the DSP & colors (Balmy Blue & Pool Party) do you notice another difference? Look at the ribbon; I tried a new technique of rolling the Balmy Blue sheer ribbon on the left card. Something different!

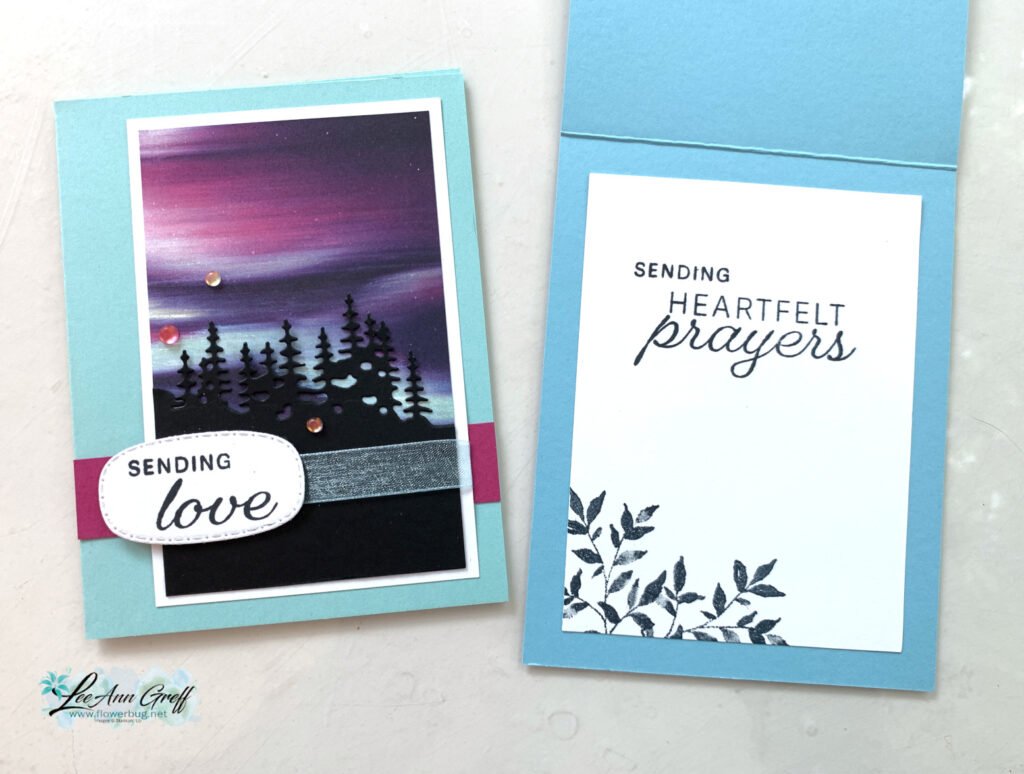
Another time saving tip for this card is that I could die-cut two sets of trees at the same time with the extra long die in the bundle seen here:

These sentiments & die-cut are from the Peace on Earth bundle; the leaves are from the Textured Notes set.

Tip; add balance to your card by placing the main layers off to one side and the greeting on the other.
This suite has been really popular with my customers. It’s something special & unique we’ve never had before. See it here.

Click on this link to get the free project sheet for this card.

Below is the video tutorial where I shared this card and another gorgeous sample. Be sure to follow me on my YouTube channel here.

Reasons to ShopwithLeeAnn.com

  • Get a free PDF project tutorial with any online order! (changes monthly)
  • An order of $55 or more earns you a free 3 card stamping kit with pre-cut layers; ready to stamp & assemble
  • Earn 10% host rewards on each order you place (over $20). Redeem on a future order.
  • Join my Flowerbug’s Team and get $90 in free product of your choice in October! Details here.
  • Be a Paper Pumpkin subscriber and enjoy the free bonus project PDF tutorial every month. Subscribe here. Refills here.

~~~

October Specials

3 new kits and a Starter Kit special! See the kits here.

And get the Starter kit here. *Choose your deal – $35 or $99 plus $90 in free products including free shipping, free Paper Pumpkin kit & free catalogs/business supplies!

~~~

All online orders from me will receive a beautiful PDF of projects featuring the Modern Christmas suite.

All Posts

  • 3 Stamping Tips you need to know!


    I thought I'd share some of my favorite tips with you today.  

    • how to use a ruler – some people find this extremely challenging
    • standard card sizes and layers
    • which ink to use when coloring with markers

    First up is the ruler and card measurements.  Understanding measurements can make card making so much easier!

    I hope the above graphic helps you when you're creating a card. Save it or print it out. 

    ~~~

    Next I have a helpful photo for coloring your stamped images.  It's very important to use the correct ink to prevent smearing as you color. 

    I do also want to share a few more tips for coloring:

    • Use Stazon ink when coloring with colored pencils, blender pens, water painters or when picking up our Classic ink from your ink pad.

    ~~~

    Lastly is a list of the three types of stamps Stampin' Up! offers.  It might be hard to read so I'll share the details in this list:

    1. Photopolymer stamps are entirely transparent and adhere to your clear block. They're flexible and easy to use; especially with 2-step use.  
    2. Clink stamps are made of high-quality rubber. They cling like crazy to our clear blocks. 
    3. Distinktive stamps are a photo-realistic image with a special texture that give added depth and dimension with a single stamp. 

    *I hope one or more of these tips help you.  Let me know which one or two you learned from today.  

    ~~~

    July Specials:

    New Online Exclusives are here!  

    ~~~

    Last Chance List has been updated!  see it all here. Don't miss out on the deals!

    ~~~

    Get my Turtle-y Cute PDF tutorial free with any online order in July!

    Leave a Reply

    Your email address will not be published. Required fields are marked *

  • Floral Charm fun-fold card kit to go or choose the PDF tutorial option


    This is my second card kit to go I've created for July.  It features the new Floral Charm designer paper released in our newest Online Exclusives.  It's absolutely gorgeous designer paper!  

    My favorite thing about this pack of paper is that the reverse side of the pretty floral patterns have a coordinating solid print. So I created a batch of fancy fold cards to show them off!  

    The directions for these fun fold cards are included in the PDF tutorial plus there's a private video you'll get access to when you purchase either the kit or the PDF tutorial.  

    This kit to go includes the following products:

    • 1/2 pkg Floral Charm DSP (6" X 12")
    • a share of Peacock/Gold ribbon
    • a share of Shimmer dots
    • pre-cut or die-cut pieces for each of 10 cards
    • the PDF tutorial & video link 

    The kit to go is $31 and can be reserved here.  It is shipped out at the end of July. The PDF tutorial is $16 and can be seen here.  The tutorial is emailed to you immediately after purchase. 

    *You will need stamp greetings, inks, a paper trimmer (to cut your new designer paper) and adhesives to finish the cards. 

    See all of my available kits to go and tutorials here.  Opt in for more than one to save on shipping costs! 

    *If you'd like to subscribe to receive a kit automatically each month please use the button below.  My subscribers get a free surprise every few months along with the guarantee of a beautiful kit full of products too! 

    ~~~

    July Specials:

    New Online Exclusives are here!  

    ~~~

    Last Chance List has been updated!  see it all here. Don't miss out on the deals!

    ~~~

    Get my Turtle-y Cute PDF tutorial free with any online order in July!

    Leave a Reply

    Your email address will not be published. Required fields are marked *

  • Kintsugi Inspirations fun fold card kit to go or tutorial. Reserve yours now!


    I'm thrilled with the cards in the Kintsugi Inspiration kit this month!  I am featuring this unique, gold foil accented designer paper for one of my kits to go in July. (I add 2 new kits to my shop each month!)

     The gorgeous designer paper is definitely the star of these stunning cards. Each of the 10 cards are unique fun fold designs and the video will help you assemble each one.

    The directions for the cards are included in the PDF tutorial plus there's a private video you'll get access to when you purchase either the kit or the PDF tutorial.  

    This kit to go includes the following products:

    • 1/2 pkg Kintsugi Inspirations specialty DSP (6" X 12")
    • a share of Misty Moonlight 1/4" ribbon
    • a share of gold Flower Accent gems
    • pre-cut or die-cut pieces for each of 10 cards
    • the PDF tutorial & video link 

    The kit to go is $31 and can be reserved here.  It is shipped out at the end of July. The PDF tutorial is $16 and can be seen here.  The tutorial is emailed to you immediately after purchase. 

    *You will need stamp greetings, a paper trimmer (to cut your new designer paper), adhesives and inks to finish the cards. 

    See all of my available kits to go and tutorials here.  Opt in for more than one to save on shipping costs! 

    *If you'd like to subscribe to receive a kit automatically each month please use the button below.  My subscribers get a free surprise every few months along with the guarantee of a beautiful kit full of products too! 

    ~~~

    July Specials:

    New Online Exclusives are here!  

    ~~~

    Last Chance List has been updated!  see it all here. Don't miss out on the deals!

    ~~~

    Get my Turtle-y Cute PDF tutorial free with any online order in July!

    Leave a Reply

    Your email address will not be published. Required fields are marked *


Notice: LeeAnn Greff, Independent Stampin’ Up! Demonstrator, Manager. The content of this website is my sole responsibility as an independent Stampin’ Up! demonstrator and the use of, and content of, the classes, services, or products offered on this website is not endorsed by Stampin’ Up! Copyright 2025